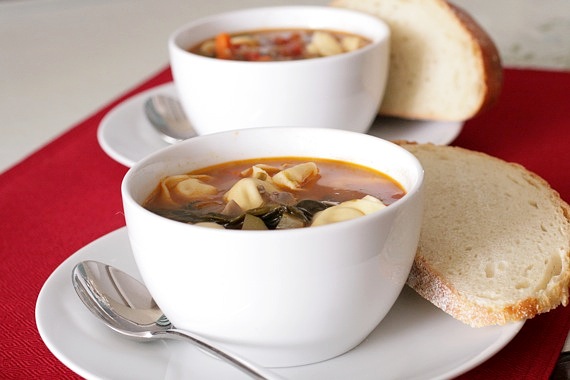
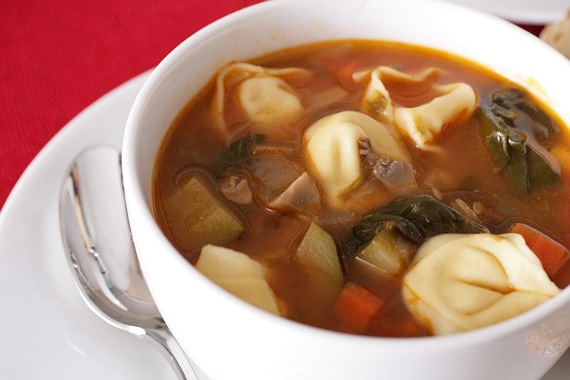
I just can’t believe that with the many pots of soup I’ve made over the years, this hasn’t been one of them. I mean, how could I discount such a delicious concept? Cheese-filled pasta in soup?! Brilliant! This couldn’t have been easier to make and it’s so hearty and filling. I really love all the chunky vegetables along with the soft, cheesy pasta…this was so delicious and comforting. All you need is a little crusty bread and you’ve got a delicious, healthy meal! And the leftovers are even better! I made this soup weeks ago during all the horrible, snowy weather we were having and it was comforting and so yummy! I’m so happy this thought popped into my head- we’ve discovered a new favorite!
Vegetable Tortellini Soup
2 tablespoons olive oil
1 small onion, chopped
1 clove garlic, minced
3 carrots, peeled and chopped
1/2 cup red wine
1 can diced tomatoes
1 medium zucchini, chopped
1 bunch fresh spinach, rinsed and roughly chopped
7-8 cremini mushrooms, cleaned and chopped
4 cups vegetable or chicken broth
1 package (12 oz.) cheese tortellini (found in the refrigerated section)
salt and pepper
In a large pot, heat the olive oil over medium-high heat. Add in the chopped onion and carrots. Cook for 5-7 minutes, until vegetables are starting to soften, then add in the garlic and cook for 1 minute more. Stir in the wine and scrape off any bits from the bottom of the pan. Add in the tomatoes, zucchini, salt and pepper and broth; bring to a boil then reduce heat and cook for about 20 minutes, until all the vegetables are soft. Stir in the fresh spinach, mushrooms and tortellini. Cook for 15 minutes more. Serves 4.
Recipe source: Sing For Your Supper
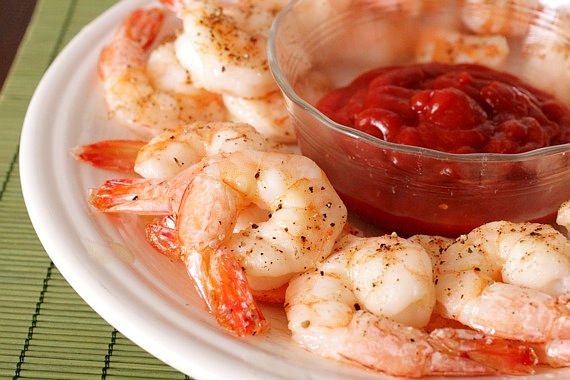
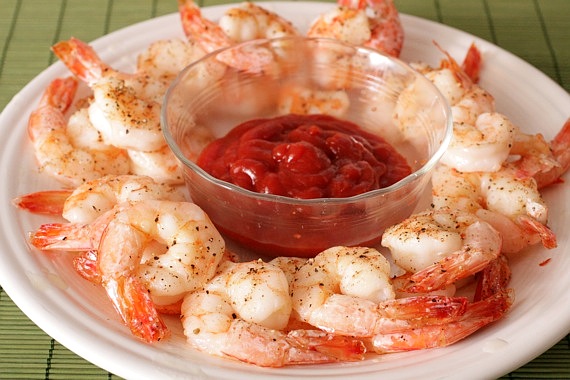
This is one of those great, impressive easy-as-can-be appetizers that make you look like a rock star, but really took you less than 10 minutes to throw together. Aren’t those the greatest?! I like to keep a stack of fast, easy appetizer recipes handy for when I need to put something together in a hurry, and roasted shrimp cocktail is definitely one of them! It’s great for get-togethers, or if you’re hosting a nice dinner party, or maybe if you just want a nice, no-fuss appetizer for a quiet dinner at home for you and your sweetie. Everybody loves shrimp cocktail, but I feel like it gets a little tiresome after awhile; this is the perfect way to make it interesting again! Give it a try at your next party- your guests will love it!
Roasted Shrimp Cocktail
2 pounds (12 to 15-count) shrimp
1 tablespoon good olive oil
1/2 teaspoon kosher salt
1/2 teaspoon freshly ground black pepper
Preheat the oven to 400 degrees F.
Peel and devein the shrimp, leaving the tails on. Place them on a sheet pan with the olive oil, salt, and pepper and spread them in 1 layer. Roast for 8 to 10 minutes, just until pink and firm and cooked through. Set aside to cool.
Serve with cocktail sauce for dipping.
Recipe source: Ina Garten
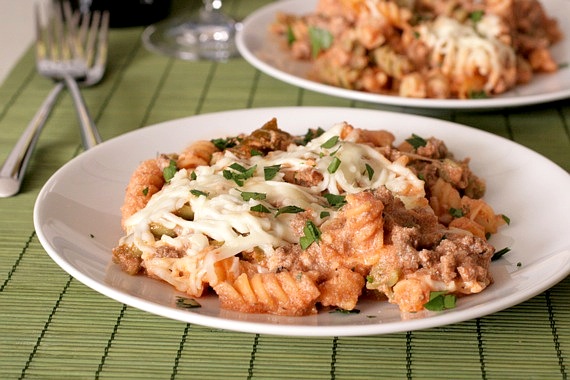
Everybody loves lasagna but they don’t always have the time to put one together. Let’s be frank- it’s a slight pain in the butt. Not hard. Just a little time-consuming. I ran across this problem last week while trying to think up a quick dinner; lasagna sounded SO delicious, but I just didn’t have the time to whip one up. That’s where this pasta comes in. It’s totally quick and easy (we’re talking under 30 minutes to make!) and has all the delicious components of lasagna…without any of the trouble! The most time-consuming part is browning the beef and boiling the pasta – easy peasy! This is another extremely weeknight-friendly dish, and I think we could all use a few more of those! Try this next time you’ve got a craving for lasagna but don’t have the time! It won’t disappoint!
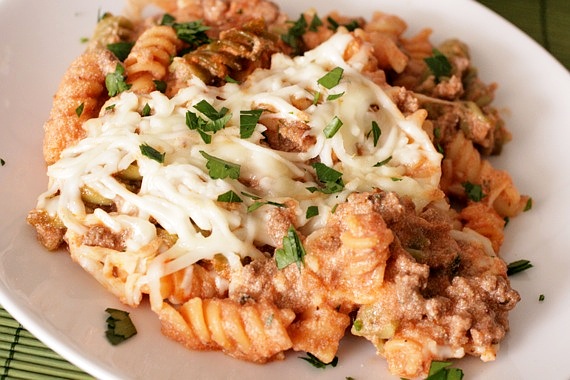
Rotini Lasagna
1 pound lean ground beef
1 pound (16 ounces) rotini pasta (any short pasta you have will work)
1 28-ounce jar spaghetti sauce (of course homemade is great too)
1/2 cup water
1/2 teaspoon salt
1 15-ounce container ricotta cheese
1/4 cup chopped fresh parsley
1/2 cup shredded mozzarella cheese
Preheat oven to 350 degrees. Brown and drain beef in a large skillet. Stir in spaghetti sauce, water, salt, ricotta cheese and parsley.
Cook the pasta according to package directions and drain. Stir into beef mixture. Pour into a greased 9×13 baking dish and top with the mozzarella cheese. Bake for 15 minutes. Top with additional parsley, if desired and serve.
Recipe source: inspired by a recipe seen on The Pioneer Woman via Tasty Kitchen

Joel, our friends, my parents, grandparents, co-workers, neighbors, brother-in-law, opera friends….these are all the people who claim these to be their all-time favorite chocolate chip cookies. That’s not something to be taken lightly. These cookies have been hastily featured on here before, but they most certainly did NOT receive the full respect and attention they deserve. Now, I know I’ve definitely made my fair share of chocolate chip cookies through the years, but just bare with me while I share just one more (for now!)- the BFCCCCs (Big, Fat, Chewy Chocolate Chip Cookies). I’ve honestly never made these for anyone who didn’t immediately say they were the best they’ve ever had, and I’ve made these a floppity-gillion times. That’s big. For me, it’s sort of a toss-up (and also depends largely on what mood I’m in) between these and the famous NY Times chocolate chip cookies. But for whatever reason, when I make chocolate chip cookies, it’s usually these. 🙂 I realize the cookies in my pictures are not exactly “big and fat”- I prefer my cookies on the smaller side, so I always use a standard cookie scoop instead of the heaping 1/4 cup-size scoop it calls for.
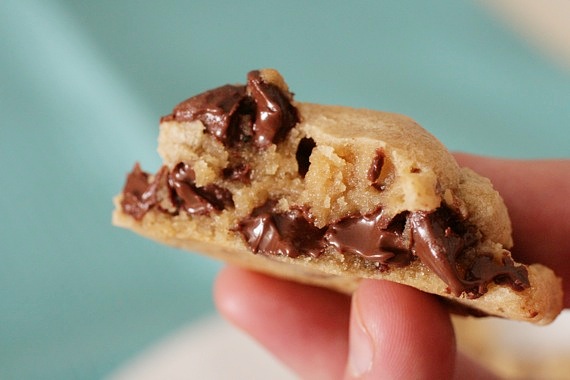
You see that? That’s heaven in cookie form, right there! There’s not much better in life than a warm chocolate chip cookie and a glass of milk. Honestly. Now, I can’t actually tell you where this original recipe started. It bares a striking resemblance to the Cook’s Illustrated recipe, but with a few minor changes; yet the original recipe I first found was from allrecipes.com. Who knows. What I do know is, it’s delicious.
Big, Fat, Chewy Chocolate Chip Cookies
2 cups, plus 2 tablespoons all-purpose flour
1/2 teaspoon baking soda
1/2 teaspoon salt
1 cup unsalted butter, melted and slightly cooled
1 cup packed brown sugar
1/2 cup white sugar
1 tablespoon vanilla extract
1 egg
1 egg yolk
1 1/2 cups semisweet chocolate chips
Preheat the oven to 325 degrees. Line cookie sheets with parchment paper. Sift together the flour, baking soda and salt; set aside.
In a medium bowl, cream together the melted butter, brown sugar and white sugar until well blended. Beat in the vanilla, egg, and egg yolk until light and creamy. Mix in the sifted ingredients until just blended. Stir in the chocolate chips by hand using a wooden spoon.
Drop cookie dough 1/4 cup at a time onto the prepared cookie sheets. Cookies should be about 3 inches apart.
Bake for 15 to 17 minutes in the preheated oven, or until the edges are lightly golden (If you’re making smaller cookies like mine, bake them for about 10 minutes). Cool on baking sheets for a few minutes before transferring to wire racks to cool completely. Makes approximately 12-14 very large cookies or 36 smaller cookies.
Recipe source: allrecipes.com

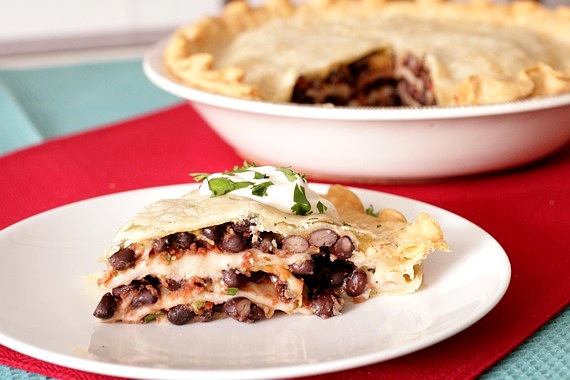
Here’s another winning recipe from my sweet coworker, Janna. She hosted us all for a Christmas party this year and served ALL KINDS of delicious food- including this black bean pie. I have to admit, when she first told me about it, I was a little curious about the ingredients; I wasn’t sure it sounded like something I’d like. However, after one taste, I was hooked! It’s the easiest dish in the world to whip up- canned black beans, salsa, cheese, tortillas and pie crust- that’s it! This is one of those perfect weeknight meals for when you need to feed your family in a hurry. It would be a new and fun alternative to “taco night”! It’s delicious and we both love it! Thanks, Janna, for another delicious recipe!
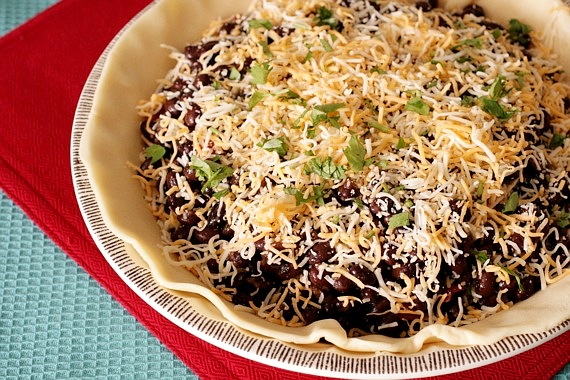
Black Bean Pie
2 9-inch pie crusts
2 cans black beans, drained and rinsed
1 cup salsa (your favorite store-bought brand or homemade)
3/4 cup shredded cheddar cheese
2 flour tortillas
cilantro (optional)
Preheat the oven to 350 degrees. Press one of the pie crusts in the bottom of a pie plate.
In a large bowl, combine the beans and salsa. Spread 1/3 of the mixture in the bottom of the pie plate. Top with 1/3 of the cheese and a sprinkling of cilantro, then one of the flour tortillas. Repeat with another 1/3 of the bean mixture, cheese and cilantro and tortilla. Finally, spread the last of the bean mixture, cheese and cilantro. Top with the 2nd pie crust and seal the edges. Make 4 small slits in the center of the crust with a small knife.
Bake for 30-40 minutes, or until crust is golden brown. Serve with sour cream and additional cilantro, if desired.
Recipe source: my friend Janna, who got it from her mother
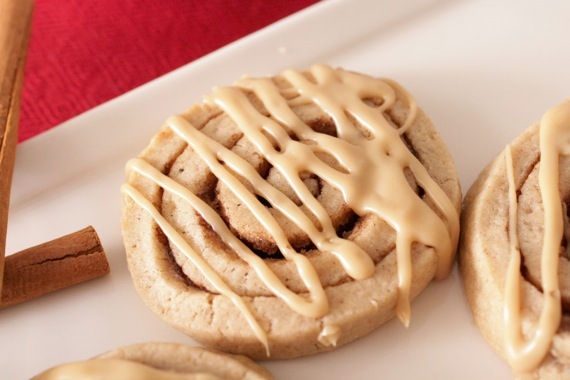
I have my friend Kim to thank for these cookies. You see, I had not prepared adequately for the great “Snowpocalypse” we had a couple of weeks ago and….ran out of butter. It was horrible. Being snowed in your house for 4 days without any butter?! A nightmare!! However, I whined enough about it on my facebook page that a nearby friend, Kim, came to my rescue. She brought me FOUR boxes of butter, y’all. FOUR. I was so happy I immediately got in my kitchen and made these cookies. They look good, huh? Well they ARE!
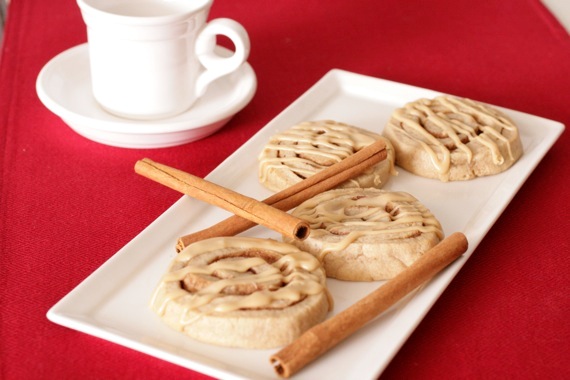
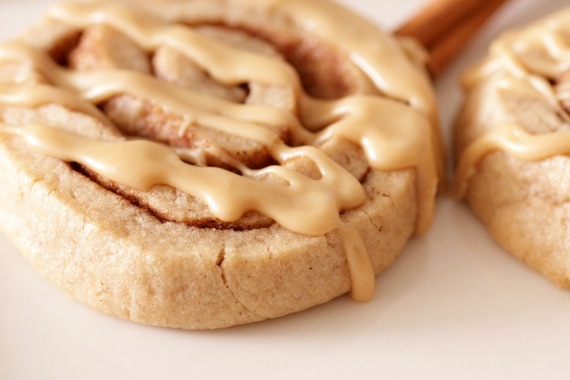
I got the recipe from the lovely Darla of Bakingdom not too long ago and it was the very first thing I turned to when I finally got some butter! I’m so glad, too! These were really fun to make- a little more involved than average cookies, which I thought was a nice change of pace. The cookie itself is crumbly and buttery and just loaded with warm, spicy cinnamon; but the icing is what pushes these cookies over the top. It has espresso powder, so it’s got a wonderful coffee flavor which I just LOVE! These were such a treat on a cold day with a hot cup of coffee- I can’t wait to make them again!
Cinnamon Roll Cookies
For the cookies:
1 cup (2 sticks) unsalted butter, softened
1/2 cup brown sugar
1/2 cup sugar
2 eggs
1 teaspoon vanilla
2 teaspoons cinnamon
3 cups flour
2 teaspoons baking powder
1 teaspoon salt
For the filling:
1/4 cup (1/2 stick) unsalted butter, very soft
1/4, plus 2 tablespoons packed brown sugar
2 teaspoons cinnamon
For the icing:
2 cups confectioners’ sugar
2 tablespoons melted butter
1/2 teaspoon instant espresso powder
2 teaspoons vanilla
2-4 tablespoons milk
To make the cookies: In a medium bowl, combine the flour, cinnamon, baking powder, and salt; set aside.
In a large bowl, or the bowl of a standing mixer, cream the butter and sugars together until light and fluffy. Add the eggs one at a time, and beat until just combined. Scrape the sides of the bowl, then add half of the flour mixture and mix until just combined. Add the remaining flour mixture and beat until thoroughly combined, scraping the bowl as needed. Scrape the dough into a ball in the center of the bowl, cover with plastic wrap, and chill in the freezer for 30 minutes, or the refrigerator for at least an hour.
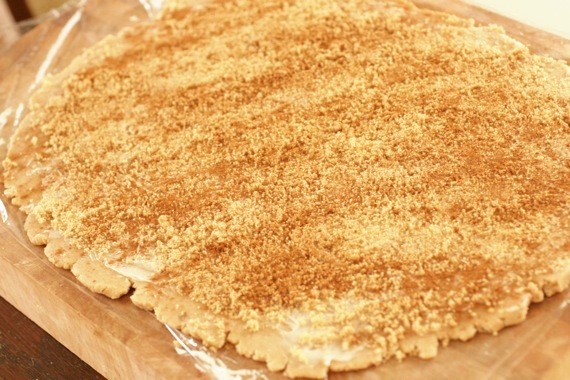
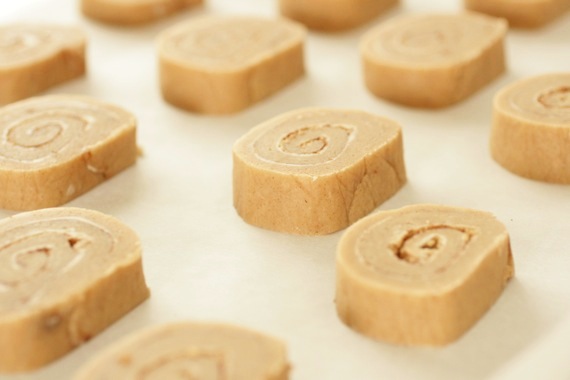
Once the dough is chilled, divide it into two equal halves. Place one half back in the bowl and put it back in the refrigerator for now. On a large piece of plastic wrap, pat the first half of the dough into a rectangle about nine inches by twelve inches, and about half an inch thick. Place half of butter on the dough and spread it all the way to the edges. Sprinkle half of the brown sugar evenly over the buttered dough and press the sugar into the dough. Finally, sprinkle half of the cinnamon evenly over the dough. Use the plastic wrap to tightly roll the dough into a log. Place the log in the freezer for 30 minutes or the refrigerator for at least an hour. Repeat with the remaining half of the dough and filling ingredients.
Preheat the oven to 350 degrees. Line a baking sheet with Silpat mats or parchment paper.
After the dough has chilled again, slice each log into half inch slices (about 24 per log). Place on the prepared baking sheets and bake for 10 to 12 minutes. Transfer to a wire cooling rack and allow to cool completely before icing.
To make the icing: In a medium bowl, combine the butter and instant espresso powder. Add the confectioners’ sugar and vanilla and whisk until it just comes together. Next, add the milk, one tablespoon at a time until the desired consistency is reached. It should be thin enough to drizzle, but thicker than a glaze.
With the cookies on a wire cooling rack set over parchment paper, drizzle the icing over the them with your whisk. Allow the cookies to set up for a few minutes before stacking or storing.
Recipe source: Bakingdom
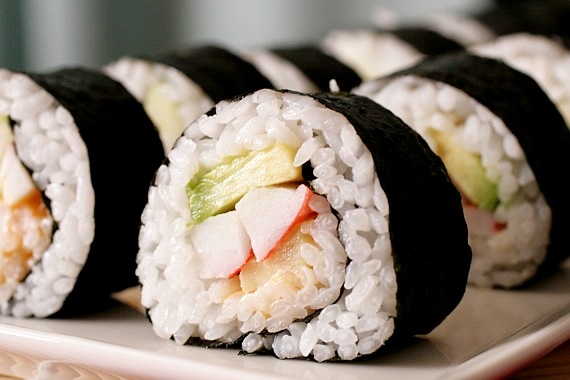
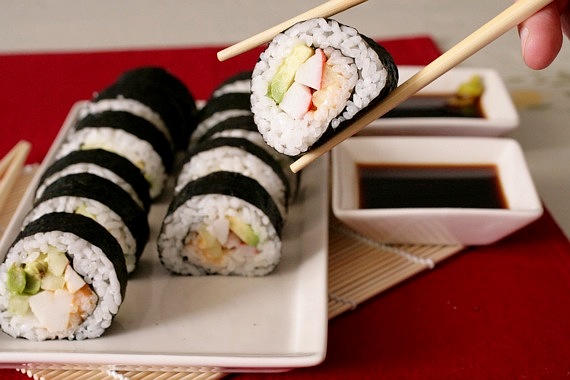
That’s right- Joel and I made sushi for our Valentine’s Day dinner, just like I said we would! And believe it or not, we didn’t screw it up! A miracle! In fact, we were so excited about it, we decided to make a little video, including YOU all in the fun! That’s right- this is a Sing For Your Supper first! My very first video tutorial (don’t worry, it’s very short- less than 3 minutes)!
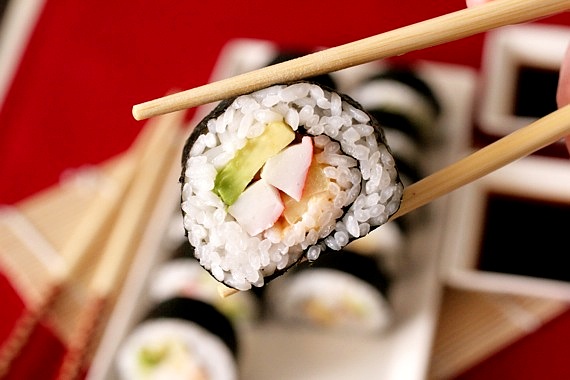
Believe it or not, making sushi at home isn’t quite as scary as you’d think. I’ll be honest, we were both pretty pessimistic about our chances of making a decent California roll, and I fully expected to fail miserably. But it really was FUN and easy, and our rolls turned out super delicious! However, before I show you how we did it, there are a few things I’d like to make clear:
I am not a professional sushi maker.
I am fully aware that my “California roll” is not a real, honest-to-goodness, traditional California roll.
I realize that my knife-wielding skills are a little lack-luster.
Yes, I have an accent.
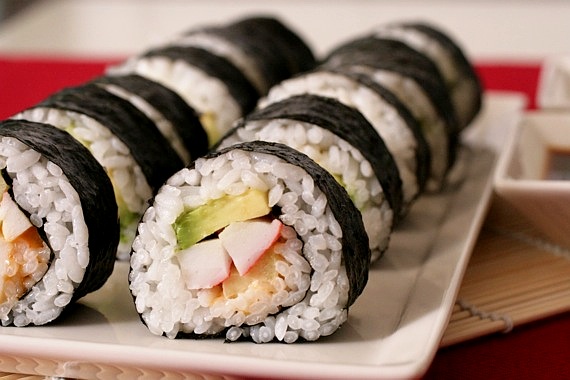
Sushi video tutorial:
[FMP autohide=”true”]/wp271/wp-content/uploads/2011/02/Sushi.m4v[/FMP]
What you’ll need:
Nori (seaweed)
bamboo mat
plastic wrap
sushi rice
rice vinegar
salt
sugar
water
crab meat
cucumber, thinly sliced
avocado, thinly sliced
soy sauce
wasabi
mayo/Sriracha mixture (optional- you won’t find this in a traditional California roll, but we really liked the flavor it added! Mix 1/4 cup mayonnaise with 2 or 3 splashes of Sriracha)
Mix 2 tablespoon rice vinegar, 1 tablespoon sugar and 1/2 teaspoon salt in a small saucepan over medium heat. Bring to a boil and remove from heat.
Cook your rice according to the instructions on the package. I made 2 cups, which gave us enough for 2 rolls (with a little leftover). You don’t have to own a rice cooker for this- I did mine on the stove top and it turned out just fine.
After your rice is cooked, spread it in a thin, even layer on a baking sheet, sprinkle with the vinegar mixture and let it sit out until it’s completely cooled (I laid down a sheet of wax paper before spreading my rice, just so it wouldn’t stick to the baking sheet).
When you’re ready to start filling your sushi, place a sheet of nori on the bamboo mat covered with plastic wrap. Have a small bowl of water mixed with a little rice vinegar nearby. Dip your fingers in the water and start spreading the rice in a thin, even layer over the nori. You’ll need to continuously dip your fingers in the water to keep them from sticking to the rice (and that rice is STICKY!). Leave a little bit of a border so you’ll be able to seal the roll later.
Place a few pieces of crab, cucumber and avocado at the top of the roll (closest to you), followed by the spicy Sriracha/mayo mixture, if desired.
Now it’s time to roll; carefully lift the bamboo mat underneath the top of the nori (where the filling is) and start to roll it over until you can tuck the top underneath. Keep using the mat to help you roll it as tightly as possible (this is actually a lot easier than it sounds). After you’ve finished rolling, dab a little water/vinegar mixture on the edge of the nori to seal the edges. Slice in 1 inch pieces and you’ve got SUSHI!
For dipping: Mix a TINY amount of wasabi into your soy sauce for a spicy kick. But be warned, wasabi packs a BIG punch- a little goes a long way! Dip your sushi and enjoy!
**If you decide to use any raw fish, definitely make sure it’s “sushi-grade” (extra fresh)!
References: Gimme Some Oven and Itsy Bitsy Foodie
Out Takes (enter at your own risk!):
[FMP autohide=”true”]/wp271/wp-content/uploads/2011/02/Out-Takes.m4v[/FMP]
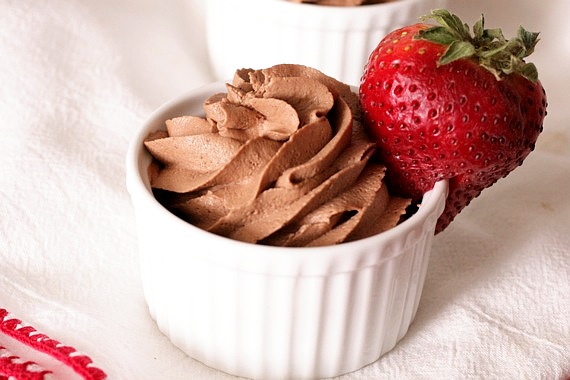
When I was a kid, my family used to go to this really nice seafood restaurant on special occasions. It was a huge buffet with crab legs, seafood gratins, pastas, fish, oysters, lobster tails and much, much more. It was a real treat. But the thing I cared about most on that buffet was always the chocolate mousse. I felt so grown up eating something out of a stemmed crystal glass. I would eat as much chocolate mousse as I could hold. It was silky smooth and oh-so luxurious – I absolutely loved it. Still do. Chocolate mousse has always been one of my very favorite desserts. Which is why I’ve had this recipe bookmarked for well over a year. For whatever reason I never got around to making my own chocolate mousse – then I saw this gorgeous recipe on Smitten Kitchen and knew I had to try it.
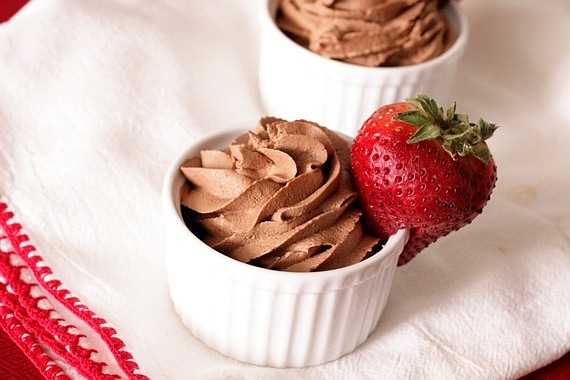
Deb describes this as “silky and decadent” and I could not agree more. The whipped egg yolks are what make this extra creamy and the whipped cream and beaten egg whites make it so light and fluffy it could almost float away. I’m being perfectly honest with you when I say this is the most delicious, luxurious chocolate mousse I’ve ever had in my whole life. An absolute dream.
Silky, Decadent Chocolate Mousse
8 ounces bittersweet chocolate (no more than 60% cacao), chopped
3/4 stick (3 ounces) unsalted butter, cut into 6 pieces
3 large eggs, separated
1 tablespoon Grand Marnier liqueur (or swap with a liqueur of your choice; yes, you can leave it out but it won’t be as good)
1 cup very cold heavy or whipping cream
2 tablespoons sugar
1/2 teaspoon vanilla
1/8 teaspoon salt
Set a large, heat-proof bowl over a saucepan of barely simmering water and melt the chocolate and butter in it, gently stirring it until smooth. Remove from heat. Alternately, you can melt them in your microwave, stirring thoroughly at 30 seconds and every 15 seconds thereafter until the mixture is smooth.
Beat the egg yolks in the bowl of an electric mixer fitted with a whisk attachment until thick enough to form a ribbon that takes a few seconds to dissolve — this will take about two to four minutes to achieve. Whisk yolks into chocolate mixture along with Grand Marnier, then cool to warm.
Wash your mixing bowl and beat the heavy cream, sugar and vanilla until it just holds stiff peaks. Transfer to another bowl and set aside. Wash your mixing bowl again (I know it requires lots of washes for this recipe; alternatively you can just use a hand mixer and 3 different bowls).
Beat the egg whites and salt until they just hold soft peaks.
Fold the whipped cream and beaten whites into the chocolate mixture, gently but thoroughly. Transfer to 8 (4 ounce) ramekins or one large serving bowl, or go restaurant-style, serving it in stemmed glasses with white or dark chocolate shavings on top.
To make ahead: Mousse can be chilled, its surface covered with parchment paper, up to 2 days. Let stand at room temperature at least 30 minutes before serving.
Recipe source: slightly adapted from Smitten Kitchen, originally from Gourmet Magazine, October 2009
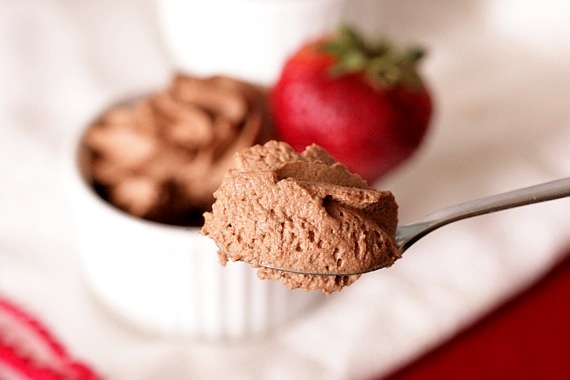
Lighter than air……
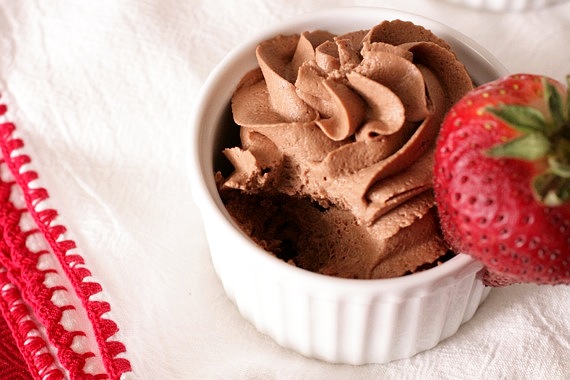
P.S. Happy, happy Valentine’s Day! 🙂

If you’re anything like me, you’re probably planning a quiet, lovely dinner-for-two at home with your sweetie this Valentine’s Day (that’s the best way to do it, in my opinion!). Which means you’re going to need a knock-out dessert to end the meal on a high note! You’ve come to the right place because I happen to have a few delicious desserts that are sure to ‘wow’ your significant other this Valentine’s Day!
Red Velvet Cake Napoleons – I just posted these yesterday and just had to share them again because they’re so cute! If you have kids, this would be a great project for them to help with! So much fun to make and a little something different from a cupcake or regular cake.

Mini Chocolate Chip Sandwich Cookies – These are just for fun; fun to sit and nibble while watching a movie together (Johnny Depp in Chocolat, anyone??), or as a little Valentine’s midnight snack! I’m addicted to chocolate chip cookies, so these have a special place in my heart!

Pink Raspberry Marshmallows – Fluffy, sugary….pink. These are so much fun to make and to eat! And they’d bet totally delicious dipped in rich, fudgy chocolate fondue!

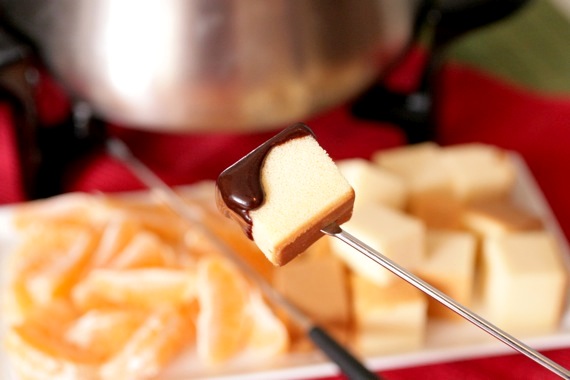
Fudgy Chocolate Fondue – Speaking of fudgy fondue, this one is to DIE for! I think chocolate fondue is the ultimate Valentine’s Day dessert – it’s so romantic! The dipping possibilities are endless: strawberries (the ultimate fondue dipper!), oranges, bananas, cheesecake bites, pound cake, angel food cake, cherries, marshmallows…anything you want! This is my go-to Valentine’s Day dessert!
Giant Cookie Cake – Cookie cakes have a special meaning for hubby and me. I used to make them for him in high school when we were both in band. He LOVED them and looked forward to getting them from me! Last year I put together a special cookie cake just for him as a Valentine’s Day treat! These are the easiest things in the world to make and you can decorate it any way you want! This is another one that would be great for the kids to help with!

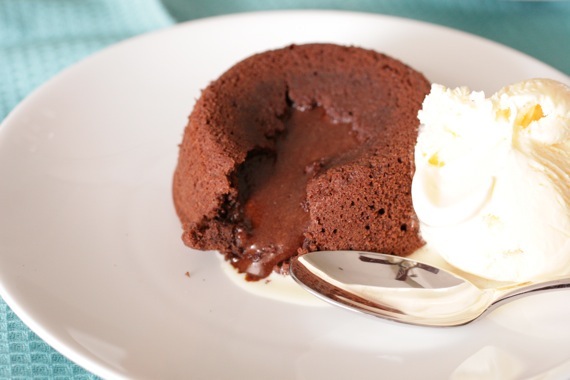
Gooey Chocolate Cakes – And lastly, my all-time favorite dessert. I make these anytime I need a “wow factor” dessert, a quick and easy chocolate fix, or a cozy night at home. Those gooey, molten centers get me every single time! Mmm!!! I will be making these for our Valentine’s dessert this year and can’t wait to dig in! There’s a rule that goes along with these cakes, however – you MUST serve with ice cream on top! It’s just not the same without it! Period!
I hope you’re able to gather some inspiration from these recipes for your own romantic Valentine’s meal! These are my very best and hope you enjoy! Whatever you and your sweetheart have planned for this Valentine’s Day, I hope it’s extra special and wonderfully romantic! Enjoy!

I’m actually not the world’s biggest fan of red velvet cake. Never have really seen the big deal. However, lately I’ve been craving it like crazy! I guess because so may delicious looking red velvet recipes have been popping up all over the blogosphere lately. I guess February is definitely a red velvet kind of month. A year or so ago, I copied down my great-grandmother’s recipe for red velvet cake and have been wanting to try it ever since. I figured now would be as good a time as any, then my friend Kelsey recommended I try her recipe- in fact, her exact words were, “try my recipe- I dare you not to love it.” Well, how can I resist THAT?! And luckily, upon comparing the two recipes, I found that Kelsey’s is almost identical to my great-grandmother’s, with only a couple of very minor differences. Excellent!

I didn’t want to make a traditional cake (which is very unlike me, but I just decided to ride the wave…), and ended up baking the cake in a jelly roll pan. After baking and cooling I found myself looking at it thinking, “well….what the heck do I do now?!” I knew I wanted to somehow do something heart-shaped, for a Valentine’s theme, but beyond that I was lacking inspiration. Lucky for me, my friend Leah suggested Napoleons. Perfect Leah, thanks! Napoleons (or Mille-feuille) are traditionally made with puff pastry and pastry creme, but I thought in honor of Valentine’s Day a cute little red velvet cake Napoleon would be oh-so-fun! The red velvet cake turned out so delicious- especially with the tangy cream cheese frosting! These little guys were so much fun to make and so easy! A perfect little sweet treat for your sweetheart this Valentine’s Day!
Red Velvet Cake Napoleons
For the cake:
2 1/2 cups cake flour
1 1/2 cups sugar
1 teaspoon baking soda
1 tablespoon cocoa powder
1 teaspoon salt
2 eggs
1 1/2 cups vegetable oil
1 cup buttermilk
2 tablespoons (1 oz.) red food coloring
1 teaspoon vanilla extract
1 teaspoon white distilled vinegar
For the frosting:
12 ounces cream cheese, softened
8 ounces butter (2 sticks), softened
1 1/2 teaspoons vanilla extract
3 cups confectioners’ sugar
squirt of fresh lemon juice
For the cake:
Preheat oven to 350 degrees. Grease and line a jelly roll pan with parchment paper.
Sift together flour, sugar, baking soda, cocoa, and salt into a medium bowl.
Beat eggs, oil, buttermilk, food coloring, vanilla, and vinegar in a large bowl with an electric mixer until well combined. Add dry ingredients and beat until smooth, about 2 minutes.
Pour batter into the prepared pan and bake for 30-35 minutes, or until a toothpick inserted into the middle comes out clean. Let cool completely.
When the cake is cooled, flip it onto a large surface and peel the parchment paper off. Using a heart-shaped cookie cutter, cut out hearts and set aside. Using a serrated knife, slice each heart in half. Set aside while you make the frosting.
For the frosting:
Beat cream cheese, butter, vanilla and lemon juice together in a large bowl with an electric mixer until combined. Add sugar and beat until frosting is light and fluffy, 3-5 minutes (you’ll end up with some left over).
To assemble:
Place a small amount of frosting on one of the hearts, place another heart on top, pressing down slightly, then more frosting; finally place one last heart on top and a dollop of frosting (that’s 3 hearts total). Top with sprinkles, if desired. Repeat with the remaining hearts. I ended up with 14 Napoleons.
Recipe source: cake and frosting seen on Apple A Day, originally from Saveur.com
