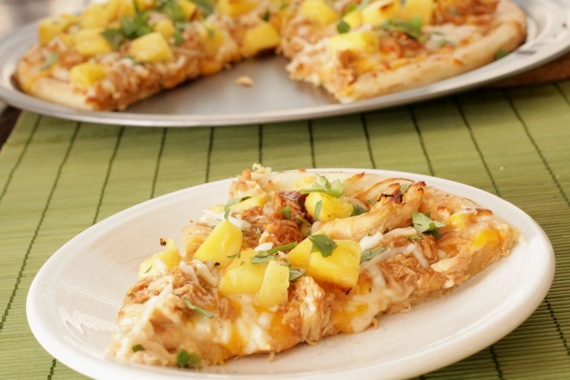
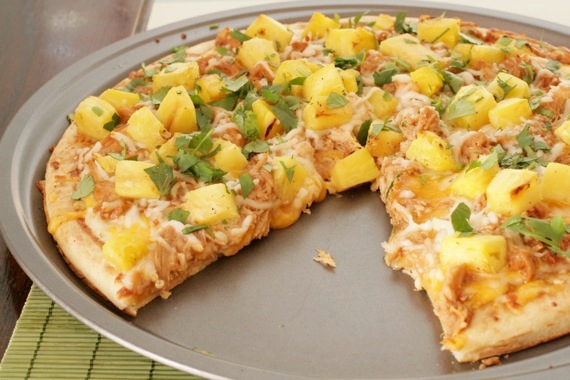
Thursday night at our house is usually “pizza night”. We didn’t really plan it out that way, it just sort of happened over time. By the time Thursday rolls around, I’ll have cooked dinner every night that week and we’re ready for something convenient, plus, we happen to live within a stones throw of the best pizza in the area. So, somehow, Thursday night eventually turned into “pizza night”. But just because it happens to be “pizza night”, doesn’t mean it has to be take out pizza. We love making pizza at home- our favorite variety is black olives, mushrooms, green olives and fresh tomatoes, but last week we wanted something different. I had some leftover grilled pineapple from the night before and thought the classic ham/pineapple combination might be good, but honestly, I’m a little tired of that one. Then I remembered I had two small chicken breasts thawed in the fridge, so I decided on BBQ chicken pizza with pineapple and cilantro! YES!
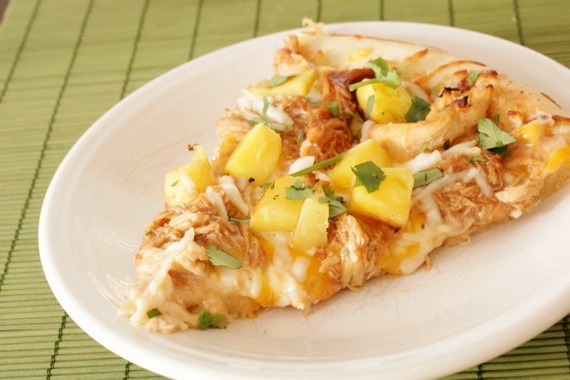
I cooked my chicken in the crockpot, then shredded it and tossed it with BBQ sauce, brushed the pizza crust with a very thin layer of BBQ sauce and ranch dressing, topped it with cheddar and mozzarella cheese, the BBQ chicken and the pineapple, then after baking, gave it a hearty sprinkling of cilantro. OMG-HOLY-YUM!!! We gobbled this up as if we hadn’t eaten in days! An instant favorite! You MUST try this pizza!
BBQ Chicken and Grilled Pineapple Pizza
1 large, thin pizza crust (I used Boboli brand)
1 cup grated mozzarella cheese
1/2 cup grated cheddar cheese
2 chicken breasts, fully cooked and shredded
1/2 cup BBQ sauce, plus more for brushing on the crust
1/4 cup ranch salad dressing (*I make my own with a ranch seasoning packet, mayo and buttermilk)
fresh pineapple, cut into 1-inch pieces (however much you like- we like lots!)
fresh cilantro, chopped, about 1/3 cup
Preheat the oven to 375 degrees. Toss the cooked, shredded chicken breasts with the BBQ sauce. Set aside.
Brush the pizza crust with a thin layer of BBQ sauce (if you’re using homemade pizza dough or the roll-out kind in the can, you’ll need to pre-bake it for 10 minutes or so, just to crisp it up a little bit. My crust was pre-baked already, so I skipped this step), then spread on the ranch dressing. Top with the cheddar cheese and mozzarella cheese, then the chicken and pineapple. Bake for about 15 minutes, until all the cheese is melted and the crust is golden brown. Top with the chopped cilantro. Makes 1 pizza.
Recipe source: Sing For Your Supper original
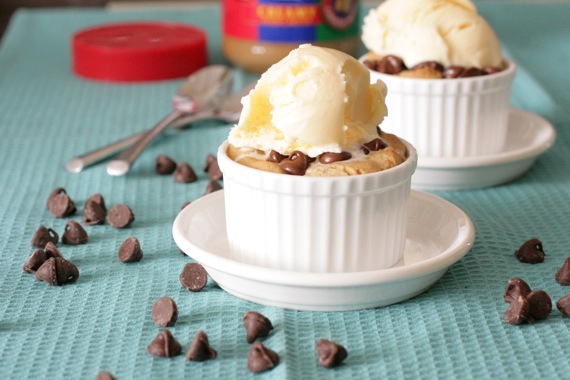
Every once in awhile, a dessert comes along that you can’t stop daydreaming about. You think about it while lying in bed trying to sleep, you think about it when you’re having a rough day, maybe you even think about it while you’re in the middle of giving a voice lesson (ahem…not me, of course…). I mean, who can resist a warm, gooey cookie with ice cream on top? Not me. NOT me.
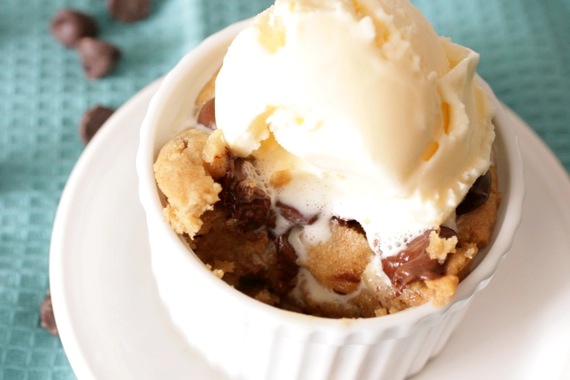
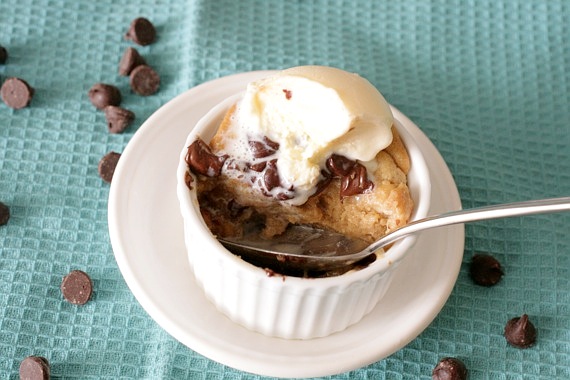
A couple of months back, I posted an excellent recipe for peanut butter cookies; after I made the initial batch, I safely tucked the extra dough away in the freezer for safe-keeping. The other night, in the midst of a warm-gooey-chocolaty craving emergency, I made these beauties. Peanut butter cookie dough, baked in a ramekin until just barely cooked (even a little gooey on the inside), then topped with chocolate chips and a big scoop of ice cream. Pretty much the best thing I’ve put in my mouth in a long time! I simply cannot resist warm gooey cookie dough, so this was an absolutely heavenly treat for me. Joel loved it too!
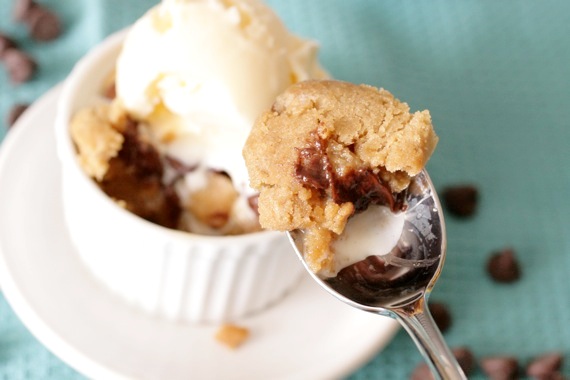
Peanut Butter-Chocolate Cookie Cups
peanut butter cookie dough (homemade or store-bought)
chocolate chips
ice cream
Preheat the oven to 350 degrees. Grease two 2 1/2-3 inch ramekins (muffin cups would also work if you don’t have ramekins).
Fill the ramekins 3/4 full with the cookie dough (slightly packed). Bake for 10-12 minutes, until just beginning to brown on the outside, but still slightly undercooked on the inside (feel free to bake a little longer if you don’t like it too gooey).
Top immediately with chocolate chips (as much as you’d like) and allow to melt slightly.
Top with ice cream and serve with a spoon. Perfect for late-night cravings and sweet tooth emergencies.
Recipe source: Sing For Your Supper original
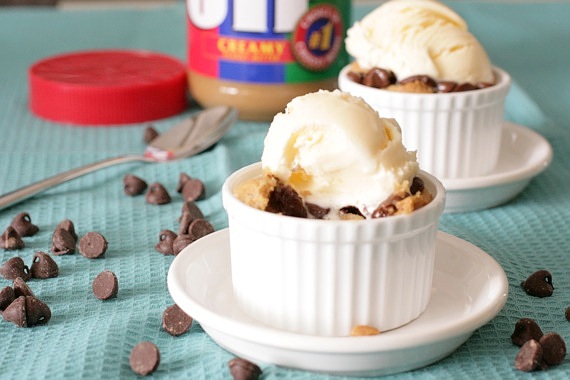
Mmmm….gooey peanut butter cookie…….
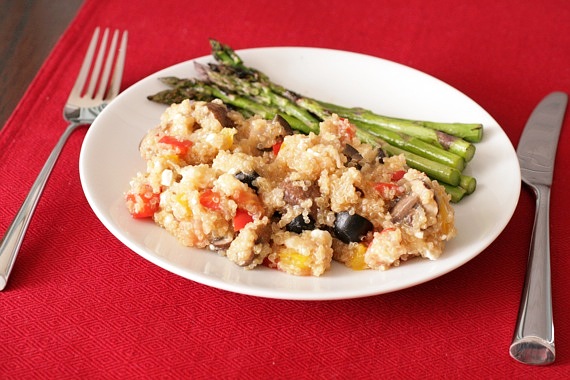
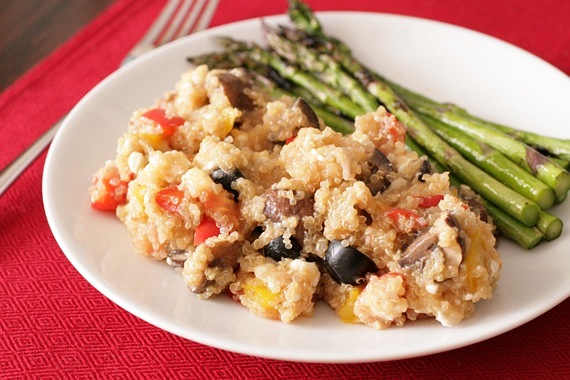
[keen-wah]. You thought it was [kwin-oah], didn’t you? 😉 That’s ok, so did I at first. Up until a couple of years ago, I had never even heard of this stuff, much less know how to cook it. But it’s become pretty popular lately- mostly due to how healthy it is (very high in protein and fiber), but also because it’s extremely versatile. You can bake with it, eat it for breakfast (like oatmeal), make a salad with it, cook it like rice and throw in lots of yummy vegetables…the list goes on! It’s a grain-like seed with a texture similar to a cross between rice and couscous (you can read all about quinoa here). Joel and I both loved the texture and thought it was all-around a delicious new food to add to our menu rotation! I cooked it with red and yellow bell peppers, red onions, garlic, baby portobella mushrooms, black olives and feta cheese for a flavorful Mediterranean twist – absolutely delicious! I’m so happy I finally decided to try quinoa and can’t wait to experiment with all kinds of flavors and dishes!
Mediterranean-Style Quinoa
1 cup uncooked quinoa, rinsed thoroughly
2 cups chicken broth
1 tablespoon olive oil
1/2 yellow bell pepper, chopped
1/2 red bell pepper, chopped
1/2 red onion, chopped
1 clove garlic, minced
squeeze of fresh lemon juice
6-8 baby portobella mushrooms, cut into quarters
1 small can chopped black olives
1/3 cup feta cheese
salt and pepper
Bring the quinoa and chicken broth to a boil over medium-high heat. Reduce the heat to low and simmer, stirring occasionally, for 20-25 minutes, until all the liquid has absorbed.
In the meantime, heat the olive oil in a large skillet over medium-high heat and sauté the onions, peppers and garlic until beginning to soften, about 7 minutes. Add in the mushrooms and cook for another 5 minutes. Turn off heat.
Add the cooked quinoa to the pan with the vegetables. Season with salt and pepper and stir in the lemon juice, black olives and feta cheese. Serve immediately. Serves 2-4.
Recipe source: Sing For Your Supper original
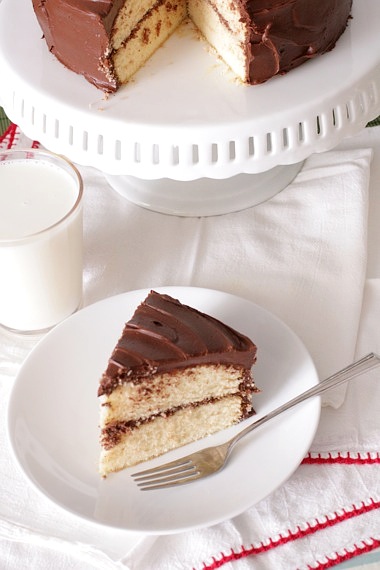
In my opinion, there’s nothing better than a good old fashioned yellow cake with chocolate frosting. There’s just something so comforting and homey about it. While I do love a good chocolate-on-chocolate cake, the combination of a moist, buttery yellow cake with rich, creamy chocolate frosting is unbeatable! Makes me feel as if I were sitting at my mom’s kitchen table after school. I love desserts like that- nothing fancy or intricately decorated, just simply frosted, like my grandmother would do.
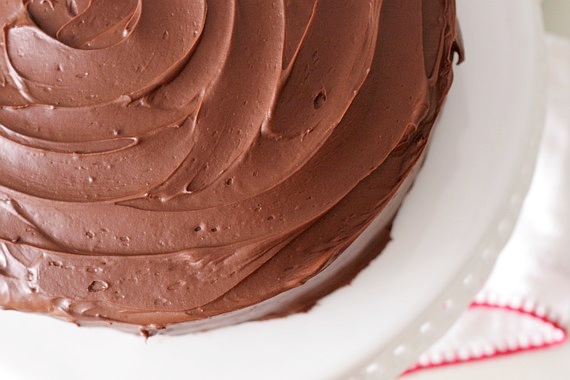
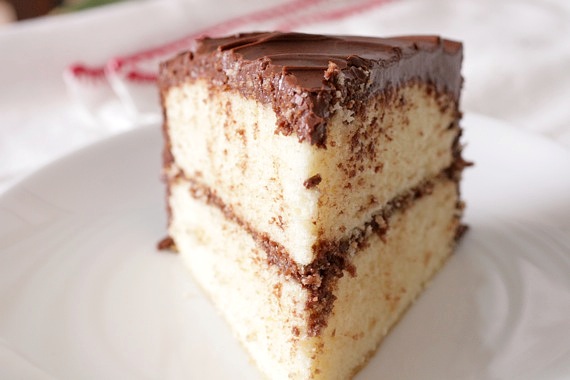
And I have to say, this is the BEST yellow cake I’ve ever had. I was unsure which recipe to use (there are so many good ones out there), but luckily my friend Bridget of The Way The Cookie Crumbles did an in-depth yellow cake comparison on her blog recently and took all the guess work out of it for me! Thanks Bridget (she’s done lots of these comparisons on her blog, so be sure to check them all out!)! I ended up choosing a Cooks Illustrated recipe and it definitely did not disappoint! It’s definitely the most moist yellow cake I’ve ever had and by far the most flavorful. The butter flavor really comes out and the texture is just perfect- light and tender. I paired it with my favorite chocolate frosting recipe and it was just scrumptious. We LOVED this cake (in fact, I’ve had an embarrassing amount of it in the past few days)!
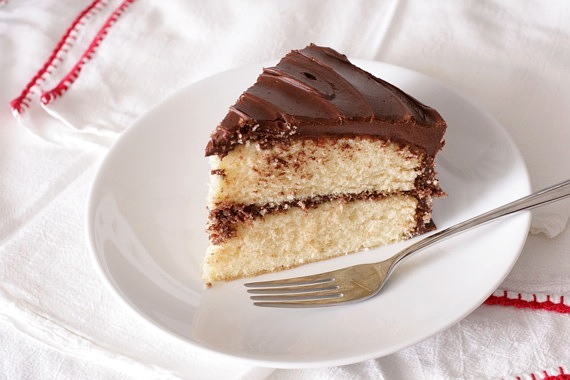
For those of you who are searching for the perfect yellow cake recipe (and I know there are a lot of you!), this is it. I’ve made Martha Stewart’s recipe as well and it doesn’t compare. It may be a little more involved than your average cake recipes, but trust me, it’s worth it.
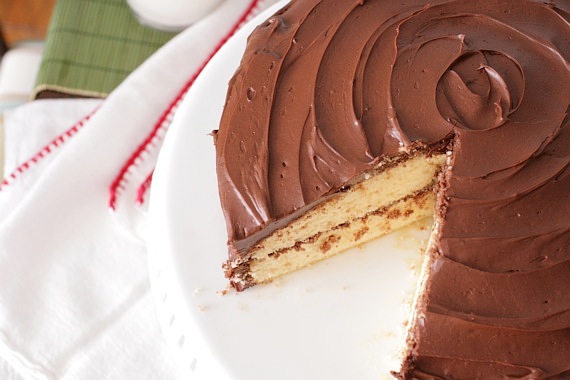
Fluffy Yellow Layer Cake
Makes two 9-inch round cakes
2 1/2 cups cake flour, plus extra for dusting pans
1 1/4 teaspoon baking powder
1/4 teaspoon baking soda
1/4 teaspoon table salt
1 3/4 cups sugar
10 tablespoons unsalted butter, melted and cooled slightly
1 cup buttermilk, at room temperature
3 tablespoons vegetable oil
2 teaspoons vanilla extract
6 large egg yolks plus 3 large egg whites, at room temperature
Adjust an oven rack to the middle position and heat the oven to 350 degrees. Grease two 9-inch cake pans and line the bottoms with parchment paper. Grease the paper rounds, dust the pans with flour, and knock out the excess. Whisk the flour, baking powder, baking soda, salt and 1 1/2 cups sugar together in a large bowl. In a 4-cup liquid measuring cup or medium bowl, whisk together the melted butter, buttermilk, oil, vanilla, and yolks.
In the clean bowl of a stand mixer fitted with the whisk attachment, beat the egg whites at medium-high speed until foamy, about 30 seconds. With the machine running, gradually add the remaining 1/4 cup sugar; continue to beat until stiff peaks just form, 30 to 60 seconds (whites should hold peak but mixture should appear moist). Transfer to a bowl and set aside.
Add the flour mixture to the now-empty mixing bowl fitted with the whisk attachment. With the mixer running at low speed, gradually pour in the butter mixture and mix until almost incorporated (a few streaks of dry flour will remain), about 15 seconds. Stop mixer and scrape the whisk and sides of the bowl. Return the mixer to medium-low speed and beat until smooth and fully incorporated, 10 to 15 seconds.
Using rubber spatula, stir 1/3 of the whites into the batter to lighten, then add the remaining whites and gently fold into the batter until no white streaks remain. Divide the batter evenly between the prepared cake pans. Lightly tap the pans against the counter 2 or 3 times to dislodge any large air bubbles.
Bake until the cake layers begin to pull away from sides of pans and a toothpick inserted into the center comes out clean, 20-22 minutes. Cool the cakes in the pans on a wire rack for 10 minutes. Loosen the cakes from the sides of the pan with a small knife, then invert onto a greased wire rack and peel off the parchment. Invert the cakes again and cool completely on rack, about 1 1/2 hours.
Perfect Chocolate Frosting
3/4 cup (1 1/2 sticks) butter, melted
1 cup cocoa powder
5 1/2 cups powdered sugar
1/2 cup milk
1 1/2 teaspoons vanilla extract
Stir melted butter into cocoa and alternately add powdered sugar and milk, beating to spreading consistency. Add a small amount of additional milk, if needed. Stir in vanilla. Makes about 3 1/2 cups frosting.
Frost cake when completely cooled, as desired.
Recipe sources: cake recipe seen on The Way The Cookie Crumbles, originally from Cooks Illustrated. Frosting recipe from Hershey’s.
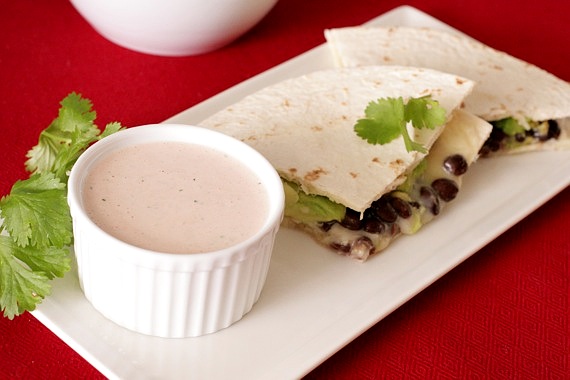
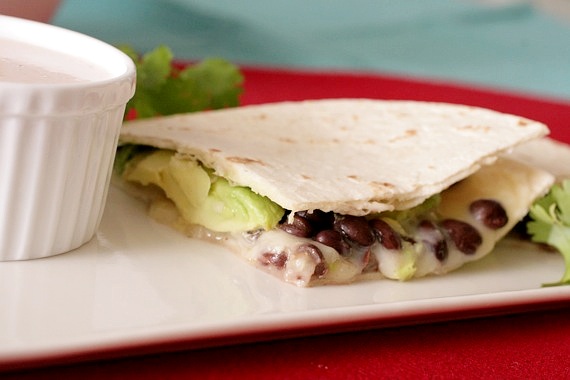
Have I mentioned how much I love quesadillas? All you need is tortillas and cheese and you’ve got the foundation for a great weeknight dinner! This time around, I chose black beans and avocado. Black beans are so good for you and full of flavor (we love them!) and the avocado added a nice creaminess. Add in a little grated monterrey jack cheese and cilantro and you’ve got a delicious dinner! I whipped up a quick dipping sauce with ranch dressing and homemade salsa that really gave the quesadillas a nice kick. We loved this meal and I’m certain I’ll be making it again and again.
Black Bean and Avocado Quesadillas
4 large flour tortillas
1 cup grated monterrey jack cheese
1 can black beans, drained and rinsed
1 avocado, sliced
cilantro
Preheat the oven to 350 degrees. Line two of the tortillas with the cheese, black beans, avocado and cilantro. Place the two remaining tortillas on top and bake for 5-7 minutes, until the cheese is melted. Slice into quarters.
If desired, mix 1/2 cup ranch salad dressing and 1/4 cup salsa for dipping. Serves 2.
Recipe source: Sing For Your Supper original
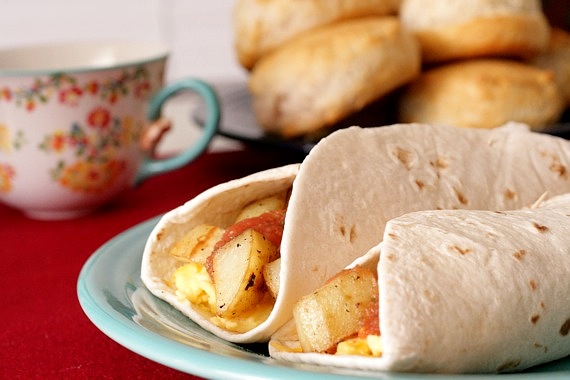
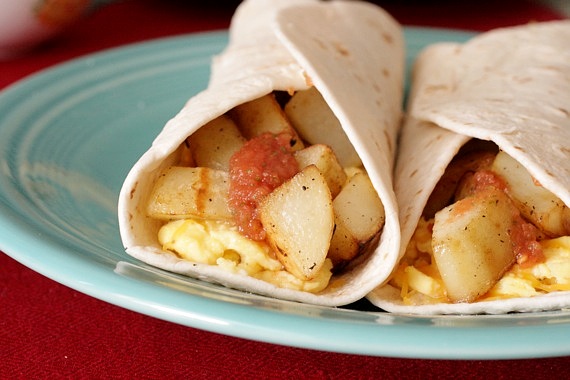
I have to confess that one of my favorite fast-food treats is Whataburger’s breakfast taquitos. Particularly the potato, egg and cheese variety. They’re huge and full of crispy tater tots, scrambled eggs and lots of cheese. LOVE it! Unfortunately, like most places, they stop serving breakfast at 11AM, so I can’t get them at dinner time (shucks, Whataburger!), so I just made my own! These were so good and a teensy bit healthier since I didn’t deep-fry my potatoes. Topped with a big spoonful of homemade salsa, these weren’t only better than Whataburger’s, they were some of the best breakfast taquitos I’ve ever had! Go me! 🙂
Potato, Egg and Cheese Breakfast Taquitos
1 large russet potato, peeled and cut into 1-inch chunks
half an onion, chopped
1 tablespoon vegetable oil
1/2 tablespoon butter
4 eggs
1/2 cup shredded cheddar cheese
salt and pepper
2 large flour tortillas (I used the burrito size)
salsa, for serving (optional)
Put the potatoes in a pot and fill with enough water to cover them. Bring to a boil and cook until the potatoes are just beginning to soften, about 5-7 minutes. You don’t want them to cook all the way; they’ll finish cooking in the skillet. Drain and set aside.
Heat the vegetable oil in a medium skillet over medium heat; add the onions and sauté for 5 minutes, or until soft. Add the potatoes, salt and pepper and cook for another 5-10 minutes, until the potatoes are cooked through and starting to get brown and crisp around the edges.
In a separate skillet, melt the butter over medium heat. Crack the eggs in a bowl and whisk until homogeneous. Add to the hot skillet and stir constantly, until all the eggs are scrambled. Season with salt and pepper.
To assemble: Wrap the tortillas in a damp paper towel and heat in the microwave for 10-15 seconds, until warm. Divide the eggs, potatoes and cheese between the two tortillas. Top with salsa if desired. Serves 2.
Recipe source: Sing For Your Supper original, inspired by Whataburger (thanks, Whataburger!)
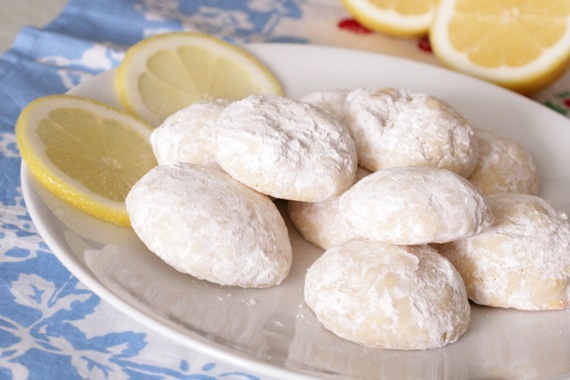
Spring is just around the corner, and lately we’ve been lucky enough to enjoy a few gorgeous, Spring days a little early. Which, naturally means I’m dying to get in my kitchen and whip up something with fresh, bright, lemony flavors. A couple of weeks ago, the weather was absolutely gorgeous- warm, sunny and breezy- so Joel and I decided to go on a picnic. He made us some sandwiches, and I whipped up some pasta salad and these tart, crunchy lemon cookies. They turned out to be the perfect picnic treat! We sat and munched on our cookies and soaked up the sun while Izzy chased a tennis ball around – it was an absolutely beautiful afternoon.

My two cuties!

We really must go on more picnics!
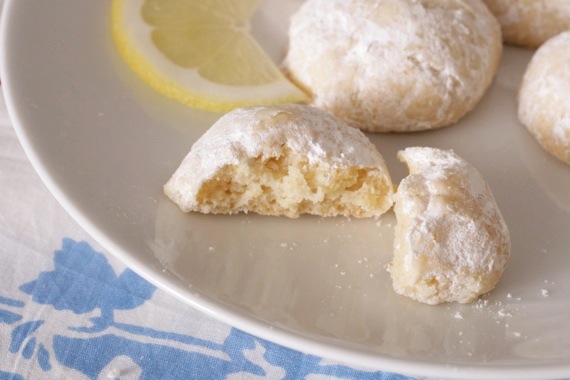
Lemon Snowball Cookies
1/2 cup butter, softened
2/3 cup sugar
1 egg
1/4 cup lemon juice
1 teaspoon vanilla
1 tablespoon grated lemon peel
1 3/4 cups all-purpose flour
1/4 teaspoon baking soda
1/4 teaspoon cream of tartar
1/4 teaspoon salt
confectioners’ sugar
In a mixing bowl, cream butter, sugar and egg until well blended. Add lemon juice, peel and vanilla. Combine flour, baking soda, cream of tartar and salt; stir into creamed mixture. Cover and refrigerate the dough for at least 1 hour.
Roll dough into 1-inch balls. Place on a baking sheet lined with parchment paper and bake at 350 degrees for 10-12 minutes or until bottoms are lightly browned (cookies will not brown on top).
Transfer immediately to wire racks and cool for 5 minutes, then roll in confectioners’ sugar.
Recipe source: allrecipes.com
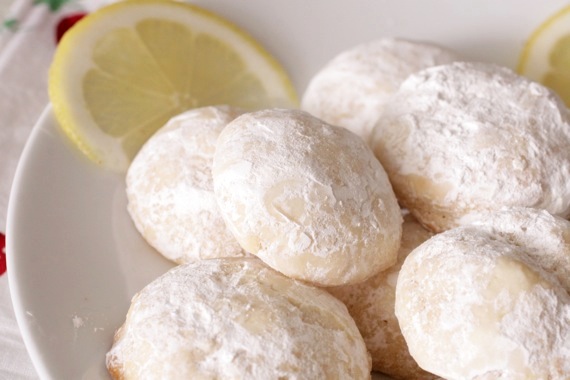
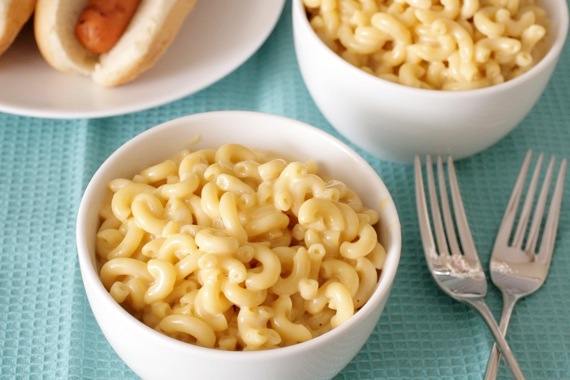
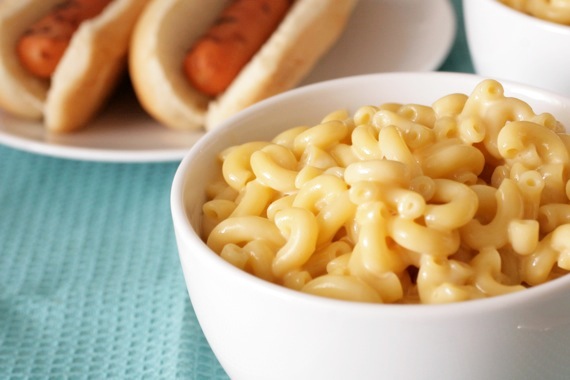
If you were to ask 10 people what the quintessential American side dish is, I’m betting at least 6 or 7 of them would say ‘mac and cheese’. I’m pretty certain it’s most people’s favorite comfort dish. Think about it, when you’ve had a rotten, tiring day and want something easy and comforting for dinner, what do you turn to? For me, no doubt, it’s mac and cheese. Something about that cheesy, gooey goodness makes me feel like a million bucks after just one bite. All my stress melts away. While I do, indeed love the stuff from the blue box, I have to admit, nothing beats homemade. This is a spin on how my mom used to make it, with cheddar and Velveeta cheeses. Yum, yum, yummy!
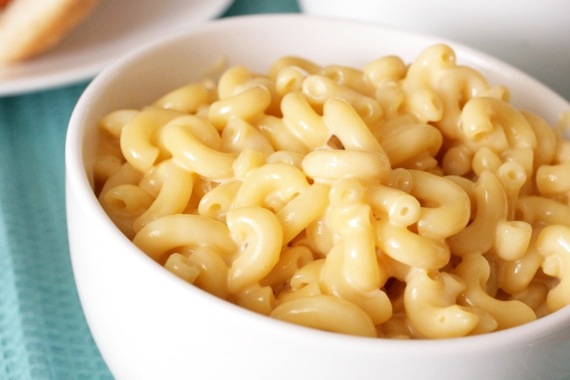
Classic Macaroni and Cheese
1 pound elbow macaroni pasta
2 tablespoons butter
2 tablespoons flour
1/2 teaspoon ground mustard
salt and pepper
1 12-ounce can evaporated milk (feel free to use reduced fat milk)
1 cup shredded cheddar cheese
8 ounces Velveeta cheese, cubed
Boil the pasta until al dente then drain and set aside.
While pasta is boiling, make the sauce. Melt the butter in a large pan over medium heat. Stir in the flour, ground mustard, salt and pepper and whisk for 1 minute. Slowly pour in the milk and whisk constantly until it thickens. Add the cheeses and stir until melted.
Pour the sauce over the macaroni and stir to coat. Serve immediately.
Recipe source: adapted from my mom’s recipe (I’m not certain where the original recipe came from)
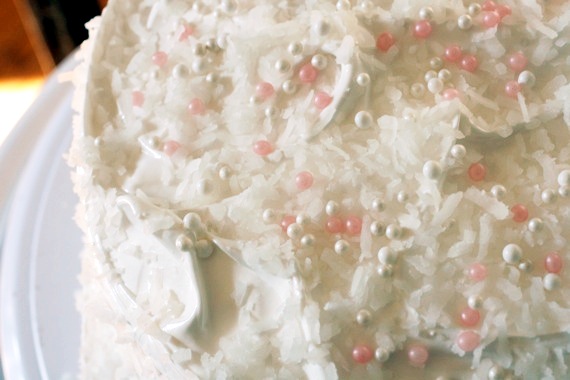
This is a very special, nostalgic cake for my family. It was my great-grandmother, Baba’s favorite go-to cake recipe. The Lady Baltimore Cake. It’s dainty, delicate, feminine and beautiful to look at. It starts with a light, tender white cake, filled with a delicate orange marmalade filling, spread with a fluffy marshmallowy frosting and sprinkled all over with sweetened coconut. Baba made this cake for special occasions, birthdays, holidays, etc. My mother’s birthdays were made so special because Baba would always make her this cake. And finally, after years of being too scared to try it for myself, I made it for my mother’s birthday last week. I love making something that Baba used to make- it’s almost as if it transports me through time and I’m standing next to her in her kitchen, baking alongside her.
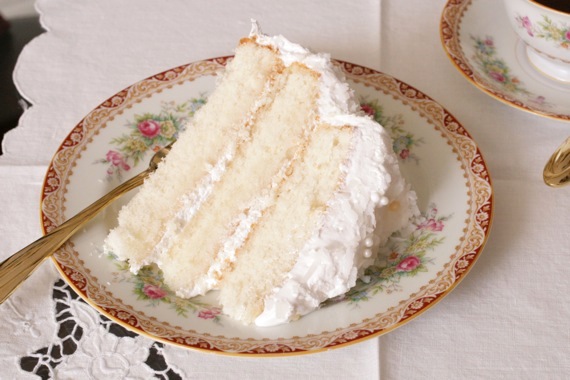
Food is so powerful. One taste can bring back old friends, memories, and family. Glancing at an old, hand-written recipe can bring back smells and emotions and feelings from your childhood. Eating at your mom’s table, no matter your age, can make you feel safe and happy. Sharing a dessert with your husband can make you feel so loved and secure. And baking a cake from a book that your great-grandmother once used links you to something you can’t quite explain. I was so happy to make this cake for my mother, because for one short moment, we both got to be with Baba again. This is a very special cake. One I hope to be making for years and years to come.
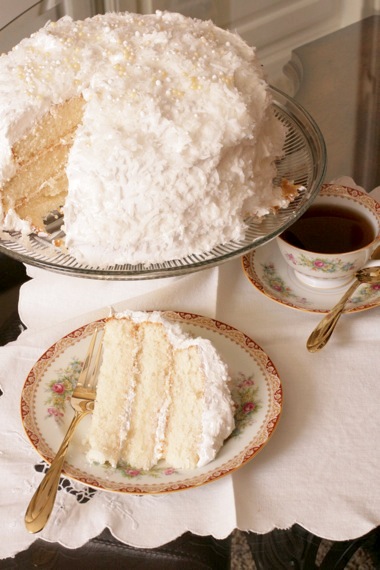
(That’s Baba’s china my mom let me use in the pictures- we thought it only fitting! Isn’t it gorgeous?)
The cake portion of this recipe is very similar to Dorie Greenspan’s Perfect Party Cake (my favorite white cake recipe), which is why it’s so light and fluffy. However, I noticed something odd while reading over the frosting portion of the recipe; no butter. NO butter?! What?! But I trudged on, thinking to myself, “Baba used this recipe a ton, so it must be right!” Upon actually making it, I realized it’s basically a marshmallow frosting. YUM! The frosting takes a little extra time and effort but in the end, it’s worth every second. I couldn’t get Joel to stop eating it! If you ever need an impressive cake for a special occasion, try the Lady Baltimore Cake- it’s different from your run-of-the-mill white cakes and really looks beautiful on a cake stand. It would really be perfect for showers, actually.
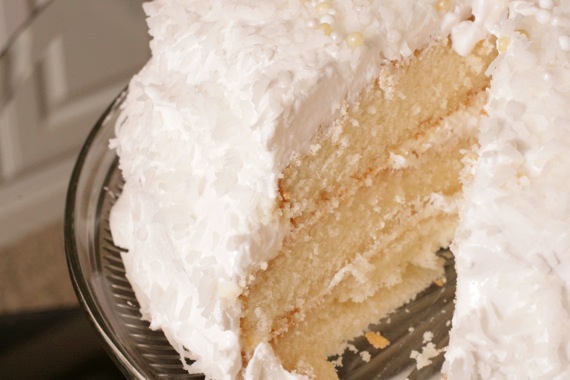
Lady Baltimore Cake
3/4 cup butter, at room temperature
2 cups sugar
grated zest of one lemon
3 cups cake flour
3 teaspoons baking powder
1/2 teaspoon salt
1/2 cup milk
1/2 cup water
1 1/2 teaspoons vanilla
6 egg whites
Preheat oven to 350 degrees and line 3 9-inch cake pans with parchment paper and grease generously.
Cream butter, sugar and lemon zest together until light and fluffy, about 2 minutes. Sift flour, baking powder and salt together and set aside.
Combine milk, water and vanilla. Add small amounts of flour mixture to creamed butter mixture, alternately with milk mixture, beating until smooth after each addition.
Beat egg whites until stiff and gently fold into batter. Pour into prepared pans and bake for 20-25 minutes, or until a toothpick inserted into the center comes out clean. The cakes shouldn’t get very brown on top. Allow to cool for 10 minutes in the pans, then transfer cakes to wire wracks to cool completely.
For the Orange Marmalade Filling:
3/4 (18-ounce) jar orange marmalade
1 tablespoon fresh orange juice
1 tablespoon fresh lemon juice
1 teaspoon Grand Marnier (or any orange liqueur), optional
Heat the marmalade, orange juice and lemon juice in a small saucepan over medium heat just before it reaches boiling point. Remove from heat and stir in the Grand Marnier. Strain out the peels and allow to cool to room temperature.
For the Frosting:
3 cups sugar
1 cup water
1/4 teaspoon cream of tartar
3 egg whites
1 teaspoon vanilla
sweetened, flaked coconut, for garnish
Using a mixer, beat egg whites until stiff.
Boil sugar, water and cream of tartar in a small saucepan over medium-high heat until it reaches 238 degrees on a candy thermometer, or until a small amount of syrup will form a soft ball when dropped into very cold water (this is what’s known as “soft ball stage”).
With the mixer running, slowly pour the hot syrup over the egg whites and continue to beat until the mixture is of spreading consistency (this could take up to 10 minutes; don’t be alarmed if your mixture is runny, just keep beating and eventually it will thicken up.). Add vanilla.
To Assemble:
Spread half of the orange marmalade filling in the center of the bottom cake layer, leaving an inch border around the outside (when you add the frosting, the marmalade will spread). Gently spread some of the frosting over the marmalade and place second cake layer on top. Repeat with the other half of the marmalade filling and more frosting, then place the third cake layer on top. Frost the whole cake with the frosting (be generous, the recipe makes a TON of frosting!) and sprinkle generously with coconut. Refrigerate until 30 minutes to one hour before serving.
Recipe source: adapted from Baba’s favorite, The American Woman’s Cookbook
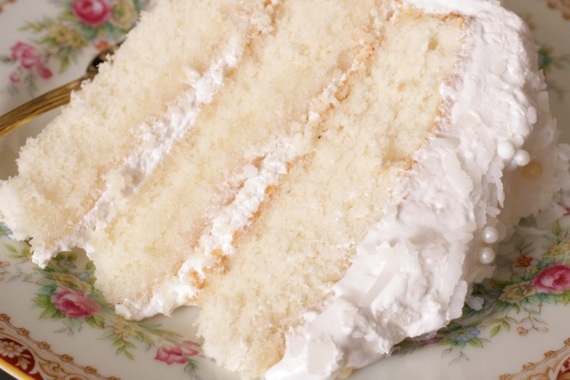
I hope this cake made your birthday extra-special, mommy! I love you!
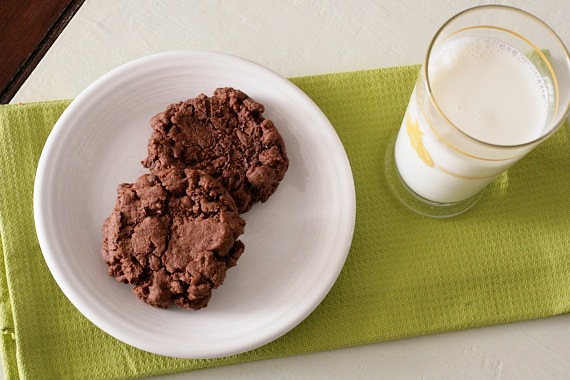
Are you ready for a chocolate explosion in your mouth?! These big, fat, gooey, chocolaty cookies are just that- an explosion of chocolate awesomeness. Annie posted these awhile back and I immediately thought, “oh, please let me have all the ingredients to make these cookies!” Sure enough, these are the BEST kind of cookies- the kind that require very few ingredients, all of which you most likely already have in your pantry/fridge! I LOVE cookies like that! The dough takes no time to throw together (and tastes AMAZING- seriously. I’m not a huge raw cookie dough eater, but this dough was irresistible!), and the cookies themselves are just melt-in-your-mouth delicious. I highly recommend these – they’ll satisfy any emergency chocolate craving in less than 20 minutes, and they’d also be wonderful for parties, get-togethers or after school snacks. Or co-workers. Mine couldn’t leave these alone; we all kept taking turns microwaving ours for a few seconds for optimum gooeyness. That’s a must, by the way. These cookies are best when warm- WITH milk!
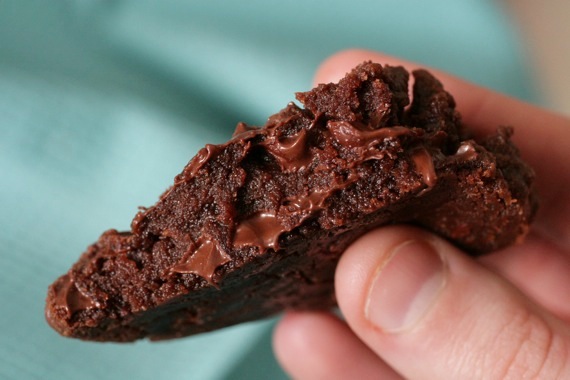
Thanks to Joel for his wonderful hand modeling skills. Nobody can hold a cookie like he can. 🙂
Giant Double Chocolate Cookies
1 cup (2 sticks) cold, unsalted butter, cubed
1 1/4 cup sugar
2 large eggs
1/2 cup dark cocoa powder
2 1/4 cups all-purpose flour
1/4 teaspoon coarse salt
1 teaspoon baking powder
2 1/2 cups semi-sweet chocolate chips
Preheat the oven to 350˚. Line baking sheets with parchment paper or silicone baking mats. In the bowl of an electric mixer, combine the butter and sugar. Beat together on medium-high speed until light and fluffy, 2-3 minutes. Blend in the eggs one at a time, scraping down the bowl as needed. Mix in the cocoa powder until well blended. Add the flour, salt and baking powder to the bowl and mix on low speed just until incorporated. Fold in the chocolate chips with a spatula. Transfer the dough to a work surface and knead briefly by hand to be sure the ingredients are well combined.
Divide the dough into 4 ounce portions (or divide into 12 equal pieces). Roll each portion of dough into a ball and flatten just slightly into a disc. Place on the prepared baking sheets, a few inches apart. Bake 16-20 minutes. Let cool on the baking sheets 5-10 minutes, then transfer to a wire rack to cool completely.
Makes 12 very large cookies.
Recipe source: Annie’s Eats; originally seen on My Baking Addiction, inspired by Levain Bakery


