
Sorry for yet another long hiatus. It’s really not my fault this time. Game of Thrones sucked me in and literally ALL my spare time went to getting caught up to the current season. Then we were so far behind on all our other shows I had to catch up on those. It’s just a never ending time-suck, television.
On top of that, Elliott has been sick SO much lately. Ugh. First he had RSV, then a few weeks later he caught Hand, Foot, and Mouth Disease from the church nursery. And let me tell you, THAT IS NOT FUN. Hopefully he’s done being sick for awhile. Poor baby.
To make up for my time away, I made you some delicious fish! And it is so, so easy. I don’t know about you, but I get kinda bored with fish. I run out of interesting ways to cook it and get stuck in a rut. This recipe pulled me right out, though. The crust is so nice and crunchy with so much good flavor. A great healthy dinner option!
Parmesan Crusted Cod
4 Alaskan Cod fillets
1 cup panko bread crumbs
1/2 cup finely grated parmesan cheese (this really isn’t the time to use the powder in the green can, use fresh)
handful chopped parsley
1/4 teaspoon paprika
salt and pepper
1 egg
Preheat the oven to 400 degrees. Crack the egg into a pie plate or shallow platter and whisk. Set aside. Combine the bread crumbs, parmesan cheese, parsley, paprika, and salt and pepper in a separate pie plate or platter.
Dip both sides of the fillets in the egg, then dredge in the crumb mixture, making sure to coat the fish evenly. Place on a greased baking sheet. Bake for about 20 minutes, until the fish is flaky and no longer translucent. Serve with lemon wedges, if desired. Serves 4.
I’m going to keep this short and sweet: dramatic 3 year old girls and teething 9 month olds are HARD, yo. Like, thank-the-Lord-and-pass-the-wine-and-xanax-we-survied-another-day HARD. These days, I can barely be expected to keep myself from getting in my car and driving to the nearest liquor store to buy out their entire inventory of tequila, let alone cook a decent dinner. Thank goodness for crockpots. Because, after my first cup of coffee and before the first meltdown of the day, there’s still a glimmer of hope. Like, I feel like I could accomplish anything right after that first cup of coffee. Got my energy; got my caffeine; I CAN COOK DINNER TONIGHT! Bring on those poopy diapers! Hit me with your best toddler tantrum! I GOT this! I’m gonna thaw that meat today, dangit!
Then it usually starts to go downhill around 9am. Clingy, crying baby. Whiny toddler. By the time naptime rolls around, I’m a shell of a human. Wishing I could crawl into the fetal position and pray for death.
Obviously, I’m kidding (sort of). My life is very full (sometimes). I’m a very happy mommy (except when I’m not). 😉 Really, though. If I’m being serious, of course life gets a little cray (ok, a LOT cray), but I wouldn’t have it any other way. On those freaking ridiculous days where I can’t be expected to function normally, this dinner is SO VERY EASY. And really, really good. Everybody will love it. And you can save yourself a little trouble. You deserve it. I know I do.
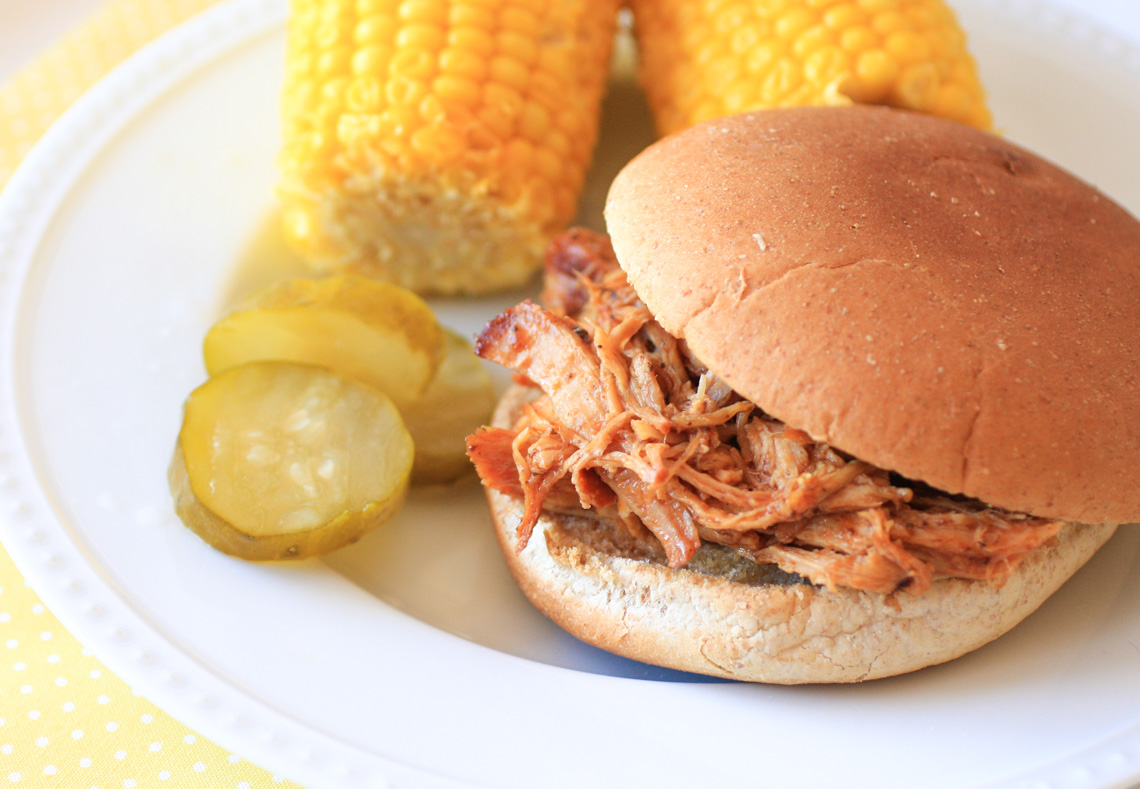
Pork. Dr. Pepper. BBQ sauce. Do it.
Dr. Pepper Pulled Pork
pork roast (about 2-3 pounds)
1 can Dr. Pepper
1/3 cup BBQ sauce
Put the pork roast, Dr. Pepper, and BBQ sauce in a slow cooker and cook on low for 6-8 hours. When the pork is very tender, shred with 2 forks and toss with the remaining cooking liquid. Serve on hamburger buns. Serves 4.
Moist, flavorful chicken, sautéed peppers and onions, and pepperjack cheese get cozy and melty inside toasty flour tortillas to make the ultimate quesadilla. Another weeknight winner!

I wish I had some funny, quirky story to share about something that happened to us recently, but in all honesty, NOTHING has happened to us lately (except sickness, and that’s anything but fun). In fact, the most exciting thing I’ve done this week is walk to the mailbox. And you can only do that once a day.
Yes, we’ve been confined to our house for like, a month (ok not quite that long), and I’ve HAD it. I need out. I need air. That’s why, this weekend, come hell or high water, we’re busting out. The kids are going to their grandparents’ house and Joel and I are going on a date. I don’t care if it’s 50 below outside. I’m going. Wish me luck.
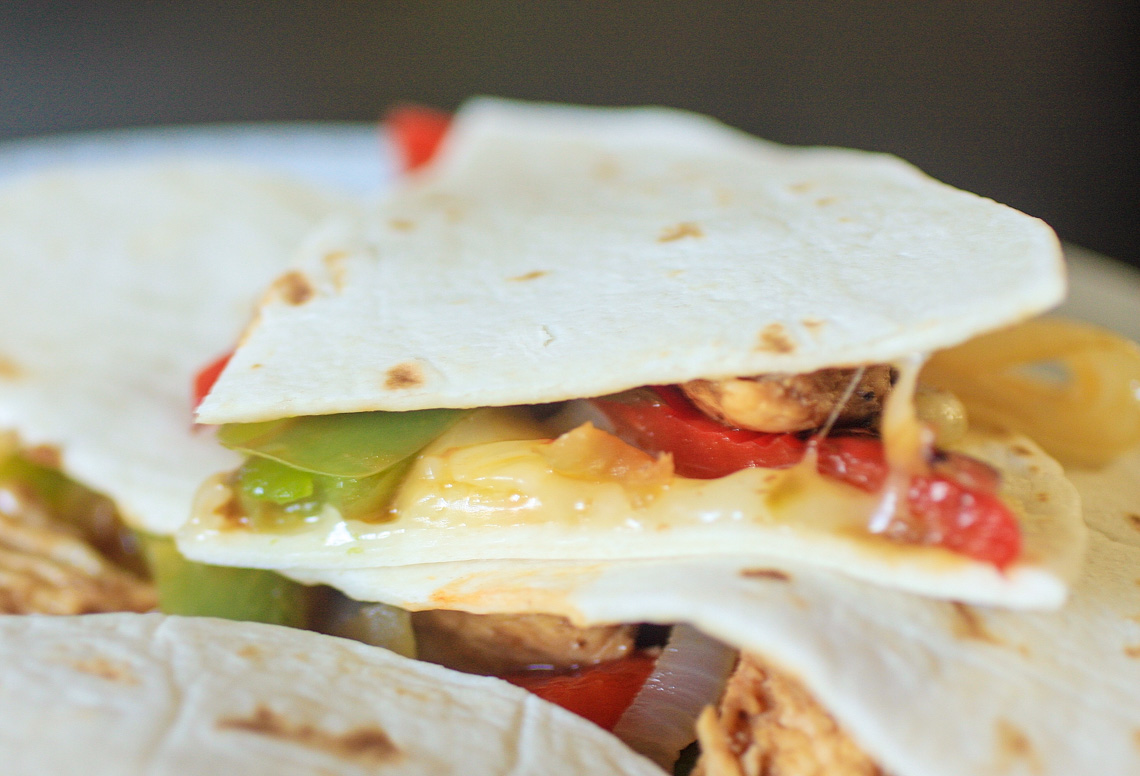
Anyway, these quesadillas. These are soooo good. So cheesy and full of flavor. There’s really not much else to say about them. Other than they’re perfect for busy weeknights or quick lunches. I use a liquid fajita marinade/seasoning called La Fabulosa that’s easily found in my local grocery stores here in Texas, but if you don’t have access to something like that, you can use any other kind of fajita seasoning or marinade. Easy, quick, super delicious. Boom.
Chicken Fajita Quesadillas
2 chicken breasts, cut into 1 inch chunks
2 bell peppers, cut into strips
1 onion, sliced into thin rings
1 tablespoon butter
1/4 cup water
1 teaspoon liquid fajita marinade/seasoning
salt and pepper
1 teaspoon brown sugar
flour tortillas
pepper jack cheese, shredded
Preheat the oven to 400 degrees. Melt butter in a large pan over medium-high heat. Cook the onions and peppers until beginning to soften; about 5-7 minutes. Transfer to a plate. Add the water to deglaze the pan and scrape up all the brown bits.
Add chicken and season with salt, pepper, liquid seasoning, and brown sugar. Cook until no longer pink, about 5 minutes.
Place the cheese, veggies, and chicken between 2 tortillas and bake for about 5 minutes, just to melt the cheese. Makes approximately 4 large quesadillas.
Sing For Your Supper original recipe
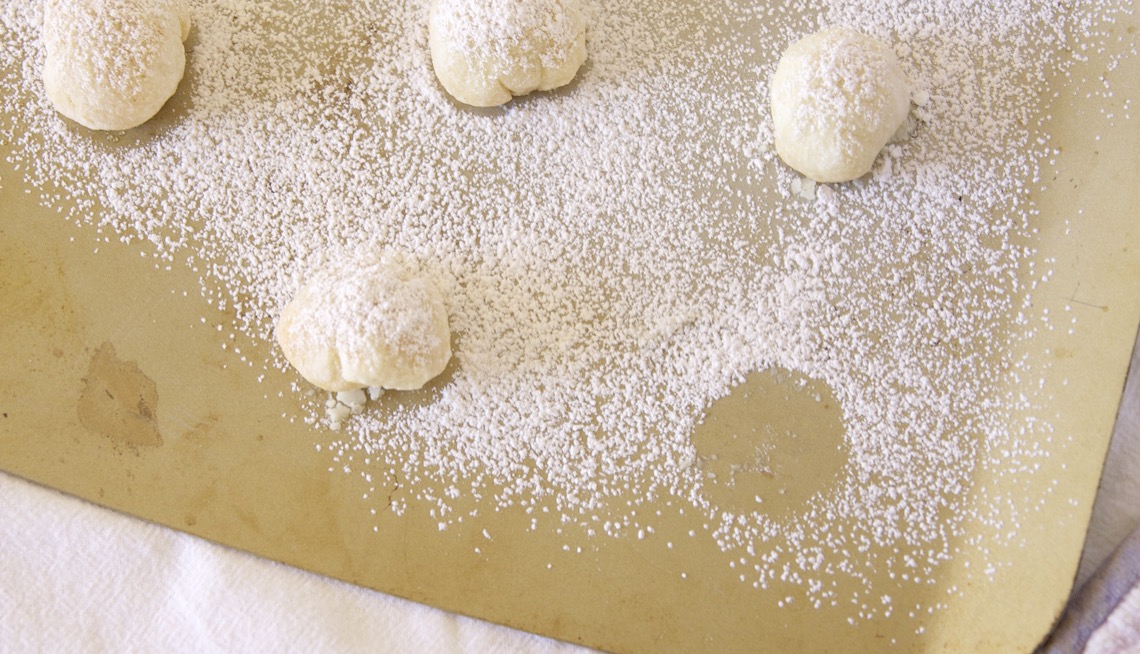
Have leftover pie crust? Stuff it with chocolate chips, roll it in powdered sugar, and bake it into flaky, chocolaty little snow balls. This is a GREAT one for the kids to help with!

I love to look back at my pre-children self and giggle at all the ‘from-scratch’ stuff I used to have time to make (pie crusts, biscuits, etc). I’m aaaall about the shortcuts nowadays; not because making pie crusts from scratch is hard, but because WHO WANTS TO CLEAN THAT FOOD PROCESSOR?! All those little parts to wash…. Anyway, I’ve recently discovered the AWESOMENESS of Trader Joe’s frozen pie crusts. My gosh, they’re amazing. I seriously could not make anything better from scratch. I use them all the time. Only thing is, they’re huge. Like, deep DEEP dish size. So I always have lots of extra dough just lying around.
Recently, I was making a quiche and ended up with lots of extra dough. Then I remembered this idea and decided I had the perfect opportunity to bake cookies with Cassidy. We rolled out the dough and used a round biscuit cutter to cut out circles, then Cassidy put the chocolate chunks in the center of each one. Then we closed them up, made them into little balls, rolled them in powdered sugar, and popped them in the oven! So easy and SO yummy! Like tiny little bites of chocolate pie! I can’t wait for the holidays to get here so we can make these again in different variations! Cinnamon-sugar, cherry, raspberry…the possibilities are endless!
Chocolate-Stuffed Pie Crust Cookies
Leftover pie crust dough
Chocolate chunks or chips
Powdered sugar
Preheat oven to 350 degrees. Take all the scraps of leftover dough and form into a ball. Roll out to about 1/8-1/4 inch thickness and cut into circles using a biscuit cutter or a small glass. Place 3 or 4 chocolate chunks or chips in the center of each circle and close up like a pouch. Form into a ball and roll in powdered sugar.
Place on a baking sheet and bake for 8-10 minutes, until golden brown. Sprinkle with more powdered sugar, if desired. These are great right out of the oven, or at room temperature.
Adapted from Averie Cooks
Roasted tomatoes, onions, and garlic blended together and topped with crunchy, buttery sourdough croutons. A must for cold weather!

HI THERE!!! My, my, my, what a long hiatus, huh?! Life with 2 kids is honestly a lot harder than I thought it would be. Just about the time I’ll get one of them down for a nap, the other wakes up ready to party. By the end of the day, I’m too pooped to even consider sitting in front of the computer when I could be collapsed in bed catching up on recorded tv shows (Blacklist, anyone?). But it’s not like we don’t have fun. My kids are the coolest, funniest, sweetest little dumplin’s any mommy could ask for! Elliott is almost 5 months now. Don’t ask me how that happened, since clearly, I only gave birth to him yesterday. Obviously time is playing some sort of cruel trick on me. He is SO. FREAKING. ADORABLE. And Cassidy…don’t even get me started. Let’s just say she keeps me laughing and/or crying pretty much all the time. 2 year olds, yo.
It’s great to be back in the blogosphere. I’m cooking up lots of good stuff and ready to jump in again head-first (if anyone’s still out there, that is…)!
Let’s talk soup! Soup season is a magical season. A throw-whatever-you’ve-got-in-the-pot season. Which is perfect for busy moms and dads. Which is why I love it so much. For years I’ve been wanting to try making my own tomato soup, but never got around to it for some reason. Well here it is, in all its comforting yumminess.
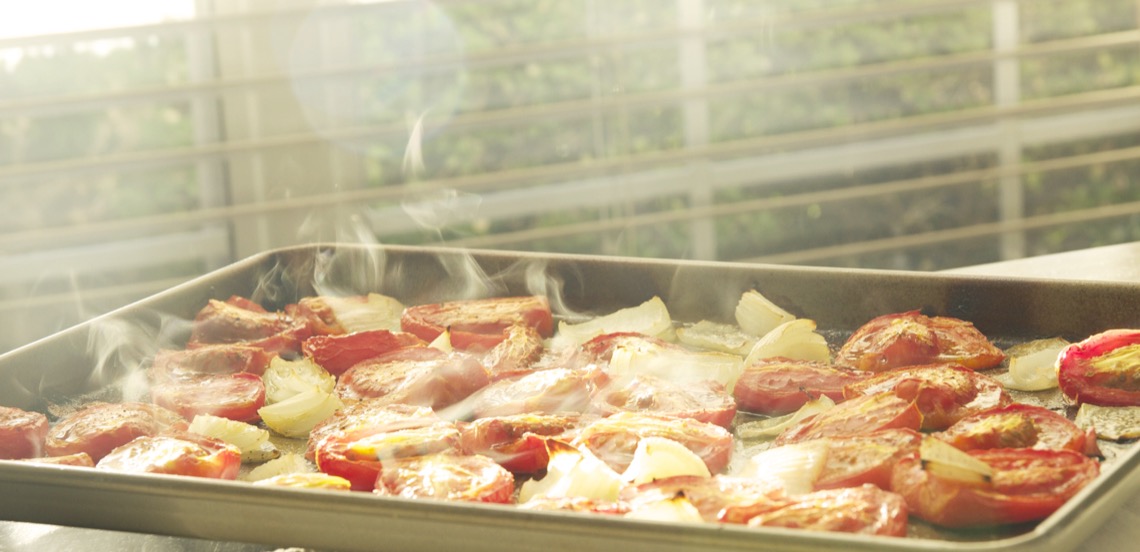
I drizzled roma tomatoes, onions, and garlic with olive oil and roasted them all together for about an hour. Then I blended it all together with chicken broth, a little milk, and some dried basil. DONE. Easy. Those croutons, though. That was my favorite part. I love crusty bread dipped in my soup, so these croutons were a no-brainer. This soup was loved by all. I highly recommend it!
Roasted Tomato Soup with Sourdough Croutons
Approx. 3 pounds Roma tomatoes, cut into halves, length-wise
1 head garlic
1 onion, roughly chopped
2 cups chicken broth
1 cup milk (you could use half and half if you want- just use about 1/2 cup)
1 15-oz can tomato sauce
2 tablespoons tomato paste
1 1/2 teaspoons dried basil
1/4 teaspoon cayenne pepper
salt and pepper
olive oil
1/2 loaf day-old sourdough bread, cut into 1-inch cubes
2 tablespoons butter
Preheat the oven to 400 degrees. Place tomatoes cut-side up on a baking sheet with the onions and drizzle with olive oil, then sprinkle generously with salt and pepper. Cut the top off of the head of garlic, drizzle with a little olive oil, then wrap tightly with foil, making a little pouch. Place it on the baking sheet with the tomatoes and onions. Roast for about 1 hour, or until the tomatoes and onions start to get a little browned (it may take longer depending on your oven).
Remove from the oven and place in a food processor. Remove the garlic from the foil and squeeze the cloves from the head (they should be very soft, so they’ll squeeze out easily) into the food processor. Pulse until smooth. Pour into a large pot and whisk in the chicken broth, milk, tomato sauce, tomato paste, basil, cayenne pepper, and salt and pepper to taste. Simmer for 15 minutes over medium-low heat.
Meanwhile, in a large skillet, melt the butter over medium heat and add the sourdough cubes. Season with salt and pepper and sauté until lightly browned and crisp, stirring constantly; about 5-7 minutes.
Ladle the soup into bowls and top with as many croutons as you like! Enjoy!

I don’t know about you, but when it comes to preparing fish, I usually find myself in a bit of a rut. I do the same things over and over again. For some reason, I have trouble thinking outside the box when it comes to fish. We do LOVE fish, though, so naturally, I was excited to find this recipe. It’s unusual (to us, anyway), quick, and super flavorful. Cassidy loved it and Joel and I loved it. This one will definitely stay in the dinner rotation for sure!
Tortilla-Crusted Tilapia
5 tilapia pieces
7 corn tortillas, torn into small pieces
1 teaspoon lime juice
5 or 6 tortilla chips
1 jalapeno pepper, seeded and chopped
1/4 cup cilantro
1/2 teaspoon chili powder
1/4 teaspoon paprika
1/4 teaspoon garlic powder
1/4 teaspoon ground cumin
1/4 teaspoon onion powder
1 teaspoon salt
1 egg, beaten
Preheat oven to 375 degrees.
Put all of the ingredients (except egg and tilapia) in a food processor or blender and pulse a few times, until you have a bread crumb-like consistency. Put mixture in a shallow platter or large plate.
Dip the fish into the beaten egg and then into the tortilla mixture.
Place each one on a greased baking sheet. Bake for 10-15 minutes, until fish is flaky and tender. Serves 5.
Recipe source: Raining Hot Coupons

Let’s say hypothetically, you’ve had a day from you-know-where; maybe hypothetically, your sweet, precious little angel had somehow transformed into a squealing, screaming, whining, hitting little devil. [hypothetically] Perhaps the little tike dropped her toy espresso maker on your foot at just the right angle, so as to make each step you take after that excruciatingly painful. And then, perhaps, upon trying to give her a hug, the little sweetheart tried to slap your face away and ended up cutting your gums with her adorable little fingernail. HYPOTHETICALLY. 12 screaming tantrums, 4 thrown sippy cups, and 1 disappointingly short nap later, it’s dinner time. Joy. And since your precious cherub is teething, getting her to eat anything is darn near impossible. And don’t forget the fact that you let her eat Chick-fil-a nuggets for lunch, so whatever you cook needs to be healthy. Go ahead, supermom. Get in that kitchen and make some magic! And don’t forget to whistle a happy tune while you do it! 😉
Luckily, I have recipes like this one on standby. Quick, easy, and good for you. My 3 requirements. And when I’ve had the (ahem, hypothetical) day from you-know-where (by the way, my freaking foot is still throbbing…), I can pull this dinner off in less than 30 minutes. Remember that awesome roasted broccoli I just shared with you? Well guess what- it’s GREAT on pizza! And Cassidy loves it! Mommy: 1; Rotten day: 0!

Roasted Veggie Pizza
4 personal-sized thin pizza crusts (I use store-bought, but feel free to make your own)
1 head broccoli, cut into bite-sized pieces
1 red bell pepper, sliced thinly
1 heaping cup button mushrooms, sliced
salt and pepper
olive oil
pizza sauce
mozzarella cheese
Preheat oven to 400 degrees and line a baking sheet with foil. Toss the broccoli, red pepper, and mushrooms in a little olive oil and spread in a single layer on the baking sheet. Sprinkle with salt and pepper and roast for about 20 minutes, until vegetables are soft.
Make your pizzas: spread each pizza crust with a thin layer of pizza sauce. Top with roasted veggies, then cheese. Bake in the preheated oven (still at 400) for about 8 minutes, until crust is crisp and cheese is melted. Serve immediately.
Recipe source: Sing For Your Supper original

Moms: do you have trouble getting your little ones to eat their veggies? Well don’t give up! Green vegetables like peas, spinach, green beans, broccoli, kale, etc are so, so good for our growing kiddos! I understand the struggle – up until I started cooking it like this, I could never get Cassidy to eat her broccoli. She loves peas and green beans, but it seemed like no matter what I did, she wouldn’t touch broccoli. Probably because it tastes like flavorless mush by the time I finish steaming it. But broccoli fixed this way? She can’t get enough and I’m thrilled!
It’s SO simple- toss your broccoli florets with a little olive oil, salt, and pepper and roast it at 400 for about 15-20 minutes. That’s it and it’s WONDERFUL! The broccoli gets nice and soft, but it’s still bursting with flavor. I’m a huge fan of roasting any vegetables since it brings out the flavor so beautifully, and I have to say, I think roasted broccoli is my new favorite.
…just make sure you burn a candle or open a window since we all know how stinky it is to cook broccoli. A small price to pay for a delicious, healthy side dish, right? 😉
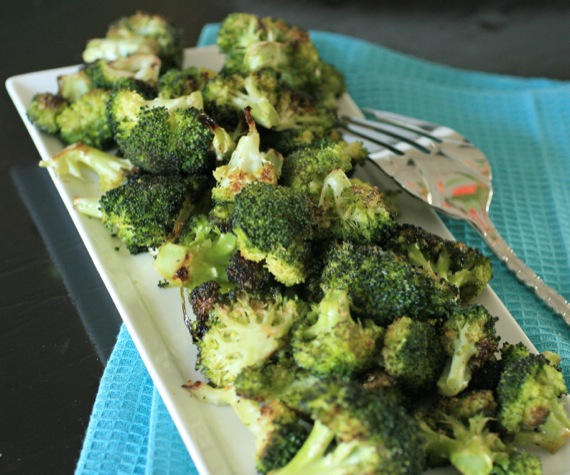
Roasted Broccoli
1 head fresh broccoli, cut up into bite-size pieces
olive oil
salt
pepper
Preheat oven to 400 degrees. Toss the broccoli with the olive oil, then spread onto a baking sheet lined with foil (this makes cleanup a snap!) and sprinkle with salt and pepper. Roast for about 15-20 minutes, turning the broccoli over halfway through cooking. Edges should be slightly dark and broccoli will be tender when done. Serves 2-3 as a side dish.
Recipe source: Sing For Your Supper original, although, this is not a new concept 😉

As promised, here’s the second trifle I told you about. And my personal favorite. 🙂 Don’t get me wrong, I love, loooove a good chocolaty trifle, but something about this lemon variety won me over. Maybe the sweet, lemony syrup- soaked angel food cake, or the lemon-vanilla pudding between layers, or the slices of fresh, ripe strawberries…whatever it is, this dessert is a WINNER! And so ideal for a summer cookout! No one wants to turn their ovens on during the hot summertime, so this trifle is where it’s at. No oven required.
Summery Lemon Strawberry Trifle
1 angel food cake, cut into cubes
3 large lemons
1 cup water
1 cup sugar
2 3.4-oz. boxes vanilla pudding mix
3 3/4 cups milk
1 16-oz. container Cool Whip
1 1/2 cups strawberries, hulled and sliced
Using a vegetable peeler, remove the peel from the lemons (be careful not to get the white pith or you’ll end up with a bitter taste). Squeeze the juice from the lemons into a small bowl and set aside. In a small sauce pan over medium-high heat, bring the water, sugar, and lemon peels to a boil and simmer until sugar has dissolved (about 3 minutes). Remove from heat and allow to cool. Remove peels.
Whisk the pudding mix and milk until thick, about 2 minutes. Stir in the reserved lemon juice. Set aside.
In a trifle dish or large glass bowl, place half of the angel food cake cubes in an even layer; drizzle with half of the lemon simple syrup. Layer half of the sliced strawberries, then spread half of the pudding, then half of the Cool Whip. Repeat layers. Chill for at least 4 hours before serving. Serves 12.
Recipe source: Sing For Your Supper original

This week, I’ll be sharing not one, but two awesome trifle recipes! I know…that’s kinda weird to just randomly post a bunch of trifle recipes, but I have a reason. 🙂 We threw a graduation party for the son of our good friends a couple of weeks ago and when I asked his mother what his favorite dessert is, she told me he loves chocolate cake and my lemon-lime sugar cookie truffles. I wanted to do something unique that incorporated both of his favorite things, and after lots of thought, ended up making two kinds of trifles- chocolate and lemon. They were both a huge success! I really love this kind of dessert, not only because can they be made ahead of time (and should be!), they’re super simple to throw together and the result is always fantastic.
This trifle features chocolate cake soaked with coffee, then drizzled with a bit of hot fudge and layered with chocolate pudding and cool whip. I’m not kidding when I say this is decadent. The best part is, the longer it sits, the better it gets. I love “soggy” desserts, so naturally, this one ranks pretty high on my list. If you’re looking for a dessert that looks beautiful, tastes amazing, and requires minimal time and effort, this one’s for you!

Decadent Chocolate Trifle
1 chocolate cake, baked, cooled, and cut into cubes (you may have some left over- save ’em for a snack!)
hot fudge, for drizzling
1/2 cup freshly brewed coffee that has been allowed to cool
2 3.4-oz. boxes chocolate pudding mix
4 cups milk
1 16-oz. container Cool Whip
Whisk together the pudding mix and milk until thick; about 2 minutes. Set aside.
In a trifle dish or large glass bowl, place half of the cake cubes in a single layer; spoon over half of the coffee, then drizzle a small amount of hot fudge over the cake. Spoon half of the chocolate pudding and spread evenly, then half of the cool whip. Repeat layers, reserving one or two small pieces of cake for the top. When layers are complete, crumble the cake and sprinkle over the top of the cool whip for decoration. Refrigerate for at least 4 hours before serving. Serves 12.
Recipe source: Sing For Your Supper original


