I think we can all agree that birthdays are special. As soon as you wake up the morning of your birthday, you want to feel special! When my sister and I were growing up, on the morning of our birthdays, my mom would make us our very own breakfast in bed. She would wake us up singing and laughing and the whole family greeted us on our special morning. Too bad I don’t get that kind of treatment anymore…(I’m lookin’ at you, Joel!) Hehe, just kidding…. 😉
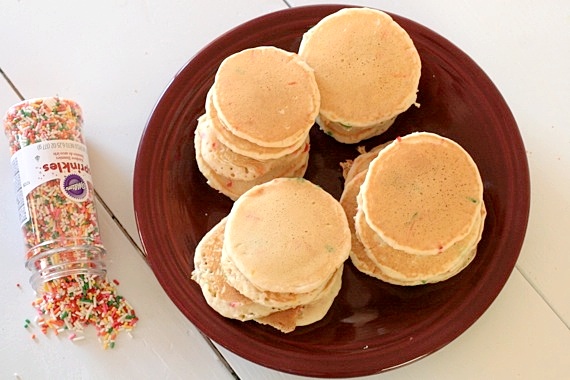
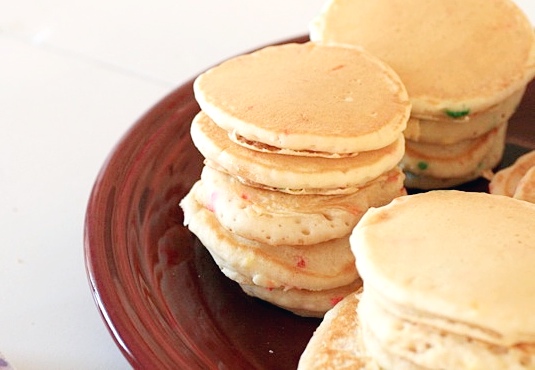
On Cassidy’s first birthday, Joel and I (like huge dorks) greeted her with lots of loud, happy singing and laughing. Then we all sat down and enjoyed these yummy, festive birthday pancakes. What a great start to a happy, happy day!
These are really soooooo easy. In fact, I’m not even going to post an actual recipe, because I used boxed pancake mix. I’m not going to spend all morning making pancakes from scratch when I could be snuggling my sweet birthday girl! These are ready in less than 10 minutes! Score!
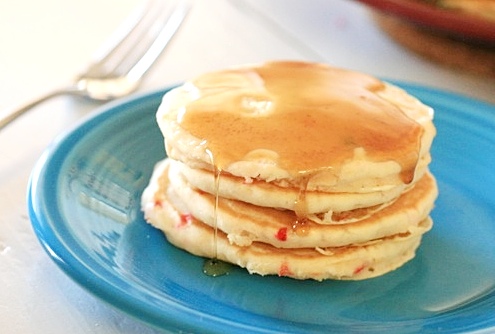
To make the pancakes: start with your favorite brand of pancake mix and prepare as directed. Stir in 1-2 tablespoons rainbow sprinkles (I used rainbow jimmies- they melt a little inside the batter and give that “funfetti” look.). Cook as directed and serve with maple syrup.

Making baby food at home is a practice very near and dear to my heart, so when I asked you all if it was something you cared about, then received such an enthusiastic response…I couldn’t WAIT to share with you! So, just for you mommies out there, I’ve put together a detailed post with everything you need to know about making healthy, safe, and delicious baby food at home for your sweet little ones!

Now, there are lots of myths out there about making your own baby food at home; so let’s just get past those right now:
Myth #1: making homemade baby food is hard. This couldn’t be more wrong. Not only is homemade baby food incredibly easy (I’ll show you how); it’s fun! I actually really enjoy making baby food at home. During all the stress of our move, I switched to store-bought for a little while and wasn’t too fond of the experience. Now that I’m back to homemade, things are much better and we’re all happier! You don’t need fancy recipes- just steam it, puree it, and store it. That’s it.
Myth #2: you need fancy, expensive equipment to make baby food at home. WRONG. I’m sure those little gadgets that are specially designed for the sole purpose of making baby food are great (too bad they cost a fortune…), but let me tell you now- save your money! All you need to make baby food at home is a vegetable steamer basket, a food processor (or blender), and a few ice cube trays for freezing (I have a couple of silicon heart-shaped ice cube trays that I like to use from time to time). The one special piece of equipment I did go out and buy was this baby food storage kit. I like it because it’s really easy, dishwasher safe, and each cup is the perfect portion size for Cassidy.
Myth #3: making homemade baby food is more expensive. Tooooootally not true! I buy mostly frozen vegetables, which are never more than around a dollar a bag, and I can usually get around 6 or 7 servings out of each bag. I can get over 8 2-ounce jars out of one sweet potato! With store-bought, depending on what kind you buy, you may spend anywhere from .75 – $1.75 a serving. Yikes!

Now, I’m not here to preach at you. If you prefer store-bought, hey, that’s fantastic. There is absolutely nothing wrong with store-bought baby food! I just happen to a.) enjoy making it, b.) appreciate knowing exactly what I’m feeding my daughter, and c.) like saving my pennies. So, without further ado, here are my best tips and methods:

Why I love store-bought frozen fruits and vegetables: I prefer frozen because not only are they pre-washed, chopped, and ready to go, they’re picked and frozen at the peak of their ripeness, which means they retain pretty much all of their vitamins and minerals. Plus, you can always get certain out-of-season vegetables year round!
Fresh is always a great option, but since I hate peeling, seeding, and chopping certain vegetables, I prefer to buy frozen. You can always buy fresh, then freeze for later use. I like to stock up on fresh fruits and vegetables at Costco, then bring them home to prep and freeze for later use. Call me crazy, but I actually kind of enjoy prepping for baby food making. Oh, and here’s a little tip: if you’re going to freeze bananas for later use, peel them, toss them with a little lemon juice, then place in an airtight ziploc baggie; that way they won’t get slimy and brown. Works every time!

Ok, now that we’ve got a few of the logistics out of the way, let’s make baby food!
Begin by preparing your fruits or vegetables. If you’re using frozen, just throw ’em in the steamer basket; since they come pre-washed and chopped, you’re good to go. Fresh may require peeling/seeding. If you’re using fruits, no cooking is necessary (except for apples and pears- I like to soften those up a bit first).

Steam your vegetables on medium-high heat. Depending on the vegetable, I steam mine for around 10-15 minutes, just until they’re good and soft. Harder veggies like sweet potatoes, rutabagas, and butternut squash may take up to 30 minutes. Once they’re fork tender, carefully (it’s hot!) put them in the food processor or blender (or if you’re really old school, a food mill) and pulse until smooth. Keep the steaming liquid close by in case your puree is too thick. I like to pulse the snot out of mine to make extra sure there are no lumps.
No seasoning is needed- most fruits and vegetables taste great on their own. However, I do like to add a pinch of cinnamon to my sweet potatoes for a little extra something. 😉

Once you’ve reached your desired consistency, set it aside to cool down a bit. Then carefully spoon the baby food into clean ice cube trays (perfectly portioned at 1 ounce each!) or freezer safe baby food containers. If you’re using ice cube trays, cover tightly with plastic wrap before freezing. And that’s it! When you’re ready to serve, pop it in the microwave for about 30 seconds to 1 minute and that’s it! Baby food!

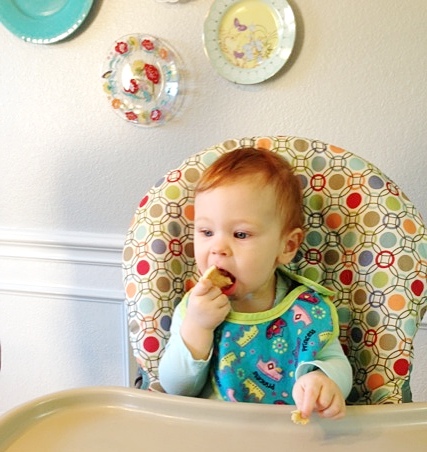
The flavors I’ve made so far are: peas, green beans, summer squash, blueberry/banana, prunes*, sweet potato with cinnamon, pears, strawberry/banana, avocado, and broccoli. (NOTE: Cassidy’s doctor told me not to make carrots or spinach at home, due to possible high levels of nitrates [which I found out only after I had made an entire batch…]. Baby food companies screen all their baby foods for nitrates before selling them, so it’s a safer bet to just buy your carrot and spinach baby food. Safety first! Just FYI.) All super easy, all heartily approved by miss Cassidy herself (as pictured below)!

*If you’re going to make prunes (hey, some babies need a little extra fiber, if you know what I’m sayin’…), you’ll need to steep them in boiling water for 5-10 minutes before pureeing, just to plump them up a bit. Same with dried cranberries or raisins.
So, there you have it! Easy, right? I hope this has all been helpful to some of you, and please don’t hesitate to email me with any questions! I love to hear from you! Now get out there and make some baby food at home! 🙂


