Insanely scrumptious.
Devilishly delicious.
Delightfully sinful.
(These are all perfect phrases to describe what I feel every time I take a bite of this aaaaaaaa-maaaaaa-ziiiing dessert).
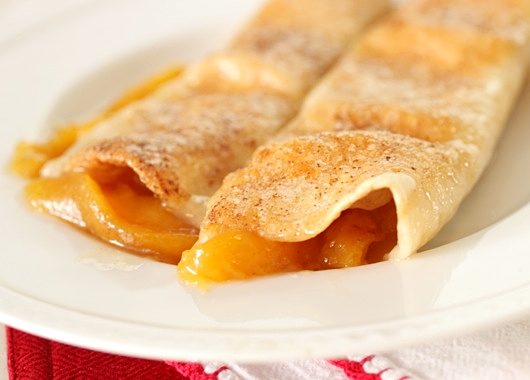
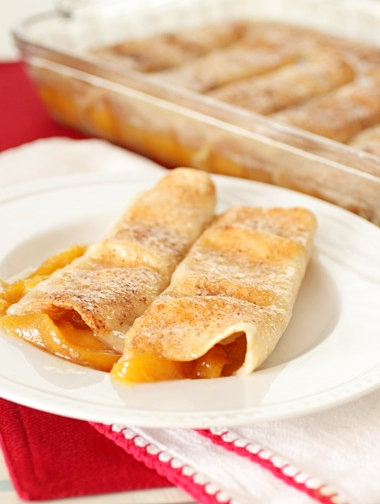
As my Peach Cobbler Week comes to a close, I thought something as wacky as peach cobbler enchiladas would be a great way to end with a bang. Don’t be thrown off by the title – obviously, this IS a dessert (duh) and has nothing whatsoever to do with Mexican food or traditional enchiladas.
My dad received this recipe from a coworker years ago and it immediately took my family by storm. Something magical happens when fresh peaches, butter (and lots of it), and sugar meet flour tortillas. It’s a bubbly, gooey, buttery, peachy miracle, is what it is! So run, don’t walk, to the grocery store and buy yourself the ingredients for these! You. Will. Thank. Me.
Peach Cobbler Enchiladas
4 cups peaches, peeled and sliced
1 cup sugar
squirt fresh lemon juice
2 sticks unsalted butter*
1 cup sugar
pinch salt
10-12 flour tortillas
cinnamon and sugar, for sprinkling
Preheat oven to 325.
Place the sliced peaches in a large pot and add just enough water to cover. Stir in the 1 cup sugar and lemon juice and bring to a boil. Reduce heat to low and simmer, uncovered, until peaches are soft and most of the water has cooked down; about 20 minutes. Remove peaches with a slotted spoon and reserve 1/2 cup juice.
Bring sugar, butter, and the reserved peach juice to a boil and cook, stirring occasionally, for about 2-3 minutes, just until the sugar is dissolved. Remove from heat.
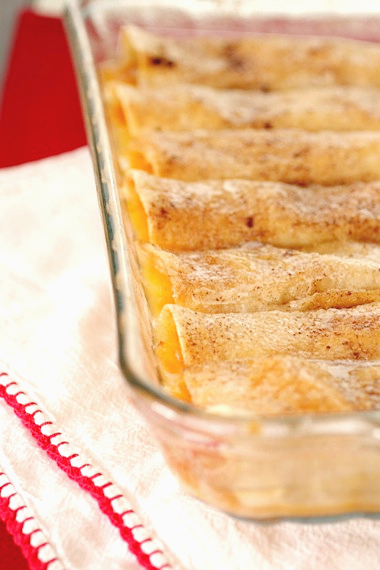
Fill tortillas with the cooked peaches and arrange in a single layer in a greased 9×13 pan. Sprinkle with cinnamon and sugar. Pour the melted butter mixture over the top and sprinkle with additional cinnamon and sugar.
Cover with foil and let stand at room temperature for 30 minutes. Bake for 1 hour uncovered, until bubbly. Let stand 5-10 minutes before serving. Serves 8.
Recipe source: heavily adapted from a former coworker of my dad’s
*Clearly, this recipe is NOT of the health food variety. I realize that. But with that in mind: YES, you can use margarine instead of real butter. And YES, you can cut back on the amounts of butter and sugar called for (even though I’ve already cut the recipe down from 3 sticks of butter and 2 cups of sugar). BUT, please do not blame me when it doesn’t turn out. As they say, “all things in moderation”. Just eat it and be happy. 🙂
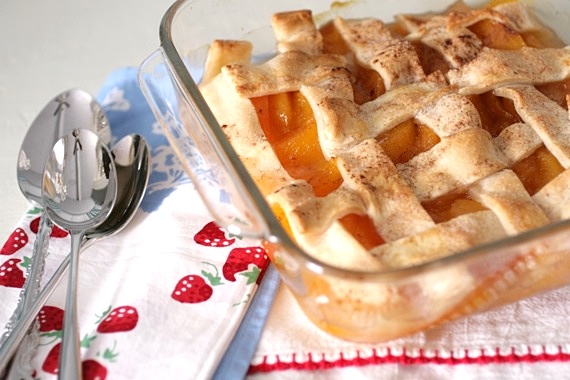
See that? That, my dear readers, is THE peach cobbler. The dessert of the gods. Baba’s peach cobbler.
It’s taken me 28 years to get here, but I have finally made a Baba peach cobbler. What’s so special about it, you ask? Not the golden, ripe, juicy peaches, or the flaky, sugary crust…to us, it’s special because all it takes is one bite and Baba’s there with us. That’s powerful food.
This is what we consider a “Southern” cobbler. A pie crust topping instead of a biscuit one. Except in my family, we make ours double-decker. Two layers of peaches and pie crust (and butter!). If you’re a biscuit-topped cobbler fan, I encourage you to try it Southern-style! You’ll love it!
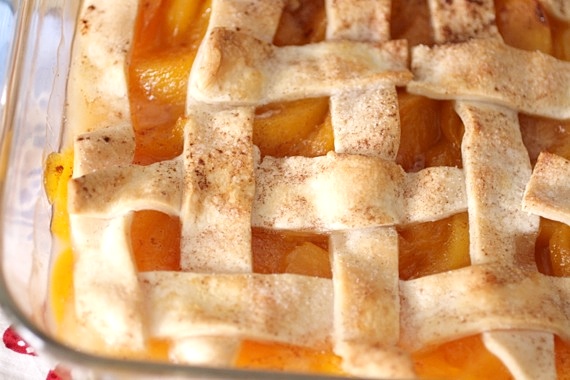
As you can see, my lattice skills are….none. To tell the truth, I’m too impatient to mess with it. Rest assured though, it doesn’t affect the taste. 😉
Baba’s Southern Peach Cobbler
4 cups peaches, peeled and sliced
1 cup sugar
squirt fresh lemon juice
3 cups flour
1 cup shortening, very cold and cut into small cubes
1/2 teaspoon salt
3 to 4 tablespoons ice water
For Cinnamon-Sugar Mixture:
3 tablespoons white sugar
1 teaspoon ground cinnamon
cold butter, for dotting crust
Preheat oven to 400 degrees.
Place the sliced peaches in a large pot and add just enough water to cover. Stir in the 1 cup sugar and lemon juice and bring to a boil. Reduce heat to low and simmer, uncovered, until peaches are soft and most of the water has cooked down; about 20 minutes. Remove peaches with a slotted spoon and reserve 1/2 cup juice.
To make the crust: Using a food processor or pastry cutter (or my personal preference, the fingers), blend the flour, salt and shortening together until texture resembles oatmeal or small peas. Slowly add the ice water a little at a time until dough just comes together. Refrigerate until needed.
Turn out dough onto a large floured surface and roll out to about 1/4 inch thickness. Cut into long strips.
To assemble: place half of the peaches and juice in the baking dish. Top with half of the strips in a lattice (criss-cross) pattern. Dot with butter and sprinkle with half of the cinnamon-sugar. Bake for about 8-10 minutes, just to let the crust crisp up a little.
Remove from oven and top with the remainder of the peaches and the rest of the crust in a lattice pattern. Dot with butter (lots of it!) and sprinkle with the remainder of the cinnamon-sugar. Bake for 25-30 minutes, until the crust is golden and juices are bubbling. Serves 6 (or in my family…4) 😉
Recipe source: My great-grandmother, Baba
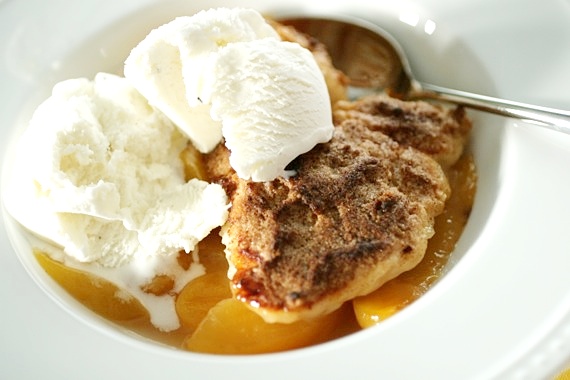
You’ve heard me talk about Baba’s peach cobbler a LOT, right? And how I’ve always been too scared to make one because it’ll never stand up to hers? Remember? Well…..
This is not Baba’s peach cobbler.
Although, I did make one (and it was goooood). But I’ll show you that one next. In case you’re wondering, this week, I’m only posting peach cobbler recipes. It’s Peach Cobbler Week at Sing For Your Supper! Exciting, right?! Right! Why do I need so much peach cobbler in my life, you ask? Because it’s heaven. It’s my favorite dessert on the entire earth. Soft, sweet, peachy goodness topped with tender, buttery crust….oh gosh. I’m getting all excited just thinking about it!
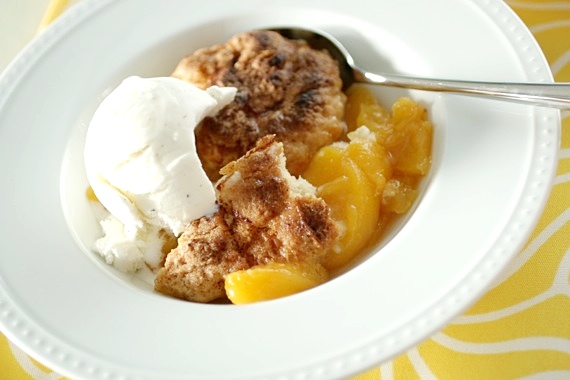
I’ve eaten a lot of cobblers in my 28 years and generally, there are two kinds of cobbler folk: those who make theirs with biscuit topping (what my family calls “yankee cobbler”), and those who make a pie crust topping. My family, Baba included, is the latter. However, I decided one day I’d break tradition and give the biscuit-topped cobbler a chance. While is still doesn’t live up to Baba’s cobbler (in my opinion), it’s still really, REALLY good.
Traditional Peach Cobbler
4 cups peaches, peeled and sliced
1 cup sugar
squirt fresh lemon juice
1 cup all-purpose flour
1/4 cup white sugar
1/4 cup brown sugar
1 teaspoon baking powder
1/2 teaspoon salt
6 tablespoons unsalted butter, chilled and cut into small pieces
1/4 cup boiling water
For Cinnamon-Sugar Mixture:
3 tablespoons white sugar
1 teaspoon ground cinnamon
Preheat oven to 400 degrees.
Place the sliced peaches in a large pot and add just enough water to cover. Stir in the 1 cup sugar and lemon juice and bring to a boil. Reduce heat to low and simmer, uncovered, until peaches are soft and most of the water has cooked down; about 20 minutes. Remove peaches with a slotted spoon and reserve 1/2 cup juice.
Place peaches and reserved juice in a greased 9×9 baking dish.
To make the topping: In a large bowl, combine flour, 1/4 cup white sugar, 1/4 cup brown sugar, baking powder, and salt. Blend in butter with your fingertips or a pastry blender until texture resembles oatmeal or small peas. Stir in water until just combined.
Drop spoonfuls of topping over the peaches and sprinkle with the sugar and cinnamon mixture. Bake until topping is golden, about 30 minutes. Serves 6.
Recipe source: adapted from allrecipes.com
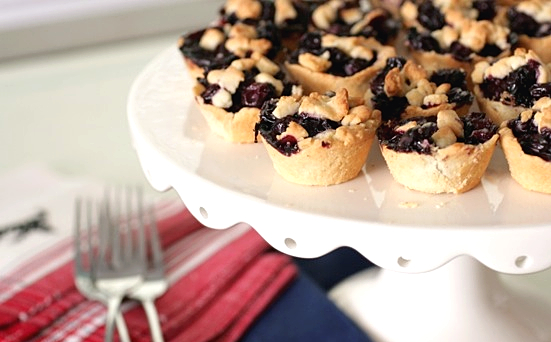
It’s a dreary, rainy day and there’s not much going on. What do you do? You get in the kitchen and bake baby blueberry pies!
But baking baby blueberry pies isn’t nearly as much fun without a special helper…

Sure, she may only sit there and drool, but she’s excellent company in the kitchen! I couldn’t have made these without her! 😉
Technically, these aren’t really ‘pies’ at all. I used my favorite tart crust from Dorie Greenspan (more like a shortbread… Mmm!) instead of a standard pie crust. The combination of those tart, juicy blueberries with the crumbly, salty-sweet crust is outstanding! These were knock-out! If you’re looking for the perfect bite-sized dessert for your 4th of July get-together, I highly recommend these! Kids and adults alike are SURE to love ’em!
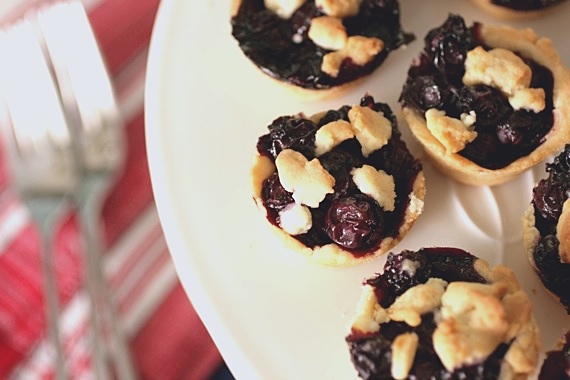
Baby Blueberry Pies
For the Filling:
1 1/2 pints blueberries, rinsed
1/3 cup sugar
juice of one lemon
pinch of salt
1 teaspoon flour
1 teaspoon cornstarch
Toss the blueberries with the sugar, lemon, salt, flour and cornstarch. Allow to sit at room temperature for 5 minutes.
For the Crust:
1 1/2 cups all-purpose flour
1/2 cup confectioners’ sugar
1/4 teaspoon salt
1 stick plus 1 tablespoon very cold unsalted butter, cut into small pieces
1 large egg yolk
Put the flour, confectioners’ sugar and salt in the bowl of a food processor and pulse a couple of times to combine. Scatter the pieces of butter over the dry ingredients and pulse until the butter is cut in coarsely – you’ll have pieces the size of oatmeal flakes and pea-size pieces. Stir the egg, just to break it up, and add it a little at a time, pulsing after each addition. When the egg is in, process in long pulses – about 10 seconds each – until the dough, which will look granular soon after the egg is added, forms clumps and curds. Turn the dough out onto a work surface and knead very gently, just to incorporate any dry ingredients that didn’t quite mix in.
Press the dough into the cups of 2 mini muffin pans (24 muffin cups total). Prick with a fork and bake at 375 degrees for 5-7 minutes.
Place some of the blueberry filling in each muffin cup (about 5-6 blueberries in each) and crumble any leftover dough over the tops. Bake for 20 minutes, until the crusts are light brown. Makes 24 baby pies.
Recipe source: Sing For Your Supper original (crust from Dorie Greenspan)

And for good measure, here’s one more of my sweet little helper… 🙂
Dear Mommy,
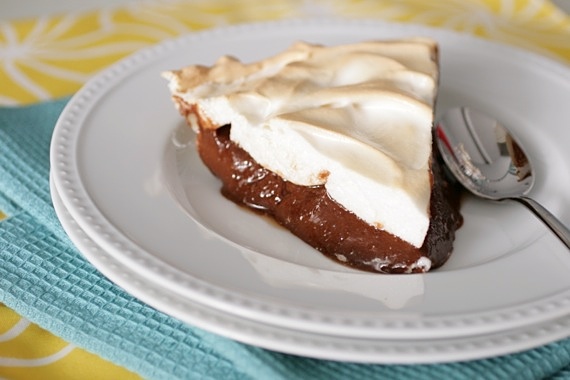
Don’t be mad at me, but this is my new favorite chocolate pie. I’m very sorry.
Love, Amy
P.S. Please still make my birthday cake next weekend. A big, pretty pink one. Thank you.
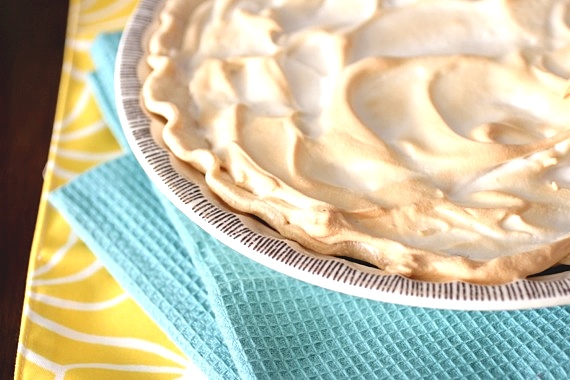
If you’re looking for the ultimate chocolate meringue pie- this one is it. It’s IT, I tell you! Gooey, creamy, chocolaty filling topped with a fluffy, marshmallowy meringue. It’s pretty much exactly like my mom’s (which has always been my favorite, and the best), except made better by a hint of coffee and a little extra butter. You. Must. Make. This.
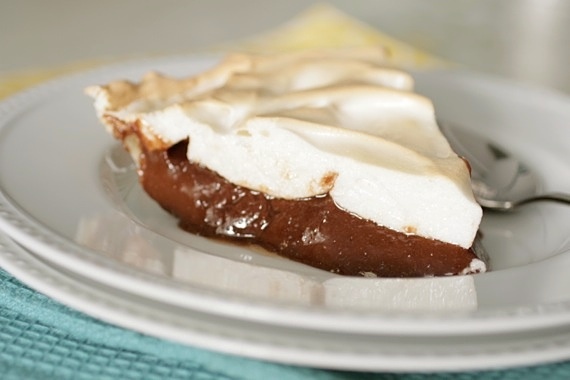
Chocolate Meringue Pie
For the Filling:
4 tablespoons cocoa
3/4 cups sugar
5 tablespoons flour
1/2 teaspoon salt
1 1/2 cups milk
1/2 teaspoon vanilla
1/4 teaspoon instant coffee powder
2 egg yolks, beaten slightly
2 tablespoons butter
For the Meringue:
2 egg whites, at room temperature
1/4 teaspoon of salt
1/2 teaspoon vanilla
4 tablespoons of sugar
1 9-inch pie crust (your favorite recipe or store-bought)
In a medium saucepan, mix sugar, flour, salt, cocoa, coffee powder, eggs and milk (all except vanilla and butter) with a whisk.
Cook while stirring on medium until it bubbles and thickens, about 8-10 minutes. If it becomes lumpy, just beat out the lumps. (It will not get any thicker in the oven so cook until it’s as thick as you want it.)
Remove from heat and stir in vanilla and butter. Meanwhile, poke holes in your pie crust with a fork and bake it at 350 until it’s brown, about 18-20 minutes.
Beat the egg whites with salt and when they start to get fluffy, gradually add the sugar and vanilla. Pour the chocolate custard into the baked pie shell and spread the beaten egg whites on top in an even layer. Bake it until the peaks on the meringue are lightly browned, about 10 minutes. Serves 8.
Recipe source: adapted from Homesick Texan
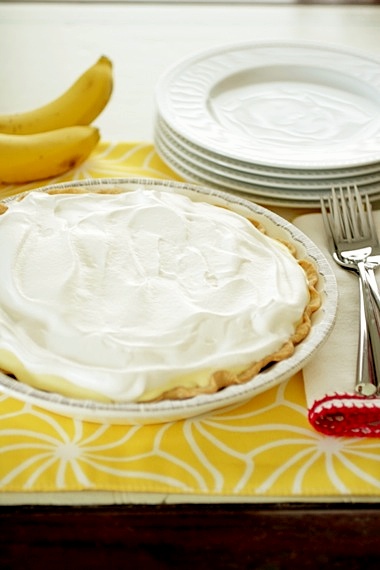
AKA: heaven in pie form. I absolutely adore, ADORE banana cream pie. Or coconut cream pie…or chocolate cream pie. Basically any pie, really, but this one truly is amazing. It’s like a pie plate full of sunshine. Which brings me to another topic. Yesterday, I received a very sweet comment on my Chicken Tortilla Soup from a reader named Marisa:
Hey Amy,
I discovered your blog a few days ago by looking at foodgawker.com and saw the amazing sushi you made! I am currently going through chemotherapy as I was diagnosed with cancer in February. Since I am no longer able to work or go to school I have been cooking a lot, and I saw this [chicken tortilla] soup on your page. I made it tonight for my family and absolutely LOVE it! I added black beans to get more protein, and have to say the flavor just in the broth is amazing! All in all, keep up this blog, it is so fun to read and look at, and congrats on your new daughter, she is SO adorable with the red hair!
I replied to the comment, but somehow it didn’t seem like enough. The rest of the night, I couldn’t get Marisa off of my mind. I was so touched that she had found comfort in the kitchen using my recipes. I wanted to do a little something to cheer her up and let her know how much I appreciate her as a reader. This pie seemed to be the perfect solution. I have no idea where Marisa is from, or what her favorite dessert is, or if she even likes banana cream pie, but I’m dedicating this recipe to her. Marisa, this delicious pie is for you; it’s such a happy, sunshiny dessert, and while I know I can’t send you a slice, I hope it will bring a smile to your face. Maybe you can make it for yourself and your family soon and enjoy a little slice of happiness.
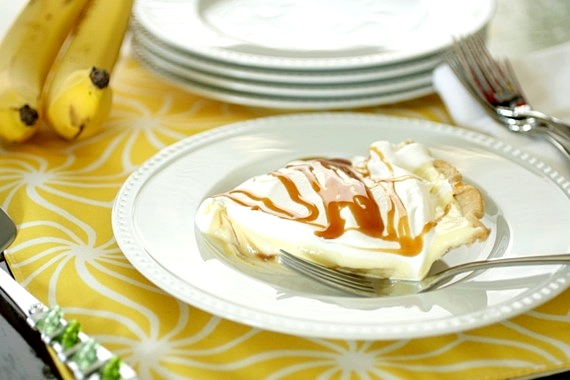
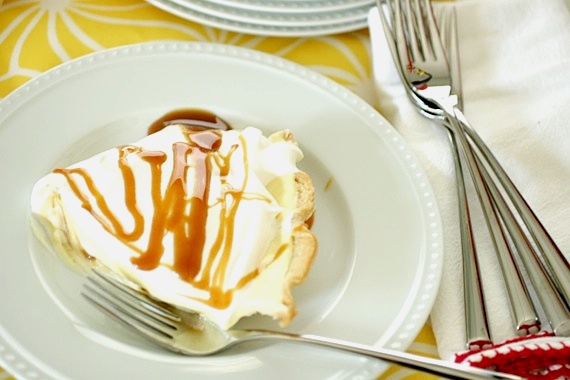
Salted Caramel Banana Cream Pie
1 9-inch pie crust, recipe follows (you can also use a store-bought crust)
For the filling:
1 small box instant vanilla pudding
1 3/4 cups milk (low fat is fine; I actually used lactose-free milk and it was perfect!)
1/2 cup salted caramel sauce, recipe follows (if you’re in a hurry, feel free to use the jarred stuff)
3 bananas
Topping:
1 cup fresh whipped cream
1 tablespoon sugar
1/2 teaspoon pure vanilla extract
Crust:
1 1/2 cups all-purpose flour
3 tablespoons sugar
1/2 teaspoon salt
1/2 teaspoon pure vanilla extract
1 1/2 sticks unsalted butter, cut into small pieces, chilled or frozen
4 to 6 tablespoons ice cold water
Salted Caramel Sauce:
1 cup sugar
1/4 cup water
3/4 cup heavy cream
3 1/2 tablespoons unsalted butter
1/4 teaspoon sea salt or kosher salt
Make the filling: Whisk the milk and pudding mix together at high speed for 2-3 minutes, until thick. Stir in one banana, cut into small chunks. Cover with plastic wrap and chill for at least 1 hour.
Make the topping: In a medium bowl, whip the cream until soft peaks form. Add the sugar, and vanilla and whip until stiff peaks form.
Make the pie dough: Preheat the oven to 425 degrees.
In a mixing bowl, mix together the flour, sugar, salt and vanilla; cut or work the butter into the flour mixture with your fingers or a cold pastry cutter until you have large pea sized chunks scattered throughout. Alternatively, pulse the dough in a food processor, or mix in a stand mixer with the paddle attachment on low speed.
Add the ice water slowly while stirring with a fork, or in the food processor or mixer, until just combined. Be careful not to overwork the dough. Wrap the dough in plastic wrap, flatten and refrigerate for at least 15 minutes.
Roll out one chilled pie dough to fit a 9-inch pie plate. Reserve the second pie dough disc for another use. Transfer dough to pie plate, pressing the dough lightly into the plate; trim the edges. Dock the dough with the prongs of a fork evenly over the bottom of the pie plate. Line the docked dough with aluminum foil and fill with pie weights or dried beans.
Bake the pie crust until the edges are brown and golden, about 15 minutes. Remove from the oven and remove the weights. Return crust to the oven to finish baking for another 5 minutes.
Make the salted caramel sauce: In a heavy-bottomed saucepan, combine the sugar and water over medium-low heat until the sugar dissolves. Increase the heat and bring to a boil without stirring. If necessary, use a wet pastry brush to wash down any crystals on the side of the pan. Boil until the syrup is a deep amber color, about 5 to 6 minutes.
Remove from the heat and carefully whisk in the heavy cream. The mixture will bubble. Stir in the unsalted butter, and salt, to taste. Transfer the caramel to a dish and cool. Makes 1 1/2 cups sauce.
To assemble the pie: thinly slice the two remaining bananas and place in a single layer in the cooled crust. Drizzle with the 1/2 cup salted caramel sauce, then pour in the pie filling. Top with the whipped cream and drizzle with additional caramel sauce before serving. Makes 1 9-inch pie.
Recipe source: adapted from Kelsey Nixon (Kelsey’s Essentials)
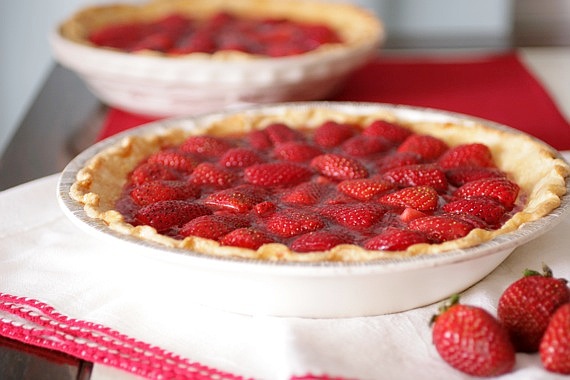
You can’t get more “strawberry” than this pie. If there were a contest for desserts with the purest, most “in-your-face” strawberry-ness, this pie would totally win. It’s nothing BUT fresh, juicy, sweet strawberries- no other flavor, no other texture…JUST strawberry. To me, that’s heaven. It’s like Summer/Spring in a pie shell. If you love strawberries like I do, this pie is right up your alley. You’re going to love it.
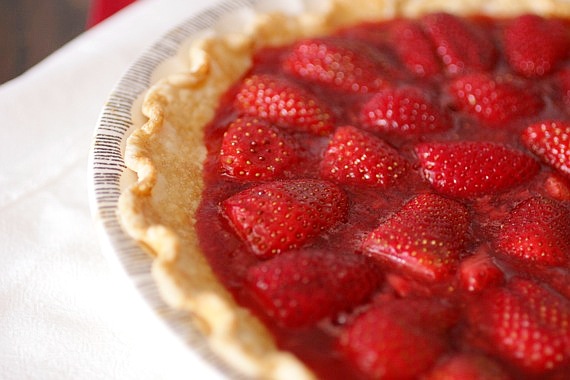
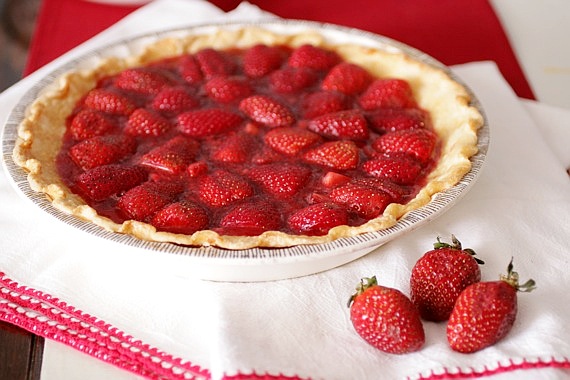
I served these pies to my family yesterday for Easter and what a treat! Such a beautiful ending to a big, delicious meal! With this recipe, I’ve discovered a new tradition- I intend to make these gorgeous pies every single Spring and Summer! In fact, I can’t wait to make them again! I’m thinking….Memorial Day?? Oh yeah! Bring on the pies!
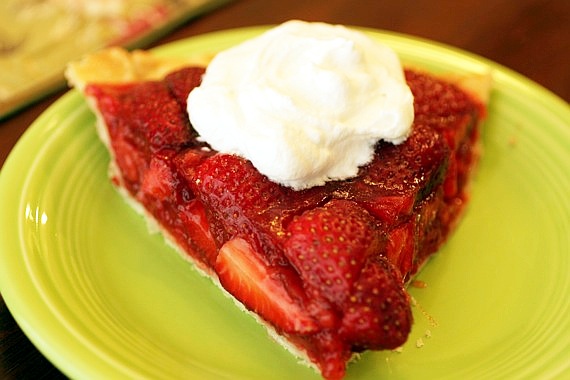
Fresh Strawberry Pie
1 9-inch pie crust, baked
2 pounds fresh strawberries, rinsed and hulled
1/2 cup granulated sugar
2 1/2 teaspoons cornstarch
1 1/2 teaspoons lemon juice, freshly squeezed
1/8 teaspoon salt
1 envelope unflavored powdered gelatin
2 tablespoons cold water
Slice about 3 cups of the strawberries into quarters and place them in a medium bowl. Crush the berries with a potato masher or a fork; you should have about 1 1/2 cups crushed berries. Place them in a saucepan over medium heat with the sugar, cornstarch, lemon juice and salt and stir to combine. Bring to a simmer, stirring occasionally for about 5-7 minutes, until the mixture begins to thicken slightly.
Soften the gelatin in the cold water and set it aside.
Remove berry mixture from the heat and add the softened gelatin and stir until the gelatin has dissolved. Set aside to cool.
Cut the remaining berries into quarters, and gently fold them into the cooled cooked mixture (if you want, you can reserve some of the strawberries to arrange on top of the pie for a more decorative presentation). Pour the filling into the baked pie shell, and chill in the refrigerator until set, at least 2 hours or overnight before serving. Makes 1 pie (I doubled the recipe for 2 pies).
Serve with fresh whipped cream if desired.
Recipe source: adapted from Rustic Garden Bistro
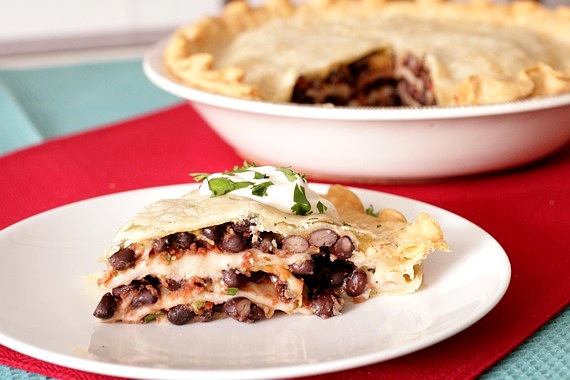
Here’s another winning recipe from my sweet coworker, Janna. She hosted us all for a Christmas party this year and served ALL KINDS of delicious food- including this black bean pie. I have to admit, when she first told me about it, I was a little curious about the ingredients; I wasn’t sure it sounded like something I’d like. However, after one taste, I was hooked! It’s the easiest dish in the world to whip up- canned black beans, salsa, cheese, tortillas and pie crust- that’s it! This is one of those perfect weeknight meals for when you need to feed your family in a hurry. It would be a new and fun alternative to “taco night”! It’s delicious and we both love it! Thanks, Janna, for another delicious recipe!
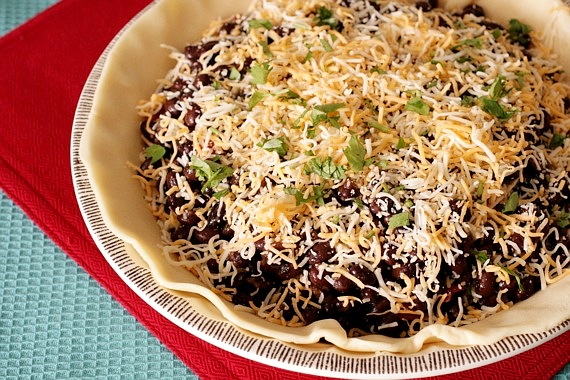
Black Bean Pie
2 9-inch pie crusts
2 cans black beans, drained and rinsed
1 cup salsa (your favorite store-bought brand or homemade)
3/4 cup shredded cheddar cheese
2 flour tortillas
cilantro (optional)
Preheat the oven to 350 degrees. Press one of the pie crusts in the bottom of a pie plate.
In a large bowl, combine the beans and salsa. Spread 1/3 of the mixture in the bottom of the pie plate. Top with 1/3 of the cheese and a sprinkling of cilantro, then one of the flour tortillas. Repeat with another 1/3 of the bean mixture, cheese and cilantro and tortilla. Finally, spread the last of the bean mixture, cheese and cilantro. Top with the 2nd pie crust and seal the edges. Make 4 small slits in the center of the crust with a small knife.
Bake for 30-40 minutes, or until crust is golden brown. Serve with sour cream and additional cilantro, if desired.
Recipe source: my friend Janna, who got it from her mother
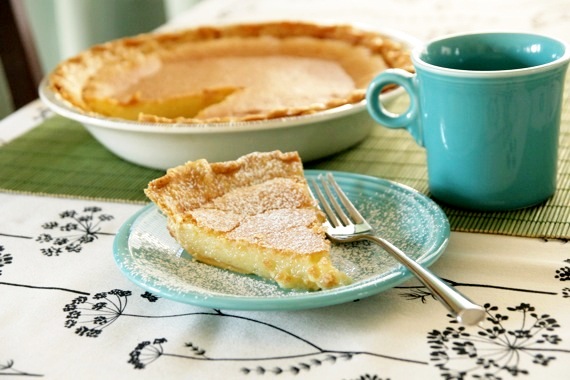
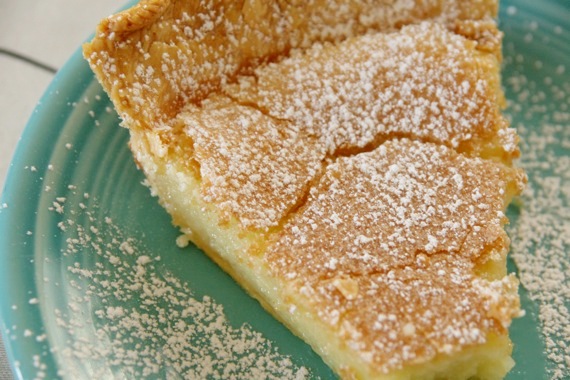
Continuing with my Thanksgiving-inspired week, I’ll post every man’s favorite: buttermilk pie. It really is man pleasin’. Really. Every male that has ever eaten this pie has gone ape for it. I don’t know if it’s the sugary-sweet filling or the creamy, buttery texture, but men seriously adore buttermilk pie. In fact, the primary reason I’m posting this right now is because my friend Michael recently sent me a text saying, “you need to make buttermilk pie!” Done and DONE, Mikey! It’s a holiday staple in our family, too. There has never been a holiday get-together that didn’t include this pie. In fact, every Thanksgiving and Christmas my mom is sure to make extra so that my dad will be able to have plenty of leftovers. This is one of Baba’s most famous and requested recipes and I’m so proud and happy to post it here for you. Make this part of your Thanksgiving dessert table- trust me.
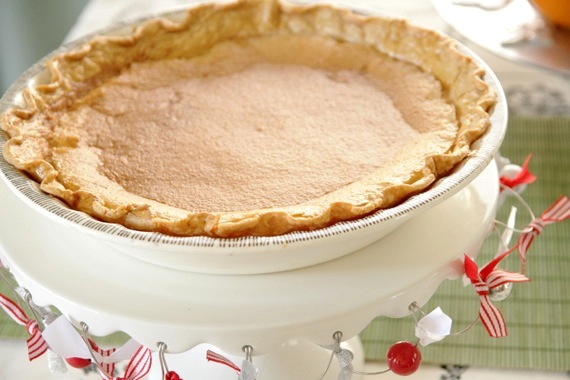
Baba’s Buttermilk Pie
-old family recipe (really, really old!)
*makes 2 9-inch pies
2 9-inch pie crusts, unbaked
3 3/4 cups sugar
1/2 cup flour
1/2 teaspoon salt
1 teaspoon vanilla
6 eggs, beaten
1 cup (2 sticks) butter, melted
1 cup buttermilk
**a little lemon zest and a squeeze of juice is a nice addition, but my dad hates lemon in his buttermilk pies, so we’ve never really done it. I did this time and it really adds a nice, subtle tartness.
Mix sugar, flour and salt. Add eggs, butter, buttermilk and vanilla. Pour into two unbaked pie crusts and bake for 1 hour at 350 degrees (check them at 50 minutes- if they’re too jiggly put them back in for a few more minutes. They shouldn’t jiggle very much at all when they’re done). If the tops are getting too brown, cover loosely with foil for the remainder of baking time. Let cool for at least 1 hour before slicing.
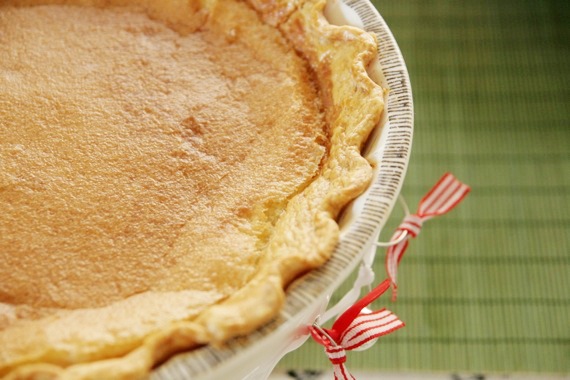
Now, to those of you thinking, “what the heck?! Buttermilk?!” Don’t worry- there isn’t even the slightest hint of buttermilk taste. It’s just sweet, thick, and buttery. A delicious Southern tradition. Man, it’s so great to live in the South. 😉
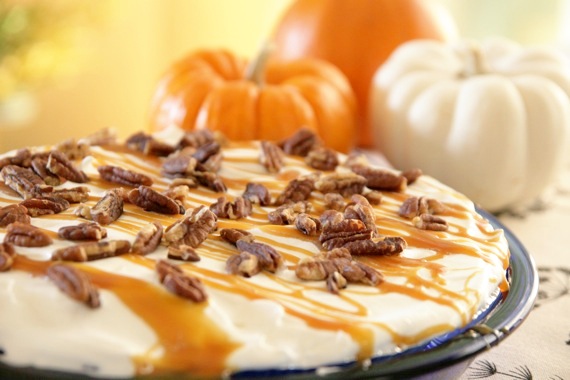
Let me start off by saying, this pie is delicious. Really, really delicious. Surprisingly delicious. After one taste, I sat there and finished off the entire slice before I was even finished photographing it! But before I go on any further, there’s something you should know about this pie. Here’s an email I recently received from a very, very sweet reader:
Amy, I’m one of your faithful followers and would like to make a request of you. We just recently found out that my dad is suffering from Multiple Myeloma (a cancer of the blood) and one of the side effects is diabetes. My dad loves his sweets and it’s been a little hard for him to make such a drastic adjustment to his diet. I would like to make him a tasty dessert that he would not believe was diabetic friendly. So now my request; sometime in the future could you post a diabetic recipe that I could make for my dad? I know that I can probably find literally thousands of recipes on the internet, but they wouldn’t have the thought and love put into them. Plus, if you make it and post it I know it will be AWESOME! Thanks so much for all the care you put into your blog. You are a very special person. Thanks again, Sheila
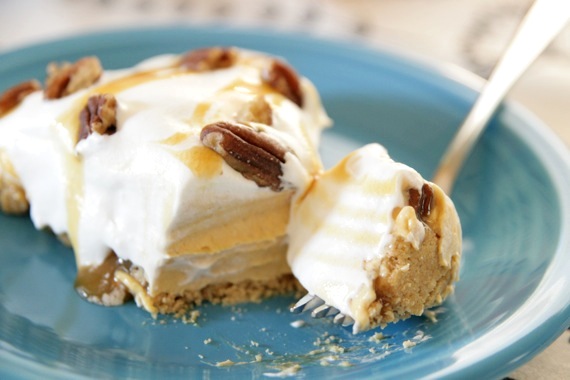
After reading Sheila’s touching email, there was absolutely NO way I was going to disappoint her. I immediately set out to find the most delicious, satisfying, ‘never-know-it’s-sugar-free’ recipe. That’s right. This pie is diabetic-friendly. And I am proud to say….YOU’D NEVER KNOW IT. After getting Sheila’s email, I emailed my Aunt Josie and got her best sugar-free recipe. My cousin Travis has diabetes, so Aunt Josie is a rockstar when it comes to flavorful, sugar-free cooking/baking. This pie is her favorite and now I can see why! It’s super easy, takes literally no time to put together and the pumpkin and spices really shine! What a crowd-pleaser! And just in time for Thanksgiving! So Sheila, I really hope your dad enjoys this pie…I sure enjoyed making it for you!
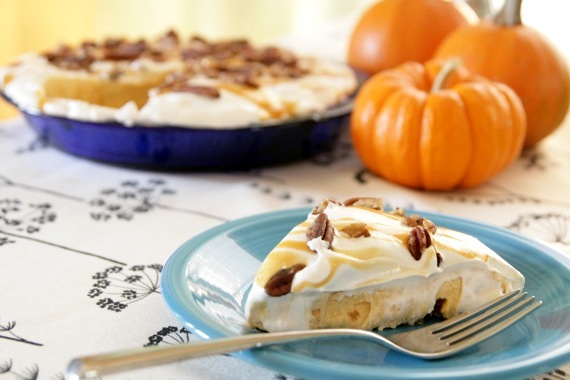
No-Bake Turtle Pumpkin Pie
-my Aunt Josie’s recipe
1/4 cup plus 2 tablespoons sugar free caramel ice cream topping, divided
1 graham cracker pie crust
1/2 cup plus 2 tablespoons pecan pieces, divided
1 cup cold 1% milk
2 packages (4-serving size) vanilla sugar-free, fat-free instant pudding
1 cup canned pumpkin
1 teaspoon ground cinnamon
1/4 teaspoon ground nutmeg
1/4 teaspoon ground cloves
1 tub (8 ounce) light whipped topping, thawed, divided
Pour 1/4 cup caramel topping into crust; sprinkle with 1/2 cup pecans.
Beat milk, pudding mixes, pumpkin, and spices with whisk until blended. Gently fold in 1 1/2 cup whipped topping. Spread into crust.
Refrigerate at least 1 hour. Top with remaining whipped topping and 2 tablespoons pecans. Drizzle with remaining 2 tablespoons caramel topping.
Nutritional analysis: (per one slice)
Calories – 165
Fiber – 2.7
Protein – 2
Total fat – 7
Carbohydrate – 23
**Josie notes that this pie is still a little high in carbs. So you might not want to go crazy and eat the whole thing yourself. 😉
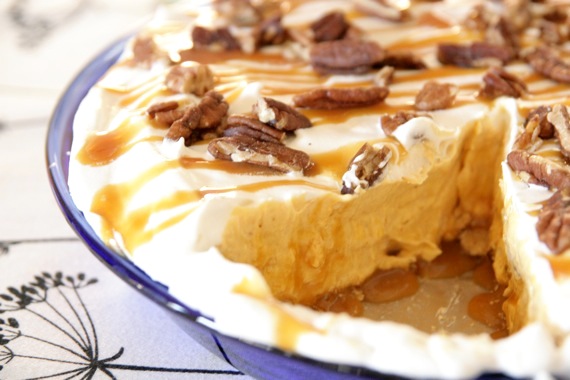
Mmm, just look at all that caramel oozing out…..*drool* Sheila, I sincerely hope this recipe makes your dad happy! And thank you for challenging me to try something outside of my comfort zone. I’m proud to say this is my very first diabetic-friendly recipe on Sing For Your Supper; hopefully there will be many more to come! Happy baking!
