Ok, it’s been cold/rainy/snowy/icy for far too long now. One of the perks of being a Texan is only having to deal with like, 3 days of REAL winter. Well, we’ve had it for weeks now and I’m sick of it. My kids and I are sick of being stuck inside. We need sunshine, we need fresh air! Granted, the snow was lovely and Cassidy did enjoy playing in it. But dang, what a PAIN it is getting kids ready to play in the snow! I had to ask myself if it was really worth it. After we each got on our 8 layers of clothing, mittens, extra socks, boots, etc, I was already sweating like a pig. Cassidy ran around a little bit, built a couple of little snowmen, and made a snow angel before she got bored. Elliott looked on from his bouncer, happy as a clam, while I frantically snapped pictures with my phone. “Cassidy, get back in that snow and make another snow angel! If I’m going to go to all this trouble I’m getting some good shots out of it! NOW SMILE AND LOOK LIKE YOU’RE HAVING FUN!”
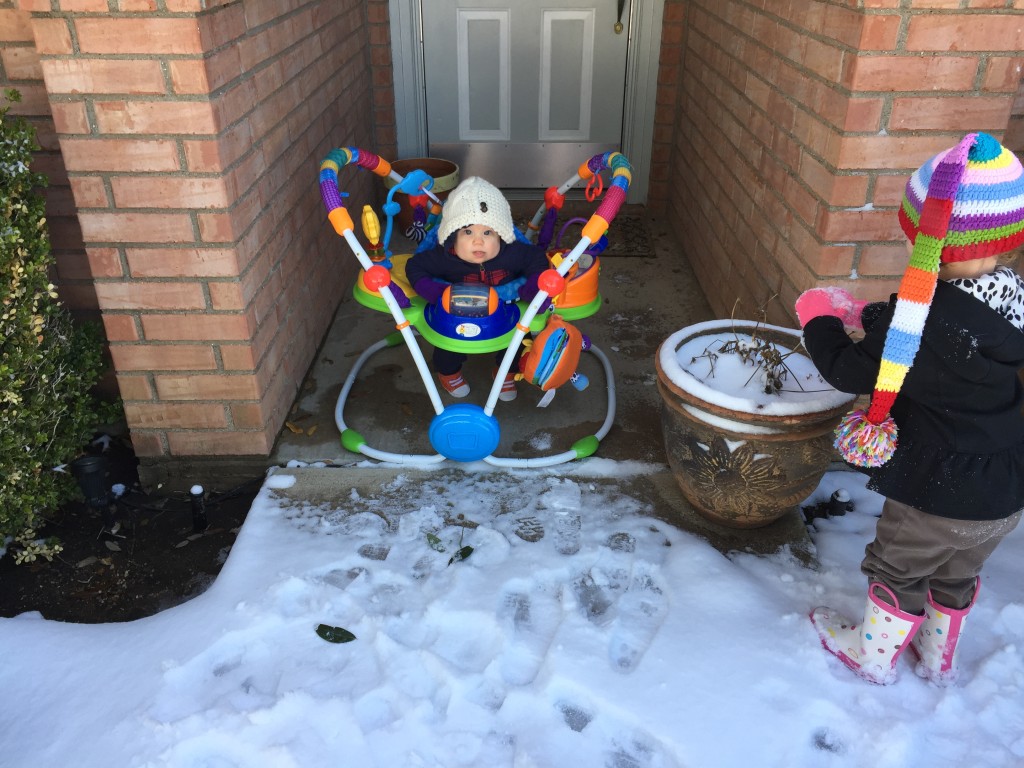
Cassidy was ready to go in after only 30 minutes or so, go figure. But I did get some pretty good pictures of my sweet babies having fun, so I guess it wasn’t a total waste. 😉
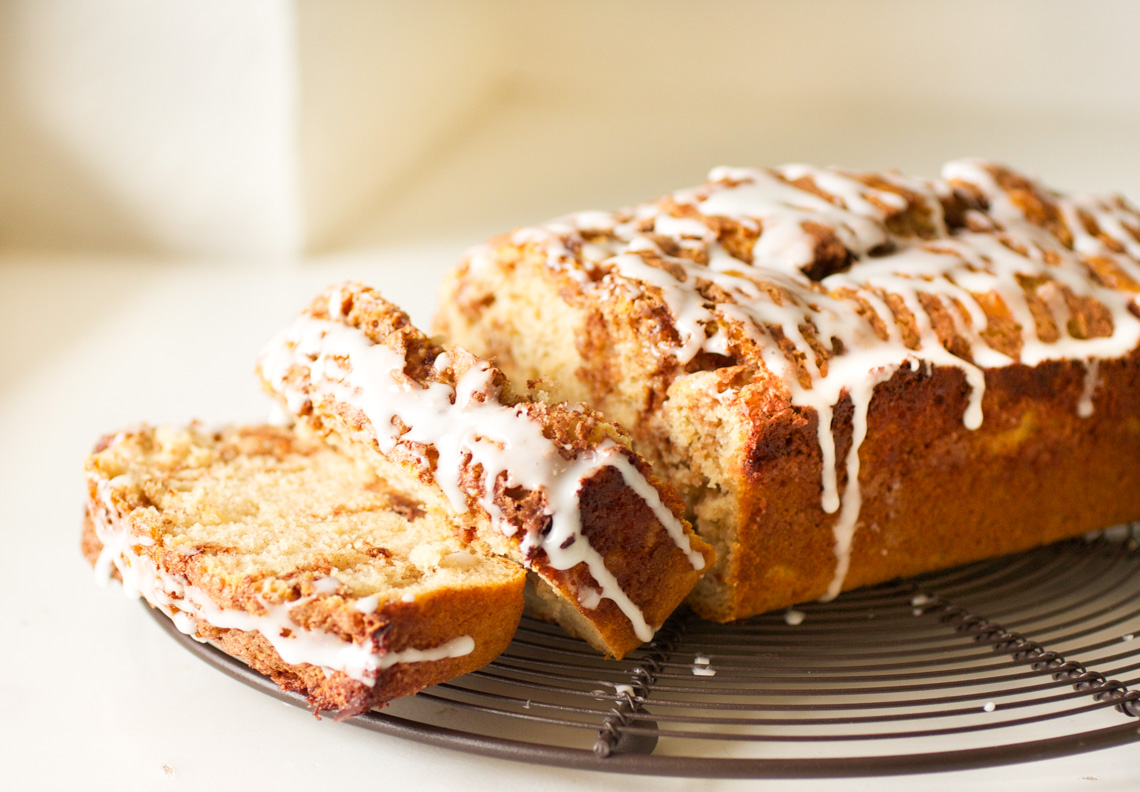
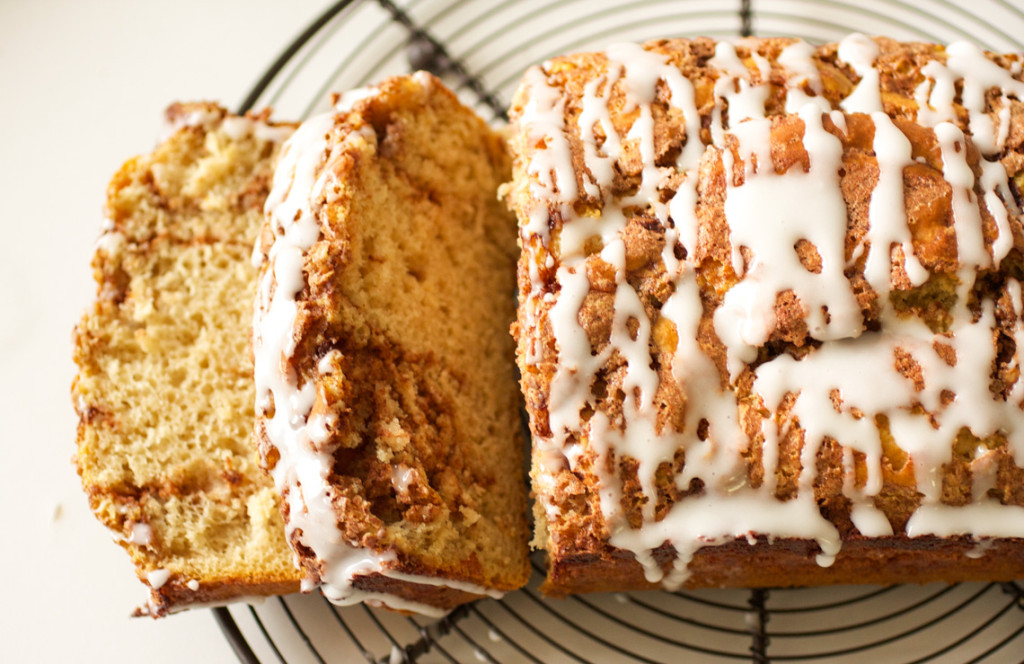
Anyway, Cinnamon Roll Bread! I always bake when it’s snowy and/or icy outside (it’s a thing), and I wanted something non-chocolatey and non-cake. I asked my friend Chris if she had any ideas and she sent me the link to this recipe. It’s really simple, really quick, and you probably already have everything you need in your fridge/pantry. It’s not too rich or sweet; it’s the perfect snack on a cold, snowy day. Have a slice with a cup of tea and try to make the best of all this freaking snow.
Cinnamon Roll Bread
2 cups all-purpose flour
1 tablespoon baking powder
1/2 teaspoon salt
1/2 cup sugar
1 egg at room temperature, lightly beaten
1 cup milk
2 teaspoons vanilla extract
1/3 cup sour cream
For the Cinnamon Swirl:
1/3 cup sugar
2 teaspoons cinnamon
1 1/2 tablespoons water
For the Glaze:
1/2 cup powdered sugar
1 tablespoon milk
Pre-heat our oven to 350 degrees and grease a 9×5 bread pan.
In a large bowl combine flour, baking powder, salt, and sugar. In a small bowl combine egg, milk, vanilla extract, and sour cream. Add the dry ingredients into the wet and stir to combine.
In a small bowl combine swirl ingredients together. Use a tablespoon to drop spoonfuls of the mixture over the bread, then use a knife to swirl the cinnamon mixture into the bread.
Bake for 45-50 minutes or until a toothpick inserted into the center comes out clean. Remove the bread from the oven and transfer it to a cooling rack to cool for 15 minutes.
Meanwhile, make the glaze. Remove the bread from the pan and allow it to continue cooling completely. When the bread has completely cooled, drizzle the glaze over the top. Serves 8.
Recipe source: Center Cut Cook
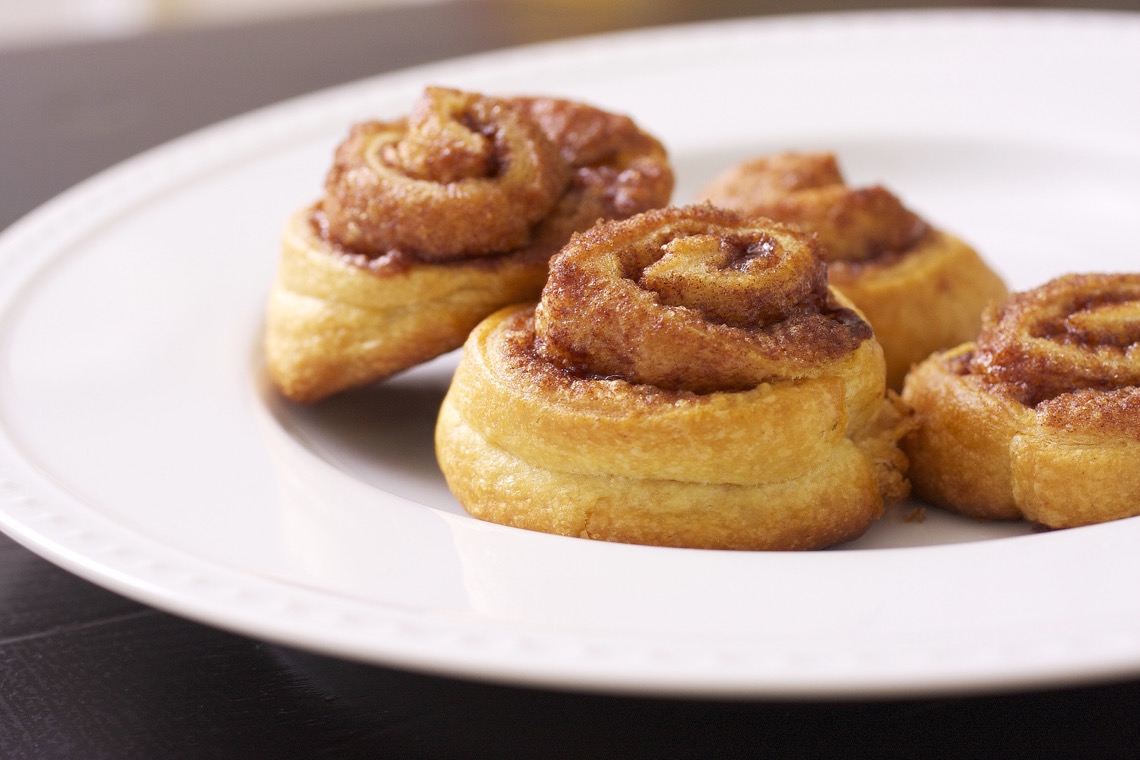
Warm, gooey cinnamon rolls can be made in a snap by using crescent roll dough to save on time.
I always like to make something “splurge-y” for breakfast on the weekends; whether it’s donuts, pancakes, or biscuits and gravy. We all loooove cinnamon rolls, but there’s no way I’m messing with yeast and rising dough and all that craziness. I have enough craziness all on my own, thankyouverymuch. Some days, just getting cereal on the table is a struggle.
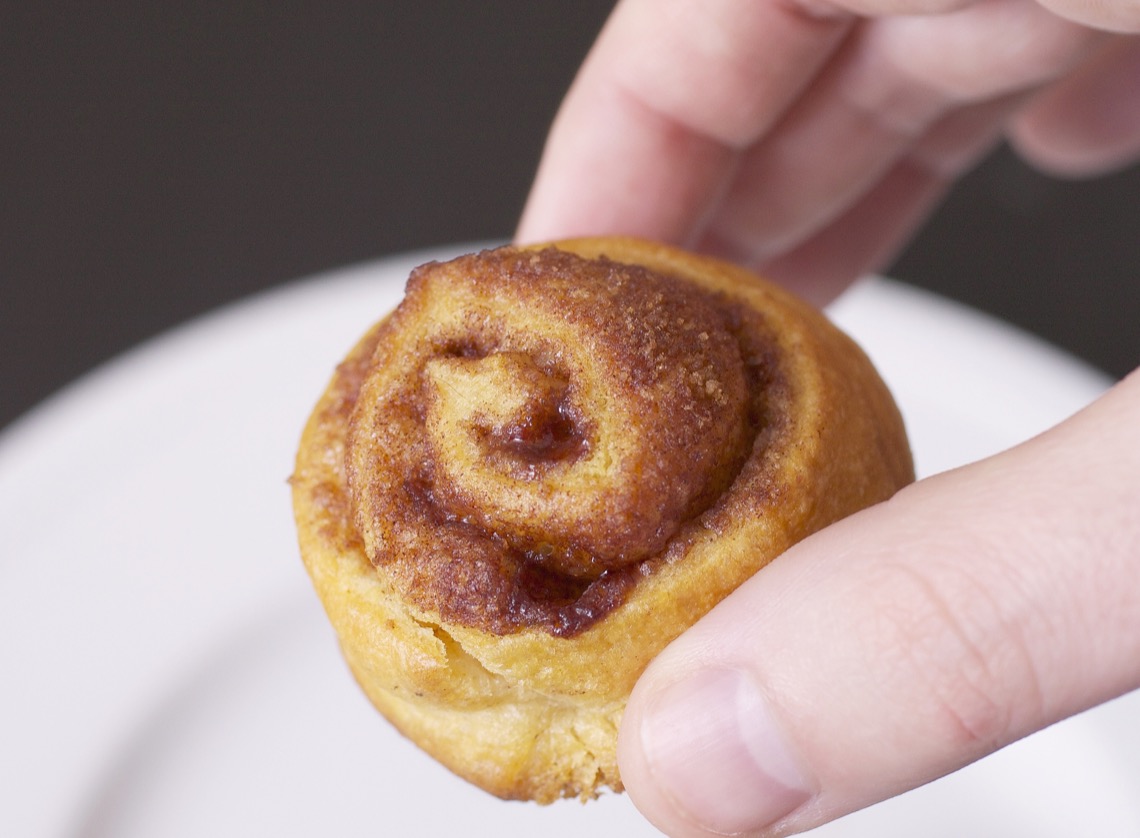
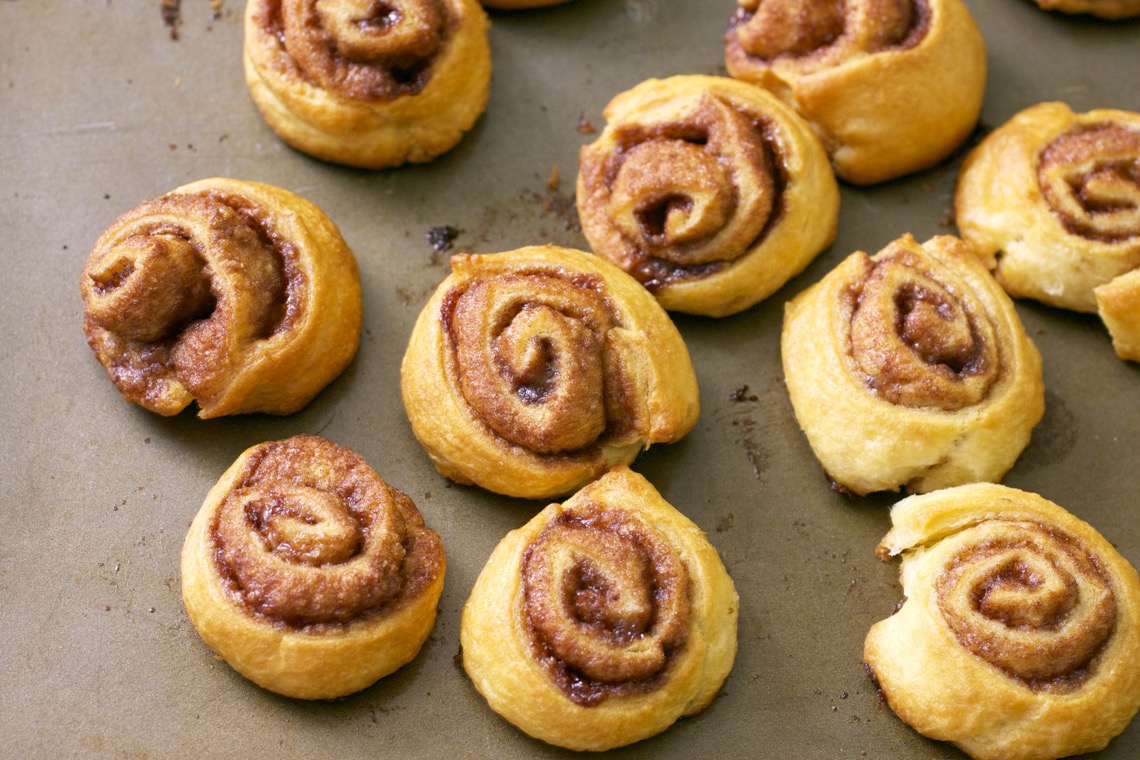 I had a random can of crescent roll dough in my fridge that was just begging to be cinnamon-sugared up. All it took was 4 ingredients and about 5 minutes of prep work and we had warm, gooey mini cinnamon rolls in a jiffy! Cassidy was especially fond of them. You can make a glaze for these using a little powdered sugar and some milk if you want, but we enjoyed them plain. Great with coffee. And since these are “mini”, you can have like, 5 or 6 at a time, right? Right. [my postpartum self is not proud of this…]
4 Ingredient Mini Cinnamon Rolls
1 can refrigerated crescent roll dough
butter
2 tablespoons brown sugar
1 1/2 teaspoons cinnamon
Preheat oven to 350 degrees. In a small bowl, mix the brown sugar and cinnamon with a fork. Roll out crescent roll dough and press seams together to make one large rectangle. Spread with butter (as much or as little as you like; I probably used around 1/2 tablespoon. Just enough to make a thin layer.). Sprinkle generously with the cinnamon-sugar mixture.
Roll the dough lengthwise into a log; cut dough into 1 1/2 inch slices and place on a baking sheet. Bake for about 10 minutes, until golden brown. Makes around 10-12 mini rolls.
Recipe source: Sing For Your Supper original

Here is the second of the two kid-friendly recipes I promised this week. I’ve actually been making these a lot, simply because we get tired of plain old sandwiches for lunch. Joel works from home, so I struggle with trying to think up tasty, quick lunches all week.
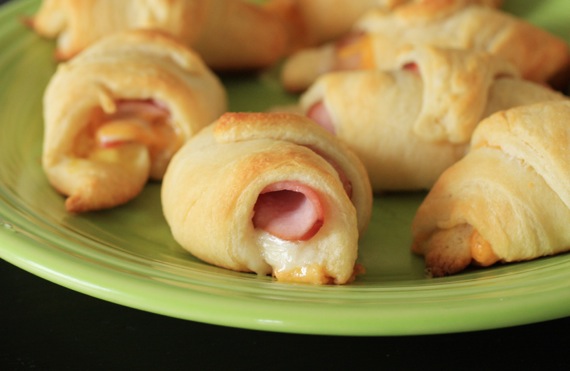
I don’t make these too often, because, clearly, they’re not the healthiest, but when you’ve got a teething toddler who doesn’t have any interest in eating all of the sudden, you’ll do what you can to make meals fun. However, I do use the reduced fat crescent rolls for these instead of the regular. Cassidy still hasn’t gotten past pulling her’s apart and eating the meat and cheese separate- but hey, whatever keeps her happy, I guess. 🙂
Ham and Cheese Roll-Ups
1 roll refrigerated reduced fat crescent roll dough, such as Pillsbury
mustard
8 slices deli ham
8 slices cheddar or swiss cheese
Preheat the oven to 350 degrees. Unroll the crescent dough and spread a little mustard on each triangle. Lay a slice of ham, then cheese on each triangle, then roll up, starting with the wide end. Place on a baking sheet and bake for about 11-13 minutes, until golden brown. Serves 2-3 as a lunch; or 6-8 as a snack.
Recipe source: Gooseberry Patch’s Kids in the Kitchen cookbook
Raise your hand if you love breakfast for dinner. Me too. Something about getting to drink coffee at night is strangely fun for me. Speaking of that, isn’t it funny how old people always drink coffee with their dinner? In our little town, you’ll go to a restaurant and see an old couple eating mexican food and drinking coffee. Weird.
Anyway, about these biscuits. Now, normally, I would insist on making my great-grandmother’s biscuits, since that was her thing. Baba was a very gifted cook, but I think she would agree with me when I say biscuits were her specialty (well, it may be a tie with her peach cobbler.). However, I don’t exactly have the recipe. Once I tried making them from the cookbook my mom said Baba always used for her biscuits, but something wasn’t right. Honestly, for whatever reason, I’m too scared to make Baba’s biscuits. Just add it to the list of things I’m too chicken to make (my mom’s fried okra, chicken fried steak, anything involving yeast…the list, unfortunately, goes on).
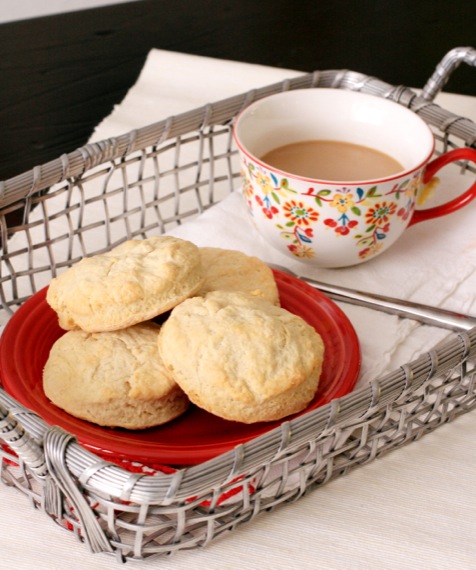
So this time, I chose Deb of Smitten Kitchen’s recipe. And they were really, really good. So perfect hot from the oven and smeared with butter alongside a cup of coffee. And far too easy to continue making store-bought. Frankly, there’s just no comparison.
Buttermilk Biscuits
2 1/4 cups all-purpose flour
1 teaspoon sugar (to taste; you can use more or less. I don’t like mine to be overly sweet)
1 tablespoon baking powder
3/4 teaspoon salt
3/4 teaspoon baking soda
9 tablespoons chilled unsalted butter, cut into small chunks
3/4 cup buttermilk
Preheat oven to 400 °F and line baking sheet with parchment paper. Whisk flour, sugar, baking powder, salt and baking soda in large, wide bowl. Using fingertips or a pastry blender, work butter into dry ingredients until the mixture resembles a coarse meal, Add buttermilk and stir until large clumps form. Using hands, knead mixture briefly until it just holds together.
Transfer dough to floured counter and pat out until 1/2 to 3/4-inch thick. Using a round cutter (about 2 inches; I always use a small juice glass, like my great-grandmother did), press straight down — twisting produces less layered sides — and transfer rounds to baking sheet, spacing two inches apart.
Bake until biscuits are golden brown on top, about 12 to 15 minutes. Serve warm. Makes approximately 9 biscuits.
Recipe source: barely adapted from Smitten Kitchen
So…May is here. I don’t know how it happened but suddenly, out of nowhere, it’s almost mid-May. Which means…Mother’s Day is almost here! Yay! This holiday has a whole new life to it now that it applies to me and not just my mom and grandmothers (not that I didn’t love celebrating Mother’s Day before I had Cassidy…it’s just more fun now.) 😉 Now that I’m on “Team Mom” (golly, that just sounds lame, doesn’t it?), I realize just how important it is for mothers everywhere to have an entire day dedicated to them. A day to feel special and well-rested, pampered and praised, and tended TO instead of being the one doing all the tending. Moms are the hardest working people on the planet- we get spit-up on, pooped on, poked at, toes stomped on, pinched, bitten, screamed at, sat on, and food thrown on us all before 8 in the morning. I think we deserve a day of recognition for that, don’t you? 😉
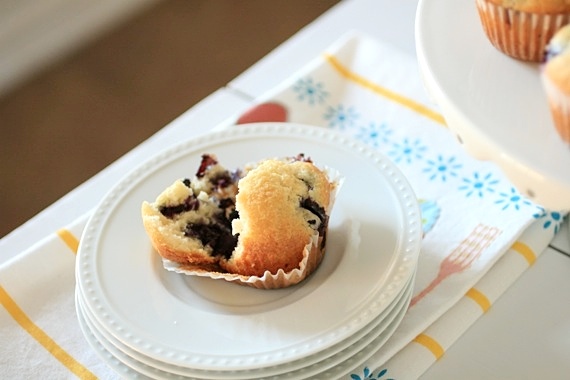
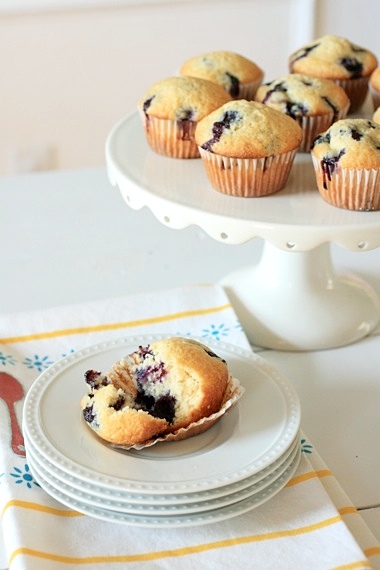
And maybe a lovely batch of muffins to wake up to with a hot cup of coffee…sipped in silence and peace. Really, that’s all I could ever ask for for Mother’s Day. A little rest, some peace and quiet, and maybe a muffin or two. Sounds heavenly to me. These muffins are no-frills, quick and easy, and taste absolutely perfect warm out of the oven with a cup of coffee. I’ve tried lots of blueberry muffin recipes, but frankly, these are my favorite. They’re everything a blueberry muffin should be. Tender, slightly sweet, and full of juicy blueberries.
I certainly wouldn’t mind if someone were to make these for me on Mother’s Day weekend… (wink, wink!) 😉

Classic Blueberry Muffins
1 1/2 cups all-purpose flour
3/4 cup sugar, plus 1 tablespoon for muffin tops
1/2 teaspoon salt
2 teaspoons baking powder
1/3 cup vegetable oil
1 large egg
1/2 cup milk
1 1/2 teaspoons vanilla extract
1 cup fresh blueberries
Preheat oven to 400 degrees F. and line 8 standard-size muffin cups with paper liners. Add 1 to 2 tablespoons of water to any empty muffin cups (this helps to make sure the muffins bake evenly).
Whisk together the flour, 3/4 cup of the sugar, baking powder and the salt in a large bowl. In a large measuring cup, whisk the vegetable oil, egg, milk, and vanilla extract until combined. Add milk mixture to the bowl with flour and sugar then use a fork to combine. Do not over mix. Batter will be thick. Carefully fold in blueberries with a wooden spoon.
Divide the batter between the 8 muffin cups and sprinkle the tops with the reserved tablespoon of sugar. Bake for 15-20 minutes until muffins are golden brown and a toothpick inserted into the middle comes out clean. Makes 8 muffins.
Recipe source: Inspired Taste
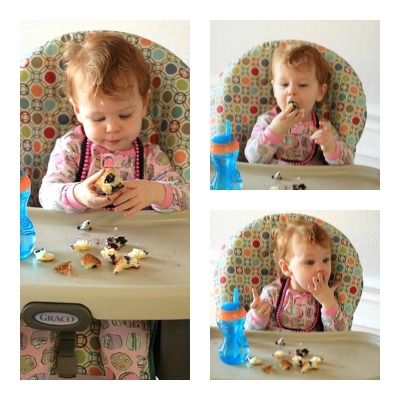
Cassidy liked them, too. 🙂
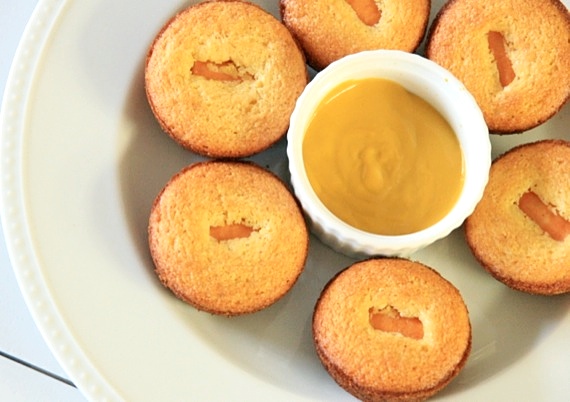
Who doesn’t love corn dogs, right? No one! Especially in fun-sized little mini muffin form! I saw these awhile back and knew I wanted to make them, but wasn’t jazzed about using store-bought wieners that are made with who-knows-what. If you buy the kind that are 100% beef, they’re full of fat and sodium; if you buy the turkey or “low fat” varieties, they’re still full of sodium along with all kinds of additives, preservatives, nitrates, and Lord only knows what else. So naturally, when I discovered Trader Joe’s (God bless that store!) carries all-natural chicken dogs that contain minimal fat and sodium, and are completely free of nitrates and preservatives- I did a major happy dance. Right there in the store. Then I came home and (finally!) made those adorable little corn dog muffins I’ve been dying to try! Yay!
Besides being so darn cute and fun to eat, these are actually really good! And bonus, they’re 100% kid-friendly! Granted, I had to cut them up into little baby-sized bites, but Cassidy still gobbled hers up.
Homemade Corn Dog Mini Muffins
1 package Jiffy corn muffin mix
1 egg
1/3 cup milk
4 all-natural wieners (I used Trader Joe’s chicken dogs), cut up into small chunks
Preheat the oven to 375 degrees. Mix the corn muffin packet with the egg and milk. Divide batter into 2 greased mini muffin pans and drop a few pieces of the wieners in each cup. Bake for 8-10 minutes. Makes about 24 mini muffins.
Recipe source: adapted from The Family Kitchen
Ok, I realize “World Nutella Day” was yesterday, but better late than never, right?
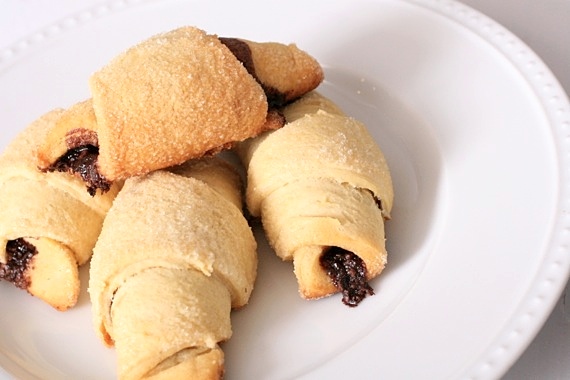
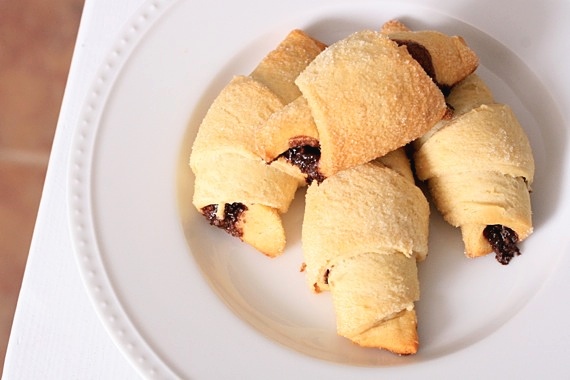
This is possibly one of the easiest recipes I’ve ever posted, considering every ingredient is store-bought. But hey, sometimes life can get a little crazy and you just need a recipe like this. All it takes is canned crescent roll dough, nutella, and sugar, and in minutes you’ll have a warm, gooey, comforting snack, breakfast, or dessert. Yes, please! These would actually be really cute (and quick!) for the kids’ Valentine’s Day breakfast- maybe even use a little pink decorating sugar and it’s just downright festive!
Quick and Easy Nutella Crescents
1 can refrigerated Pillsbury crescent roll dough
nutella
sugar, for sprinkling
Preheat the oven to 350 degrees. Spread a little nutella (about one tablespoon per triangle) on each triangle of dough. Starting with the big end, roll into a crescent shape and sprinkle generously with sugar. Arrange on a baking sheet lined with parchment paper and bake for about 8-10 minutes, until golden brown. Serve immediately. Makes 8 crescents.
Recipe source: Sing For Your Supper original

Jessica and I have been friends for over 4 years now. We met on a cooking discussion forum, quickly discovered we had lots in common, then soon discovered we were both North Texas girls! That’s how we went from internet blogging friends to real-life friends. I’ve met her family; she’s met mine. We’ve gone blackberry picking together, she came to see me in one of my operas, I’ve eaten at her family’s favorite place to get fried fish in her hometown, we made macarons together:

…we’ve seen John Mayer together, we’ve visited each others’ houses, we got stood up at a food bloggers’ dinner (man, that one was embarrassing, huh?), we met DORIE FREAKING GREENSPAN together:

…and so many more memories. Too many to list. When I first met Jess, she seemed to be looking for something she hadn’t quite found yet. Fast forward 4 1/2 years later and she’s met the man of her dreams, running stinkin’ half marathons (go girl!), and GETTING MARRIED in less than a month! She’s found everything she was missing in Chris and now they’re going to start a new life together. Wow. I am SO happy for these two I can’t even tell you! And seriously, have you SEEN her engagement photos? Amazing.

Anyway, on to the food! I’m participating in a virtual shower thrown by my good friend Nikki of Pennies on a Platter. A bunch of us got together to throw a special wedding shower celebrating the beautiful bride! I decided to make Cinnamon-Sugar Crescents because a.) I think they’d be great shower food, and b.) I know Jessica loves cinnamon. She’s always baking up yummy treats with those delicious looking cinnamon chips, and of course I’ve always been jealous because I can never find them at my grocery stores! Ugh! Don’t forget to check out Nikki and Jessica’s awesome blogs to see the full list of goodies we all made to honor the beautiful bride! And Jessica, congratulations, dear friend. I love you and I’m so amazingly happy for you.

These couldn’t be simpler; store-bought crescent roll dough, butter, cinnamon, and sugar. But ohhhh boy are they good! Soft, flaky, cinnamon-y goodness.
Cinnamon-Sugar Crescents
1 can store-bought crescent roll dough, such as Pillsbury
2 tablespoons butter, melted and slightly cooled
1 teaspoon cinnamon (or more if you like lots)
2 tablespoons sugar
Preheat the oven to 350 degrees. Combine cinnamon and sugar. Roll out the crescent dough and brush the melted butter over each triangle. Sprinkle liberally with the cinnamon-sugar mixture. Roll each triangle into a crescent shape, then brush the tops with the remainder of the melted butter. Sprinkle with more cinnamon-sugar and bake for 10-12 minutes, until golden brown. Makes 8 crescents.
Recipe source: Sing For Your Supper original

Fightin’ Texas Aggie Football is in full swing, so naturally we’re watching every single game on tv (the ones we don’t go to in person). I don’t know about you, but I need something yummy to snack on while I watch a football game, otherwise I get….bored. In fact, usually once the food is gone I pretty much lose interest in any sporting event. I know…I guess that makes me what Joel calls a “2 percent-er”. Oh well. A few weeks ago when we were enjoying one of the (few) particularly good Aggie games on tv, I whipped up this cheesy pepperoni bread and BOY did we gobble it down! It’s perfect football food! I used a store-bought can of bread dough, so it really saved a ton of time and came together lightening quick. We loved it dipped in marinara sauce- overall, a totally yummy snack that I’m sure I’ll be making over and over again every football season!

Cheesy Pepperoni Bread
1 can store-bought Pillsbury Italian or French bread (you could absolutely make your own dough- I was just short on time)
1 cup shredded mozzarella cheese
sliced pepperoni
marinara sauce for dipping
Preheat oven to 350 degrees. Unroll the bread dough so that it makes a large rectangle. Sprinkle generously with the mozzarella cheese, then top with desired amount of pepperoni. Carefully roll the dough jellyroll style into a loaf and place seam side down on a baking sheet lined with parchment paper or foil. Bake 18-20 minutes, or until the top is golden brown.
Recipe source: adapted from Brown Eyed Baker


Believe it or not, every now and then I like a healthy treat. Although I mostly crave baked goods of the gooey, chocolaty variety, it’s nice to take a break from all that and bake up something that’s actually good for me. For some reason, the other day I had a serious craving for bran muffins….how odd. Who craves bran muffins?! Anyway, I remembered I had a box of Bran Flakes cereal in the pantry and thought I’d try making a bran muffin with it. These were actually very light and fluffy (you can thank the banana for that) and not heavy or overly “bran-y”. We really enjoyed them with a little butter and honey. My coworkers loved them too! Next time you need a good, quick, healthy muffin, gives these a try- they’re highly satisfying and actually good for you! 🙂
Banana Bran Muffins
1 1/4 cups whole wheat flour
1/2 cup sugar
1 tablespoon honey
1 tablespoon baking powder
1/4 teaspoon salt
2 cups bran flakes cereal
1 1/4 cups fat-free milk
1 egg
1/4 cup vegetable oil
2 ripe bananas, mashed
Stir together flour, sugar, baking powder and salt. Set aside.
In large mixing bowl, combine bran cereal and milk. Let stand about 2 minutes or until cereal softens. Add honey, egg and oil. Beat well. Add flour mixture, stirring only until combined. Stir in the banana. Spoon evenly into 12 muffin pan cups fit with cupcake liners.
Bake at 400 degrees about 20 minutes or until golden brown. Serve warm.
Recipe source: adapted from Kellogg’s.com