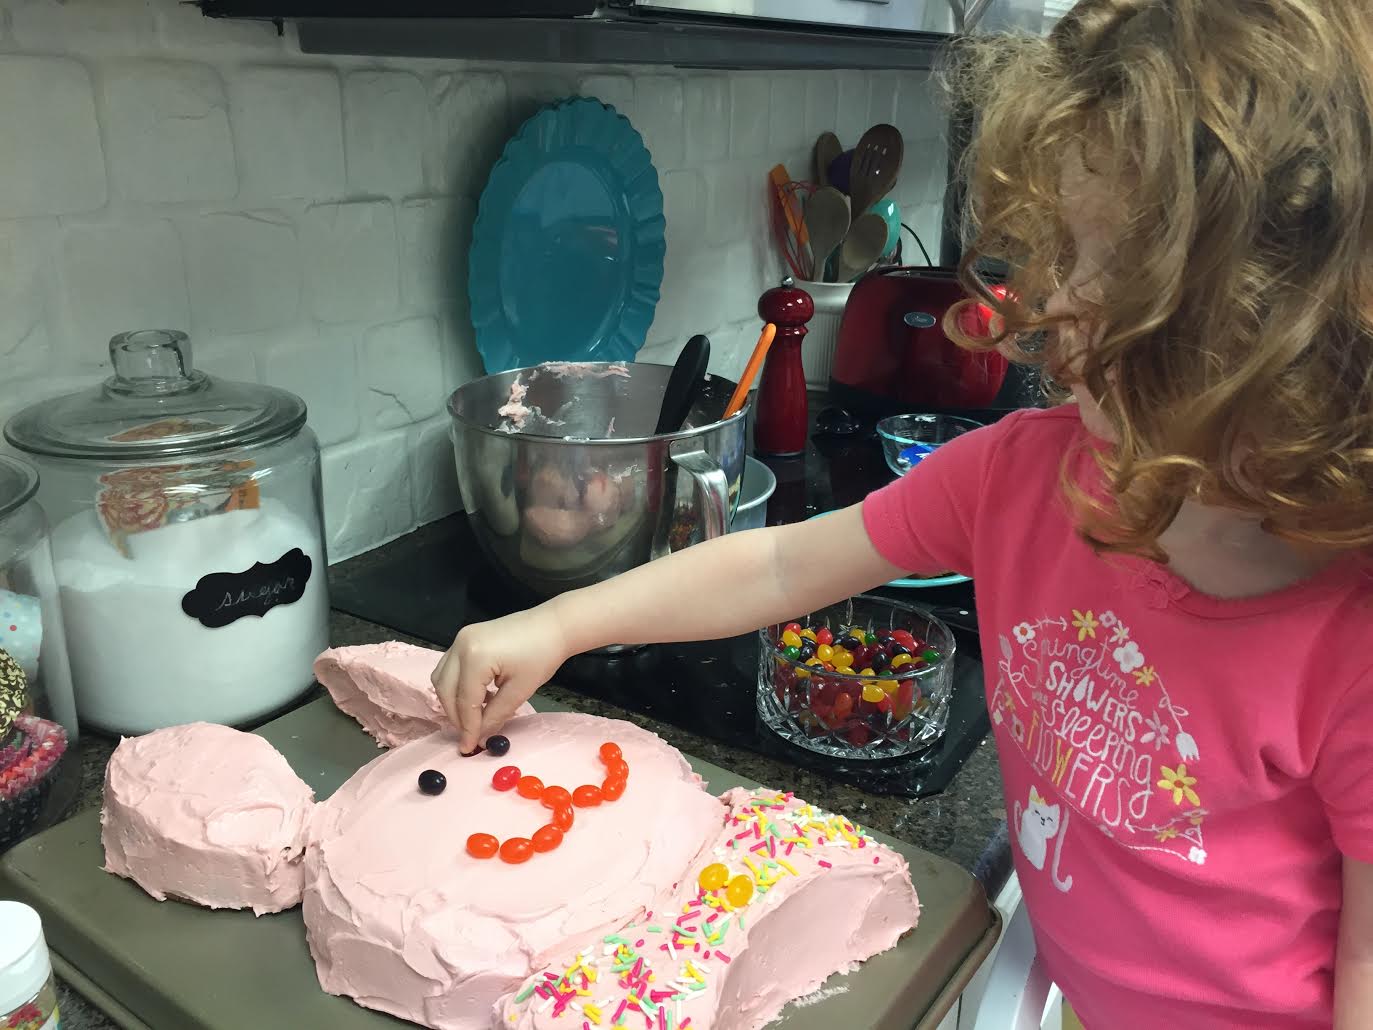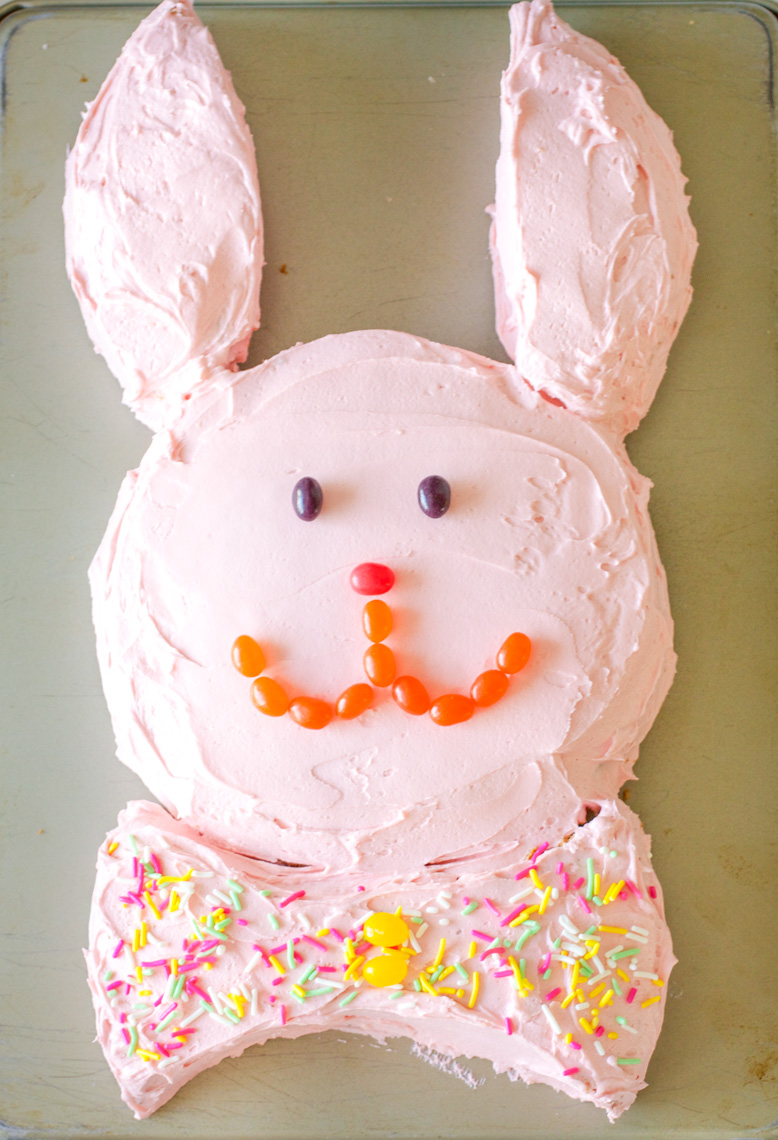
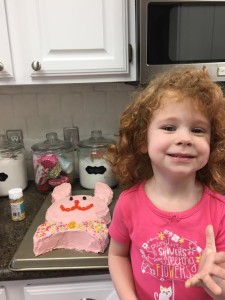
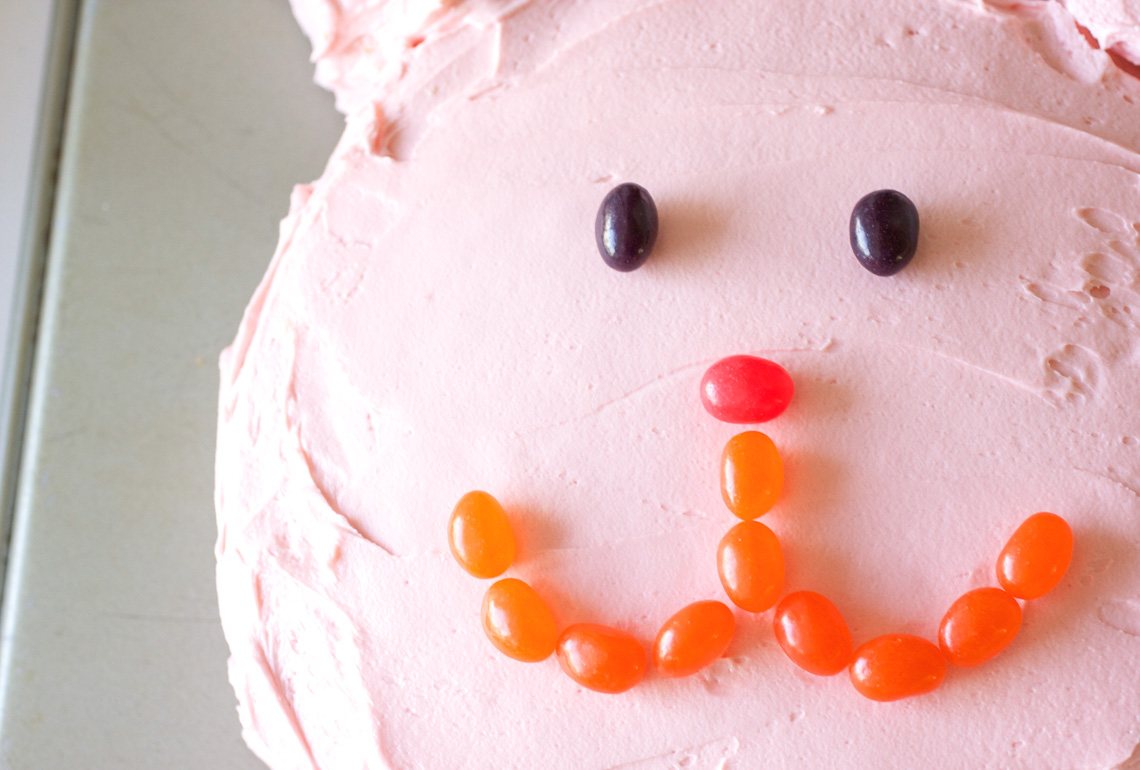
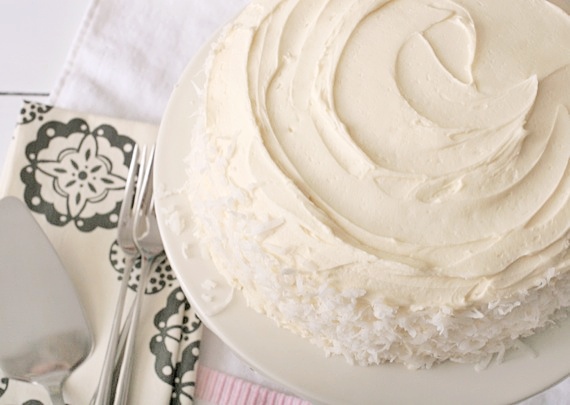
I don’t get tired of making this cake. Every Easter, this is what we do. We dye eggs, we read Easter books, we make an Easter bunny cake. Tradition! My mom always made this cake with us; now I make it with mine. It really couldn’t be easier- just a little bit of cutting, then simply frost and decorate! It’s so much fun for the kids to help with- the sprinkles, the jellybeans…such fun!
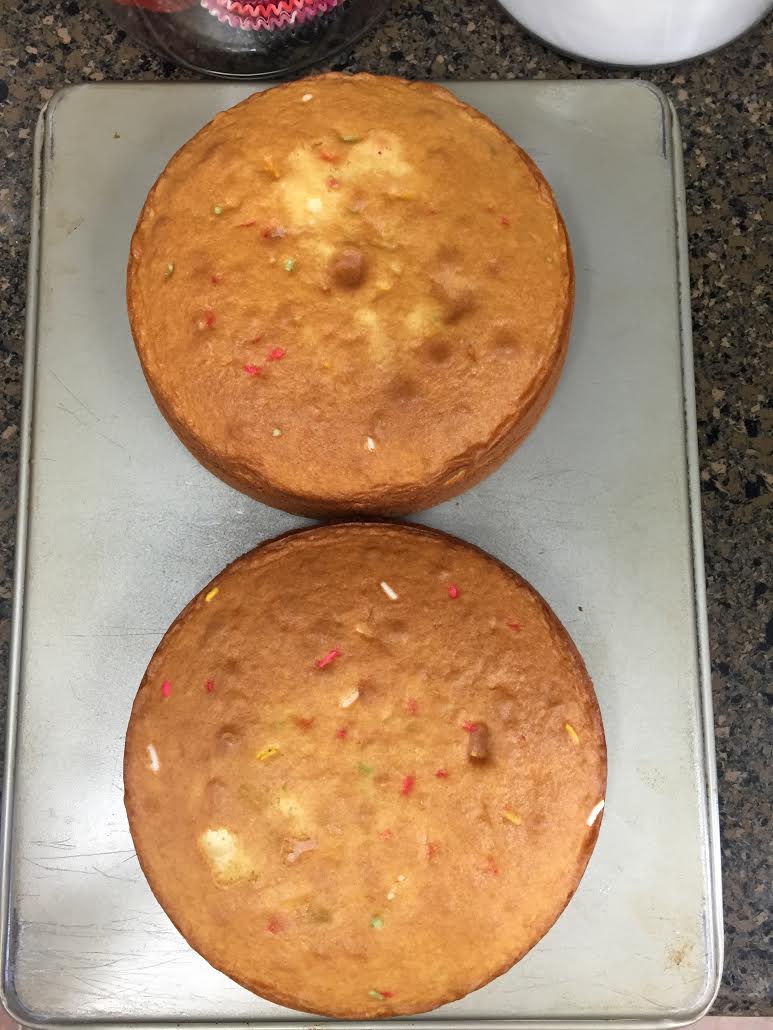
Just start with 2 round cakes (mine are 8 inches). I’m not including a recipe, because I take the easy road and just use a boxed mix. Funfetti is always good. 😉
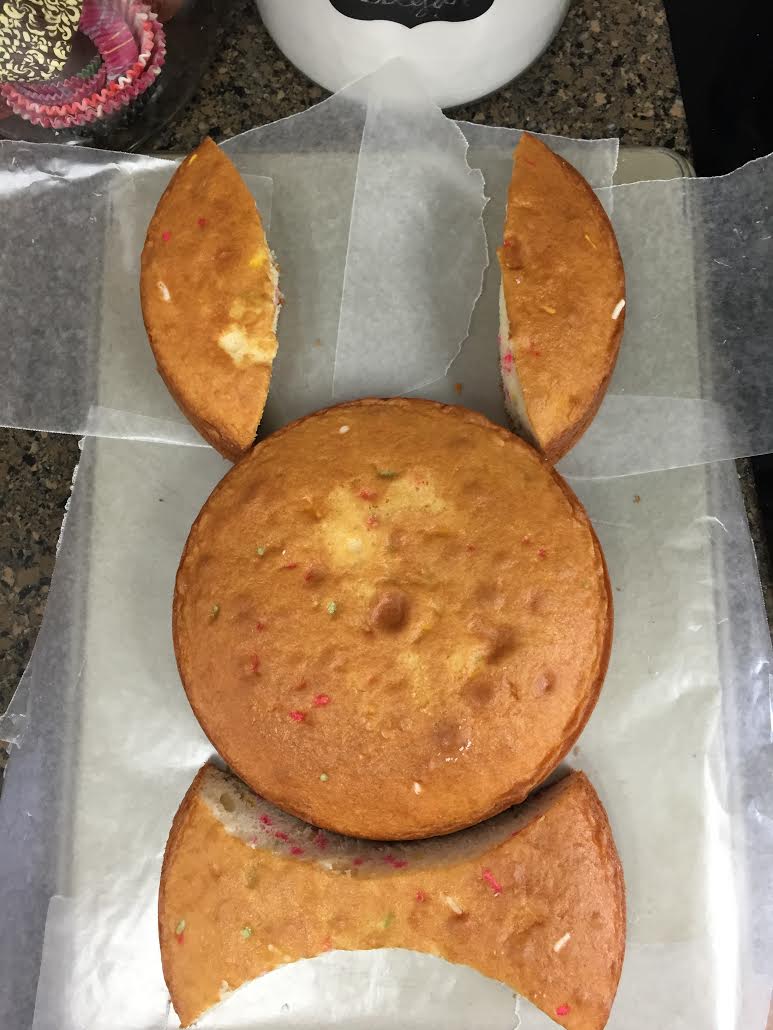
Then cut 2 football-shaped pieces out of each side. These pieces will be the ears and the bow tie. Then, simply frost and decorate! Simple and fun!

Here’s my frosting recipe:
Vanilla Buttercream
1 cup (2 sticks) unsalted butter, softened
6 cups confectioners’ sugar
1/4 cup milk
1 1/2 teaspoons vanilla extract
1/4 teaspoon almond extract
pink food coloring, if desired
Place the butter in a large mixing bowl. Add 4 cups of the sugar and then the milk, vanilla, and almond extract. On the medium speed of an electric mixer, beat until smooth and creamy, about 3-5 minutes. Gradually add the remaining sugar, 1 cup at a time, beating well after each addition (about 2 minutes), until the icing is a good spreading consistency. You may not need to add all of the sugar (or if you like it thicker, feel free to use more). Stir in a few drops of food coloring until the desired color is reached. Use the icing at room temperature and store in the refrigerator. If you’re not using it right away, allow it to set out at room temperature for 30 minutes to an hour before use.
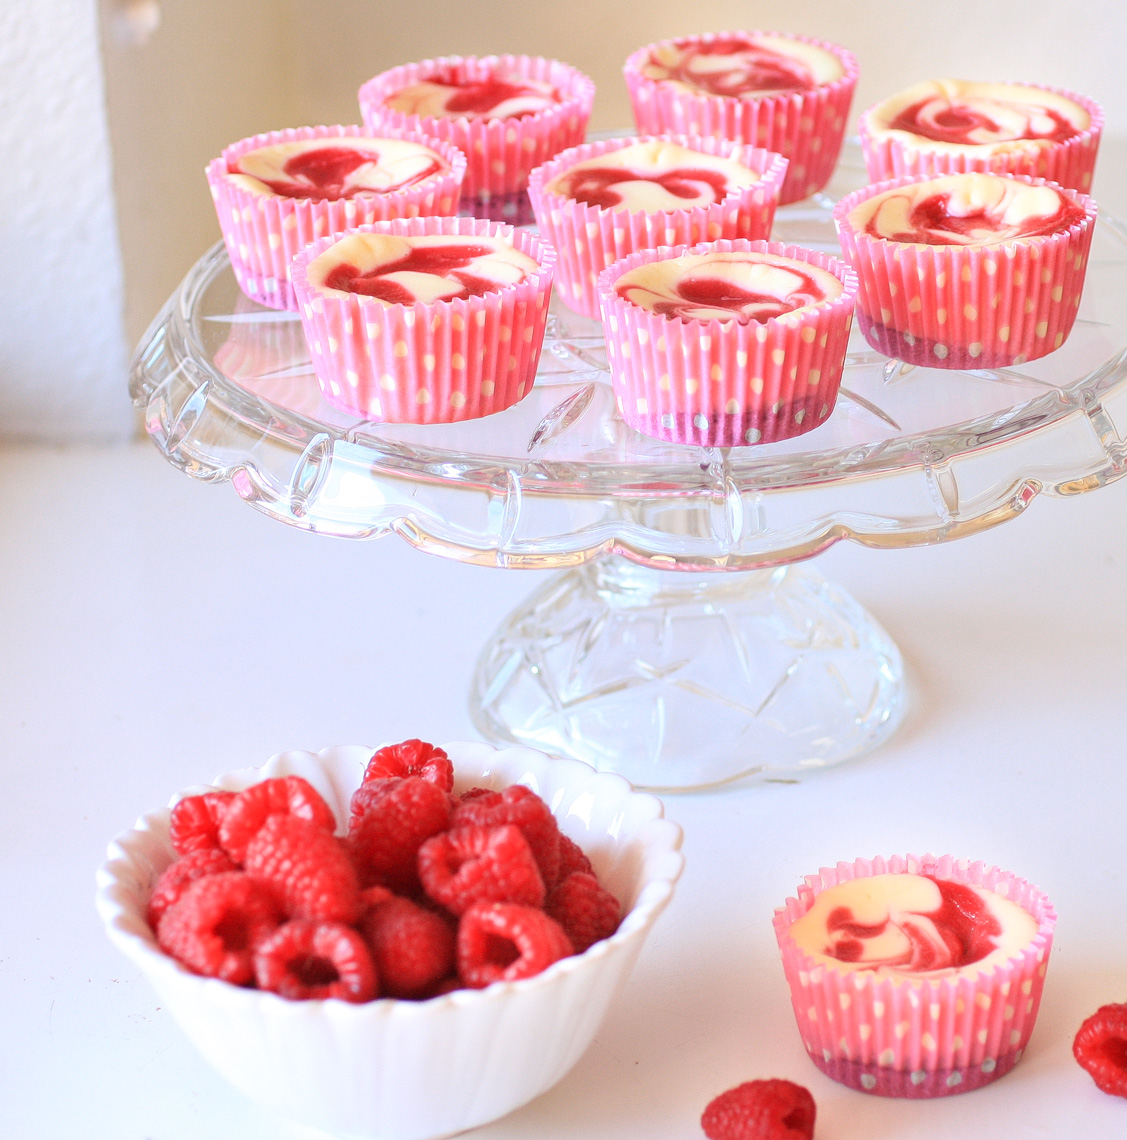
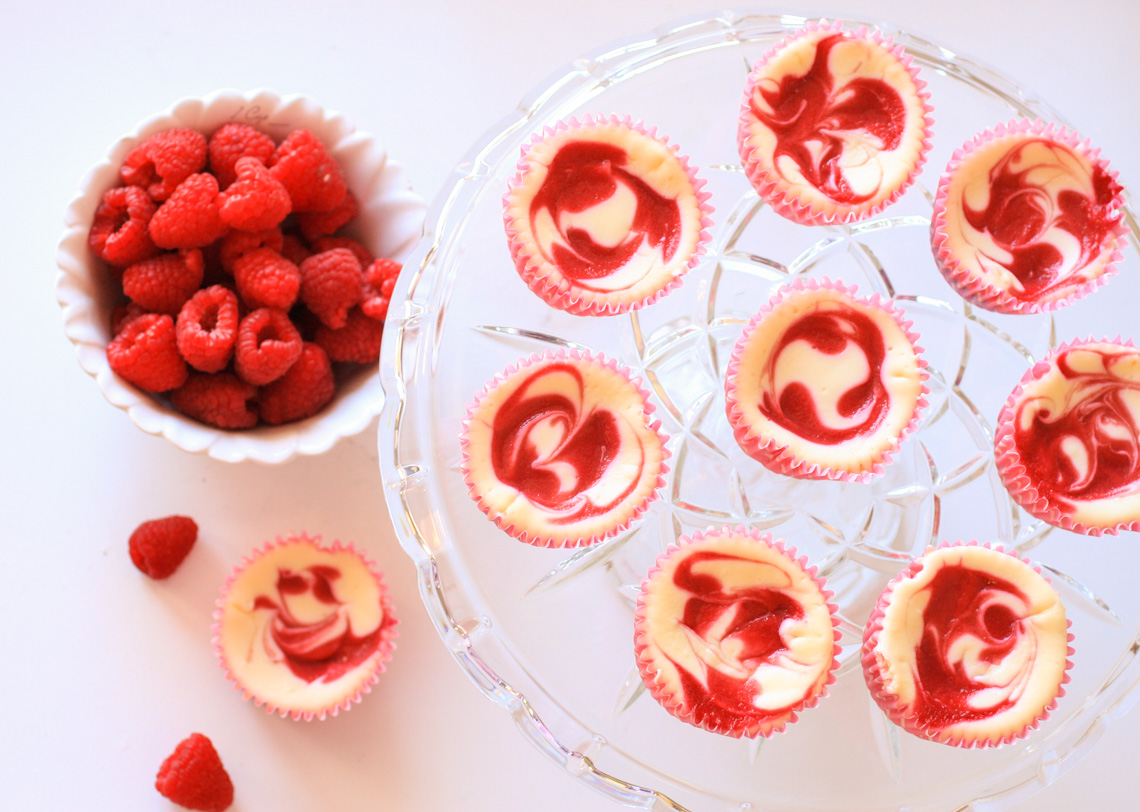
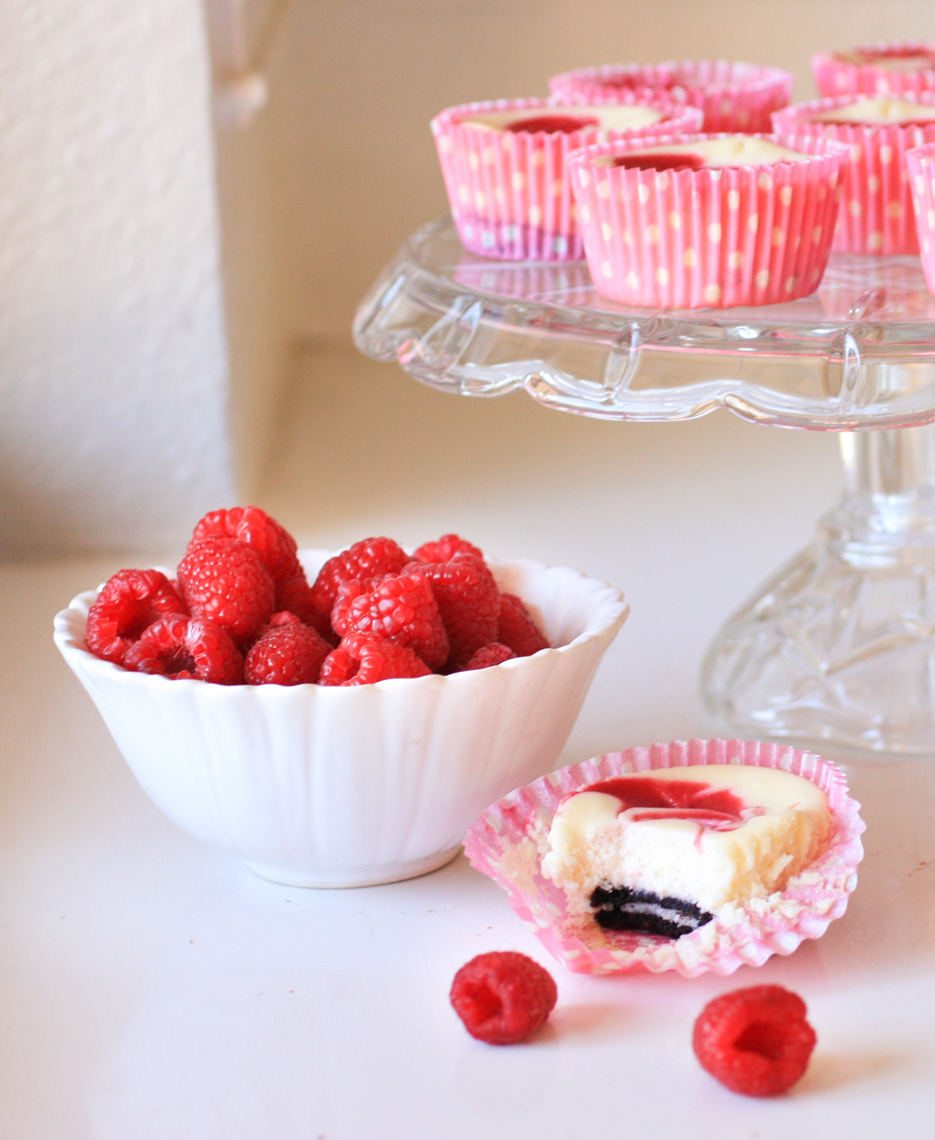
OK. I’ve got my cuppa tea (Yorkshire, with milk and honey!), got my fuzzy blanket, got my Taylor Swift going, and it’s QUIET and peaceful in this little corner of my bedroom- I’m happy. So let’s talk about CHEESECAKE. Raspberry cheesecake, to be more specific. Raspberry cheesecake with an Oreo as the crust. YES.
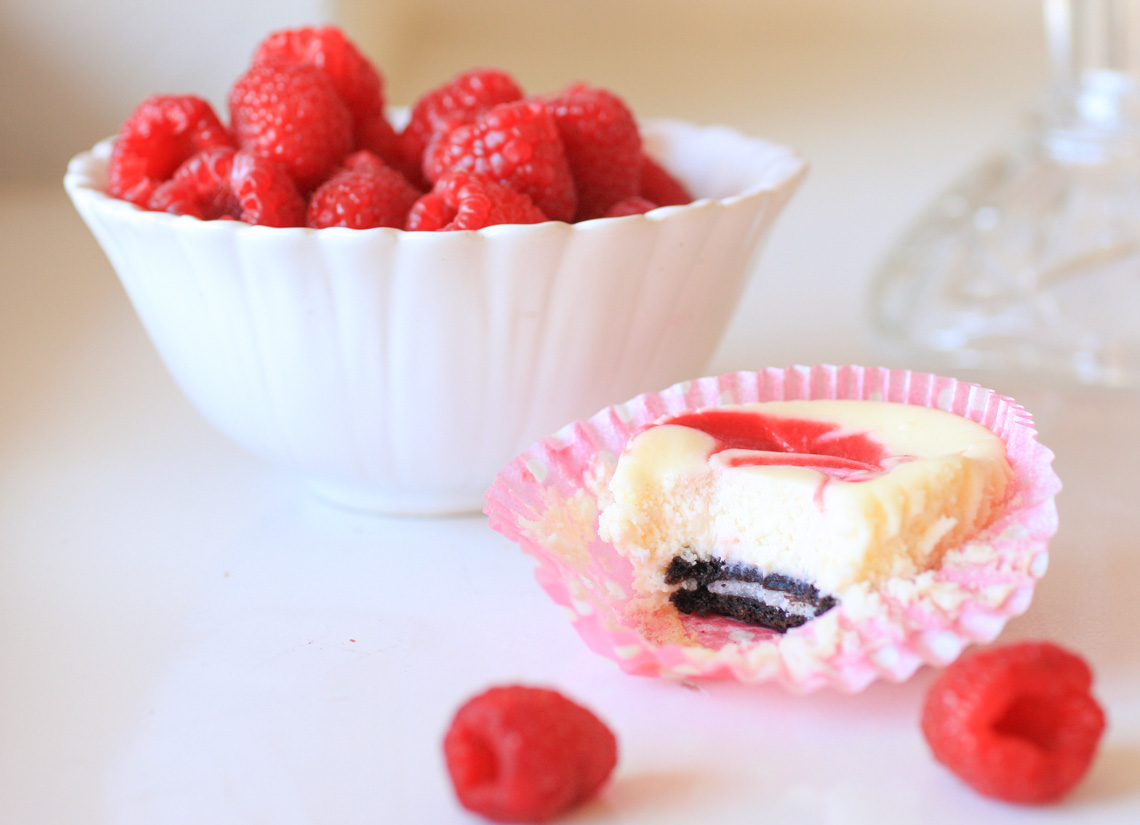
As much as I love plain ol’ cheesecake, I adore raspberry cheesecake. I guess because the tartness of the raspberry really cuts through that creamy richness of the cheesecake. And since Oreos are God’s food, why not add them in for good measure? You know, just in case this recipe wasn’t already awesome enough.
I made these cheesecakes for our Valentine’s Day dessert (Joel and I always stay in and cook dinner together. It’s tradition.). I usually make chocolate fondue or one of my all-time favorites, Gooey Chocolate Cakes, but due to the billions of brownie recipes I’ve made lately, I decided to go non-chocolate this year. It was a very good call. We inhaled these; even as full as we were, having just had steaks, baked potatoes, and wine. Another good call. We’re great decision makers, really.
Mini Oreo-Bottom Raspberry Cheesecakes
2 pounds (four 8-ounce boxes) cream cheese, at room temperature
1 1/3 cups sugar
1/2 teaspoon salt
2 teaspoons pure vanilla extract
4 large eggs, at room temperature
1 1/3 cups sour cream
6 ounces fresh raspberries
1 tablespoon raspberry jam
1 tablespoon sugar
36 Oreo cookies
Preheat the oven to 325 degrees. Line muffin pans with cupcake liners (you’ll need 36) and put an Oreo in the bottom of each.
Working in a stand mixer, preferably fitted with a paddle attachment, or with a hand mixer in a large bowl, beat the cream cheese at medium speed until it is soft and fluffy, about 4 minutes. With the mixer running, add the sugar and salt and continue to beat another 4 minutes or so, until the cream cheese is light. Beat in the vanilla. Add the eggs one at a time, beating for a full minute after each addition. Reduce the mixer speed to low and stir in the sour cream.
To make the raspberry swirl, pulse raspberries, jam, and sugar in a blender until smooth and pureed. Push through a fine mesh sieve to remove seeds.
Give the cheesecake batter a few stirs with a rubber spatula and spoon into the cupcake liners. Drop 3 small spoonfuls (about half a teaspoon) of raspberry puree on the top of each and swirl with a toothpick.
Bake for about 20-23 minutes, rotating the pans halfway through baking. They’ll puff up during baking, but as they cool they’ll level out again.
Let cool completely and refrigerate for at least 4 hours or overnight. Makes 36 cupcakes.
Recipe source: cheesecake from Dorie Greenspan’s Baking From My Home to Yours; raspberry swirl adapted from Annie’s Eats
So, first my kids were sick. For like, 3 weeks. Then Joel was sick (and ladies, I think we can all agree that “man colds” are the WORST). So, 3 weeks of snotty noses, sneezes, tissues, and Joel’s booming, earth-shaking cough. Then the delightful freaking polar vortex. With all that loveliness going on, nobody’s left the house, we’ve all been in rotten moods, and mama is TIRED.
Mama needed cake. Mama deserved cake. Preferably one with lots of deep, dark chocolate. Yeah, that’d be good.
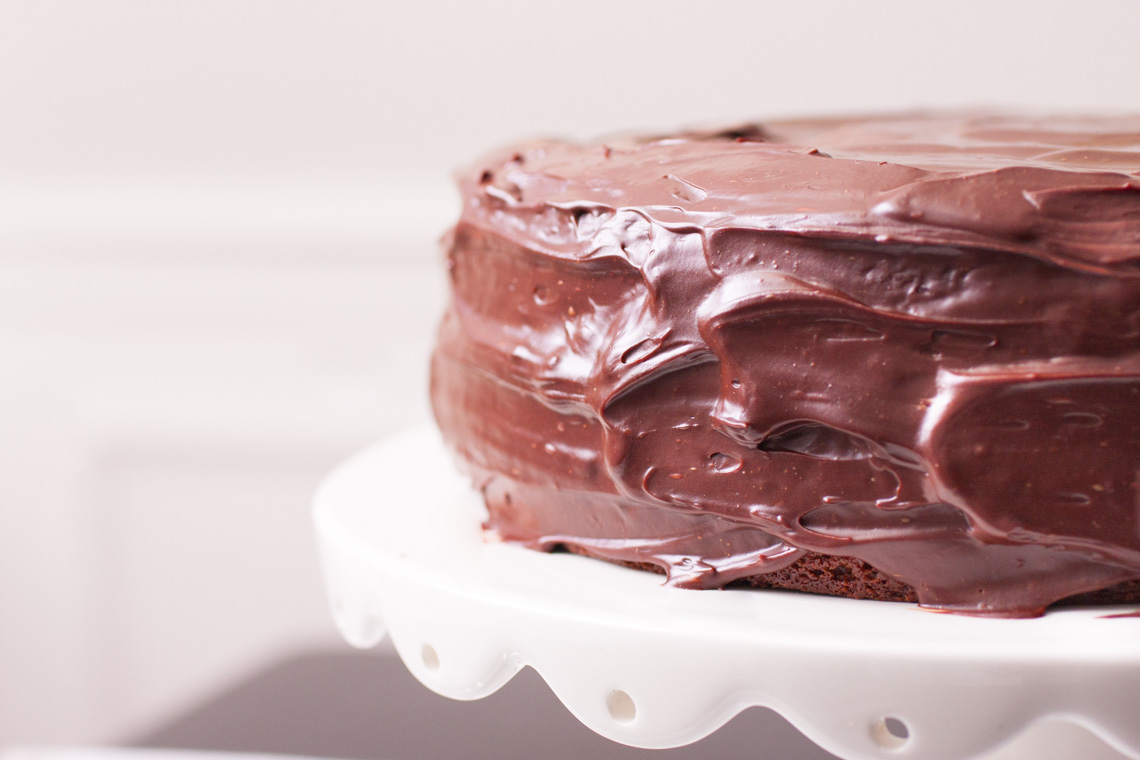
So I just made one. A whole cake for me. Of course I shared, but deep down in my heart I knew it was my own, special “Amy cake”. Cake and I share a special bond, see.
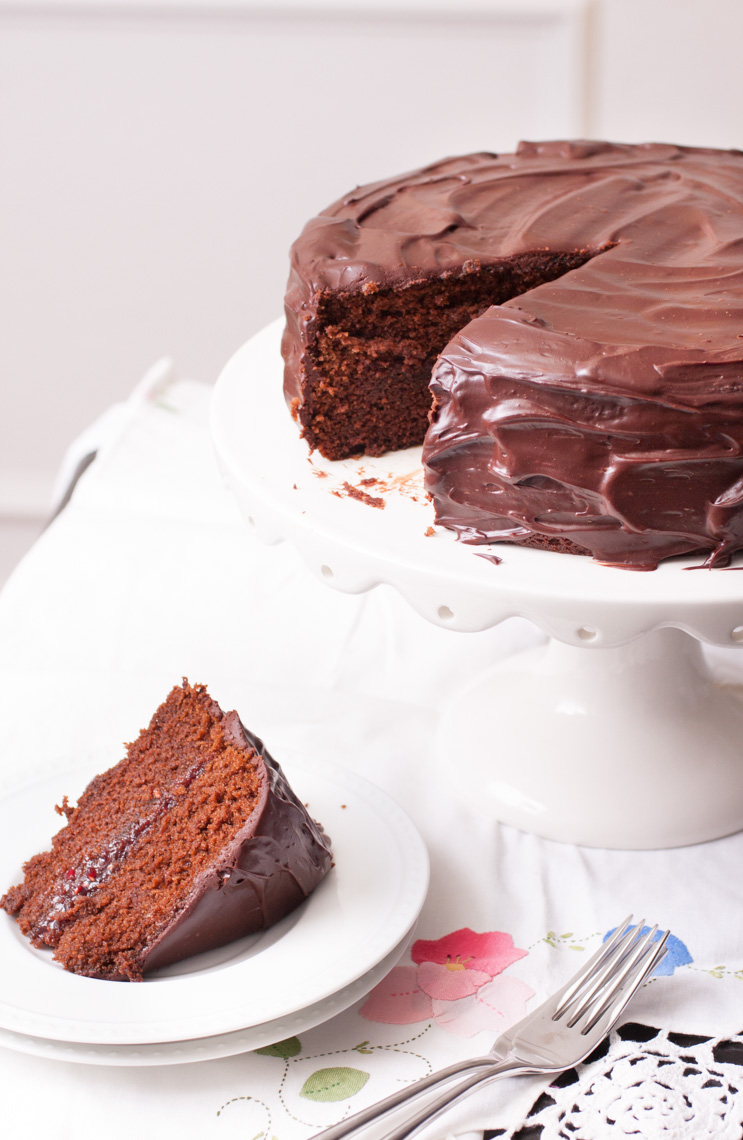
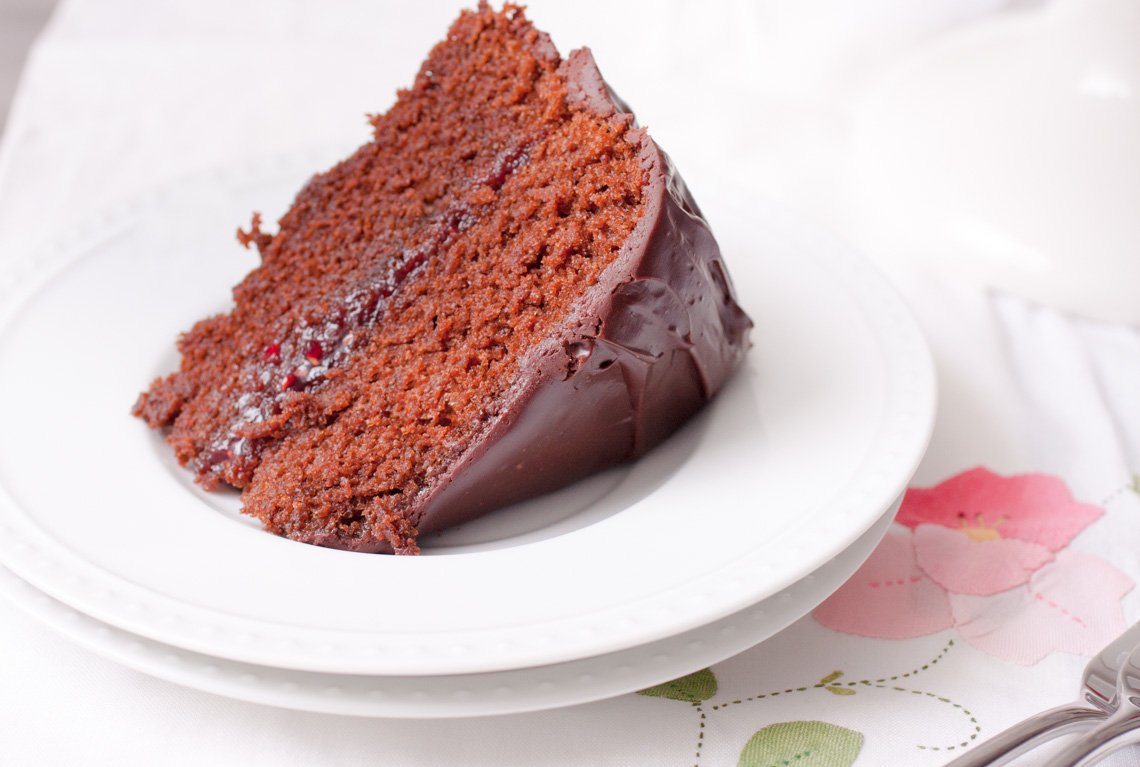
This particular cake is my favorite chocolate cake recipe- Hershey’s- filled with raspberry jam and topped with smooth, rich chocolate ganache. Not too shabby. I love the raspberry/chocolate combination (especially dark chocolate) so this cake is right up my alley. Just a little slice’ll do ya, though, since this is some heavy stuff! VERY rich!
Raspberry-Filled Chocolate Ganache Cake
2 cups sugar
1 3/4 cups all purpose flour
3/4 cup cocoa powder
1 1/2 teaspoons baking powder
1 1/2 teaspoons baking soda
1 teaspoon salt
2 eggs
1 cup milk
1/2 cup vegetable oil
2 teaspoons vanilla extract
1 cup boiling water
3/4 cup raspberry preserves
8 ounces dark chocolate, chopped
3/4 cup half and half
1/8 teaspoon salt
1 tablespoon sugar
Preheat the oven to 350 degrees. Grease and flour two 9-inch round baking pans.
Stir together sugar, flour, cocoa, baking powder, baking soda and salt in the bowl of an electric mixer fitted with the paddle attachment. Add eggs, milk, oil, and vanilla and beat on medium speed for 2 minutes. Gradually stir in boiling water (batter will be thin), then pour into prepared pans.
Bake 30 to 35 minutes or until toothpick inserted in center comes out clean. Cool 20 minutes; remove from pans to wire racks. Cool completely.
Heat raspberry preserves in a small saucepan over medium-high heat, until bubbling and slightly thickened; about 5 minutes. Let cool.
Heat half and half (you can also use cream if you want a richer ganache) over medium heat until almost at the boiling point. Pour over the chopped chocolate and stir until well-combined. Stir in sugar and salt. Let sit for about an hour, until thickened slightly. You could also refrigerate it for a few minutes to speed up the process; just not too long, or it’ll solidify.
Spread cooled raspberry preserves onto the bottom layer of cake, then top with second layer. Spread ganache all over the cake. Store in the refrigerator. Bring to room temperature before serving. Serves approximately 8-12.
Recipe source: adapted from Hershey’s.
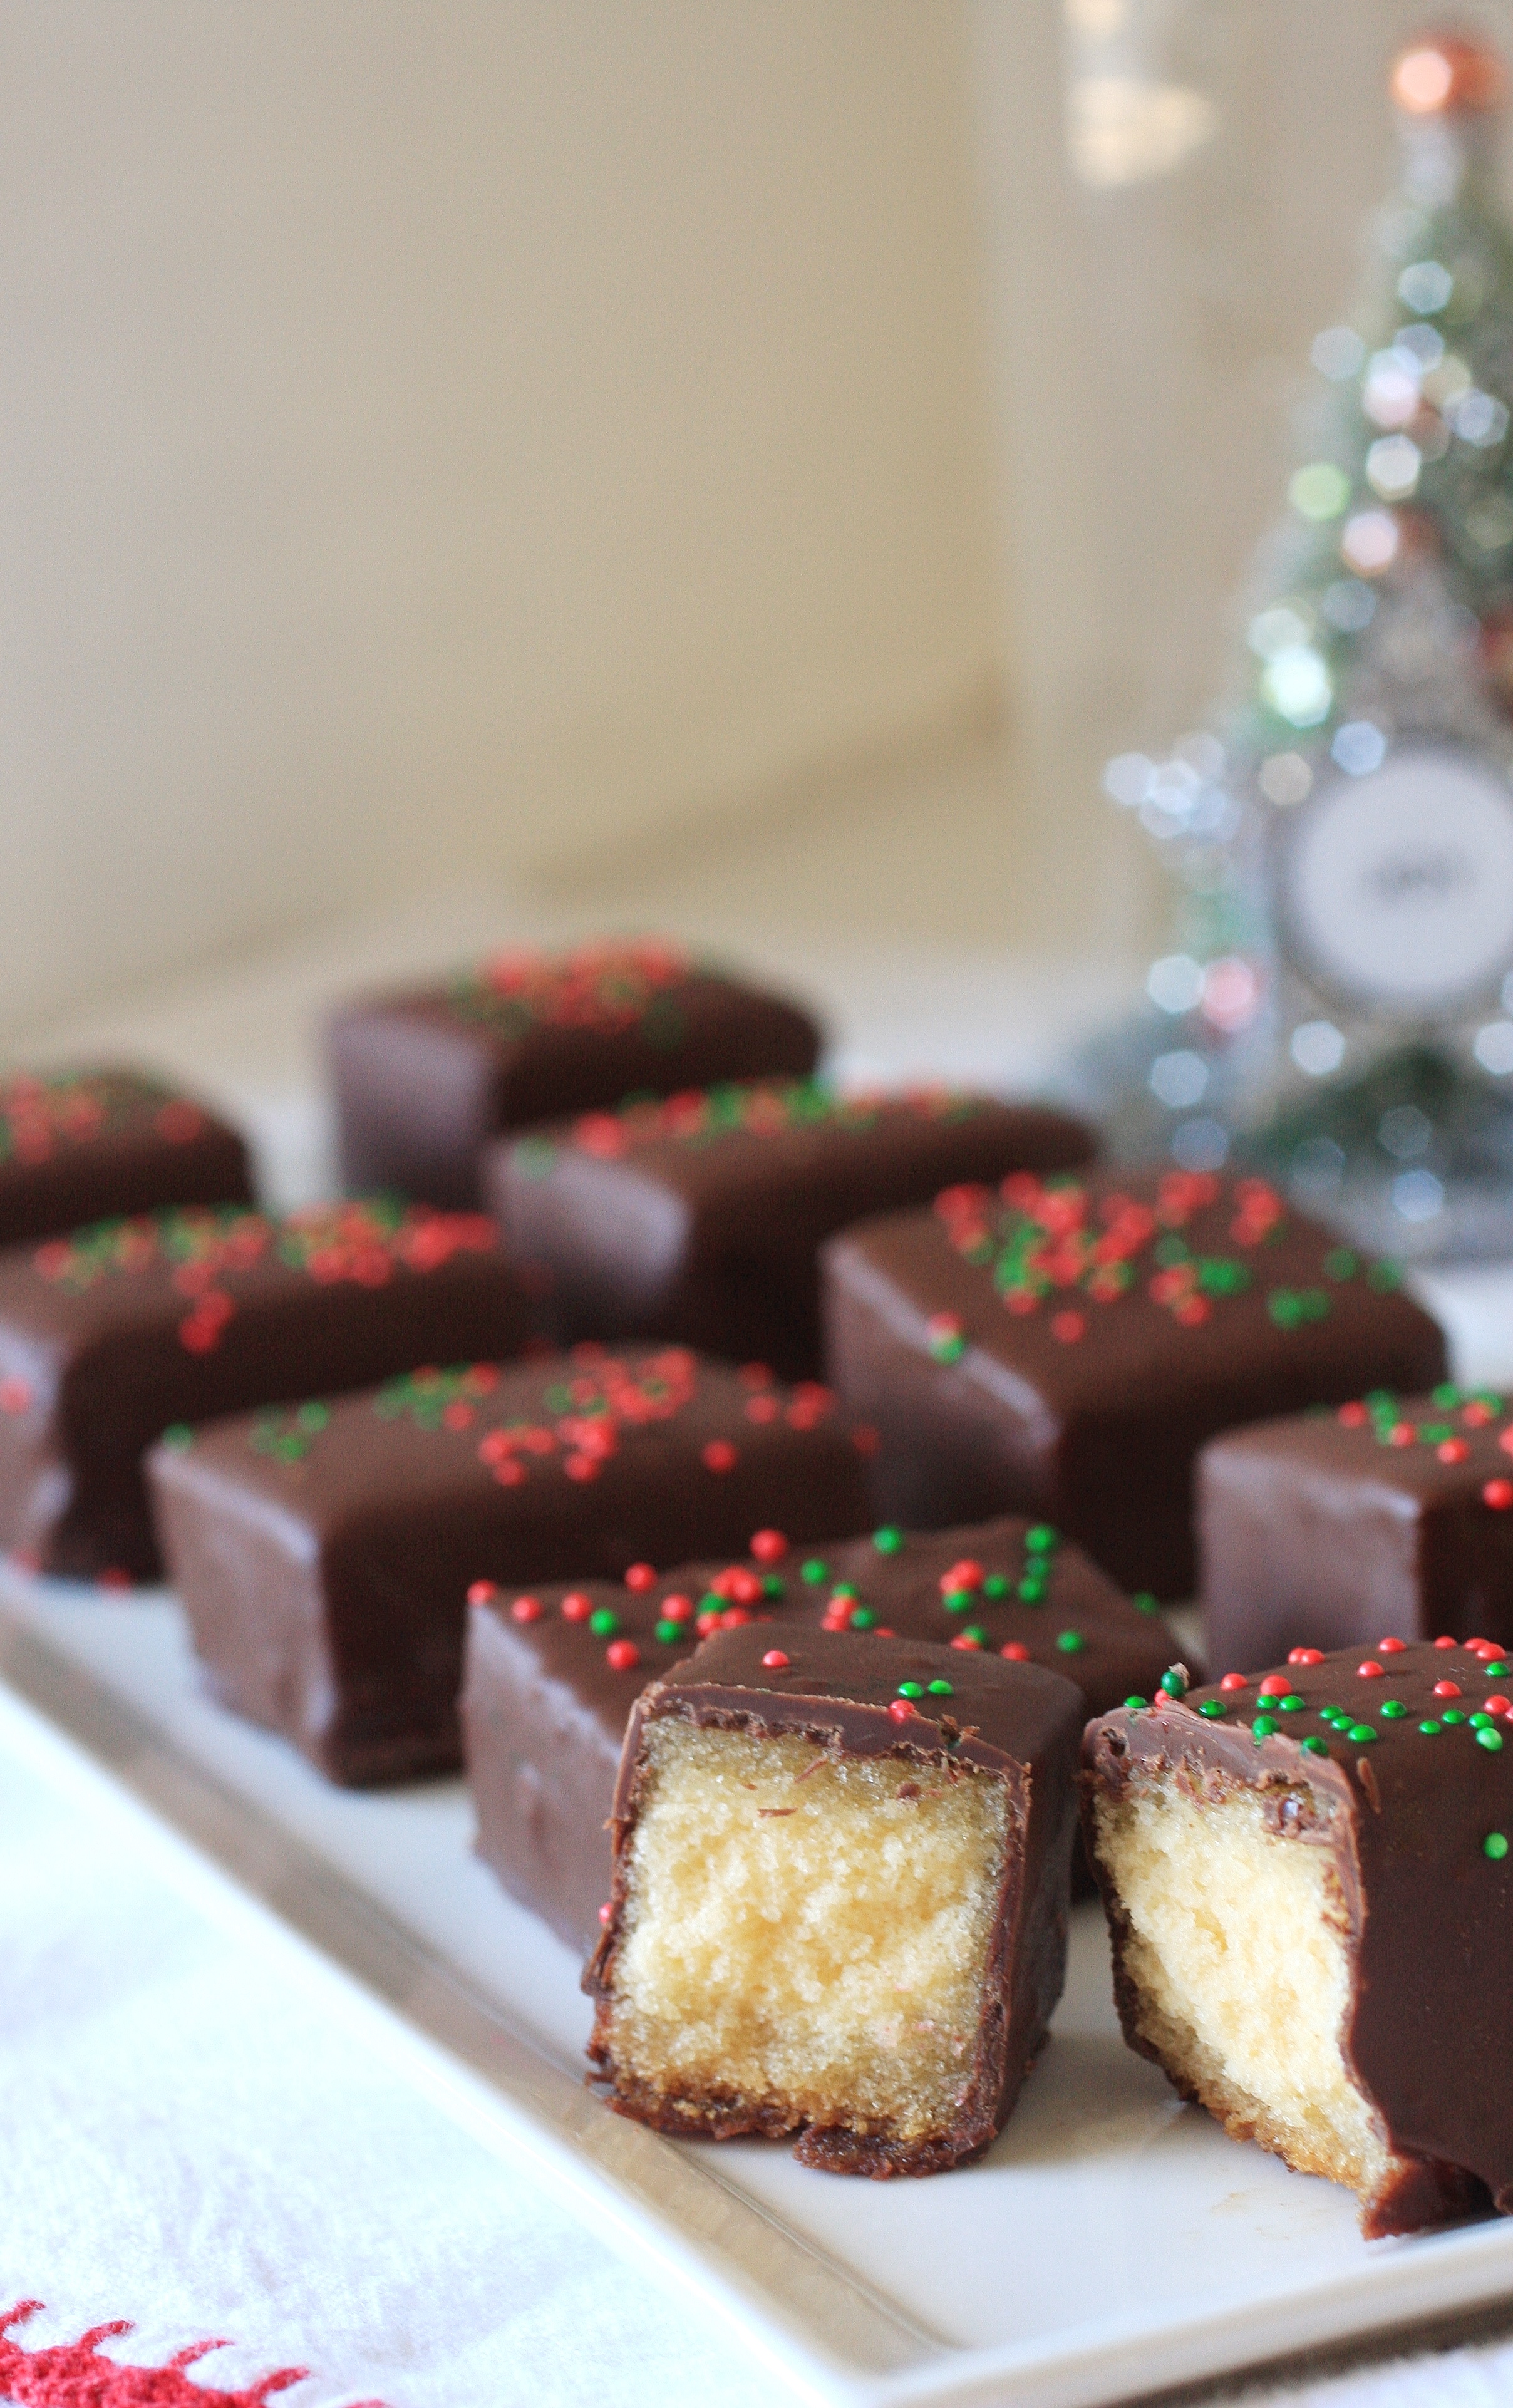
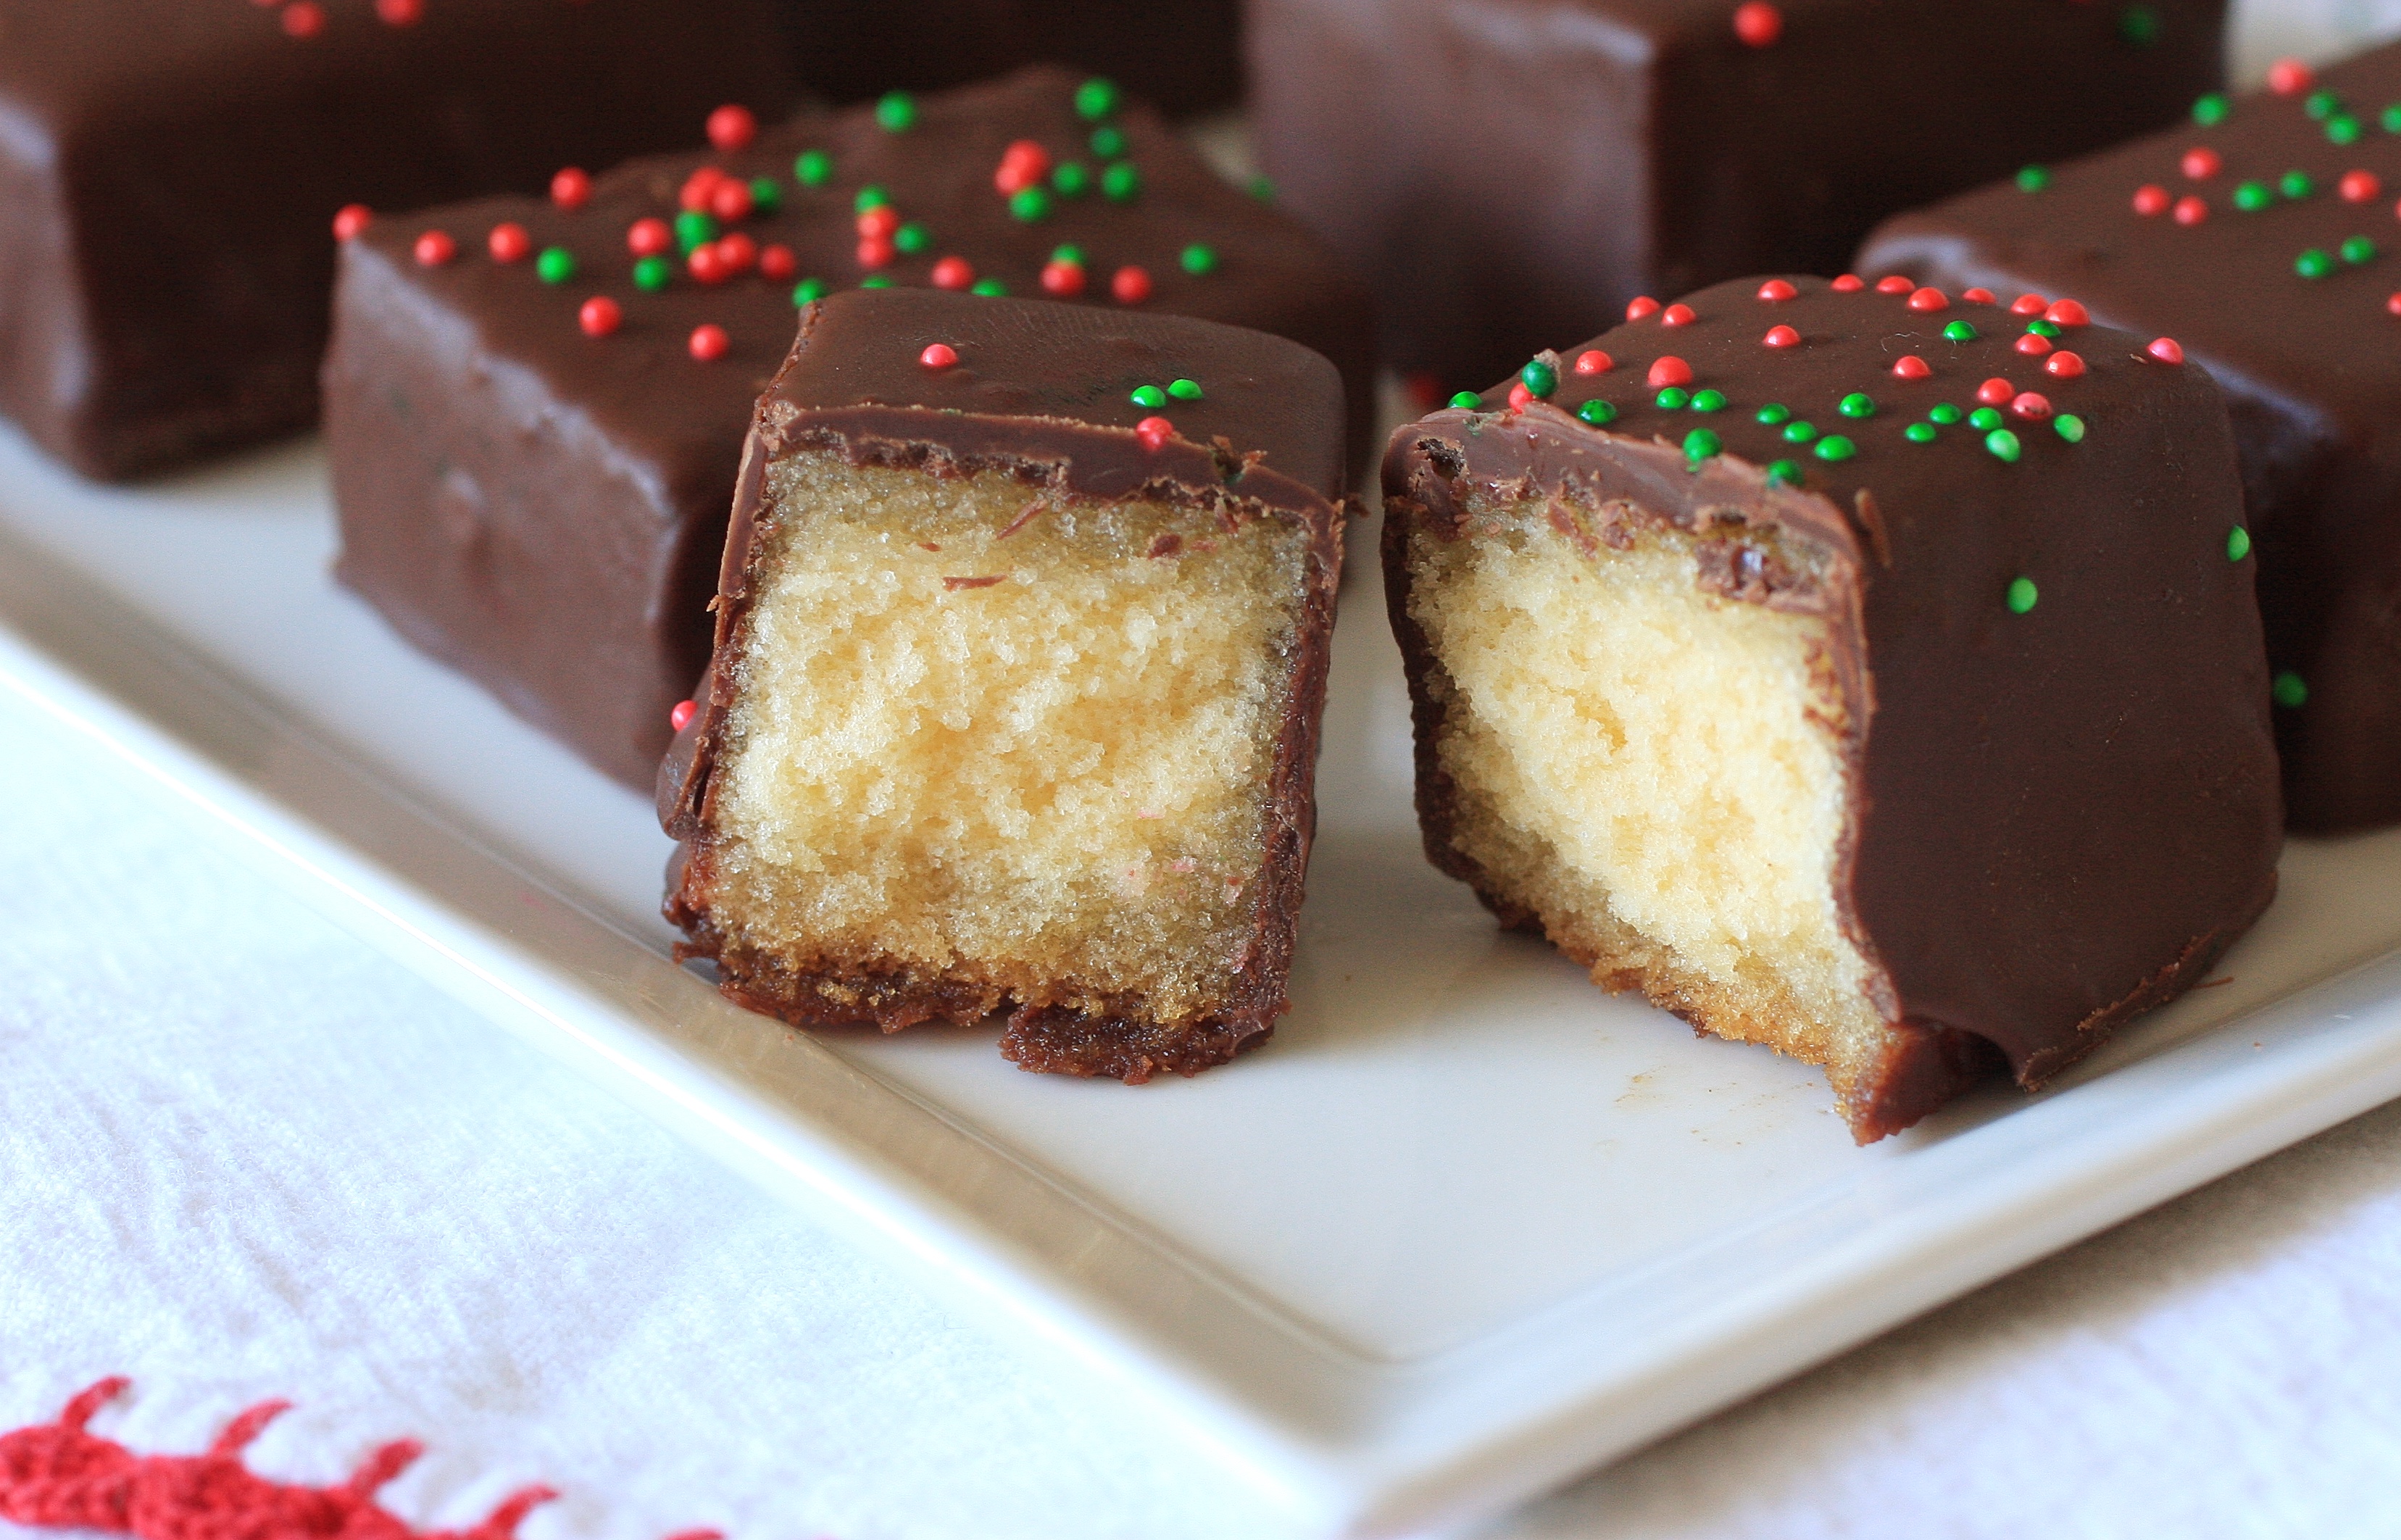
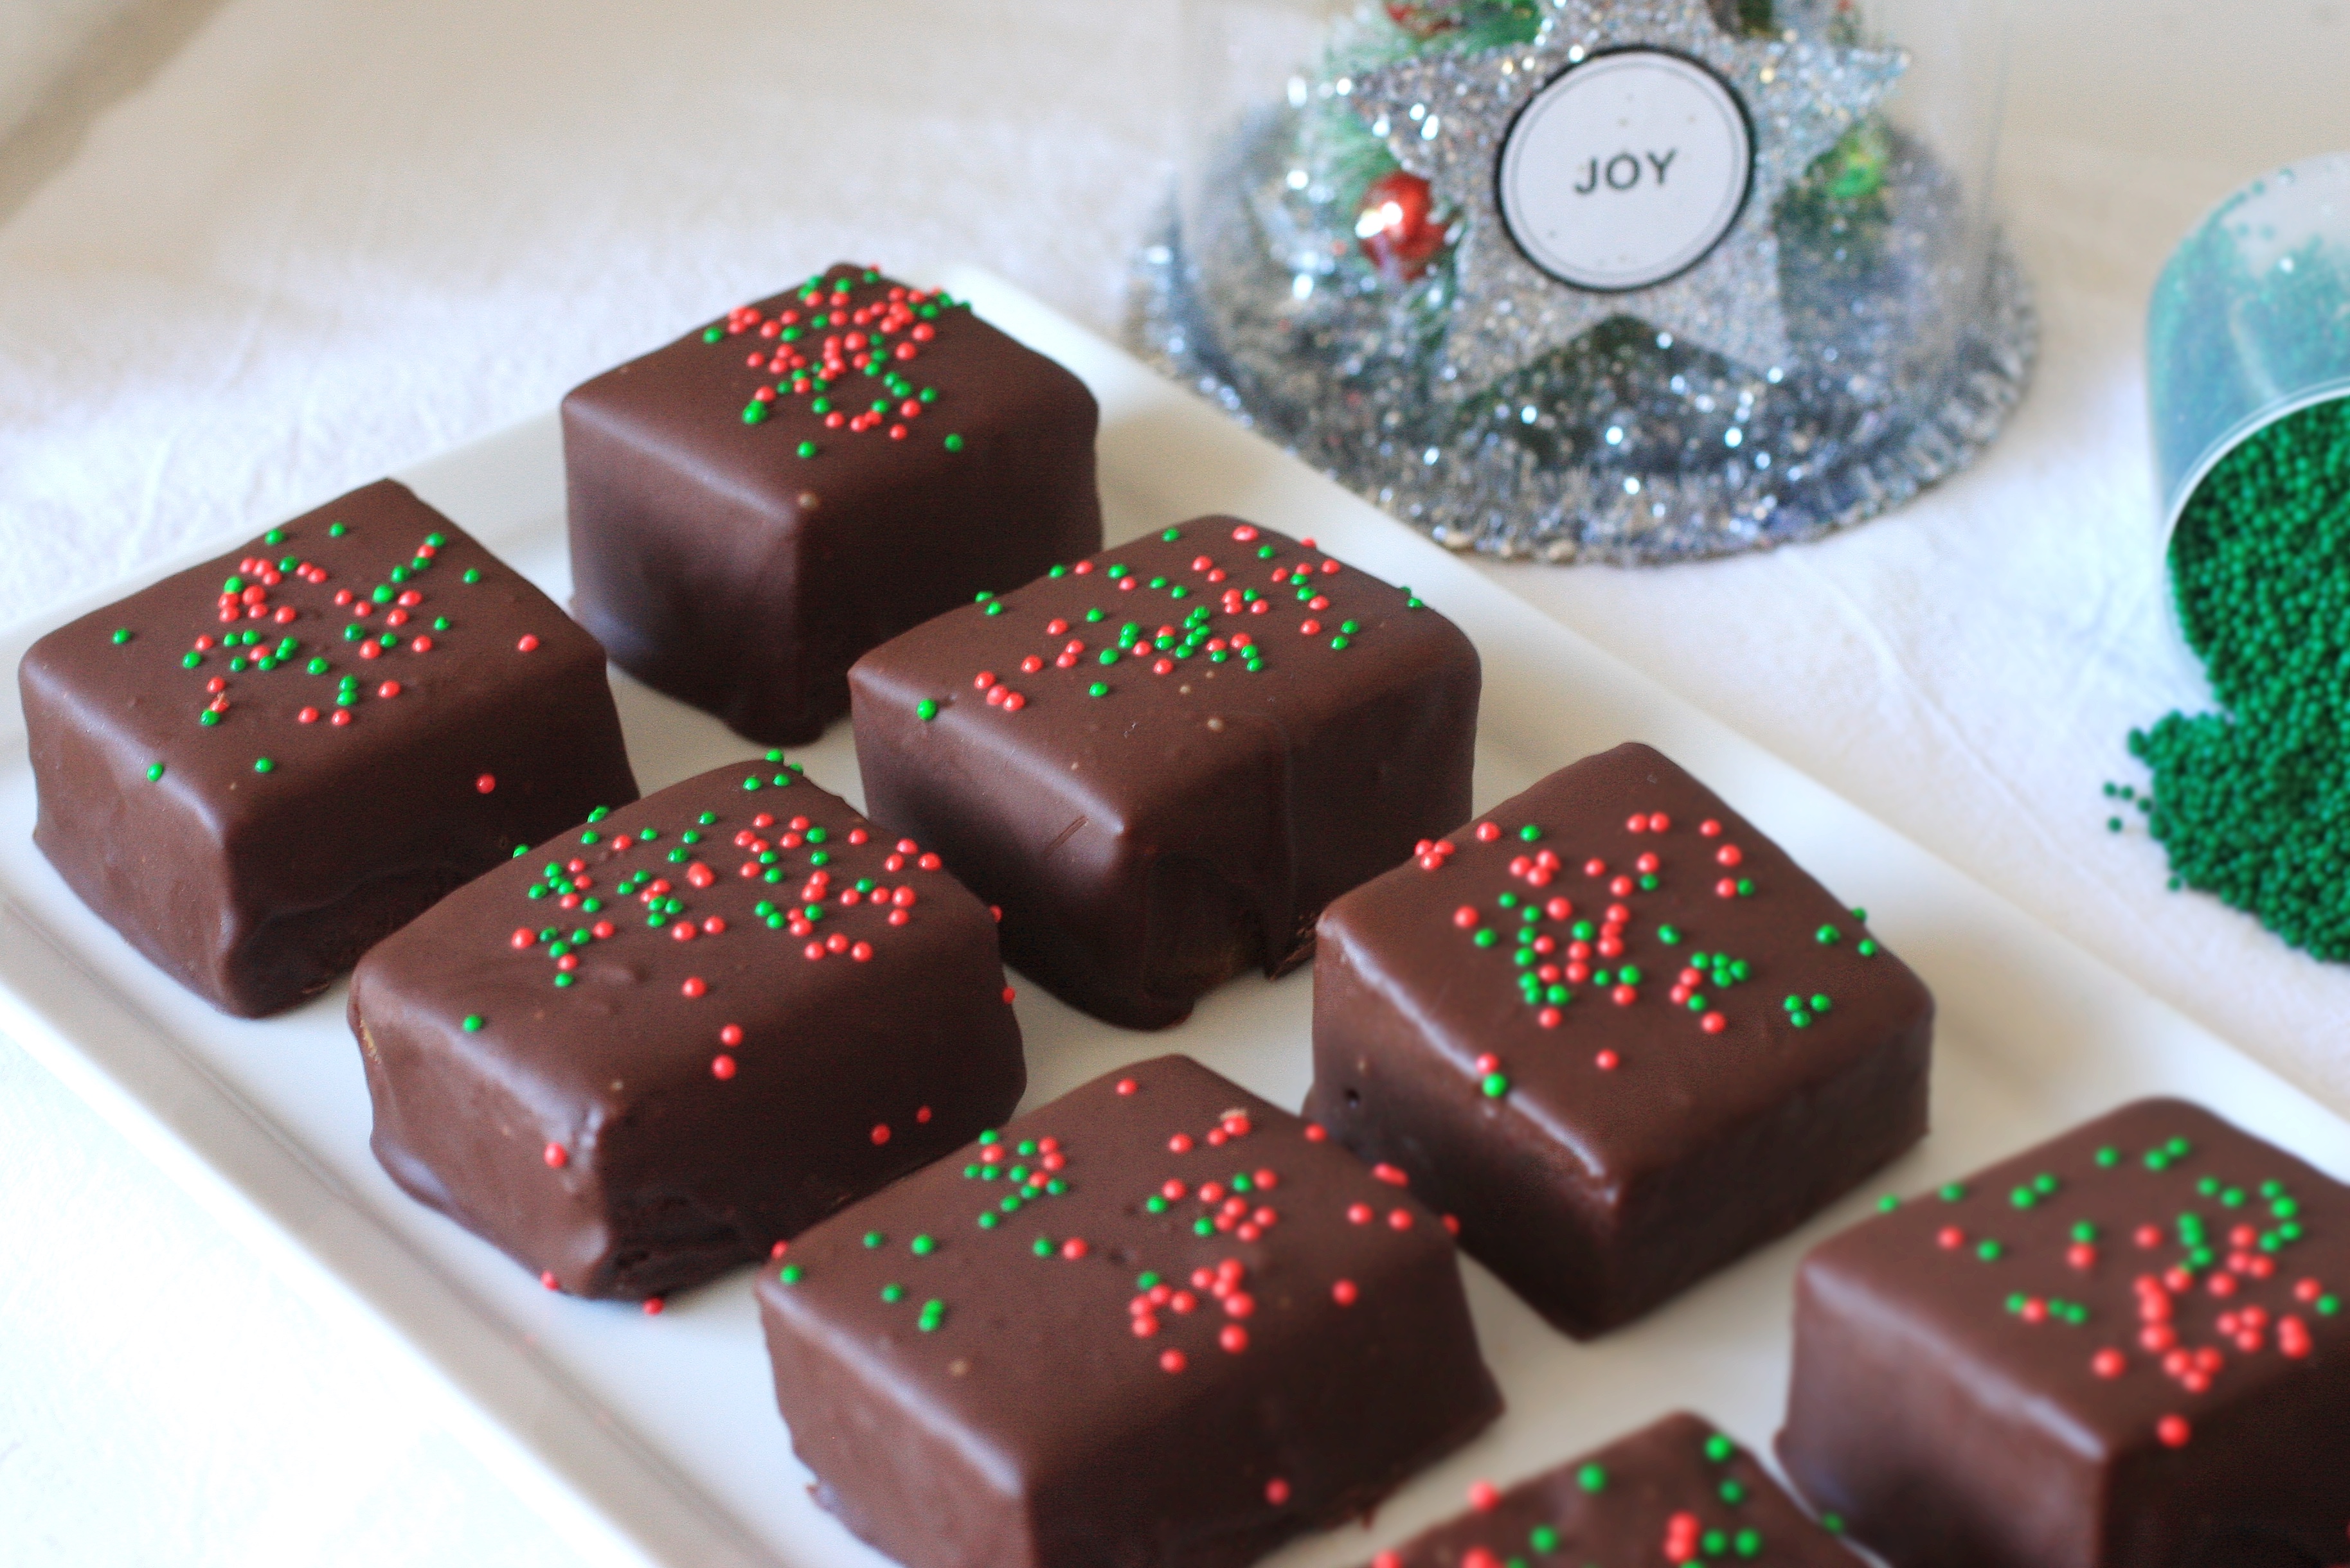
Cubes of buttery pound cake are drenched in a decadent rum syrup, then dipped in dark chocolate for a sweet little bite that packs BIG flavor!
Let me just tell you guys; I am SO pumped about Christmas baking this year! Last year I was pregnant with Elliott and sick and miserable (bah, humbug!) all the time, so I had zero desire to stand in the kitchen and bake anything. I managed to bake our traditional M&M cookies for Santa Claus with Cassidy, but that was about it. Now that Elliott is old enough to really enjoy his bouncer and spend more than 5 minutes in it, I’m able to devote lots more time to baking and being in the kitchen and I’m LOVING it! Cassidy is loving helping me, too.
She didn’t really help me with these because they’re a very adult Christmas goodie. Not sure I want my 3 year old messing around with rum syrup. Although, I’m quite happy to mess around with rum syrup. One smell of this stuff and I want to bathe in it! I am an absolute sucker for my family’s rum cake, so I knew this recipe would be right up my alley. Pound cake? Good. Chocolate? Gooood. Rum syrup? GOOOOD.
These did NOT disappoint! Upon taste-testing, Joel and I each popped one in our mouth and immediately gave each other the “OHMYGOSHTHISISAMAAAAAZING!!!” look. Very minimal effort, too, I might add. Granted, there are multiple steps involved, but each step is super simple. I’m anxious to try this again with different liqueurs- amaretto, raspberry, orange…all good ideas!
Chocolate Dipped, Rum Soaked Cake Bites
1 pound cake, homemade or store-bought. I used the Sara Lee pound cake found in the freezer section of the grocery store. It worked great for this!
1/2 cup granulated sugar
1 tablespoon corn syrup
3 tablespoons water
pinch salt
1/2 cup dark rum
2 cups dark chocolate (I used Guittard semi sweet)
2 tablespoons shortening
Cut the crusts off of the pound cake and cut into 1 1/2 inch cubes. Place in a single layer in a pie plate or platter with a little bit of a lip (to keep syrup from dripping off).
Line a baking sheet with wax paper.
In a small saucepan, mix together the sugar, corn syrup, water, and salt. Stir over medium heat, until the mixture starts to boil and sugar is dissolved, about 2 or 3 minutes. Remove from heat and let sit until cool. Add the rum.
Pour the rum syrup over the cake pieces and allow them to soak for about 5 minutes. I didn’t use all of the syrup, but you certainly can if you want a soggier texture. Remove the cake pieces and place on the lined baking sheet. Freeze for 1 hour. *(It’s important not to skip this step because the cake will be so soggy that it will fall apart when dipping in the hot chocolate. Freezing it first will make it nice and firm and easy to dip.)
When you’re ready to dip the cake bites, melt the chocolate and shortening together in a double boiler until smooth. You could also do this in the microwave; just be sure to take it out and stir it every 30 seconds or so.
Get out a fresh sheet of wax paper. Dip the cake pieces in the chocolate with a fork and tap to get off the excess chocolate. Place on the wax paper and sprinkle with colored sprinkles, coconut, or nuts (the sky’s the limit!). Refrigerate for at least 15 minutes for the chocolate to set. Makes approx. 12-15 bites.
Recipe source: very heavily adapted from an idea found on Swamp Hollow Designs
Sorry for my absence lately. We just finished a BIG master bathroom remodel and I’ve been a little preoccupied with getting it all cleaned up and finding the right finishing touches for it. It looks SO good and I can’t wait to share pictures with you! Hopefully I’ll have it all put together pretty quickly (it’s been tough finding just the right wall art…).
In other news, I’m finally in my 3rd trimester! Home stretch, baby! Only problem is, we can’t pick a name. Like, CAN’T. We have a short list of names we like, but none of them feel like “the one”. I guess it’ll come down to the last minute with this baby. Maybe I’ll get him named before we leave the hospital. Maybe. *sigh*
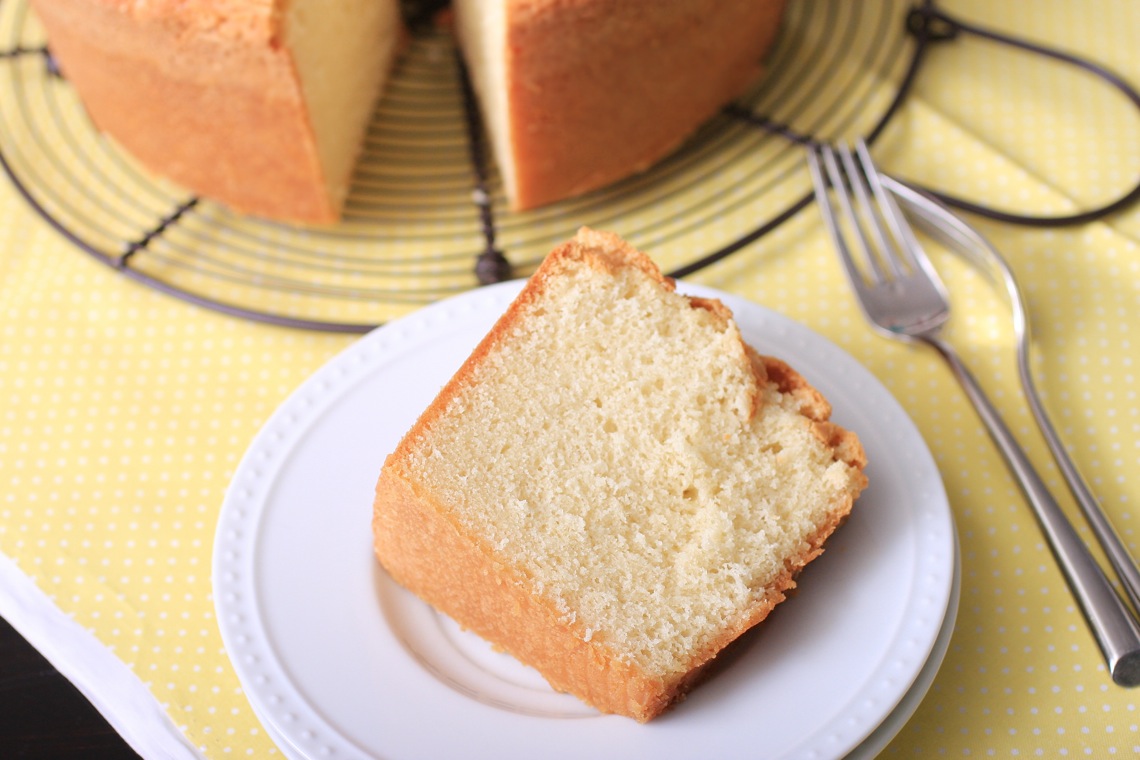
Ok, this pound cake. There’s not much you need to know other than it’s rich, it’s buttery, it’s really, really GOOD. Especially the lovely crust that forms on the top…that’s the best part. This was so good in the mornings spread with a little butter alongside a cup of coffee. Oh, and it makes a TON. This is one big pound cake- enough to serve probably 10 people. I’m guessing it would freeze really nicely if you had tons of leftovers (like I did).
Sour Cream Pound Cake
1/2 pound (2 sticks) butter, at room temperature
3 cups sugar
1 cup sour cream
1/2 teaspoon baking soda
3 cups all-purpose flour
1/2 teaspoon salt
6 large eggs
1 teaspoon vanilla
1 teaspoon almond extract
Preheat oven to 325 degrees.
In a large mixing bowl, cream the butter and sugar together. Add the sour cream and mix until incorporated. Sift the baking soda, flour, and salt together. Add to the creamed mixture alternating with eggs, beating after each addition. Add the vanilla and almond extracts and pour the mixture into a greased and floured 10-inch tube pan. Bake for 1 hour 20 minutes or until a toothpick inserted into the center comes out clean. Serves 8-10.
Recipe source: slightly adapted from Paula Deen
Just thought I’d update y’all a little on my pregnancy. I’m 21 (almost 22) weeks along now- over halfway there! Feeling great physically, albeit a little tired. Joel and I sing in the praise band at church and each week I’m finding it harder and harder to sing without feeling like I’ve just run a marathon. My diaphragm feels like its being shoved up into my throat, so having enough breath support is tough. The extra hormones are driving me a little batty this time around. One day I’ll be feeling great, all sunshine and roses and the next day…

Let’s just say, poor Joel has been a saint to put up with all of my craziness lately. Cassidy is starting to understand a little better and talks a lot about the “baby in Mommy’s tummy”. So sweet.
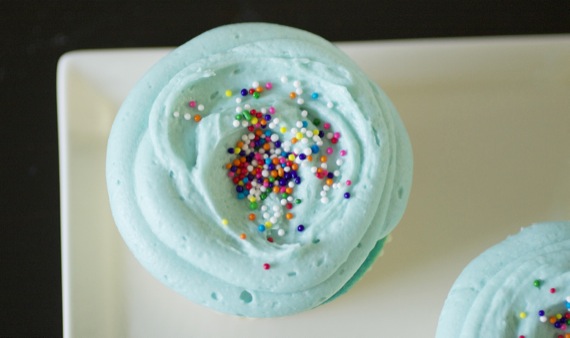
So anyway, the purpose of this post is not only to share with you these yummy cupcakes, but announce that….
WE’RE HAVING A BOY!!!
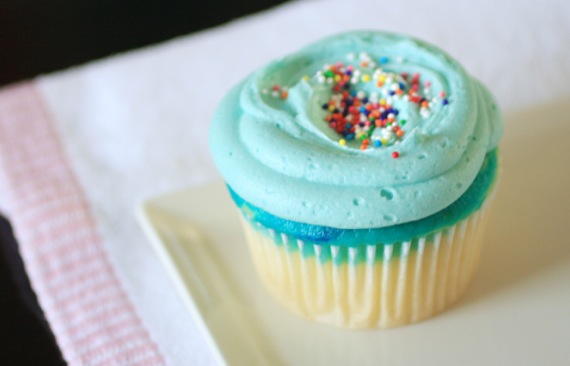
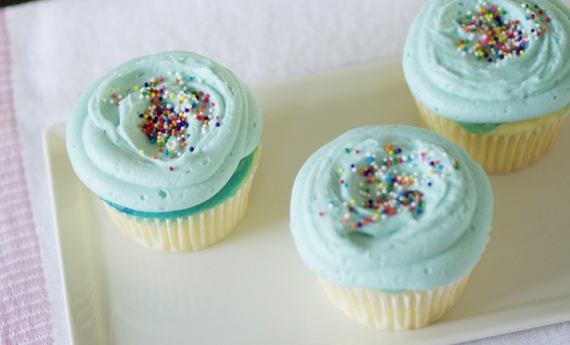
We went for our anatomy scan a couple of weeks ago and were totally blown away to find out Cassidy will have a little brother! I had made these boy-themed cupcakes months ago in honor oF my friend’s soon-to-be baby boy but never posted them; little did I know I’d be repurposing them to announce our own little boy! 🙂
I used my favorite recipe for white cake, reserved a little of the batter, colored it blue, then swirled it into the tops of each unbaked cupcake. It didn’t sink down into the cupcake during baking as much I would’ve liked, but the tops still looked pretty cool before I frosted them (which really ended up not mattering, since the frosting covered that part up. Oh well.). They tasted great, and that’s what mattered! Now I think I need a cupcake…
Blue Marbled Vanilla Cupcakes
2 1/4 cups cake flour
1 tablespoon baking powder
1/2 teaspoon salt
1 1/4 cups buttermilk
4 large egg whites
1 1/2 cups sugar
1 stick (8 tablespoons) unsalted butter, at room temperature
1 teaspoon pure vanilla extract
1/2 teaspoon almond extract
Center a rack in the oven to 350 degrees. Fill cupcake pans with cupcake liners.
Sift together the flour, baking powder and salt.
Whisk together the buttermilk and egg whites in a medium bowl.
Put the sugar and butter in the bowl of a stand mixer (or use a hand mixer) and working with the paddle attachment, beat at medium speed for a full 3 minutes, until the butter and sugar are very light. Beat in the vanilla and almond extracts, then add one third of the flour mixture, still beating on medium speed.
Beat in half of the buttermilk-egg mixture, then beat in half of the remaining dry ingredients until incorporated. Add the rest of the buttermilk and eggs, beating until the batter is homogeneous, then add the last of the dry ingredients.
Finally, give the batter a good 2-minute beating to ensure that it is thoroughly mixed and well aerated.
Set aside 1/4 of the batter in a separate bowl. Mix in a few drops of blue food coloring until you reach the desired shade of blue.
Using a small spoon, fill each cupcake liner 1/2 full with the batter. Drop a small spoonful of the blue batter on top and swirl with the back of a spoon or a toothpick to create a marbled effect.
Bake for 15 to 20 minutes, or until the cupcakes are well risen and springy to the touch – a toothpick inserted into the centers should come out clean. Transfer the cupcakes to cooling racks and cool completely before frosting them. Makes approximately 24 cupcakes.
Vanilla Buttercream
1 cup (2 sticks) unsalted butter, softened
6 to 8 cups confectioners’ sugar
1/4 cup milk
1 1/2 teaspoons vanilla extract
1/4 teaspoon almond extract
blue food coloring
Place the butter in a large mixing bowl. Add 4 cups of the sugar and then the milk and vanilla. On the medium speed of an electric mixer, beat until smooth and creamy, about 3-5 minutes. Gradually add the remaining sugar, 1 cup at a time, beating well after each addition (about 2 minutes), until the icing is thick enough to be of good spreading or piping consistency. You may not need to add all of the sugar. Stir in a few drops blue food coloring until the desired color of blue is reached. Use and store the icing at room temperature because icing will set if chilled. Makes enough to frost 24 cupcakes.
Recipe sources: white cake adapted from Dorie Greenspan’s Baking From My Home to Yours; frosting adapted from Magnolia Bakery
I’m an extremely dramatic person. Those of you who know me or gave birth to me (hi, mom!) know this for a fact. I bring the drama wherever I go. Not necessarily always in a bad way- sometimes I’m just very dramatically funny, or loud, or goofy (drama’s not always a bad thing, you know.). However, sometimes it can be a bad thing; like on days when something goes wrong or something disappointing happens, I totally succumb to the drama and immerse myself in a could of moodiness instead of accepting what happened and simply moving on. I walk around in a fog. Just for the record- that’s not a good thing. It’s one of the characteristics I most dislike in myself. There’s always that little voice in my head saying, “just move on, Amy. There’s still so much to be happy about!”; but it’s so much easier to be dramatic. Slowly but surely, I’m trying to fix this.
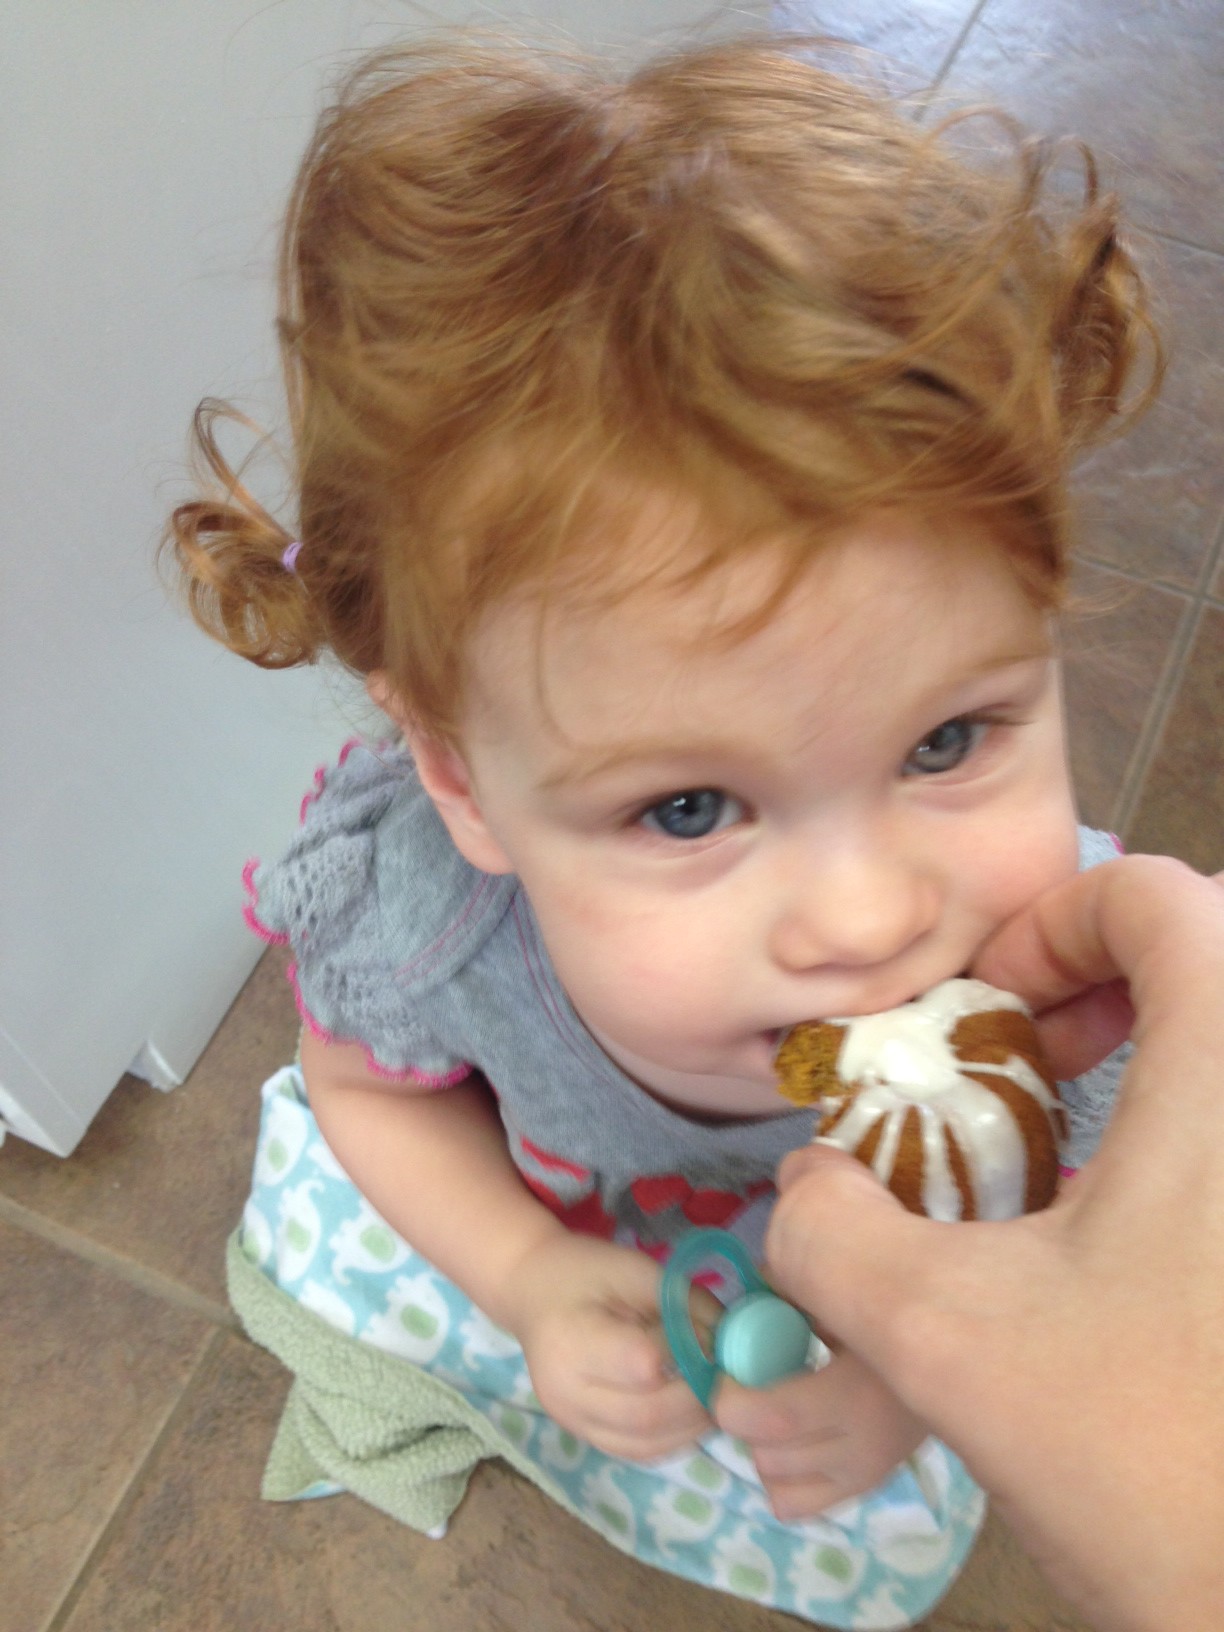
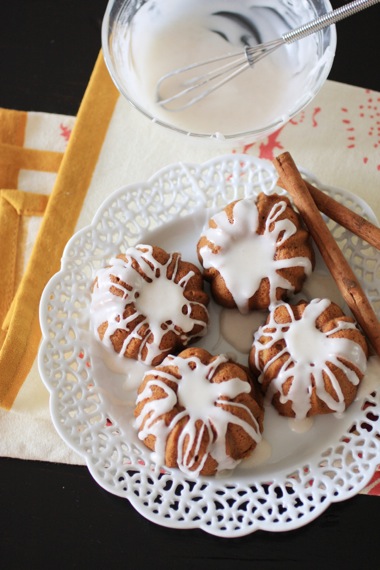
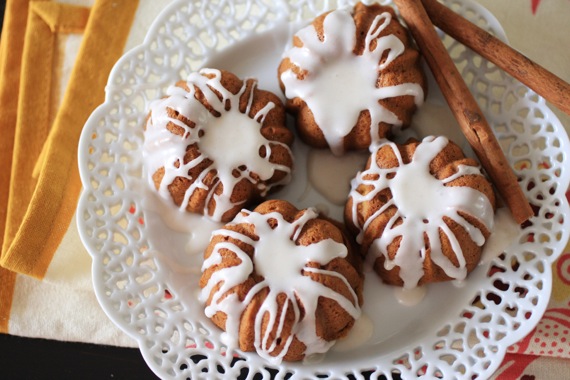
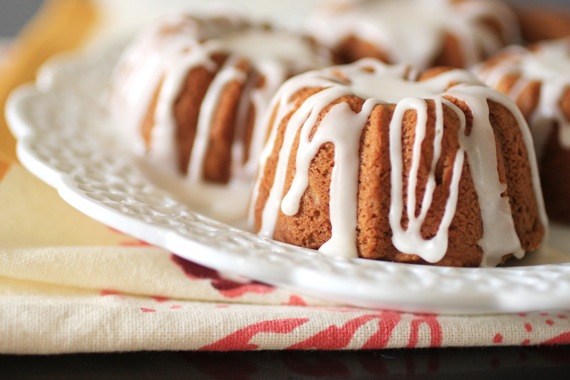
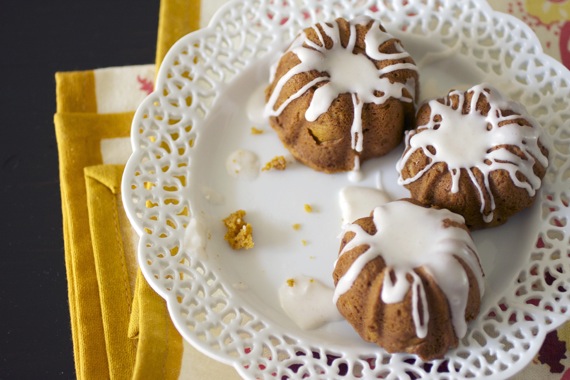
Like today, for instance. I had sort of a rough morning, but chose to rise above the drama and just move on. Know what I did? I lit a pumpkin-scented candle, put on some music, and baked these pumpkin mini bundts with my baby girl (she mostly just sat in the floor and played with a whisk). And it really helped!! I pulled them out of the oven and realized I hadn’t felt sorry for myself or dwelt on the bad news at all! Nothing like a little fall baking to pull you out of a slump!
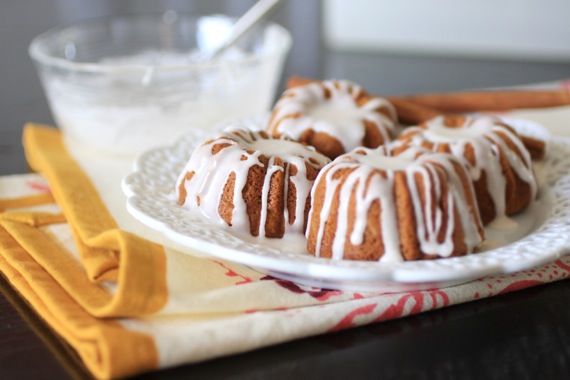
Now, let’s talk about these mini bundts! Aren’t they just adorable?! And so easy- all I did was take the recipe for my pumpkin pound cake (with a couple of tiny tweaks), bake it into mini bundts, and whip up a quick and easy cinnamon glaze! The house smells amazing and my blues are long gone! 🙂 I’ll be honest with you, I actually had to level off the bottoms of these because they rose quite a bit during baking, but that was no biggie- Cassidy loved snacking on the bottoms!
Pumpkin Mini Bundts with Cinnamon Glaze
1 cup granulated sugar
1 cup brown sugar
1 cup canola oil
3 eggs
3 cups all-purpose flour
2 teaspoons baking soda
1 teaspoon ground cinnamon
1 teaspoon ground nutmeg
1/4 teaspoon ground cloves
1/8 teaspoon ground ginger
1/2 teaspoon salt
1 package instant butterscotch pudding mix
1 can (15 ounces) pumpkin puree
In a large bowl, combine sugar and oil until blended. Add eggs, one at a time, beating well after each addition. In a separate bowl, combine flour, baking soda, cinnamon, nutmeg, cloves, ginger, salt, and pudding mix; add to egg mixture alternately with pumpkin, beating well after each addition. Batter will be thick.
Transfer to 2 greased mini bundt pans (if you don’t have 2 pans, just bake one pan at a time). Bake at 350 degrees for about 20 minutes or until toothpick inserted comes out clean. Cool for 10 minutes before inverting onto a wire rack. If cakes rose too much during baking (as mine did), simply level off with a sharp knife and save the bottoms for snacking!). Makes 24 mini bunts.
Glaze:
1 cup confectioners’ sugar
1/4 teaspoon cinnamon
splash milk
Mix all ingredients together until glaze reaches a thick consistency; just make sure it’s still runny enough to drizzle. Drizzle over cakes and serve.
Recipe source: adapted from a Sing For Your Supper recipe; originally adapted from Taste of Home

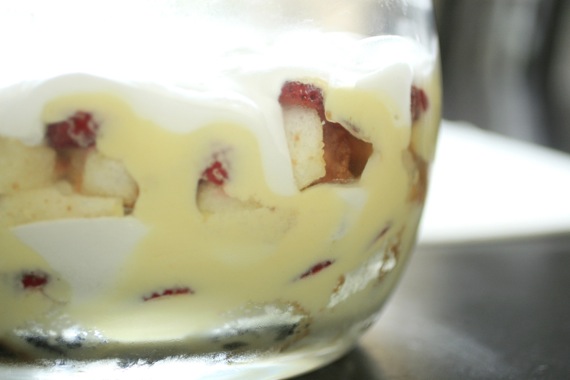
As promised, here’s the second trifle I told you about. And my personal favorite. 🙂 Don’t get me wrong, I love, loooove a good chocolaty trifle, but something about this lemon variety won me over. Maybe the sweet, lemony syrup- soaked angel food cake, or the lemon-vanilla pudding between layers, or the slices of fresh, ripe strawberries…whatever it is, this dessert is a WINNER! And so ideal for a summer cookout! No one wants to turn their ovens on during the hot summertime, so this trifle is where it’s at. No oven required.
Summery Lemon Strawberry Trifle
1 angel food cake, cut into cubes
3 large lemons
1 cup water
1 cup sugar
2 3.4-oz. boxes vanilla pudding mix
3 3/4 cups milk
1 16-oz. container Cool Whip
1 1/2 cups strawberries, hulled and sliced
Using a vegetable peeler, remove the peel from the lemons (be careful not to get the white pith or you’ll end up with a bitter taste). Squeeze the juice from the lemons into a small bowl and set aside. In a small sauce pan over medium-high heat, bring the water, sugar, and lemon peels to a boil and simmer until sugar has dissolved (about 3 minutes). Remove from heat and allow to cool. Remove peels.
Whisk the pudding mix and milk until thick, about 2 minutes. Stir in the reserved lemon juice. Set aside.
In a trifle dish or large glass bowl, place half of the angel food cake cubes in an even layer; drizzle with half of the lemon simple syrup. Layer half of the sliced strawberries, then spread half of the pudding, then half of the Cool Whip. Repeat layers. Chill for at least 4 hours before serving. Serves 12.
Recipe source: Sing For Your Supper original
This week, I’ll be sharing not one, but two awesome trifle recipes! I know…that’s kinda weird to just randomly post a bunch of trifle recipes, but I have a reason. 🙂 We threw a graduation party for the son of our good friends a couple of weeks ago and when I asked his mother what his favorite dessert is, she told me he loves chocolate cake and my lemon-lime sugar cookie truffles. I wanted to do something unique that incorporated both of his favorite things, and after lots of thought, ended up making two kinds of trifles- chocolate and lemon. They were both a huge success! I really love this kind of dessert, not only because can they be made ahead of time (and should be!), they’re super simple to throw together and the result is always fantastic.
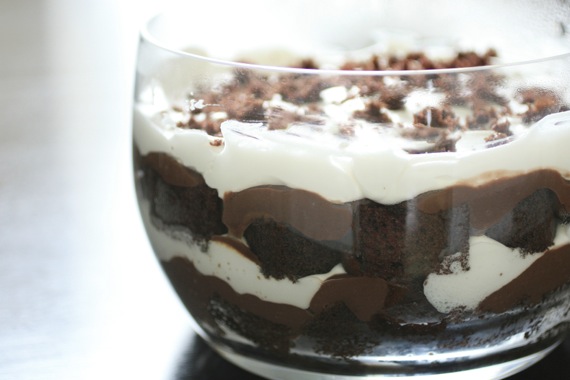
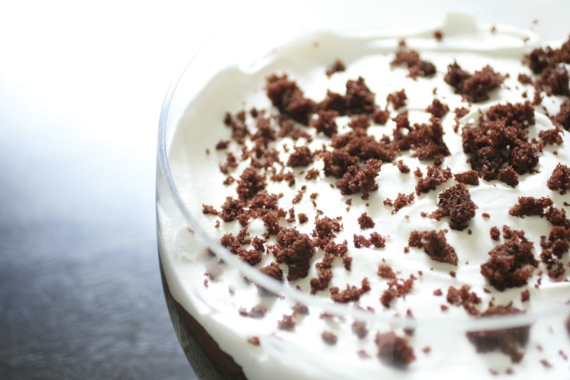
This trifle features chocolate cake soaked with coffee, then drizzled with a bit of hot fudge and layered with chocolate pudding and cool whip. I’m not kidding when I say this is decadent. The best part is, the longer it sits, the better it gets. I love “soggy” desserts, so naturally, this one ranks pretty high on my list. If you’re looking for a dessert that looks beautiful, tastes amazing, and requires minimal time and effort, this one’s for you!
Decadent Chocolate Trifle
1 chocolate cake, baked, cooled, and cut into cubes (you may have some left over- save ’em for a snack!)
hot fudge, for drizzling
1/2 cup freshly brewed coffee that has been allowed to cool
2 3.4-oz. boxes chocolate pudding mix
4 cups milk
1 16-oz. container Cool Whip
Whisk together the pudding mix and milk until thick; about 2 minutes. Set aside.
In a trifle dish or large glass bowl, place half of the cake cubes in a single layer; spoon over half of the coffee, then drizzle a small amount of hot fudge over the cake. Spoon half of the chocolate pudding and spread evenly, then half of the cool whip. Repeat layers, reserving one or two small pieces of cake for the top. When layers are complete, crumble the cake and sprinkle over the top of the cool whip for decoration. Refrigerate for at least 4 hours before serving. Serves 12.
Recipe source: Sing For Your Supper original
What happens when you’re short on time and ingredients but need an impressive cake that not only looks great but TASTES great? I’ve written a whole post on how to get homemade results from a boxed cake mix over at my family blog, A Little Something Lovely and I hope you’ll check it out! 🙂 Click here to see the post.