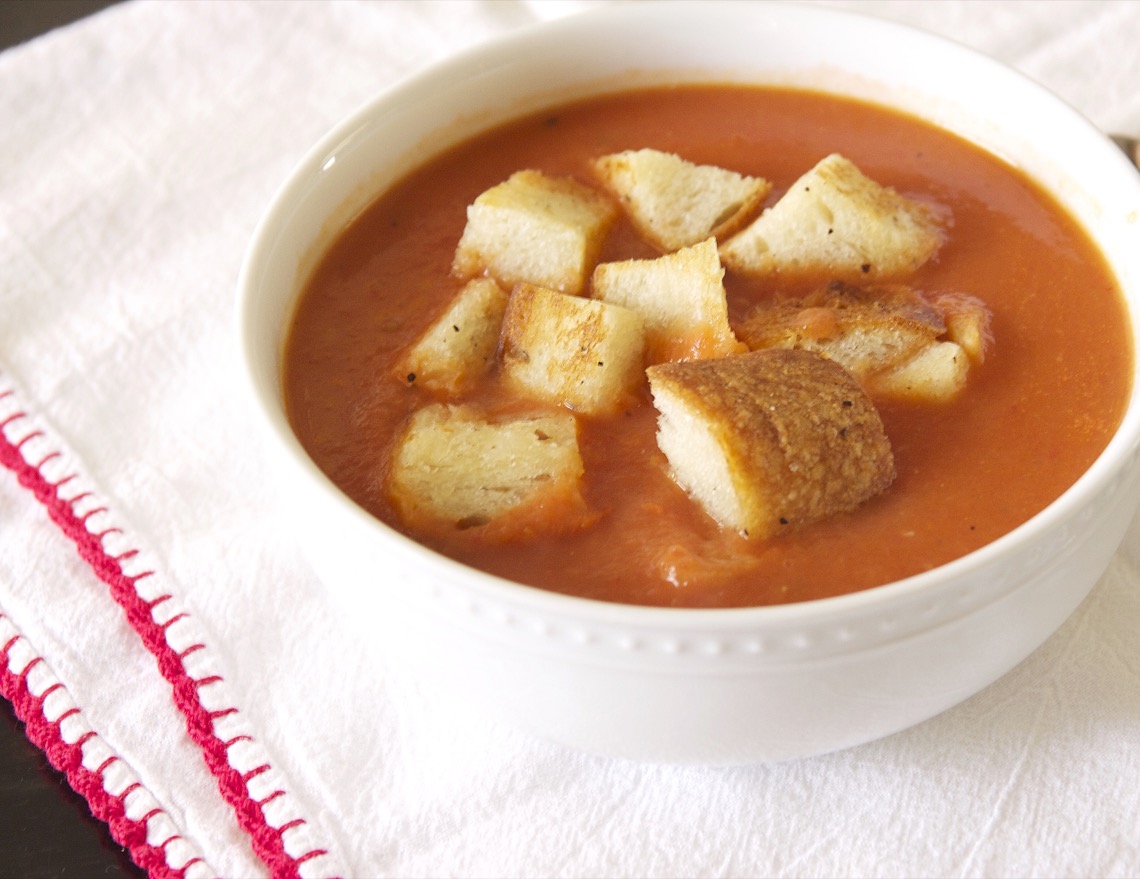
Roasted tomatoes, onions, and garlic blended together and topped with crunchy, buttery sourdough croutons. A must for cold weather!
HI THERE!!! My, my, my, what a long hiatus, huh?! Life with 2 kids is honestly a lot harder than I thought it would be. Just about the time I’ll get one of them down for a nap, the other wakes up ready to party. By the end of the day, I’m too pooped to even consider sitting in front of the computer when I could be collapsed in bed catching up on recorded tv shows (Blacklist, anyone?). But it’s not like we don’t have fun. My kids are the coolest, funniest, sweetest little dumplin’s any mommy could ask for! Elliott is almost 5 months now. Don’t ask me how that happened, since clearly, I only gave birth to him yesterday. Obviously time is playing some sort of cruel trick on me. He is SO. FREAKING. ADORABLE. And Cassidy…don’t even get me started. Let’s just say she keeps me laughing and/or crying pretty much all the time. 2 year olds, yo.
It’s great to be back in the blogosphere. I’m cooking up lots of good stuff and ready to jump in again head-first (if anyone’s still out there, that is…)!
Let’s talk soup! Soup season is a magical season. A throw-whatever-you’ve-got-in-the-pot season. Which is perfect for busy moms and dads. Which is why I love it so much. For years I’ve been wanting to try making my own tomato soup, but never got around to it for some reason. Well here it is, in all its comforting yumminess.

I drizzled roma tomatoes, onions, and garlic with olive oil and roasted them all together for about an hour. Then I blended it all together with chicken broth, a little milk, and some dried basil. DONE. Easy. Those croutons, though. That was my favorite part. I love crusty bread dipped in my soup, so these croutons were a no-brainer. This soup was loved by all. I highly recommend it!
Roasted Tomato Soup with Sourdough Croutons
Approx. 3 pounds Roma tomatoes, cut into halves, length-wise
1 head garlic
1 onion, roughly chopped
2 cups chicken broth
1 cup milk (you could use half and half if you want- just use about 1/2 cup)
1 15-oz can tomato sauce
2 tablespoons tomato paste
1 1/2 teaspoons dried basil
1/4 teaspoon cayenne pepper
salt and pepper
olive oil
1/2 loaf day-old sourdough bread, cut into 1-inch cubes
2 tablespoons butter
Preheat the oven to 400 degrees. Place tomatoes cut-side up on a baking sheet with the onions and drizzle with olive oil, then sprinkle generously with salt and pepper. Cut the top off of the head of garlic, drizzle with a little olive oil, then wrap tightly with foil, making a little pouch. Place it on the baking sheet with the tomatoes and onions. Roast for about 1 hour, or until the tomatoes and onions start to get a little browned (it may take longer depending on your oven).
Remove from the oven and place in a food processor. Remove the garlic from the foil and squeeze the cloves from the head (they should be very soft, so they’ll squeeze out easily) into the food processor. Pulse until smooth. Pour into a large pot and whisk in the chicken broth, milk, tomato sauce, tomato paste, basil, cayenne pepper, and salt and pepper to taste. Simmer for 15 minutes over medium-low heat.
Meanwhile, in a large skillet, melt the butter over medium heat and add the sourdough cubes. Season with salt and pepper and sauté until lightly browned and crisp, stirring constantly; about 5-7 minutes.
Ladle the soup into bowls and top with as many croutons as you like! Enjoy!
Try this easy stovetop version of rich, velvety, homemade apple butter as a spread for toast and muffins, or enjoy it all by itself!
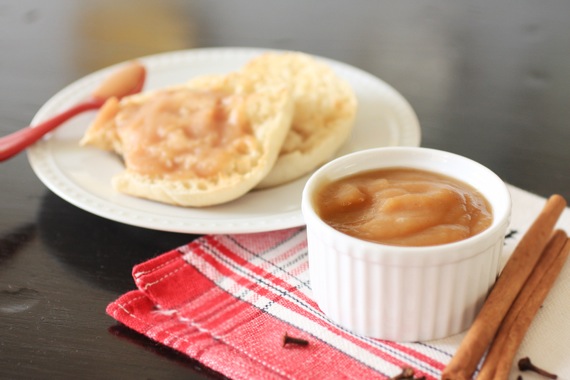
October had just begun, there was a slight chill in the air, and I wanted apple butter. I headed to the grocery store to find my favorite jarred variety. Not only did they not have my preferred brand, but the one kind they did have was insanely expensive. I stood there in the jams and jellies aisle shaking my fist at the apple butter people (whoever they were) and then realized, “apples are on sale! I’ll just…..MAKE MY OWN!” [cue hallelujah chorus]

I really didn’t want to wait all day for the slow cooker versions (which is basically all I could find online), so I decided to try it on the stovetop and see what happened. Turns out, it works really well on the stovetop! And super tasty- I think the butter really gives it an extra richness that’s unbeatable!
Spreadable, velvety, rich apple butter…perfection on a piece of toast or even just by itself!
Stovetop Apple Butter
5 pounds apples, peeled, cored, and cut into chunks (I used Pink Lady, but Honeycrisp or Gala would work too)
2/3 cup brown sugar
squirt fresh lemon juice
1 1/2 teaspoons cinnamon
1/4 teaspoon ground cloves
pinch salt
1/2 stick butter (4 tablespoons)
1 teaspoon vanilla
Combine all ingredients except vanilla in a large pot and cook, covered, on low for 3 hours, stirring occasionally. Apples will be extremely soft. Stir in vanilla.
Using an immersion blender, puree the apples until completely smooth. You could also use a food processor, working in batches. I stopped the cooking process here because I was (very) satisfied with the taste and texture of the apple butter, but you could continue cooking it uncovered on low for another hour or so, if you desire a thicker, darker consistency. Let cool completely. Store in the refrigerator. Makes approximately enough for 3 pint-sized jars.
Recipe source: Sing For Your Supper original
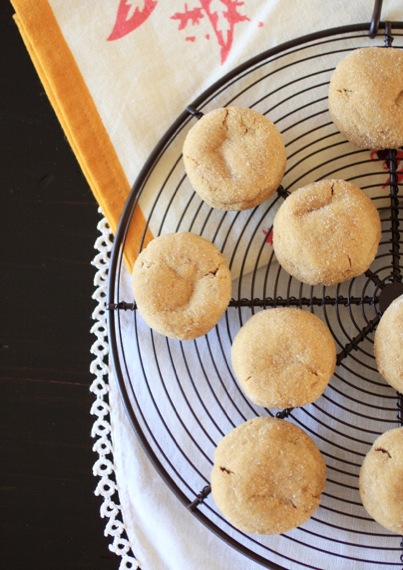
I’ve been baking lots of cookies lately. We’ve recently had two sets of friends welcome new babies and then we hosted a party Saturday as well. And everyone knows you can’t have babies or parties without cookies…I guess. Not to mention, I just really, really like baking cookies.
In addition to taking meals to my friends, I also made my favorite oatmeal cookies as well as these gingersnaps to welcome their new little bundles. My favorite thing to do for new parents is take them bags of frozen, perfectly portioned balls of cookie dough (in addition to some already baked ones) for them to keep in their freezer. Then, all they need to do is pull a couple out and pop them in the oven anytime they want fresh baked cookies!
I am such a good friend.
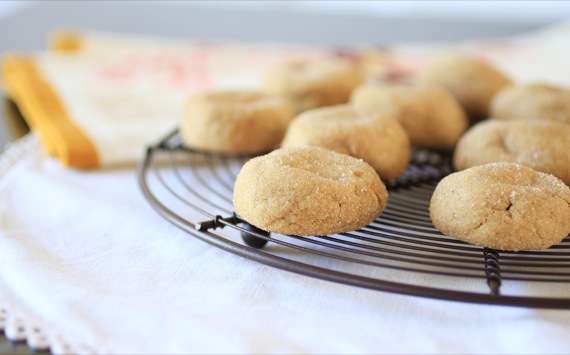
I had seen these cookies recently and knew I just had to make them ASAP. There’s a nip in the air (when I say ‘nip’, I really mean 85 degrees instead of 95), pumpkins are everywhere you look, and Halloween is just around the corner- perfect conditions for soft, gingery cookies! And these are soooo good. Chewy and puffy with a nice kick of spice. In essence, the perfect fall cookie.

Soft and Chewy Gingersnaps
3 cups all-purpose flour
1 teaspoon baking soda
2 teaspoons ground ginger
1 1/4 teaspoons ground cinnamon
1/4 teaspoon ground cloves
1/4 teaspoon nutmeg
1/2 teaspoon salt
3/4 cup (1 1/2 sticks) unsalted butter, softened to room temperature
3/4 cup dark brown sugar
1/3 cup dark molasses
1 egg, at room temperature
2 teaspoons vanilla extract
1/3 cup granulated sugar, for rolling
In a large bowl, mix the flour, baking soda, ginger, cinnamon, cloves, nutmeg, and salt. Set aside. In the bowl of a stand or handheld mixer, beat the butter at medium speed for about a minute. Add the brown sugar and beat until light and fluffy. Add the molasses, egg, and vanilla and continue to beat until combined, scraping down the sides as needed.
With the speed on low, slowly add the dry ingredients. Do not overmix. Cover dough and chill for 4 hours or overnight.**
Line a large baking sheet with parchment paper or a silicone mat. Shape dough into 1-inch balls and roll in sugar. Place balls 2 inches apart on the prepared cookies sheets. Bake for 8-10 minutes at 350 degrees, until the edges are just turning brown – cookies will be puffy and still appear soft in the middle.
Transfer the cookies to a wire rack to cool completely. Store in an airtight container at room temperature for up to 1 week.
Recipe Source: Sally’s Baking Addiction
**Sally (and I) highly recommend chilling the dough for at least 4 hours, or else the cookies will not be as puffy as shown above.



I’m an extremely dramatic person. Those of you who know me or gave birth to me (hi, mom!) know this for a fact. I bring the drama wherever I go. Not necessarily always in a bad way- sometimes I’m just very dramatically funny, or loud, or goofy (drama’s not always a bad thing, you know.). However, sometimes it can be a bad thing; like on days when something goes wrong or something disappointing happens, I totally succumb to the drama and immerse myself in a could of moodiness instead of accepting what happened and simply moving on. I walk around in a fog. Just for the record- that’s not a good thing. It’s one of the characteristics I most dislike in myself. There’s always that little voice in my head saying, “just move on, Amy. There’s still so much to be happy about!”; but it’s so much easier to be dramatic. Slowly but surely, I’m trying to fix this.
Like today, for instance. I had sort of a rough morning, but chose to rise above the drama and just move on. Know what I did? I lit a pumpkin-scented candle, put on some music, and baked these pumpkin mini bundts with my baby girl (she mostly just sat in the floor and played with a whisk). And it really helped!! I pulled them out of the oven and realized I hadn’t felt sorry for myself or dwelt on the bad news at all! Nothing like a little fall baking to pull you out of a slump!

Now, let’s talk about these mini bundts! Aren’t they just adorable?! And so easy- all I did was take the recipe for my pumpkin pound cake (with a couple of tiny tweaks), bake it into mini bundts, and whip up a quick and easy cinnamon glaze! The house smells amazing and my blues are long gone! 🙂 I’ll be honest with you, I actually had to level off the bottoms of these because they rose quite a bit during baking, but that was no biggie- Cassidy loved snacking on the bottoms!


Pumpkin Mini Bundts with Cinnamon Glaze
1 cup granulated sugar
1 cup brown sugar
1 cup canola oil
3 eggs
3 cups all-purpose flour
2 teaspoons baking soda
1 teaspoon ground cinnamon
1 teaspoon ground nutmeg
1/4 teaspoon ground cloves
1/8 teaspoon ground ginger
1/2 teaspoon salt
1 package instant butterscotch pudding mix
1 can (15 ounces) pumpkin puree
In a large bowl, combine sugar and oil until blended. Add eggs, one at a time, beating well after each addition. In a separate bowl, combine flour, baking soda, cinnamon, nutmeg, cloves, ginger, salt, and pudding mix; add to egg mixture alternately with pumpkin, beating well after each addition. Batter will be thick.
Transfer to 2 greased mini bundt pans (if you don’t have 2 pans, just bake one pan at a time). Bake at 350 degrees for about 20 minutes or until toothpick inserted comes out clean. Cool for 10 minutes before inverting onto a wire rack. If cakes rose too much during baking (as mine did), simply level off with a sharp knife and save the bottoms for snacking!). Makes 24 mini bunts.
Glaze:
1 cup confectioners’ sugar
1/4 teaspoon cinnamon
splash milk
Mix all ingredients together until glaze reaches a thick consistency; just make sure it’s still runny enough to drizzle. Drizzle over cakes and serve.
Recipe source: adapted from a Sing For Your Supper recipe; originally adapted from Taste of Home


Thanksgiving is in 6 days!! YAY! And that means my FAVORITE day of the whole year is only 7 days away — Christmas Decorating Day! Forget Black Friday; I’m all about staying home, eating leftovers, and pulling out every single box of Christmas decorations while listening to my favorite Christmas CDs (hello, Amy Grant, Bing Crosby, and Harry Connick, Jr.!). It’s a happy day, I tell you!
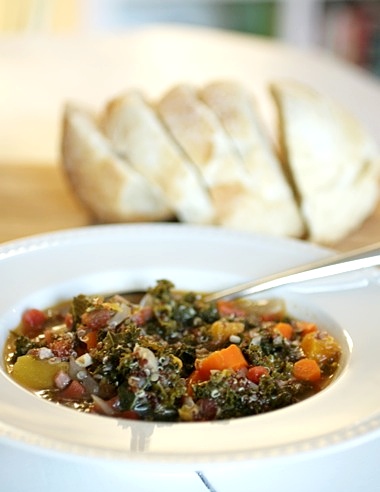
But that really has nothing to do with this recipe. I just felt like sharing. 🙂 I recently bought a giant bag of quinoa from Trader Joe’s (LOVE that we have one of those now!) and have been using it like crazy lately. I’ve never used it in a soup before, but I’ve always loved the idea of using quinoa in place of rice or pasta in a soup. I decided to whip something up using the huge amount of kale in my fridge and some frozen chopped butternut squash leftover from baby food-making. 🙂 I loooove the combination of hearty, flavorful kale with the creamy butternut squash. And the quinoa adds a great nuttiness. There are so many textures going on- it makes for one great soup!
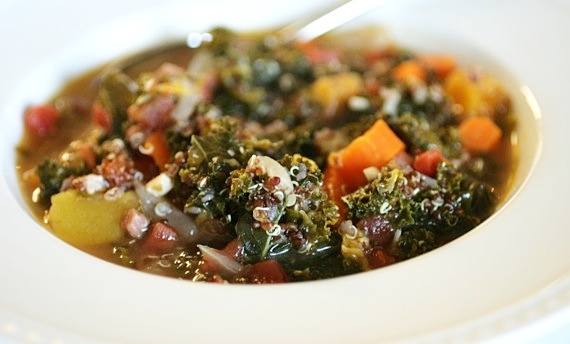
Kale, Butternut Squash, and Quinoa Soup
2 cups kale, rinsed and chopped
1 cup quinoa, thoroughly rinsed
1 cup cubed butternut squash
1/3 cup pancetta, chopped
1 medium onion, chopped
2 cloves garlic, minced
5 or 6 carrots, chopped
6 cups chicken stock or broth
salt and pepper
In a large stock pot over medium heat, cook the pancetta for 2-3 minutes; add the onion and cook until translucent. Stir in the garlic and cook for 1 minute. Add carrots, kale, butternut squash, and salt and pepper and bring to a boil; reduce heat to medium-low and cook for about 15 minutes, until the carrots are tender. Add the quinoa. Cook for about 20 minutes more, until quinoa is translucent. Serves 4.
Recipe source: Sing For Your Supper original
I don’t post political rants. I don’t even post my political opinions. This is a food blog, not a place for me to try to sway others toward my ways of thinking. That’s why I had to chuckle while reading my twitter feed during the days leading up to and during the election.
“Oh, I’m a big, important food blogger with my own cookbook (who doesn’t have one these days?….ok, me…. womp, wah), so naturally, people will change their votes based on my snarky, foul-mouthed tweets…”. Really? Really??
I just couldn’t help but laugh. In fact, that’s all you can do when people you normally look up to and respect are posting things that are mean, condescending, and downright nasty about others. So food bloggers, let’s stick to what we know – food. Speaking of food- Thanksgiving is a mere 2 weeks away! Do you know how exciting that is?! Get those cans of pumpkin ready, because the best time of the year (next to Christmastime, of course…duh) is UPON US! Yippee!!!
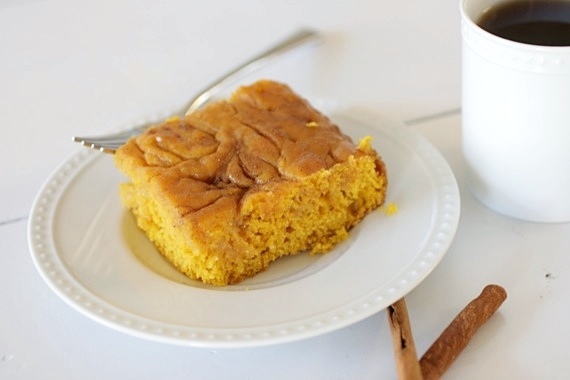
This cake rocks. Moist, pumpkiny, cinnamony, cake drizzled with sweet, sticky sweetened condensed milk. I’m in love!
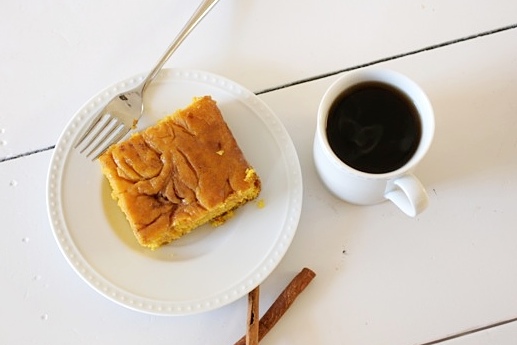
Sticky Pumpkin Cinnamon Cake
1 boxed yellow cake mix
1 can pumpkin
1/3 cup vegetable oil
2 eggs
1 teaspoon cinnamon
2 tablespoons unsalted butter, melted
1 14-ounce can sweetened condensed milk
1/2 teaspoon cinnamon
Preheat the oven to 350 degrees. In a large bowl, combine the cake mix, pumpkin, oil, eggs, and cinnamon; beat until smooth. Spread into a greased 9×13 pan; drizzle the melted butter over the top of the batter (I used a knife to swirl the butter into the batter so it would be a little more evenly drizzled over the cake, but you don’t have to do this.) Bake for 25-30 minutes, until a toothpick inserted into the center comes out clean.
Meanwhile, mix the sweetened condensed milk and cinnamon.
While the cake is still warm, poke holes all over the top using a toothpick or fork. Pour the sweetened condensed milk over the top of the cake and spread evenly. Let sit at room temperature until all the glaze has soaked into the cake. Serve immediately. Serves 12.
Recipe source: Sing For Your Supper original
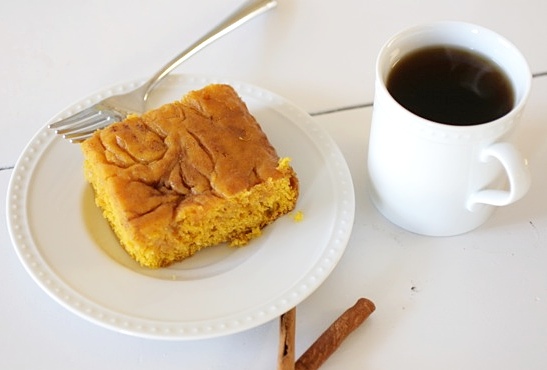

We’re so excited about Cassidy’s first Halloween! We’re taking her trick-or-treating dressed as the world’s cutest pumpkin. 😉 The poor baby had to get 2 shots at her 9 month checkup today, so she deserves lots of goodies (even though she can’t eat candy…). I hope everyone has a fun, fun, FUN Halloween! Be safe!
Love,
Joel, Amy, Cassidy, and Izzy

One bright, sunny, fall day, Cookies and Cream Popcorn met Halloween Popcorn.
Cookies and Cream Popcorn loved Halloween Popcorn‘s bright, colorful sprinkles and Halloween Popcorn couldn’t resist Cookies and Cream Popcorn‘s bits of crunchy, creamy Oreos. They instantly fell in love and that’s how Halloween Oreo Popcorn came to be. And they lived happily ever after….in my tummy. 😉
Since Halloween is only 5 days away (wahoo!!!), I knew I just had to post something to get us all in the spirit (right, like I need any help…). This Halloween Oreo Popcorn is the perfect treat for snacking on the couch while watching The Nightmare Before Christmas with your little pumpkins! 🙂

Halloween Oreo Popcorn
2 bags microwave popcorn, popped (this time, I used buttered popcorn and it turned out great!)
10-15 Oreos, chopped
1 bag candy corn
1 16-ounce package white chocolate bark or candy coating**
Halloween sprinkles
wax paper
Place the popped popcorn, Oreos, and candy corn in a very large bowl (you need plenty of room to stir the popcorn). Melt the white chocolate bark in the microwave in 30 second increments, stirring after each time, until melted. Drizzle over the popcorn mixture and stir to coat each piece of popcorn.
Pour the mixture over wax paper and spread into an even layer. Sprinkle with Halloween sprinkles and allow to cool for at least 15-30 minutes. Break into pieces. Serves 6-8.
Recipe source: Sing For Your Supper
**Almond bark or candy coating can be found on the baking aisle next to the chocolate chips. You can substitute white chocolate chips if preferred.

…….HAPPY HALLOWEEEEEEEEEN!! 🙂
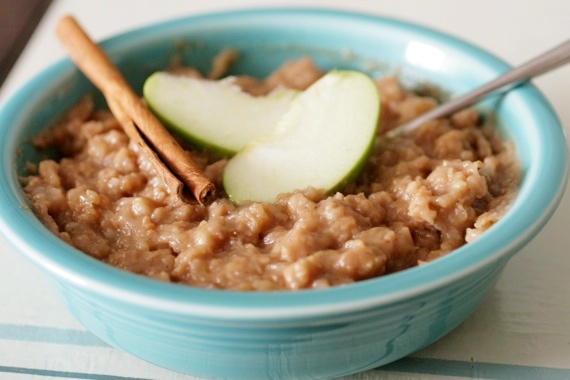
My house is an absolute wreck. A disaster zone. A nightmare. We’re still in the big middle of renovations (we should be long-since finished by now, but you know how these things go…), so all of our furniture is piled in the middle of rooms, half of our carpet is rolled up and disgusting looking, our stairs don’t even have carpet on them, so all that’s there is ugly, torn up padding and tack strips, and up until last night there was a layer of dust 1 inch thick covering every surface of my kitchen and dining room. And on top of all that, we just had a baby shower recently, so there’s baby stuff all over the place and nowhere to put it! It’s. A. Mess. Luckily, (hopefully…) everything will be finished by the end of this week (please, Lord!). So, with all this madness, stress and clutter everywhere, you can imagine I haven’t done much cooking. And by much, I mean practically none. That’s where the beauty of this recipe comes into play. You throw your oats, water, spices and fruit in the slow cooker and let it do its’ thing overnight. In the morning, you’ve got hearty, delicious oatmeal waiting for you. No standing over the stove stirring involved. It’s a beautiful thing. Not to mention really, really delicious. Give this a try this week- your family will love it!
Overnight Apple Cinnamon Oatmeal
1 cup steel cut oats**
3 1/2 cups water
1 medium-large apple, peeled and chopped (I like Honeycrisp or Pink Lady)
1 1/2 teaspoons ground cinnamon
1/4 teaspoon nutmeg
1/4 cup brown sugar
Spray a slow cooker with non-stick spray and place the oats, water, apple, cinnamon, nutmeg and brown sugar inside. Stir to combine. Cover, set to low, and allow to cook overnight (about 8 hours). In the morning, stir the oatmeal one last time before serving. Serve with milk and additional brown sugar if desired. Serves 4.
**you don’t have to use steel cut oats, but it’s highly recommended -the texture will be mushier with regular oats since they cook for so long.
Recipe source: adapted from allrecipes.com

Happy November!!! I hope everybody had a fun, safe Halloween and lots of yummy snacks and candy were eaten! I’d be lying if I said I didn’t have a leftover bag of Reese’s minis sitting on my nightstand just waiting for me. 😉
But now the fun of Halloween is over and it’s time to start thinking about Thanksgiving! Yippee! In fact, it was a Thanksgiving side dish that inspired me for this soup- mashed sweet potatoes with brown sugar, butter, a splash of orange juice and a sprinkling of pecans. I had four very large sweet potatoes I wanted to use and the idea of soup just popped into my head. I made it just like I make my mashed sweet potatoes at Thanksgiving, except I pureed the whole thing until I had a silky smooth, creamy soup, just perfect for a chilly fall evening. This came together so quickly and easily, and it made a pretty big pot of soup, so we had delicious leftovers to look forward to! I’d even recommend this for a Thanksgiving soup course; it really is a breeze to throw together and it’s easily customizable – you can add any number of seasonings or toppings to suit your tastes!

Sweet Potato Soup
4 large sweet potatoes, peeled and roughly chopped into chunks
2 cups chicken broth
2 cups water
salt
pepper
2 tablespoons butter
1/3-1/2 cup brown sugar (depending on how sweet you want it)
splash orange juice
1/8 teaspoon cayenne pepper
In a large pot, bring the sweet potatoes, chicken broth and water to a boil; cook for approximately 20-30 minutes, until the sweet potatoes are very soft. Using an immersion blender (or a regular blender in 2 or 3 batches), puree the soup until very smooth and no lumps remain. Add the salt, pepper, butter, brown sugar, orange juice and cayenne pepper. Check for seasoning. Garnish with chopped toasted pecans, if desired. Serves 4-6.
Recipe source: Sing For Your Supper original
