The weather is (slowly) changing from boiling hot to cool and crisp, every Saturday from here until Thanksgiving will be taken up with us either road-tripping to College Station, Tx or glued to the T.V., there’s an obscenely large, menacing maroon and white flag flying proudly in our front yard, and my husband has turned from being a mature, respectable man into a squealing 8 year-old child. This can only mean one thing: it’s Aggie football season, indeed. Yes, friends, my husband and I are Aggies. Big ones. My hubby went to school there and even though I didn’t (there’s no music program to speak of, hardly), I come from a family of proud Aggies. Therefore, every September, we get serious about Fightin’ Texas Aggie Football.

This is our “Aggie shelf” in the living room- these were my granddad’s belongings from his days at A&M – yearbooks, (very old) stuffed animals and lots, lots more. We’re so proud to display his things in our home; Joel, especially.


Football food is SO good (which, by the way, if you love it as much as I do, check out my “Football Food” tag! Lots of game-day goodies in there!). There’s nothing better than having some friends over to watch the game and eat good food – like this pie! It’s an old family favorite that gets made a lot around football season. I love the layer of spicy beef and cheddar cheese- it has SO much flavor! The good news is, this keeps really well in the fridge- just pop the leftovers back in the oven for 10 or 15 minutes and it’s just as moist and flavorful as it was the first day- maybe even better!

Game-Day Mexican Cornbread Skillet Pie
1 1/2 cups cornmeal
1 teaspoon salt
2/3 cup oil
1 cup sour cream
3 teaspoons baking powder
1 can cream style corn
2 eggs, slightly beaten
1 small can green chiles
2 cloves garlic, minced
1 onion, chopped
1 red bell pepper, chopped
2 roma tomatoes, seeded and chopped
1 pound lean ground beef
1 teaspoon cumin
1 teaspoon chili powder
1 teaspoon black pepper
1 teaspoon salt
dash cayenne pepper
1 cup shredded cheddar cheese
Preheat the oven to 350 degrees. Mix the first 8 ingredients in a bowl and set aside. In a medium pan, saute the onions, garlic and peppers over medium-high heat until soft. Add in the ground beef and cook through. Drain off grease and stir in the tomatoes, cumin, chili powder, black pepper, salt and cayenne pepper. Remove from heat.
Grease a cast iron skillet (or any oven-safe skillet) and sprinkle the bottom with a little cornmeal. Spread half of the cornbread mixture, followed by the beef mixture. Top with the cheddar cheese, then spread the remaining cornbread mixture over the top. Bake for 45-50 minutes, or until golden brown. Enjoy in front of the T.V. while cheering for your favorite football team! Serves 4.
Recipe source: Sing For Your Supper original (though technically I guess I can’t take credit since my mom has been making it for years!)


Gig ‘Em and God Bless! 😉


For August’s ‘You Want Pies With That?‘ challenge, Branny decided we should create a pie that represents our personality. How fun is that?! As soon as I saw her choice, I immediately started thinking about how I could come up with an A.D.D. pie. However, with us getting ready to go on a trip, and things being so busy and with me being so, well….A.D.D., it just didn’t work out for me to devote the time I needed for my A.D.D. pie (bummer- that would’ve been perfect). So instead, I asked my hubby what he thought was the best way to describe my personality; “sunny and bright”, he said with a smile (isn’t he sweet?). Although I’m not sure about “sunny and bright”….more like, “sunny and bright with a likely chance of severe thunderstorms”; I went to work on a pie that fit the bill. Somehow I ended up with a Strawberry-Lemonade Pie, then I took it a step further and came up with a Strawberry-Lemonade Cheesecake Pie. Muuuuch better (and really, really delicious!)! So anyway, this is the pie that best fits my personality (according to my husband….who is apparently blinded by love…).

Sunny and Bright Strawberry-Lemonade Cheesecake Pie with Chambord Whipped Cream
For the pie:
1 graham cracker crust (your favorite recipe or store-bought)
1 8-oz. block of cream cheese, at room temperature
10-15 strawberries, hulled and sliced
juice of 2 large lemons
1/3 cup sugar
1 teaspoon vanilla extract
1/4 cup sour cream
1/2 cup heavy cream
splash orange liqueur, such as Triple Sec or Grand Marnier
For the Chambord Whipped cream:
1 cup heavy cream
1/3 cup sugar
1 tablespoon Chambord (Raspberry liqueur)
1 teaspoon vanilla extract
In the bowl of an electric mixer, add the cream cheese, sugar and sour cream and beat at medium speed for 2 minutes, until the cream cheese is smooth. Add in the lemon juice, vanilla extract and orange liqueur. Mix just until combined. Transfer to another bowl and use the mixer bowl to whip the cream. Beat the 1/2 cup heavy cream at medium speed until stiff peaks form. Gently fold the whipped cream into the cheesecake mixture. Refrigerate until needed.
To make the Chambord Whipped Cream Topping:
Beat the 1 cup of heavy cream, 1/3 cup sugar, Chambord and vanilla extract on medium speed until stiff peaks form. Refrigerate until needed.
To assemble:
In the prepared graham cracker crust, place half of the sliced strawberries in a single layer. Top with the cheesecake mixture; add another layer of sliced strawberries, then top with the Chambord whipped cream. Garnish with additional strawberries. Chill for at least 2 hours before serving. The pie is best served on the day its made.
*The liqueur is optional- it just adds a little extra flavor, but you can certainly leave it out if you want!

I absolutely, positively adore peaches. I can’t get enough of them. I guess it stems from my love of peach cobbler, or maybe it’s just because of their sweet, juicy, slightly tart nature. The best fruit, in my opinion. So naturally, when Erin of Milk and Honey, chose “Summer Fruit” for this month’s ‘You Want Pies With That?’ theme, I knew immediately that I would make a peach pie. No contest. In fact, I’ve been waiting a LONG time to make this pie! I saw this recipe on Taste of Home a loooong time ago, and have been waiting until peaches were in season to make it! Finally, the time came- thank my lucky stars! This is one FABULOUS pie. And I’m not just saying that- WOWEE! One bite and I knew I had a real winner of a recipe on my hands. The filling is thick and rich, but not at all too sweet. The topping is crisp, crumbly and slightly scented with cinnamon- it’s what gives a lot of the sweetness to the pie. YUM. I’ll most definitely be making this over, and over, and over again! I’m absolutely thrilled to submit this to July’s ‘YWPWT’ challenge!

Peach-Blueberry Sour Cream Pie
-adapted from tasteofhome.com
Pastry for single-crust pie (9 inches)
3 cups sliced peeled peaches
1 cup fresh blueberries
2 tablespoons peach preserves or jam (I used plum)
1 cup sugar
1 cup (8 ounces) sour cream
3 egg yolks
1/4 cup all-purpose flour
1 teaspoon vanilla extract
TOPPING:
1/2 cup all-purpose flour
1/2 cup packed brown sugar
1/4 cup sugar
3 tablespoons chopped pecans
1/2 teaspoon ground cinnamon
1/4 cup cold butter, cubed
Line a 9-in. pie plate with pastry; trim and flute edges. In a large bowl, combine peaches, blueberries and jam. Transfer to pastry. In a small bowl, whisk the sugar, sour cream, egg yolks, flour and vanilla. Pour over peaches.
Bake at 425° for 30 minutes (keep an eye on it because it will brown quickly around the edges- you may need to cover them with foil if they’re getting too brown). Meanwhile, in a small bowl, combine the flour, sugars, pecans and cinnamon. Cut in butter until crumbly; sprinkle over pie.
Bake for 15-20 minutes or until a knife inserted in the center comes out clean and topping is golden brown. Cover edges with foil during the last 15 minutes to prevent over-browning if necessary. Cool completely on a wire rack for 3 hours before serving. Store in the refrigerator. Yield: 8 servings.


This month over at ‘You Want Pies With That?‘, the theme is “Summery Drinks”, chosen by Suz of You Can’t Eat What? and Sara of Cupcake Muffin. We were supposed to create a pie or a tart inspired by our favorite drink to sip by the pool during the summertime. My kind of theme!! It didn’t take long for me to figure out what kind of drink I’d be inspired by….I *love* piña coladas!! Creamy, smooth and “coconut-y” with a hint of dark rum. Bliss. I knew immediately that I’d use Dorie Greenspan’s recipe for Toasted Coconut Cream Tart as a base- that filling is insanely delicious!!! I sort of played around for awhile, then eventually came up with a delicious piña colada tart; the only thing I’d change for next time is topping it with whipped cream instead of meringue, as well as using canned crushed pineapple instead of fresh, since it’s a little sweeter. My custard was a little runny (I think I probably put in too much rum- oops!) but it still tasted amazing!
Piña Colada Tart
-adapted from Dorie Greenspan
2 cups whole milk
1/2 cup sugar
6 large egg yolks
1/3 cup cornstarch
pinch of salt
2 tablespoons dark rum
1/2 teaspoon vanilla extract
1 tablespoon pineapple juice
3 1/2 tablespoons cold unsalted butter, cut into small pieces
1 cup shredded sweetened coconut
2 cups chopped pineapple (fresh or canned- I used fresh, but next time I’ll probably use canned because it’s a little sweeter)
1 9-inch sweet tart shell, baked and cooled (recipe below)
Bring milk to a boil. In a large saucepan, whisk together sugar, yolks, cornstarch and salt until well blended. Whisk in 1/4 cup of hot milk to temper the yolks, then whisk in the rest of the milk. Continue whisking over medium heat and bring to a boil. Whisk an additional 1 or 2 minutes then remove from heat. Whisk in rum, pineapple juice and vanilla and let sit for 5 minutes. Then whisk in the butter, stirring until custard is smooth. Stir in the coconut. Transfer to a container, cover the surface of the custard with plastic wrap and refrigerate until cold.
Sweet Tart Dough
(makes one 9-inch crust)
1 1/2 cups all-purpose flour
1/2 cup confectioners’ sugar
1/4 teaspoon salt
1 stick plus 1 tablespoon very cold (or frozen) unsalted butter, cut into small pieces
1 large egg yolk
To make the dough: Put the flour, confectioners’ sugar and salt in the workbowl of a food processor and pulse a couple of times to combine. Scatter the pieces of butter over the dry ingredients and pulse until the butter is cut in coarsely – you’ll have pieces the size of oatmeal flakes and pea-size pieces and that’s just fine. Stir the egg, just to break it up, and add it a little at a time, pulsing after each addition. When the egg is in, process in long pulses – about 10 seconds each – until the dough, which will look granular soon after the egg is added, forms clumps and curds. Just before your reaches this clumpy stage, the sound of the machine working the dough will change – heads up. Turn the dough out onto a work surface.
Very lightly and sparingly – make that very, very lightly and sparingly – knead the dough just to incorporate any dry ingredients that might have escaped mixing.
To make a press-in crust: Butter the tart pan and press the dough evenly along the bottom and up the sides of the pan. Don’t be stingy – you want a crust with a little heft because you want to be able to both taste and feel it. Also, don’t be too heavy-handed – you want to press the crust in so that the pieces cling to one another and knit together when baked, but you don’t want to press so hard that the crust loses its crumbly shortbreadish texture. Freeze the crust for at least 30 minutes, preferably longer, before baking.
To bake the crust: Center a rack in the oven and preheat the oven to 375 degrees F. Butter the shiny side of a piece of aluminum foil and fit the foil tightly against the crust. Bake the crust 25 minutes, then carefully remove the foil. If the crust has puffed, press it down gently with the back of a spoon. Bake for another 3 to 5 minutes, then transfer the crust to a cooling rack; keep it in its pan.
To assemble: Spread the chopped pineapple on the cooled crust and top with custard. Top with meringue or whipped cream. Chill until ready to serve.

Woo Hoo!! ‘You Want Pies With That?’ is officially up and running again! And Jessica and I got to choose this month’s theme- “Spring”. Spring is fresh. New. What better theme to have in mind while making pies?! For some reason Banana Cream Pie instantly came to mind while I was pondering what pie I would make. It always makes me think of Spring for some reason. No idea why. But instead of the traditional pie form, I chose to kick it up a notch or two by making it into a tart and adding in a little dark rum to the pastry cream (yum!).

This is Dorie Greenspan’s recipe- and there are none better, in my opinion. The sour cream in the whipped cream topping sets it apart from any other would-be “awesome” banana cream pies. And I must say, the added rum in the pastry cream really sends it home- I was more than pleased with my tart! Fresh, fruity, creamy, slightly tangy – a perfect Spring pie, in my opinion! 🙂
Banana Cream Tart
-Dorie Greenspan
For the Custard
2 cups whole milk
6 large egg yolks
1/2 cup (packed) light brown sugar, pressed through a sieve
1/3 cup cornstarch, sifted
1/2 teaspoon ground cinnamon
pinch of salt
1 teaspoon pure vanilla extract
1 teaspoon dark rum
3 tablespoons cold, unsalted butter, cut into bits
3 ripe but firm bananas
1 9-inch single tart crust
For the Topping
1 cup cold heavy cream
2 tablespoons confectioners’ sugar, sifted
1 teaspoon pure vanilla extract (I used vanilla bean paste- that’s why you see the little specks in the topping)
2 tablespoons sour cream
To Make the Custard: bring milk to a boil. Meanwhile, in a large heavy-bottomed saucepan, whisk the yolks together with the brown sugar, cornstarch, cinnamon, and salt until well blended and thick. Whisking without stopping, drizzle in about 1/4 of the hot milk- this will temper, or warm the yolks so they won’t curdle- then, still whisking, add the remainder of the milk in a steady stream. Put the pan over medium heat and, whisking constantly (make sure to get into the edges of the pan), bring the mixture to a boil. Boil, still whisking, for 1 to 2 minutes before removing from heat.
Whisk in the vanilla extract and rum. Let stand for 5 minutes, then whisk in the bits of butter, stirring until they are fully incorporated and the custard is smooth and silky. You can either press a piece of plastic wrap against the surface of the custard to create an airtight seal and refrigerate the custard until cold or, if you want to cool the custard quickly put the bowl into a larger bowl filled with ice cubes and cold water and stir occasionally until the custard is thoroughly chilled, about 20 minutes. (If it’s more convenient, you can refrigerate the custard, tightly covered, for up to 3 days.)
When you are ready to assemble the tart, peel the bananas and cut them on a shallow diagonal into 1/4-inch-thick slices.
Whisk the cold custard vigorously to loosen it, and spread about one quarter of it over the bottom of the crust- it will be a thin layer. Top with half of the banana slices. Repeat, adding a thin layer of pastry cream and the remaining bananas, then smooth the rest of the pastry cream over the last layer of bananas.
To Make the Topping: Working with a stand mixer fitted with the whisk attachment or with a hand mixer in a large bowl, beat the cream until it just starts to thicken. Beat in the confectioners’ sugar and vanilla and continue to beat until the cream holds firm peaks. Switch to a rubber spatula and fold in the sour cream.
To Finish: Spoon the whipped cream over the filling and spread it evenly to the edges of the custard. Serve, or refrigerate until needed.
Sweet Tart Dough
(makes one 9-inch crust)
1 1/2 cups all-purpose flour
1/2 cup confectioners’ sugar
1/4 teaspoon salt
1 stick plus 1 tablespoon very cold (or frozen) unsalted butter, cut into small pieces
1 large egg yolk
To make the dough: Put the flour, confectioners’ sugar and salt in the workbowl of a food processor and pulse a couple of times to combine. Scatter the pieces of butter over the dry ingredients and pulse until the butter is cut in coarsely – you’ll have pieces the size of oatmeal flakes and pea-size pieces and that’s just fine. Stir the egg, just to break it up, and add it a little at a time, pulsing after each addition. When the egg is in, process in long pulses – about 10 seconds each – until the dough, which will look granular soon after the egg is added, forms clumps and curds. Just before your reaches this clumpy stage, the sound of the machine working the dough will change – heads up. Turn the dough out onto a work surface.
Very lightly and sparingly, knead the dough just to incorporate any dry ingredients that might have escaped mixing.
Butter the tart pan and press the dough evenly along the bottom and up the sides of the pan. Don’t be stingy – you want a crust with a little heft because you want to be able to both taste and feel it. Also, don’t be too heavy-handed – you want to press the crust in so that the pieces cling to one another and knit together when baked, but you don’t want to press so hard that the crust loses its crumbly shortbreadish texture. Freeze the crust for at least 30 minutes, preferably longer, before baking.
To bake the crust: Center a rack in the oven and preheat the oven to 375 degrees F. Butter the shiny side of a piece of aluminum foil and fit the foil tightly against the crust. Bake the crust 25 minutes, then carefully remove the foil. If the crust has puffed, press it down gently with the back of a spoon. Bake for another 3 to 5 minutes, then transfer the crust to a cooling rack; keep it in its pan.

Big news, people, BIG NEWS! My excellent friend Jessica and I have been secretly working on a big project these past few weeks, and now it’s finally time to let the cat out of the bag! You may remember the super-awesome Pie-making group, ‘You Want Pies With That?’ – for the past few months, it’s been abandoned; shut down. Well, *trumpet blast* Jessica and I are re-opening it! YAAAAY! It’s got a whole new look, new logo, new everything! We’re SO very excited to get things up and running again. The new theme should be posted (hopefully) by next week and we’ll be back in business! The group is open to anyone with a blog and a love of pie. So, be sure to add the site to your google reader or become a fan on our Facebook Fan Page…whatever it takes to get connected and be a part of our fun-loving group!
Click here to see the brand spankin’ new site! Tell all your friends and join in the pie-making action!

It’s that time again! Here is my monthly “You Want Pies With That?” blog entry! This month’s theme is “Nuts About Pie”, chosen by Jaque of Daisy Lane Cakes. We could make any kind of “nutty” pie we wanted – at first I thought about doing a really tasty pecan pie or some other kind of pie chock full of nuts. However, my hubby doesn’t like nuts at all, especially in pies, so I had to get creative. Late one night as I was trying to fall asleep, this idea popped into my head and I loved it! I present to you, the Elvis FlufferNutter Pie.

For those of you who are wondering what the heck fluffernutter is, I’ll explain. Take the fluffernutter sandwich, for instance – two slices of bread: on one side, marshmallow fluff, on the other side, peanut butter; put the two slices together and voila! Fluffernutter! I thought a pie made out of peanut butter and marshmallow fluff would be great, but then I decided adding bananas would make it extra special! Plus, I could “Elvis-ize” it that way (since Elvis was quite fond of his peanut butter and banana sandwiches!)! Perfect!
I started with a plain ‘ol pie crust (blind baked), topped it with a layer of sliced bananas, then a layer of peanut butter mousse, and topped it off with marshmallow fluff and more bananas. Not your normal, run-of-the-mill pie, but hey, it was still darn tasty! I was actually surprised at how good this tasted. My good friend Courtney is staying with us for a few days, and she helped me make the pie and served as my honorable taste-tester. We both really enjoyed our slice!

Elvis FlufferNutter Pie
1 9-inch pie crust, blind-baked
3 bananas, thinly sliced
3/4 cup smooth peanut butter (not natural)
8 ounces cream cheese, softened
1/4 teaspoon cinnamon
1/2 pint heavy cream
1/4 cup powdered sugar
2 tablespoons milk
1 jar marshmallow fluff
In a stand mixer fitted with a whisk, beat the heavy cream and powdered sugar until firm peaks form. Transfer to another bowl and refrigerate until needed. In the same mixer bowl with the paddle attachment, beat the cream cheese until light and fluffy; add the peanut butter, cinnamon and milk and continue to beat until mixed. Gently fold in the whipped cream.
Place the sliced bananas in a single layer on the baked (and cooled) pie crust, then top with the peanut butter mousse. Spread a layer of marshmallow fluff and top with additional bananas. Refrigerate until ready to serve.
*Peanut butter mousse adapted from Dorie Greenspan

This was an incredibly fun pie to make…and eat! We really enjoyed it! Head on over to the You Want Pies With That? page in the next few days and check out everybody’s fantastic, nutty pies!
If you’ve happened to look over to the right on my side bar, you’ll have noticed there’s a new badge – a cute little “You Want Pies With That?” badge! I’m so excited to be a part of a new online baking group! Very similar to Tuesdays with Dorie, except this is once a month, and it’s all about pie! I love pie. I mean really love pie. Did you ever see that movie Waitress, with Kerri Russell? Well, that’s what this group is based off of – Kerri Russell’s character makes up all kinds of amazing pies all the time, and so that’s what we do, too! Once a month, somebody picks a theme – like, this month’s theme is “Taste of Summer” – and then we all create our own ingenious pie based on that! How fun!! Here’s the site where you can go and look at all the amazing pies everyone has created.
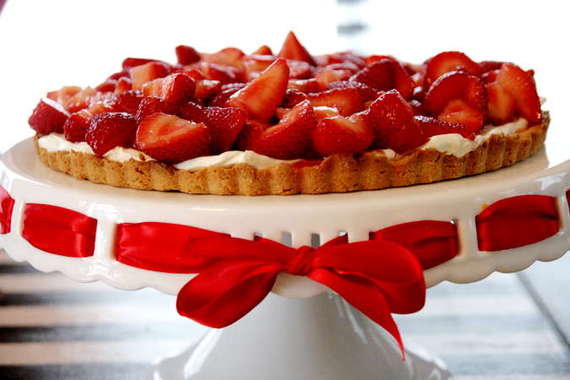
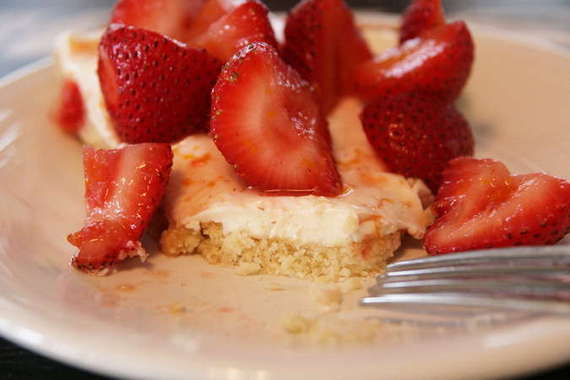
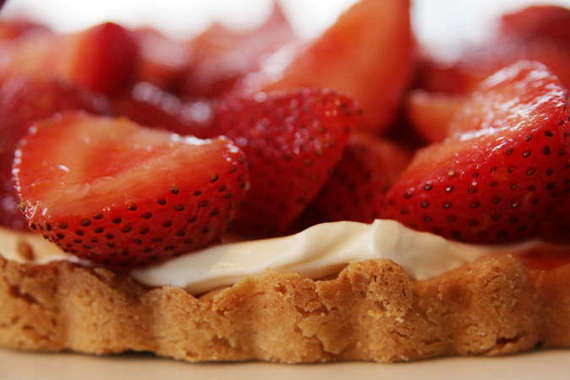
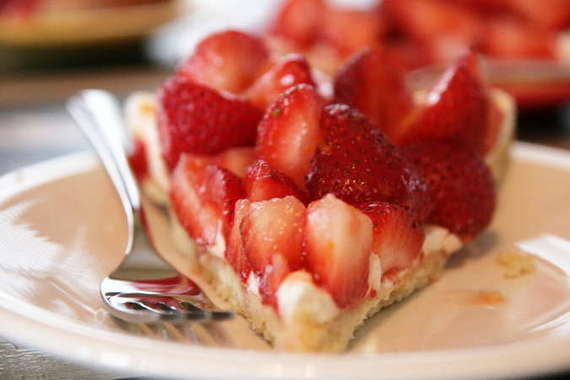
And here’s my “pie”. “Boozy Summer Strawberry Tart”. This was actually inspired by my hubby’s Aunt Judy – she suggested I toss strawberries with a little Amaretto Liqueur (YUM!); but I took it a little further and used a little splash of Grand Marnier, some orange zest and a squeeze of fresh orange juice; spread a cream cheese mixture over Dorie Greenspan’s Sweet Tart Crust, and topped it all off with the strawberries. I was a little worried since I was completely flying by the seat of my pants, but this ended up being one fantastic tart!
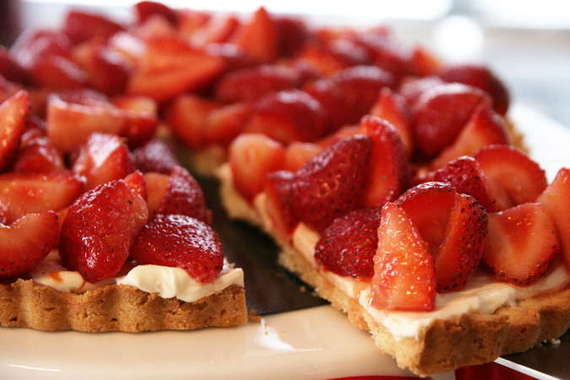
My good friend and fellow opera singer Amanda was visiting that day, so I decided to use her as my guinea pig. She absolutely loved the tart – she said it reminded her of something she ate once in Europe in a professional pastry shop (Yippee!). She thought it was the perfect summer dessert. Hubby and I both loved it too – so light and creamy and fresh. The Grand Marnier really gave the strawberries a fantastic flavor. This is definitely going to be a go-to dessert from now on! I’m so proud – my first ever, entirely made up dessert was a success! I am SO excited to be a part of this fun little group and can’t WAIT to see what fun kinds of pies lie ahead!
Boozy Summer Strawberry Tart
For the berries and cream cheese mixture:
2 regular sized containers fresh strawberries
1-2 tablespoons Grand Marnier Liqueur
1 8-oz package cream cheese, at room temperature
1 heaping tablespoon sour cream
1 teaspoon vanilla extract
1 tablespoon plus 1/2 tablespoon sugar (one tablespoon for the berries, and 1/2 tablespoon for the cream cheese mixture)
zest of half an orange
squeeze of fresh orange juice
Hull and cut the strawberries in half, length-wise and place in a large bowl with Grand Marnier, orange zest, juice and 1 tablespoon of the sugar. Toss to coat all the berries, then cover and place in the refrigerator for at least 1 hour (I left mine in for about 3 hours).
To make the cream cheese mixture, place the softened cream cheese in the bowl of a stand mixer (you can do all this with a hand mixer) and beat at medium speed until the cream cheese is smooth. Add in the sour cream, vanilla and sugar and continue to beat on medium-low speed until everything is mixed in and smooth. Refrigerate until needed.
For the tart crust:
1 1/2 cups all-purpose flour
1/2 cup confectioner’s sugar (powdered sugar)
1/4 tsp. salt
1 stick plus 1 tablespoon (9 tablespoons) very cold (or frozen) unsalted butter, cut into small pieces
1 large egg yolk
Put the flour, confectioners’ sugar and salt in a food processor and pulse a couple of times to combine. Scatter the pieces of butter over the dry ingredients and pulse until the butter is coarsely cut in–you should have some pieces the size of oatmeal flakes and some the size of peas. Stir the yolk, just to break it up, and add it a little at a time, pulsing after each addition. When the egg is in, process in long pulses–about 10 seconds each–until the dough, whisk will look granular soon after the egg is added, forms clumps and curds.
Turn the dough out onto a work surface and , very lightly and sparingly, knead the dough just to incorporate any dry ingredients that might have escaped mixing. Butter a 9-inch fluted tart pan with a removable bottom. Press the dough evenly over the bottom and up the sides of the pan, using all but one little piece of dough, which you should save in the refrigerator to patch any cracks after the crust is baked. Don’t be too heavy-handed–press the crust in so that the edges of the pieces cling to one another, but not so hard that the crust loses its crumbly texture. Freeze the crust for at least 30 minutes, preferably longer, before baking. Center a rack in the oven and preheat the oven to 375 degrees F.
Butter the shiny side of a piece of aluminum foil and fit the foil, buttered side down, tightly against the crust. (Since you froze the crust, you can bake it without weights.) Put the tart pan on a baking sheet to bake the crust for 25 minutes. Carefully remove the foil. If the crust has puffed, press it down gently with the back of a spoon. For a partially baked crust, patch the crust if necessary, then transfer the crust to a coking rack (keep it in is pan). To fully bake the crust: Bake for another 8 minutes or so, or until it is firm and golden brown. (Keep a close eye on the crust’s progress–it can go from golden to way too dark in a flash). Transfer the tart pan to a rack and cool the crust to room temperature before filling.
To Assemble:
Spread the cream cheese mixture evenly on the tart crust. Add the strawberries on top. Serve immediately and enjoy!