Who’s ready for Halloween??! Every single year, I’m always tempted to say Halloween is my favorite holiday, but Christmas always wins out. However, Halloween comes in at a VERY close 2nd! I absolutely love decorating the house (most importantly, dragging out all of my ‘Nightmare Before Christmas’ paraphernalia), but this year was even more fun than usual, because Cassidy helped me this time around. She had so much fun dragging pumpkins and other goodies out of the big boxes and saying, “cuuuuuute!” every time I’d hang something up. We had a blast together!
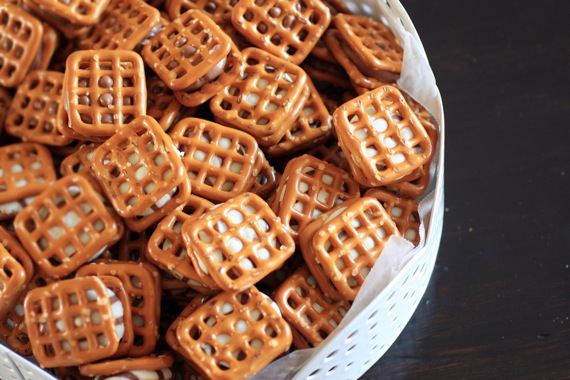
We’ve all had so much fun watching our favorite Halloween movies and eating snacks together- this seriously is just the greatest holiday. Speaking of snacks- here’s a super duper quick and easy one (and DARN addictive, I might add!). No party or gathering (or movie-watching night!) is complete without these little guys. All you need is pretzels and Hershey’s Hugs- that’s it! So little effort for so much yumminess! Plus, the kids could probably help with this one; I’m sure Cassidy will be a big help the next time I make these. 😉
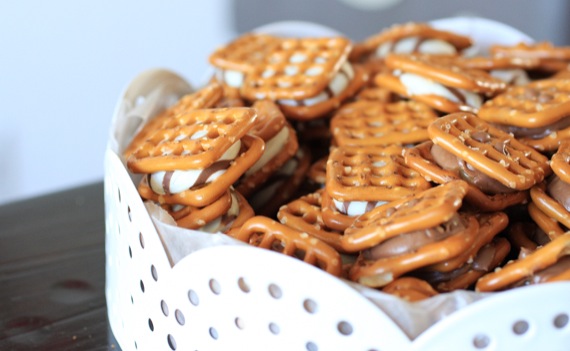
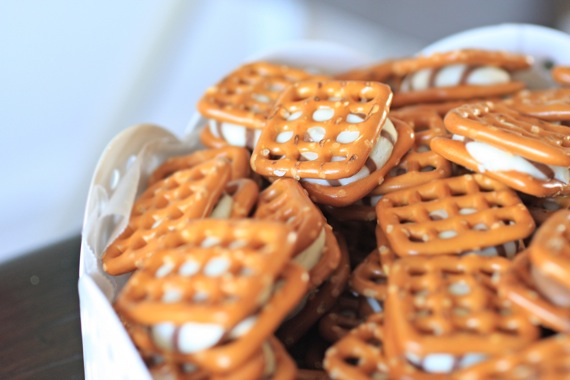
Pretzel-Kiss Sandwiches
1 bag Pretzel snaps (such as Synder’s)
2 bags Hershey’s Hugs (I also used some of the caramel-filled Hershey’s Kisses and they worked great as well)
Preheat oven to 300 degrees and line a large baking sheet with wax paper. Lay the pretzels down in an even layer on the baking sheet and top each one with a hug. Put the baking sheet in the oven for 2 minutes, until the hugs get glossy-looking.
Remove from oven and let sit for 1 minute. Gently place another pretzel on top of each hug, making a sandwich. Don’t push down too hard, or the hug will ooze out everywhere. Leave at room temperature to cool completely and harden- about 30 minutes to an hour. You could also pop them in the fridge to speed up the hardening process. Place in a big bowl and enjoy!
Recipe source: Cookies and Cups

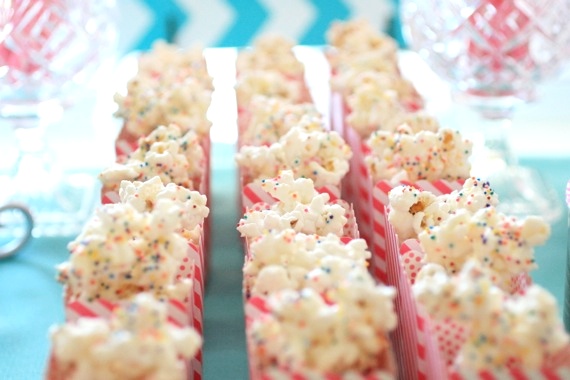
When I posted Cassidy’s 1st birthday party last week, I promised to share the recipe for the birthday popcorn, so here it is!
I think every kid should have lots of bright and colorful treats at their birthday party, and while this popcorn is ridiculously easy, it’s equally as popular! Every time I have ever made this (and trust me, I’ve made it for almost every occasion!), people seem to go nuts over it. I love it because I can customize it for ANY occasion- Christmas, Halloween, baby showers, Easter…you name it. All you need is different kinds of sprinkles and you’ve got endless possibilities. 🙂
Birthday Popcorn
2 bags unbuttered microwave popcorn, popped (I prefer the ‘tender white’ variety made by Orville Redenbacher)
12 ounces white candy coating or almond bark*
colored rainbow sprinkles
wax paper
Place the candy coating in a microwave safe bowl and heat in 30 second intervals, stirring each time, until melted and smooth.
Lay out two long sheets of wax paper on a wide surface. Place the popped popcorn in a very large bowl and slowly drizzle the melted candy coating over it. Stir with a large spoon until all the popcorn is coated. Spread in an even layer over the sheets of wax paper and immediately sprinkle liberally with the sprinkles. Let dry for at least 2-3 hours. Break into pieces and serve. Makes enough for 24-36 people.
Recipe source: Sing For Your Supper original
*white chocolate chips can also be used


There’s officially less than a week until Christmas! Where has the time gone?! I feel like I didn’t get to take part in quite as much Christmas baking as I wanted to this year, but under the circumstances, I think I did pretty ok! I have about a month until Cassidy’s due date and have officially reached the “beached whale” point of my pregnancy. Joel is really enjoying making jokes at my expense (at least he makes up for them in foot rubs!). I think the month is going to absolutely FLY by and she’ll be here before we know it! We’re pretty darn anxious to meet her, too! 🙂
We had a party this weekend and I wanted to make something really delicious to munch on besides my usual M&M cookies for dessert. By now, you’re all well aware of my undying love for Pinterest, and naturally, that’s where I went for Christmas goodie inspiration! I’ve had my eye on these salted caramel pecan bars for weeks now and couldn’t wait to make them! I’ve made the famous Saltine Cracker Toffee, which we all loved and this is very similar. It’s sugary sweet with a nice toastiness from the pecans and a subtle saltiness that I just LOVE! All in all, a big hit at the party! Oh, and super easy to throw together, too!

Salted Caramel Chocolate Pecan Bars
1 cup chopped pecans
12 whole graham crackers
1 cup firmly packed brown sugar
3/4 cup (1 1/2 sticks) butter
2 tablespoons whipping cream
1 teaspoon vanilla extract
1 cup semi-sweet chocolate chips
kosher salt
Preheat oven to 350°. Bake pecans in a single layer in a shallow pan 10 minutes or until toasted and fragrant, stirring halfway through.
Line a cookie sheet with aluminum foil and lightly grease. Arrange graham crackers in a single layer in prepared pan, slightly overlapping edges.
Combine sugar, butter, and cream in a medium-size heavy saucepan; bring to a boil over medium heat, stirring occasionally. Reduce heat and continue to cook until sugar is dissolved. Remove from heat, and stir in vanilla and pecans. Pour butter mixture over crackers, spreading to coat.
Bake at 350° for 8-10 minutes or until lightly browned and bubbly. Remove from oven and sprinkle with chocolate chips. Let sit for 5 minutes until chocolate is melted, then spread evenly over the caramel layer. Sprinkle with salt. Let cool. Chill for at least 30 minutes, then break or cut into pieces when ready to serve. Makes about 40 pieces.
Recipe source: Eat. Drink. Smile.

During the Halloween season, there’s nothing better than being snuggled up on the couch, watching Halloween movies and eating fun snacks (well, unless you’re a kid, in which case trick-or-treating is pretty hard to beat!). We make it a tradition every year to watch our favorite Halloween movies- Disney’s Icabod Crane (the cute animated version with Bing Crosby narrating), Hocus Pocus, Young Frankenstein, It’s the Great Pumpkin, Charlie Brown and of course, my all-time favorite- The Nightmare Before Christmas (ok, so I watch that one pretty much year ’round…). And watching those great movies just wouldn’t be the same without some kind of yummy snack; like this popcorn. It’s just a simple mixture of popcorn and candy corn coated in white chocolate bark and Halloween sprinkles. Nothing hard or complicated, just fun and downright yummy! Perfect for parties, trick-or-treaters or movie-watching! Whatever you make to snack on this Halloween, I hope you have a wonderful, FUN, safe time with your friends and family! Happy Halloween!!!

Halloween Popcorn
2 bags microwave popcorn, popped
1 bag candy corn
1 16-ounce package white chocolate bark*
Halloween sprinkles
wax paper
Place the popped popcorn and candy corn in a very large bowl (you need plenty of room to stir the popcorn). Melt the white chocolate bark in the microwave in 30 second increments, stirring after each time, until melted. Drizzle over the popcorn and candy corn and stir to coat each piece of popcorn. Pour the mixture over wax paper and spread into an even layer. Sprinkle with Halloween sprinkles and allow to cool for at least 15-30 minutes. Break into pieces. Serves 6-8.
*I know I’ll get questions about this: white chocolate bark (or white chocolate candy coating) can be found in your regular grocery store on the baking aisle with the chocolate chips and nuts.
Recipe source: Sing For Your Supper original (however, this isn’t exactly a new concept- I’m sure it’s been done many times before me)


I guess this pregnancy has me really digging caramel, because I feel like I’ve been making lots of caramel-y treats lately even though I’m normally not a huge fan. Hey, there are worse things to crave! Last week I had a whole afternoon to myself and thought I’d try my hand at homemade caramel corn. I’ve made it once before, but with my mom’s help (in fact, I believe it was during the Halloween season and we munched on our homemade caramel corn while watching Halloween movies!) and lucky for me, she wrote the recipe down for me! Yay! So I got in the kitchen and whipped up this delicious caramel corn- man, oh MAN! What a TREAT! This was rich, buttery and most importantly, good ‘n crunchy! I took a big bag to work and none of us could stop munching on it! I will most definitely be making this again; probably on Halloween, in fact. A perfect snack to munch on while watching Hocus Pocus! 🙂

Caramel Corn
6 quarts popped corn (3 bags microwave popcorn- I used Tender White)
2 cups brown sugar
1 cup (2 sticks) butter
1/2 cup light corn syrup
1 teaspoon salt
1 teaspoon vanilla
1 teaspoon baking soda
Preheat oven to 250 degrees. Cook brown sugar, butter, corn syrup and salt in a large saucepan over medium-high heat. Bring to a boil and cook for 5 minutes, stirring constantly. Remove from heat and stir in baking soda and vanilla. Pour over popcorn and stir to coat. Place popcorn in a large roasting pan or spread out over two baking sheets lined with greased foil. Bake, stirring every 15 minutes for about 45 minutes. Caramel corn will be crunchy (with no sogginess) when done. Let cool and break into pieces. Makes enough to serve a large crowd- approximately 10-12 people.
Recipe source: my mom


HAPPY EASTER!!! Those of you who celebrate are probably spending today getting those eggs ready to dye, making pies (or as my mom usually does- making a ginormous banana pudding), getting cute little Easter dresses ready for church tomorrow morning, and maybe even sitting down with your kids, explaining what this holiday really means and why we celebrate. Easter is such a wonderful holiday and Joel and I really love it! Every year we dye eggs (yes, apparently we’re still 10 years old…) and watch The Ten Commandments with Charlton Heston. Tomorrow we’re heading to my parents’ house, so I’m spending today making fresh strawberry pies and….BUNNY BAIT! What’s bunny bait, you ask? It’s basically just popcorn tossed with vanilla candy coating, Easter M&Ms and pretzels, but I’d like to think the Easter Bunny is out there just counting the minutes until he can hop over to our house and snatch a paw full! 🙂

Parents, this is something the kids would absolutely love! It’s super easy and quick to make (not to mention totally and completely addictive!!!), and the kids could help by breaking the pretzels into pieces and stirring the M&Ms in. I think someday when we have kids of our own, we’ll definitely make this a tradition in our house.
I hope whatever your plans are, that you all have a wonderful and happy Easter with your friends and family!
Bunny Bait
1 bag popcorn, popped (I used Tender White)
6 oz. white chocolate candy coating
1 bag Easter M&Ms
pretzel sticks, broken into small pieces
colorful sprinkles, if desired
Place the popped popcorn in a large bowl with the broken up pretzels and M&Ms. Heat the candy coating in the microwave in 30 second intervals, stirring after each time, until melted and smooth.
Drizzle the candy coating over the popcorn mixture and stir to coat. The pretzels and M&Ms will sink to the bottom, so make sure to get those stirred in and coated with the rest of the popcorn.
Spread out on a large piece of wax paper, top with a few sprinkles (if desired) and let cool. Break into pieces and serve in a large bowl.
Recipe source: slightly adapted from Bake at 350, originally from This Blessed Nest

Here’s another fluffy-frilly-girly recipe, just in time for Valentine’s Day. Pink Raspberry Marshmallows. I’ve discovered something about myself- I really like making homemade marshmallows! I just love whipping all that white, puffy fluff in the mixer! And let me tell you, homemade marshmallows are by far better than the packaged ones! Especially these- they have a light raspberry flavor and I think the pinkness adds a little something extra. 😉

I used Dorie Greenspan’s recipe, then used a heart-shaped cookie cutter to cut out the marshmallows. Very, very simple! A perfect Valentine’s treat! And if I may make a suggestion, these would taste mighty delicious dipped in some chocolate fondue (now THERE’s a perfect Valentine’s treat!!)!

Pink Raspberry Marshmallows
About 1 cup potato starch or cornstarch
2 tablespoons light corn syrup
2 1/4-ounce packets unflavored gelatin
3 large egg whites, at room temperature
3/4 cup cold water
1/2 tablespoon pure vanilla extract
1/2 tablespoon raspberry liqueur
1 1/4 cups plus 1 tablespoon sugar
pink food coloring
Line a 9×9 pan with parchment paper and dust the paper generously with potato starch or cornstarch. Have a candy thermometer at hand.
Put 1/3 cup of the water, 1 1/4 cups of the sugar and the corn syrup in a medium saucepan over medium heat. Bring the mixture to a boil, stirring until the sugar dissolves. Once the sugar is dissolved, continue to cook the syrup — without stirring — until it reaches 265 degrees F on the candy thermometer, about 10 minutes.
While the syrup is cooking, work on the gelatin and egg whites. In a microwave-safe bowl, sprinkle the gelatin over the remaining cold water (a scant 7 tablespoons) and let it sit for about 3 minutes, until it is spongy, then heat the gelatin in a microwave oven for 20 to 30 seconds to liquefy it. (Alternatively, you can dissolve the gelatin in a saucepan over low heat.)
Working in the clean, dry bowl of a stand mixer fitted with the whisk attachment or in another large bowl with a hand mixer, beat the egg whites on medium-high speed until firm but still glossy — don’t overbeat them and have them go dull.
As soon as the syrup reaches 265 degrees F, remove the pan from the heat and, with the mixer on medium speed, add the syrup, pouring it between the spinning beater(s) and the sides of the bowl. Add the gelatin and continue to beat for another 3 minutes, so that the syrup and the gelatin are fully incorporated. Beat in the vanilla, raspberry liqueur and pink food coloring, if desired.
Using a large rubber spatula, scrape the meringue mixture onto the parchment-lined pan. Then spread it into the corners and continue to spread it out. Lift the excess parchment paper up to meet the edge of the batter, then rest something against the paper so that it stays in place.
Dust the top of the marshmallows with potato starch or cornstarch and let the marshmallows set in a cool, dry place. They’ll need about 3 hours, but they can rest for 12 hours or more.
Once they are cool and set, cut the marshmallows with a pair of scissors, a long thin knife or a cookie cutter. Whatever you use, you’ll have to rinse and dry it frequently (if you use a cookie cutter, be sure to dip it in some cornstarch or powdered sugar between each use). Have a big bowl with the remaining potato starch or cornstarch at hand and cut the marshmallows as you’d like — into squares, rectangles or even strips (as they’re cut in France). As each piece is cut, drop it into the bowl. When you’ve got 4 or 5 marshmallows in the bowl, reach in with your fingers and turn the marshmallows to coat them with starch, then, one by one, toss the marshmallows from one hand to the other to shake off the excess starch; transfer them to a serving bowl. Cut and coat the rest of the batch.
Makes about 1 pound of marshmallows.
Recipe source: Dorie Greenspan, Baking From My Home to Yours


Joel and I sort of have an unhealthy addiction to Oreos. We love them. We even had an Oreo bar with a milk fountain at our wedding. 🙂 Yep, addicted. Which is why I use Oreos in baking/candy making every chance I get. Especially the holiday Oreos- the orange filled ones at Halloween, the pastel ones at Easter/Spring and the red ones at Christmas- which I what I used for this Oreo peppermint bark (at Joel’s suggestion). We had a big party with all of our friends last weekend and I made a big tray of this stuff- it was a huge hit! People can’t resist peppermint bark around the holidays anyway…add crushed up Oreos to the mix and they REALLY can’t resist it! I’ll definitely be making this year after year!

I was giddy at finding this giant block of Ghiradelli candy making chocolate at Sam’s! I see lots more candy making in my future!

Oreo Peppermint Bark
-Sing For Your Supper original
1 pound dark chocolate bark
1 pound white chocolate almond bark
1/2 teaspoon peppermint extract
10 Oreos, roughly chopped (I used the festive holiday ones!)
1/2 cup crushed peppermints
Melt the dark chocolate bark in the microwave in 30 second intervals, stirring in between. Pour out onto a large sheet of wax paper and smooth it out into one even (thin) layer with a spatula (an offset spatula works perfectly for this). Let sit at room temperature for 15-20 minutes, until hardened. Next, melt the white chocolate bark.
When the chocolate is hardened, stir the peppermint extract into the melted white chocolate bark. Pour over the dark chocolate layer and spread out evenly to the edges with a spatula.
Sprinkle the Oreos and crushed peppermints in an even layer over the top. Let sit until completely dried and hardened, about 20 or 30 minutes.
Break into pieces and serve. Enjoy!
**As always, feel free to use regular dark and white chocolate instead of bark (candy coating). I just prefer to use it because it dries so quickly and doesn’t need to be refrigerated.


No doubt you’ve heard of cake balls, and Oreo truffles, and cookie dough truffles; and most likely, you’ve even made your own cake balls, Oreo truffles, etc. I know I’ve definitely made my fair share of all kinds. And that’s exactly what these are- more ‘dessert balls’. But these are oh-so much better than the run-of-the-mill Oreo truffles or cake balls! You all know how Oreo truffles work- crushed up Oreos, cream cheese and chocolate coating. These are essentially the same thing, except made with freshly baked sugar cookies and the zest and juice of lemon and lime. I must say….pretty darn tasty. These taste like key lime pie- they’re super tart, chewy and insanely rich. As soon as my hubby got home from work, I immediately shoved one into his mouth and his exact response was, “oh my gosh, these are AWESOME!!!” My family was inclined to agree- since there were so many, my grandmother took them to my aunt and uncle’s house where they were quickly devoured (so I’m told). They even passed the test of all tests- my cousin Ethan loved them. If Ethan loved them- they’ve got to be good! I have big plans to try these in all kinds of flavors- strawberry, peach, maybe even apricot. But for now, the lemon-lime is the flavor of choice!

Lemon-Lime Sugar Cookie Truffles
1 batch of sugar cookie dough (I used a store-bought mix, but you can use any recipe you like!)
zest and juice of 1 large lemon and 1 large lime
1 1/2 blocks cream cheese (12 ounces) at room temperature
1 package white chocolate candy coating
colored sprinkles or coarse sugar, for garnish
Preheat oven to 350 degrees. Prepare the cookie dough as directed on package or recipe; add in the zest and juice of the lemon and lime and mix well. Spread the cookie dough in a greased 9×9 baking dish and bake for 30-40 minutes, or until cookies are fully baked. Cool completely.
When cookies are cooled, using your hands, remove from the dish and crumble into the bowl of a stand mixer or food processor (small chunks are fine). Add in the cream cheese and mix until the cookie crumbs and cream cheese are completely mixed together. Roll into 1-1 1/2 inch balls and refrigerate for at least 1 hour.
When the balls are thoroughly chilled, melt the white chocolate candy coating in the microwave, or over a double boiler. Carefully dip each ball into the white chocolate and turn to coat. Remove with a tooth pick and set on a cookie sheet lined with wax paper. Top with sprinkles. Repeat until all the balls are coated. Store in the refrigerator.

Candy!
Monday, January 11, 2010

It sort of seems like I tend to follow in my great-grandmother’s footsteps a lot (no, not Baba – this is Gammy, my other great-grandmother). I ended up going to the same college that she went to (only 89 years later), she was musical, just like me; and now I’m trying to follow her lead and learn to make candy like she did. During the Depression, Gammy made and sold candy to earn money for her family. She made all kinds of different candies, and kept her recipes written down in notebooks. I was lucky enough to inherit these wonderful books full of her hand-written candy recipes. A few weeks ago, I decided it was high time I learned how to make candy -it’s in my blood, after all! I wanted to make some peanut brittle for my family (especially for my Grandaddy- he loves peanuts!), so I found an easy sounding recipe and went to work, hoping Gammy’s candy-making skills would shine through me. Lucky for me, I ended up with a beautiful batch of homemade peanut brittle! Turns out, candy-making isn’t too hard; maybe one of these days I’ll get out Gammy’s old recipe books and try my luck at one of her special homemade candies! I’m just glad I found one more thing she and I have in common!
Peanut Brittle
-adapted from Allrecipes.com
1 cup unsalted cocktail peanuts
2 cups white sugar
1 cup light corn syrup
1 cup water
2 teaspoons baking soda
2 tablespoons butter
1 teaspoon vanilla extract
Lay out several sheets of greased foil to pour the hot peanut brittle onto.
In a large pot (I used my dutch oven) mix the sugar, syrup, and water together. Cook at a medium-high heat, stirring regularly. Heat until the mixture has a hard ball consistency. Heat to 250 to 265 degrees, or until a small amount of syrup dropped into cold water forms a rigid ball. If you don’t own a candy thermometer, occasionally hold spoon above mixture, allowing it to drip off spoon. When mixture is at hard ball stage, it will ‘hair’ off the spoon when falling, looking like a clear spider web.
Once mixture is at hard ball consistency, add peanuts. (They might pop a little.) When mixture starts to turn a light clear-brown, remove from stove. Add butter, vanilla, and soda and stir. Mixture will foam up.
Pour out onto the greased foil and let sit for 30 minutes to an hour or so until brittle is completely cool and hard enough to break into bite-size pieces.
*I found that it’s probably more helpful to have a second person on hand to hold the pot while you scrape out the mixture – the pot will be heavy (and hot) and it’s incredibly hard to do it all by yourself!
Mine didn’t spread much, so I only needed about 3 sheets of foil – but do make sure you grease your foil very well; it will stick!


