So, Joel finally talked me into watching Game of Thrones with him. He’s been a hardcore fanboy for years now and I’ve always made fun of him for it (breastfeeding dragons? Really?), declaring stuff like that too geeky for me. However, I read fanfic and listen to One Direction…I don’t think I’m really in any position to judge anyone’s so-called “geekiness”. So, I succumbed (I still have to close my eyes for all the nasty bloody parts, and prosthetic peen scenes because…ew.). But here I am, hooked on Game of Thrones.
I’m almost halfway through season 2 and so far it’s been pretty good. Granted, there are still some epic “WHAT THE CRAP?!” moments (um, shadow babies…wut??) and some things that I really wish I could UN-see, but against my better judgement…I like it.
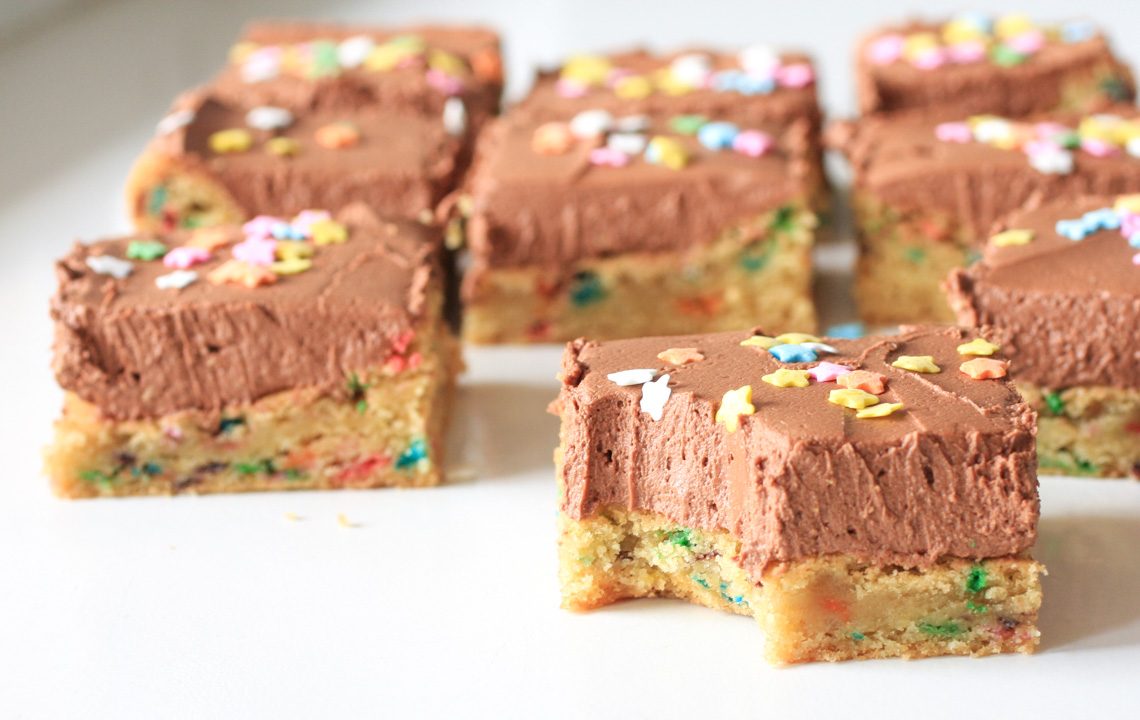
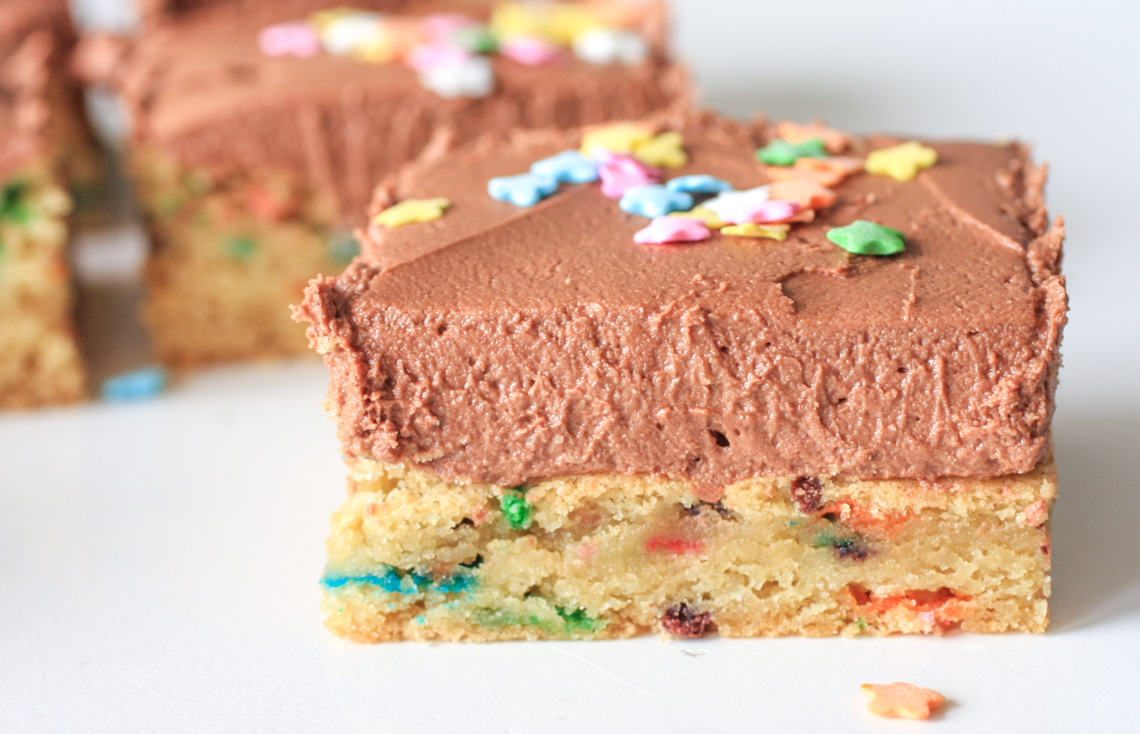
Since we’ve been having lots of GoT binge-watching sessions after the kids go to bed, I decided we needed yummy treats to go with. The cookies are thick and chewy (but not too sweet) and the frosting is light, fluffy, and perfectly chocolatey. Cassidy helped me make them and we were very pleased with how these came out! Satisfying, sweet, and just plain FUN.
I think these would bring a smile to even King Joffrey’s face (little craphead…).
Sugar Cookie Bars with Fluffy Chocolate Frosting
1/2 cup unsalted butter, at room temperature
3/4 cup granulated sugar
1 large egg + 1 egg yolk
2 teaspoons vanilla extract
1 and 1/2 cups all-purpose flour
1/2 teaspoon salt
1 teaspoon baking powder
1/2 teaspoon baking soda
1 and 1/2 teaspoons cornstarch
1/2 cup rainbow sprinkles (not nonpareils)
Chocolate buttercream:
1/2 cup unsalted butter, at room temperature
1/2 cup semi-sweet chocolate chips, melted and cooled
pinch salt
2 cups powdered sugar
1 teaspoon vanilla extract
For the bars: Preheat oven to 350 degrees. Line a 9×9 square baking pan with aluminum foil, making sure to leave enough overhang on the sides and set aside.
In a large bowl using a hand-held mixer or stand mixer fitted with a paddle attachment, cream the softened butter for about 1 minute on medium speed, until smooth and pale. Add the sugar on medium speed until fluffy and light in color. Beat in egg, egg yolk, and vanilla. Scrape down the sides as needed.
In a medium bowl, whisk together the flour, salt, baking powder, baking soda, and cornstarch. With the mixer running on low speed, gradually add the dry ingredients to the wet ingredients. The dough will be thick. Once combined, gently fold in 1/2 cup sprinkles using a rubber spatula (or by mixing on low speed).
Press the cookie dough evenly into the prepared baking pan. Bake for 25-26 minutes or until very lightly browned on top. You want the cookie bars to be extra soft, so careful not to overbake. Allow the bars to cool completely on a wire rack at room temperature before frosting. The center will slightly sink – that’s normal.
For the frosting: With a hand mixer or a stand mixer fitted with a paddle attachment, beat the butter on medium speed for about 1 minute, until smooth and pale. Stir in the melted, cooled chocolate, salt, and vanilla extract. Slowly add the powdered sugar a little at a time, scraping down the sides of the bowl as needed, until the frosting reaches a fluffy, spreadable consistency. If you like your frosting a little thicker or thinner, use more or less powdered sugar. (Makes about 1 1/2 cups)
Spread the frosting over the cooled cookie bars, then cut into 12 squares.
Recipe source: cookie bars from Sally’s Baking Addiction; frosting is my own recipe
Golly, what a great time to get back into food blogging- nothing but Christmas cookies as far as the eye can see! I’m loving all this festive baking I’ve been doing. We can all thank Elliott for that, by the way, since he’s finally gotten to a point where he actually enjoys life outside of my arms. Tonight it’s just me, my laptop, and my thoughts (…and One Direction uh, I mean, um, Mozart…).
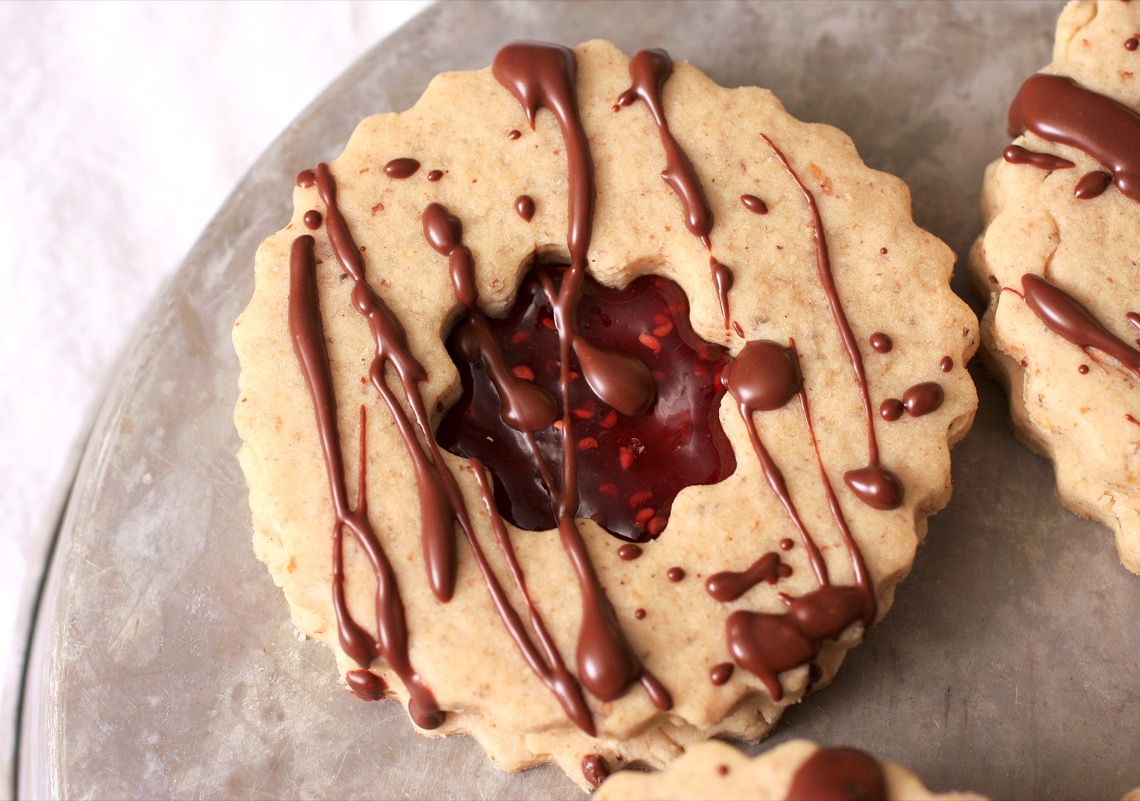
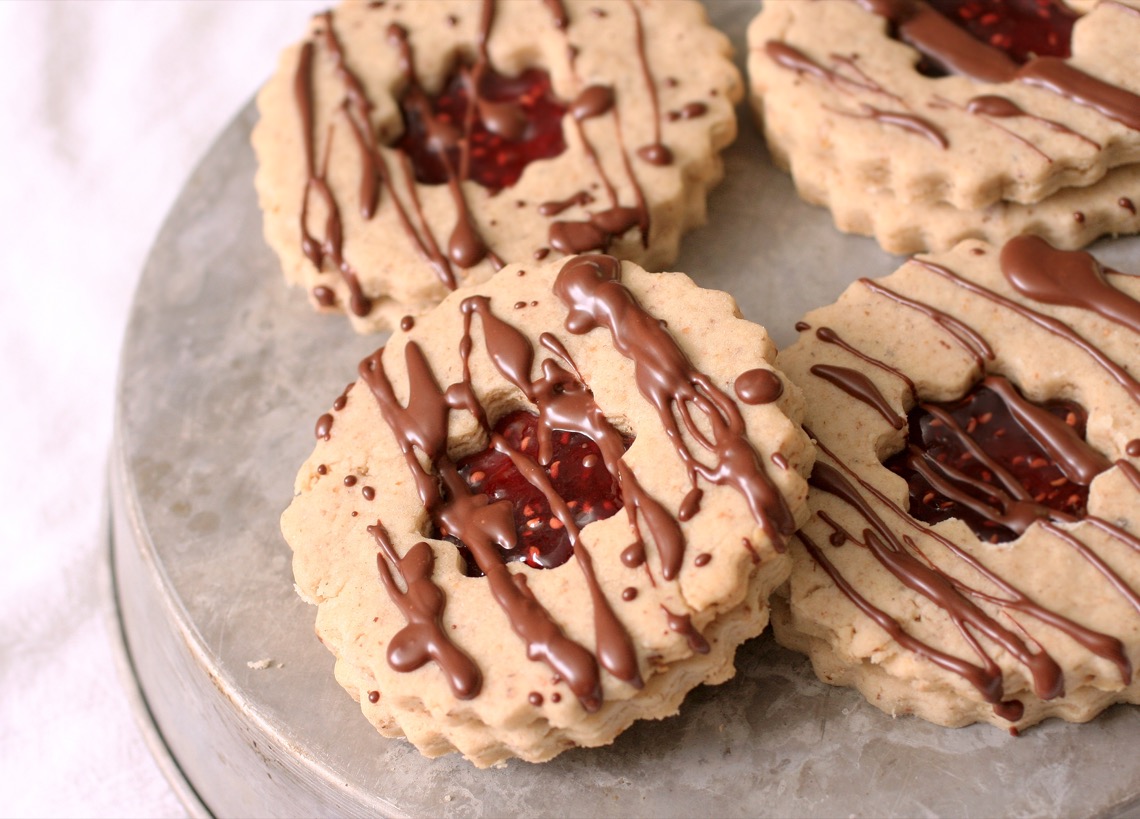
The last time I made Linzer cookies (like, 5 years ago), I wasn’t just super over-the-moon about them. Probably because I filled them with Nutella and I really feel this particular cookie needs a nice, tart jam filling to offset the richness of the cookie. So this time I chose my favorite jam- raspberry. I added a splash of Chambord (raspberry liqueur) to intensify its raspberriness. The chocolate drizzle was just icing on the cake, so to speak. I LOVE the raspberry/dark chocolate combo, so I knew this would be good. It was. Believe me. I’ve had way too many of these today.
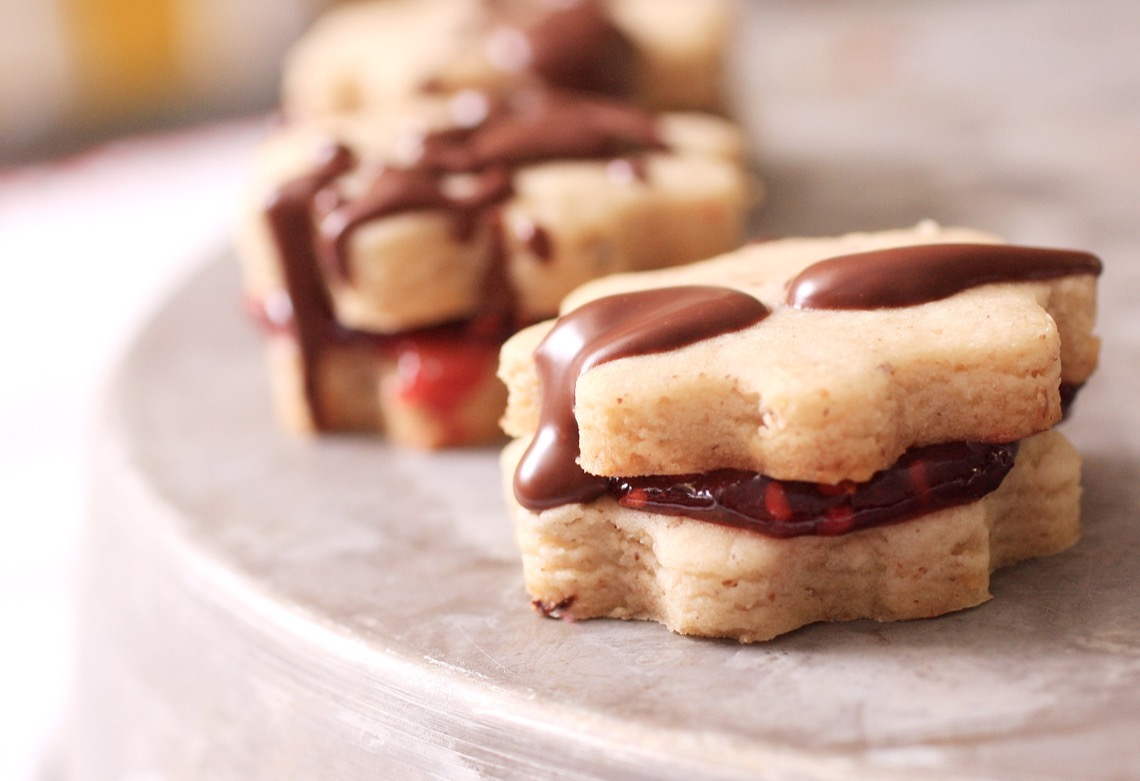
These are soft, but not chewy; crumbly, sandy, and nicely nutty. Such a fantastic cookie. I could literally eat these all day. And I did. I feel bad that my first encounter with Linzer cookies wasn’t as amazing as this go-round. I can’t wait to make these again (and I’ll still be jamming out to One Direction MOZART).

Chocolate-Raspberry Pecan Linzer Cookies
2 cups all-purpose flour, plus more for dusting
1/2 teaspoon baking powder
3/4 cup pecan halves, toasted
2 tablespoons confectioners’ sugar
1/4 teaspoon salt
1/8 teaspoon ground cinnamon
1/2 cup (1 stick) cold unsalted butter, cut into small pieces
1/4 cup granulated sugar
1 teaspoon pure vanilla extract
1 large egg
1/2 cup raspberry jam
splash raspberry liqueur, such as Chambord
1 ounce dark chocolate, chopped
Sift flour and baking powder into a bowl; set aside. Pulse pecans, confectioners’ sugar, salt, and cinnamon in a food processor until finely ground (but not wet); transfer to the bowl of an electric mixer fitted with the paddle attachment.
Add butter and granulated sugar; mix on medium speed until fluffy. Mix in vanilla and egg. Reduce speed to low. Gradually add flour mixture until combined.
Halve dough; shape into disks. Wrap in plastic and refrigerate until firm, at least 2 hours.
Preheat oven to 375 degrees. Working with 1 disk at a time, roll out dough on a lightly floured surface to 1/8 inch thick. Cut out squares (or circles, or flowers) with a 2-inch fluted cutter. Cut out centers of half the squares with a 1/2-inch flower cutter;
reroll scraps. Space 2 inches apart on ungreased baking sheets. Bake until pale golden, 8 to 10 minutes. Transfer to racks to cool.
Meanwhile, heat jam in a small saucepan over medium heat until reduced and thickened, about 7 minutes; stir in raspberry liqueur; let cool.
Heat the chocolate over a double boiler or in the microwave (just be sure to stir it every 30 seconds or so).
Spread jam onto uncut squares; top with cutout ones. Drizzle with chocolate. Makes approx. 10 sandwich cookies (since my cookie cutters were so huge, I only got 10 cookies, but if you use a smaller cutter, you’ll probably get closer to 12-14).
Recipe source: adapted from Martha Stewart ‘Cookies’
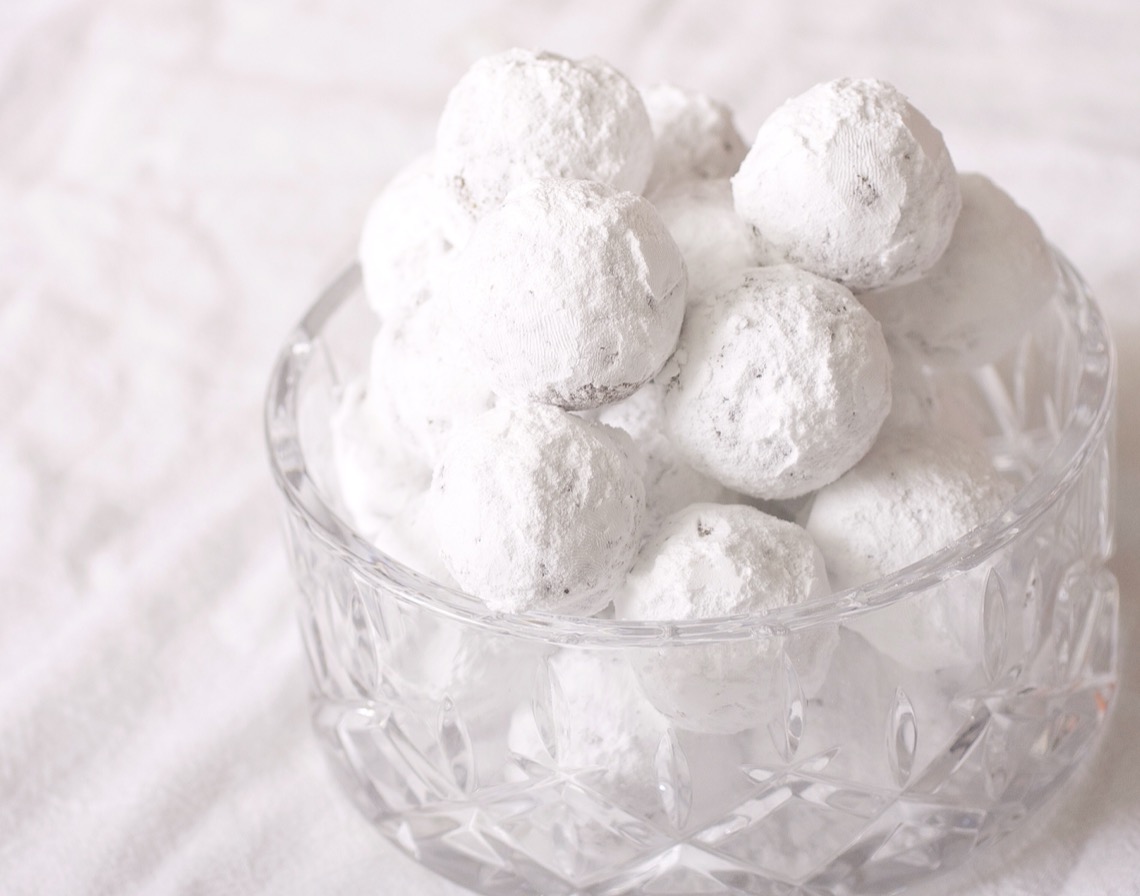
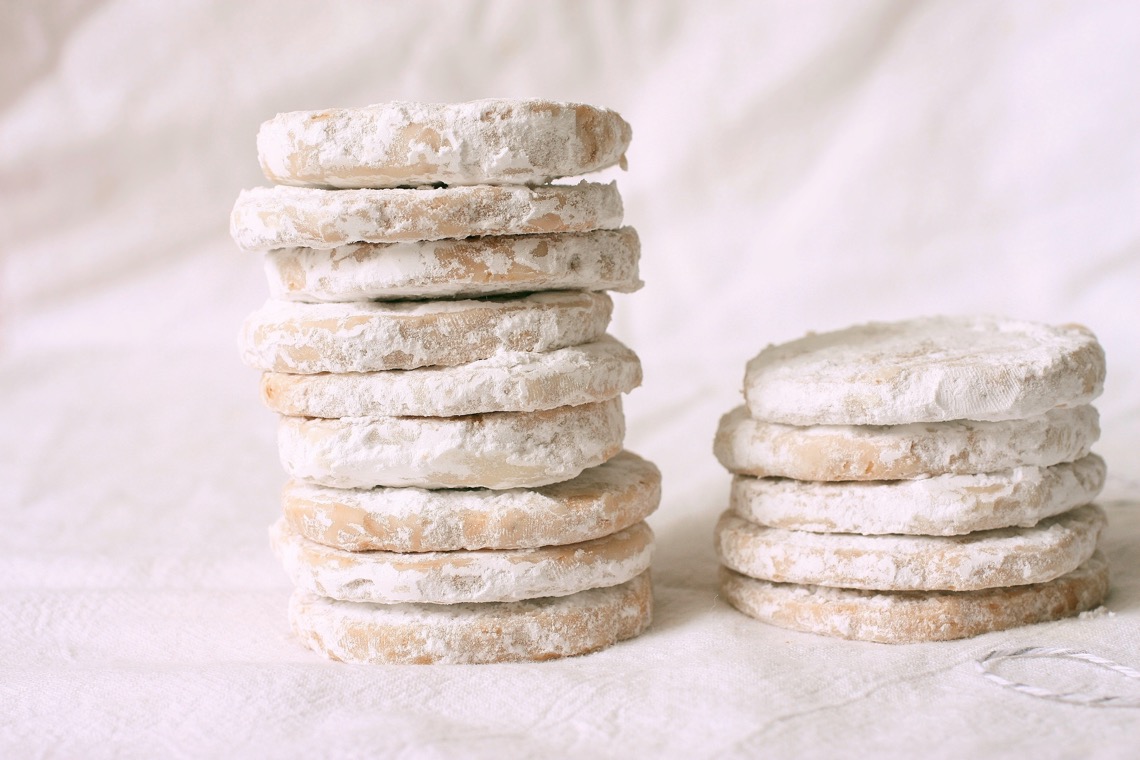
Crushed vanilla wafers, pecans, cocoa powder, and rum come together in no time to form the most sinfully delicious “grown-up goody”.
Oh boy, oh boy, oh BOY! Talk about unexpected! These little babies blew my socks off! Who knew vanilla wafers and rum could make such beautiful music together?! I certainly didn’t. I had little expectations when I set out to make these. The flavor combos just sounded funky to me, but since literally every single review on these was 4-5 stars, I had to just trust the recipe. I only tweaked it slightly and sure enough, those reviewers knew what they were talking about! I’m in LOVE, people!
These are SO simple. All you need is a food processor and time. After you roll these into balls, you want to let them sit in the fridge for 2-3 days. That part is important. They won’t look all that appetizing until you roll them in powdered sugar, but lemme tell ya- they taste fantastic. The rum flavor is SO strong and amazing. I want to turn right around and make them again. They’re that good. These are definitely a “mommy and daddy deserve a little something after wrapping all those presents, wrangling all those kids, and decking all those halls” kind of treat.
No-Bake Rum Balls
11 ounce box vanilla wafer cookies
1 1/2 cups pecans, toasted
3/4 cup confectioners’ sugar, plus more for rolling
1/4 cup cocoa powder
1/8 teaspoon salt
1/2 cup dark rum
3 tablespoons light corn syrup
Combine the vanilla wafers, pecans, confectioners’ sugar, cocoa powder, and salt in the bowl of a food processor and pulse until cookies and pecans are ground up finely (it doesn’t have to be super fine, just enough that there aren’t any large chunks).
Transfer to a large bowl and add the rum and corn syrup, stirring until well-combined. Scoop out using a cookie scoop or teaspoon and roll into 1 inch balls with your hands. Place on a wax paper-line cookie sheet. Cover with plastic wrap and refrigerate for 2-3 days (the longer they sit, the better they’ll taste).
After chilling, roll the balls in confectioners’ sugar. You can serve them cold or at room temperature. Makes approx. 3 dozen
Recipe source: adapted from allrecipes.com
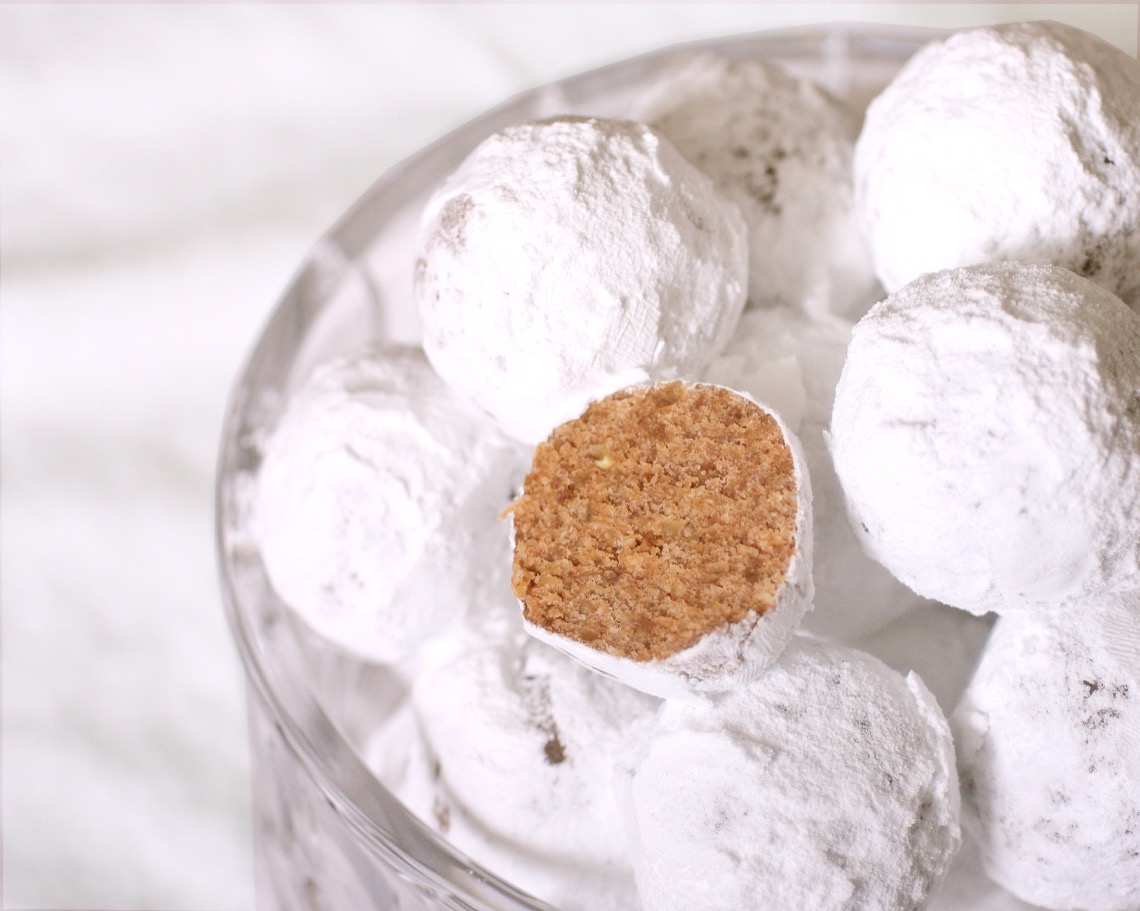
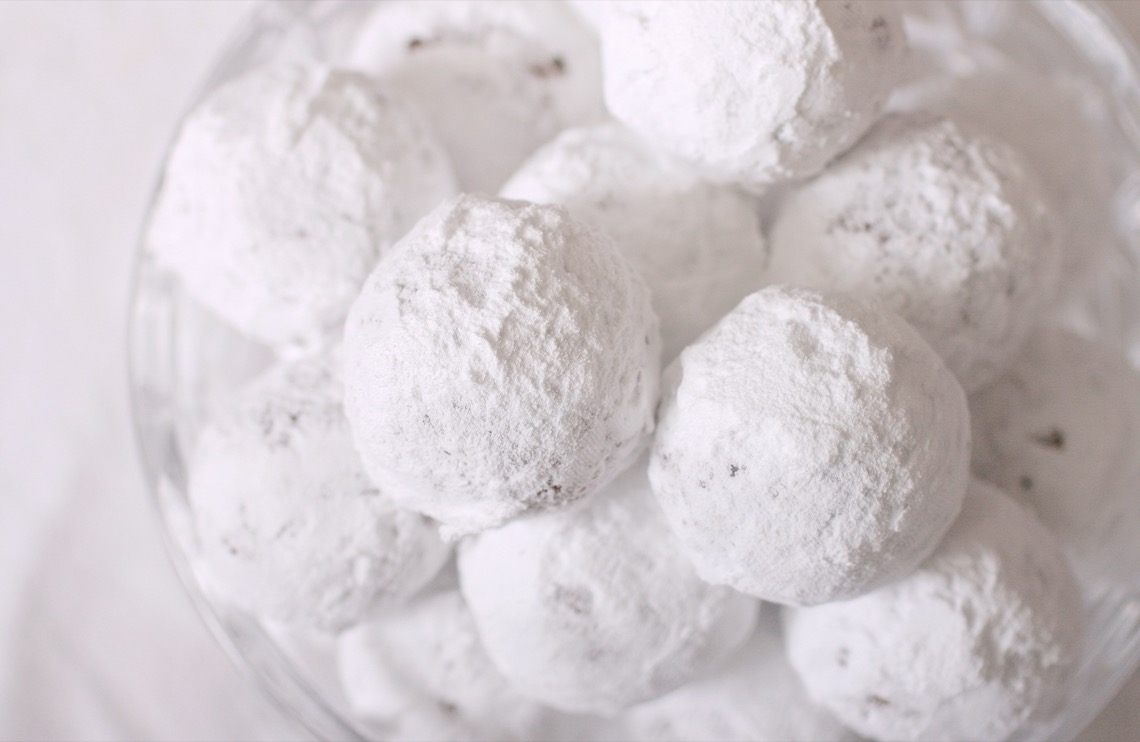
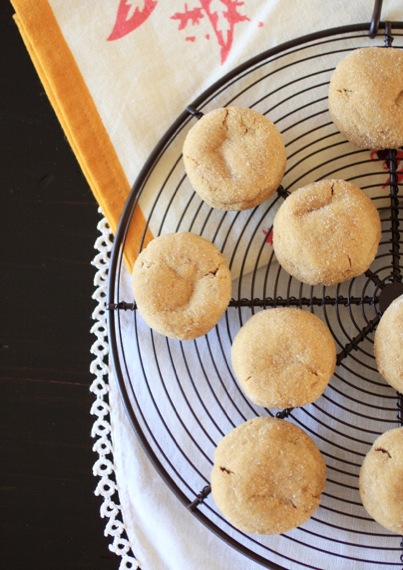
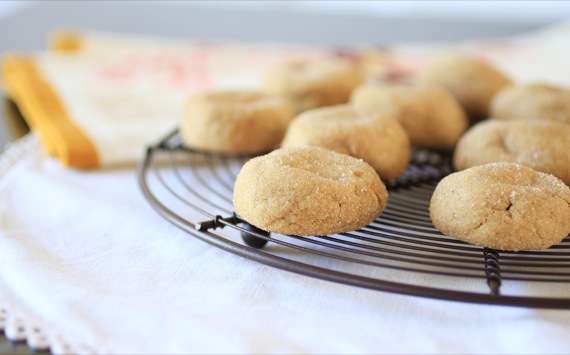
Spicy, buttery, shortbread-like cookies with a kick of dark rum. Perfect with a cup of hot coffee on a cold night.
As you can probably tell by now, I’m going for sort of a “rum theme” this week. I guess I just love rummy desserts (and I’m not even done yet! There’ll be yet another rummy recipe to come!). Can you really blame me? Something about butter, sugar, and flour combined with dark rum is…magical. And it smells even more magical while it’s baking.
These were pretty simple- just mix it all together, chill the dough, slice-n-bake, and toss in powdered sugar. Done. Cassidy enjoyed the tossing part. 😉
I’ll be honest, the rum flavor didn’t come through super strong. I’m thinking next time, using rum extract in addition to the 1/4 cup rum might be good (literally the ONLY time I can condone using rum extract). These taste like crispy, crumbly, buttery spice cookies. We enjoyed them immensely, despite the lack of rum flavor. A winner of a Christmas cookie.
Buttered Rum Meltaways
1 3/4 cups, plus 2 tablespoons all-purpose flour
2 tablespoons cornstarch
2 teaspoons ground cinnamon
2 teaspoons freshly grated nutmeg
1/4 teaspoon ground cloves
3/4 teaspoon coarse salt
3/4 cup (1 1/2 sticks) unsalted butter
1 cup confectioners’ sugar
1/4 cup dark rum
1 teaspoon vanilla extract
Whisk flour, cornstarch, spices, and salt in a bowl. Put butter and 1/3 cup sugar into the bowl of an electric mixer fitted with the paddle attachment. Mix on medium speed until pale and fluffy. Mix in rum and vanilla. Reduce speed to low, and slowly mix in flour mixture.
Divide dough in half. Place each on a piece of plastic wrap; shape dough into 1 1/4-inch logs. Chill in freezer 30 minutes.
Preheat oven to 350 degrees. Unwrap logs. Cut into 1/4-inch-thick rounds; space 1 inch apart on ungreased baking sheets. Bake until just golden, about 15 minutes. Transfer cookies to wire racks; let cool 10 minutes. Gently toss warm cookies with remaining 2/3 cup confectioners’ sugar in a ziplock bag. Makes approx. 2 dozen cookies.
Recipe source: Martha Stewart Cookies
Sandy, crumbly, dark, salty, chocolaty…these simple slice-n-bake cookies have it all! Their deliciousness is something the whole world can agree on!
Allow me to introduce you to my favorite cookie: the World Peace Cookie, a la Dorie Greenspan (we’re like, BFFs, btw). I made these cookies for the first time 7 years ago and immediately deemed them my favorite. That’s not something to be taken lightly; I’m a COOKIE GIRL. Cookies bring me great joy and this one has it all- it’s so crumbly and sandy and deeply chocolaty and salty. Salty cookies are magical.
I love how quickly these come together; just throw everything in the mixer and you’re done. BUT, this is one of those times you really must chill the dough. Normally I’m a “Psh! I’m not waiting 3 hours to bake these cookies!” kind of girl, but these cookies just will not be the same without chilling first. The chilling helps them not to spread too much while baking, and they’ll keep their perfect, crumbly texture that way. Cassidy helped me mix the dough the night before and the we baked the cookies the next day. Worth the wait, I promise!
World Peace Cookies
1 1/4 cups all purpose flour
1/3 cup unsweetened cocoa powder
1/2 teaspoon baking soda
1 stick plus 3 tablespoons (11 tablespoons) unsalted butter, at room temperature
2/3 cups (packed) light brown sugar
1/4 cup granulated sugar
1/4 teaspoon fine sea salt
1 teaspoon vanilla extract
5 ounces bittersweet chocolate, chopped
Sift flour, cocoa, and baking soda into medium bowl. Using electric mixer, fitted with the paddle attachment, beat butter until smooth (about a minute). Add both sugars, vanilla, and sea salt; beat until fluffy, about 2 minutes. Turn the mixer off and add flour mixture all at once. Dorie notes to drape a kitchen towel over the bowl before turning the mixer on so the flour doesn’t fly everywhere. Beat just until blended (mixture will be crumbly); do not overmix. Add chopped chocolate; mix just to incorporate (if dough doesn’t come together, knead lightly in bowl to form ball). Place the dough on a sheet of plastic wrap and form into 1 1/2-inch-diameter log. Wrap in plastic; chill until firm, about 3 hours, or overnight.
Preheat oven to 325 degrees. Line 2 baking sheets with parchment paper. Using thin sharp knife, cut log into 1/2-inch-thick rounds. Space 1 inch apart on prepared sheets. I like to go as far as to sprinkle a little extra salt over the top of each cookie before baking. Bake 1 sheet at a time until cookies appear dry (cookies will not be firm or golden at edges), 11 to 12 minutes. Transfer to rack to cool completely. These are best eaten after they’re completely cool. Or even the next day. Makes approx. 2 dozen cookies.
Recipe source: Dorie Greenspan, Baking From My Home to Yours
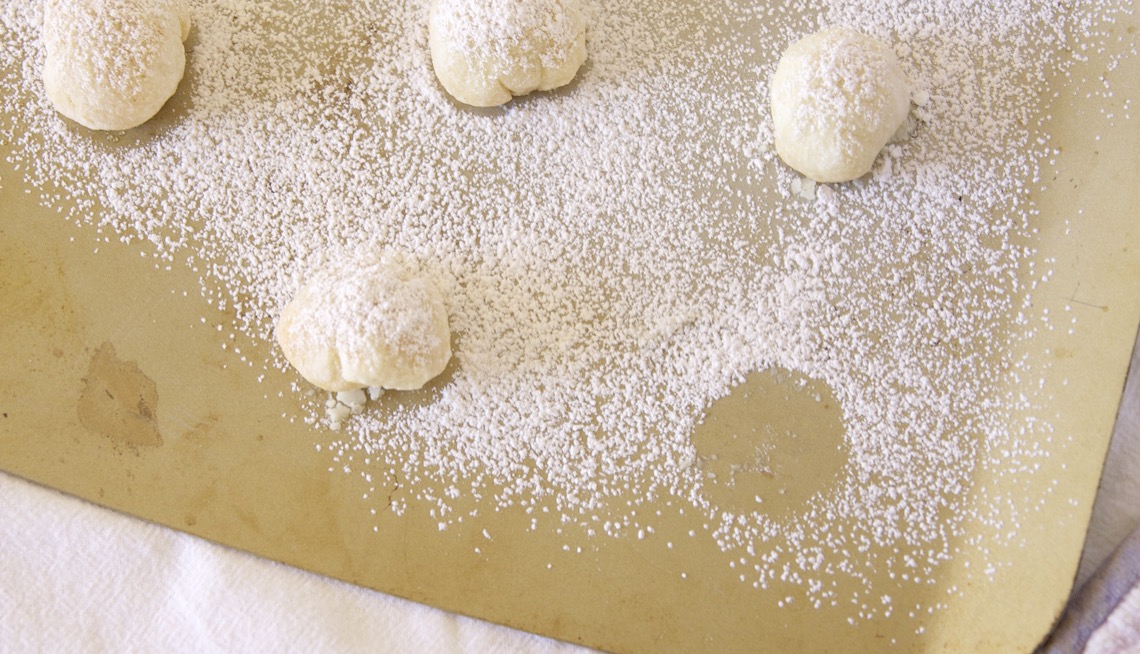
Have leftover pie crust? Stuff it with chocolate chips, roll it in powdered sugar, and bake it into flaky, chocolaty little snow balls. This is a GREAT one for the kids to help with!
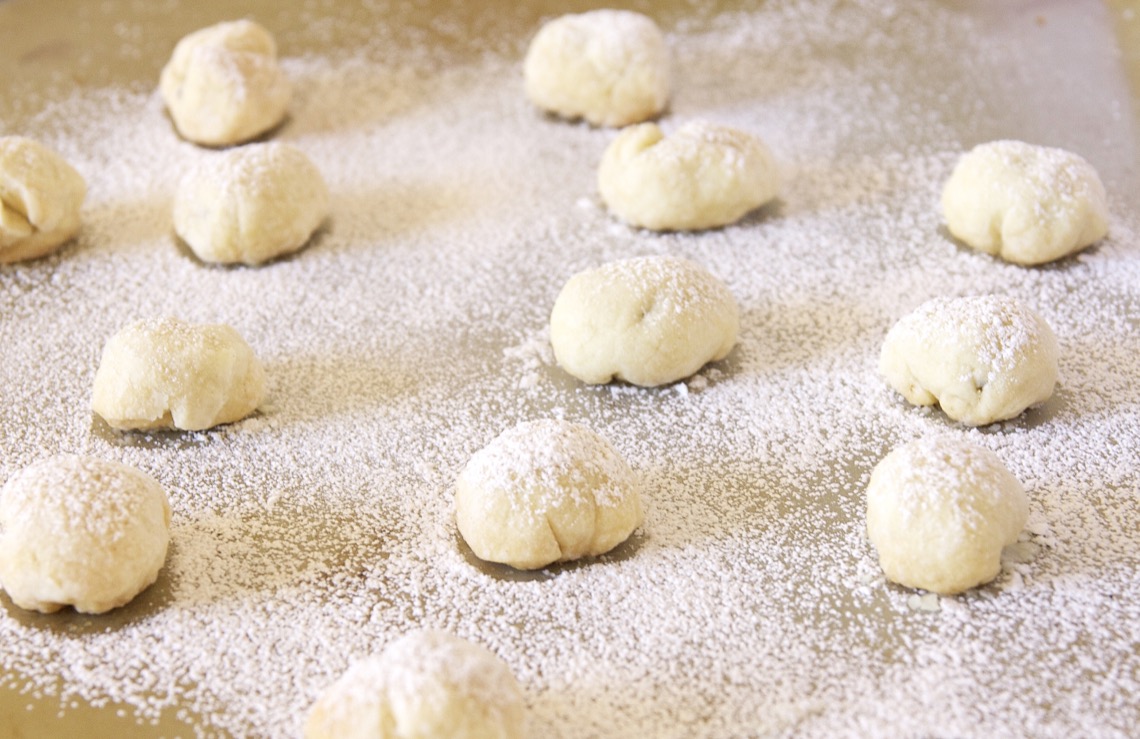
I love to look back at my pre-children self and giggle at all the ‘from-scratch’ stuff I used to have time to make (pie crusts, biscuits, etc). I’m aaaall about the shortcuts nowadays; not because making pie crusts from scratch is hard, but because WHO WANTS TO CLEAN THAT FOOD PROCESSOR?! All those little parts to wash…. Anyway, I’ve recently discovered the AWESOMENESS of Trader Joe’s frozen pie crusts. My gosh, they’re amazing. I seriously could not make anything better from scratch. I use them all the time. Only thing is, they’re huge. Like, deep DEEP dish size. So I always have lots of extra dough just lying around.
Recently, I was making a quiche and ended up with lots of extra dough. Then I remembered this idea and decided I had the perfect opportunity to bake cookies with Cassidy. We rolled out the dough and used a round biscuit cutter to cut out circles, then Cassidy put the chocolate chunks in the center of each one. Then we closed them up, made them into little balls, rolled them in powdered sugar, and popped them in the oven! So easy and SO yummy! Like tiny little bites of chocolate pie! I can’t wait for the holidays to get here so we can make these again in different variations! Cinnamon-sugar, cherry, raspberry…the possibilities are endless!
Chocolate-Stuffed Pie Crust Cookies
Leftover pie crust dough
Chocolate chunks or chips
Powdered sugar
Preheat oven to 350 degrees. Take all the scraps of leftover dough and form into a ball. Roll out to about 1/8-1/4 inch thickness and cut into circles using a biscuit cutter or a small glass. Place 3 or 4 chocolate chunks or chips in the center of each circle and close up like a pouch. Form into a ball and roll in powdered sugar.
Place on a baking sheet and bake for 8-10 minutes, until golden brown. Sprinkle with more powdered sugar, if desired. These are great right out of the oven, or at room temperature.
Adapted from Averie Cooks
I’ve been baking lots of cookies lately. We’ve recently had two sets of friends welcome new babies and then we hosted a party Saturday as well. And everyone knows you can’t have babies or parties without cookies…I guess. Not to mention, I just really, really like baking cookies.
In addition to taking meals to my friends, I also made my favorite oatmeal cookies as well as these gingersnaps to welcome their new little bundles. My favorite thing to do for new parents is take them bags of frozen, perfectly portioned balls of cookie dough (in addition to some already baked ones) for them to keep in their freezer. Then, all they need to do is pull a couple out and pop them in the oven anytime they want fresh baked cookies!
I am such a good friend.
I had seen these cookies recently and knew I just had to make them ASAP. There’s a nip in the air (when I say ‘nip’, I really mean 85 degrees instead of 95), pumpkins are everywhere you look, and Halloween is just around the corner- perfect conditions for soft, gingery cookies! And these are soooo good. Chewy and puffy with a nice kick of spice. In essence, the perfect fall cookie.
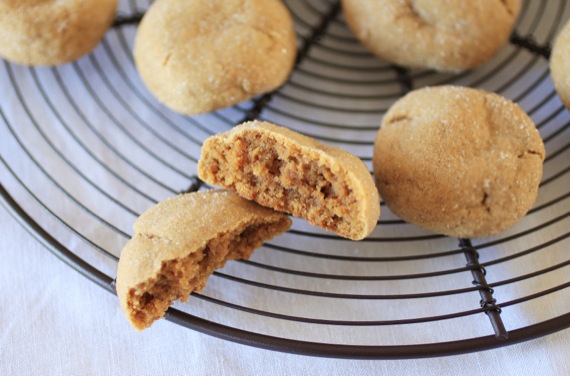
Soft and Chewy Gingersnaps
3 cups all-purpose flour
1 teaspoon baking soda
2 teaspoons ground ginger
1 1/4 teaspoons ground cinnamon
1/4 teaspoon ground cloves
1/4 teaspoon nutmeg
1/2 teaspoon salt
3/4 cup (1 1/2 sticks) unsalted butter, softened to room temperature
3/4 cup dark brown sugar
1/3 cup dark molasses
1 egg, at room temperature
2 teaspoons vanilla extract
1/3 cup granulated sugar, for rolling
In a large bowl, mix the flour, baking soda, ginger, cinnamon, cloves, nutmeg, and salt. Set aside. In the bowl of a stand or handheld mixer, beat the butter at medium speed for about a minute. Add the brown sugar and beat until light and fluffy. Add the molasses, egg, and vanilla and continue to beat until combined, scraping down the sides as needed.
With the speed on low, slowly add the dry ingredients. Do not overmix. Cover dough and chill for 4 hours or overnight.**
Line a large baking sheet with parchment paper or a silicone mat. Shape dough into 1-inch balls and roll in sugar. Place balls 2 inches apart on the prepared cookies sheets. Bake for 8-10 minutes at 350 degrees, until the edges are just turning brown – cookies will be puffy and still appear soft in the middle.
Transfer the cookies to a wire rack to cool completely. Store in an airtight container at room temperature for up to 1 week.
Recipe Source: Sally’s Baking Addiction
**Sally (and I) highly recommend chilling the dough for at least 4 hours, or else the cookies will not be as puffy as shown above.
Can I just rant a little bit? Is that ok? We recently bought a new MacBook pro, since our old one was getting pretty ragged. The “genius” at the Apple store suggested a retina display; especially since I do so much photo editing. Ok, fine, sure. Retina display it is. Can I just ask- WHY WOULD ANYONE WANT THIS???? My pictures are blurry/pixel-y. My pictures that I work so hard to ensure are as close to perfect as I can get them. My food that I style so carefully and get placed just right. They. Are. Blurry. Not when they’re giant, mind you. Just after I resize them to fit on my blog. So anyone else who owns a computer with retina display will see my pictures as blurry. What a load of you-know-what!
Do you see that photo above? I worked really hard on that photo. I was SO happy with that photo. Until I resized it and now it looks like doo-doo. Joel has explained it to me a floppity-gillion times, but I still can’t wrap my tiny, technologically-challenged brain around it. In fact, he’ll probably get annoyed with me after reading this post, and explain it to me all over again, but I’m MAD, people! I don’t care how awesome retina display is- I hate it! Anything that makes my hard-earned photos blurry is NOT a good thing! So THERE! Suck it, Joel! Suck it, Michael! And suck it, anyone else who tries to tell me how great retina display is!
Phew. Ok, I feel so much better. Are you still with me? Am I down to my last 3 readers?? Don’t worry, I’ll talk about food now, I promise.
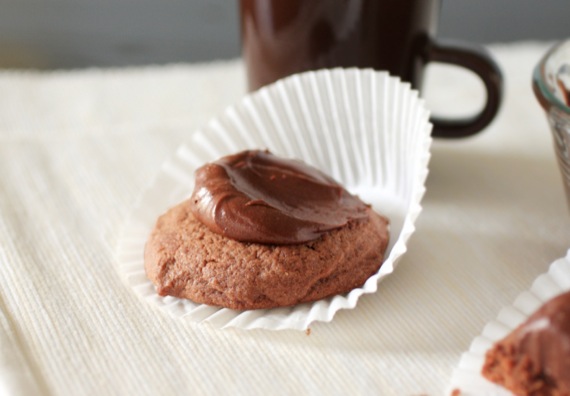
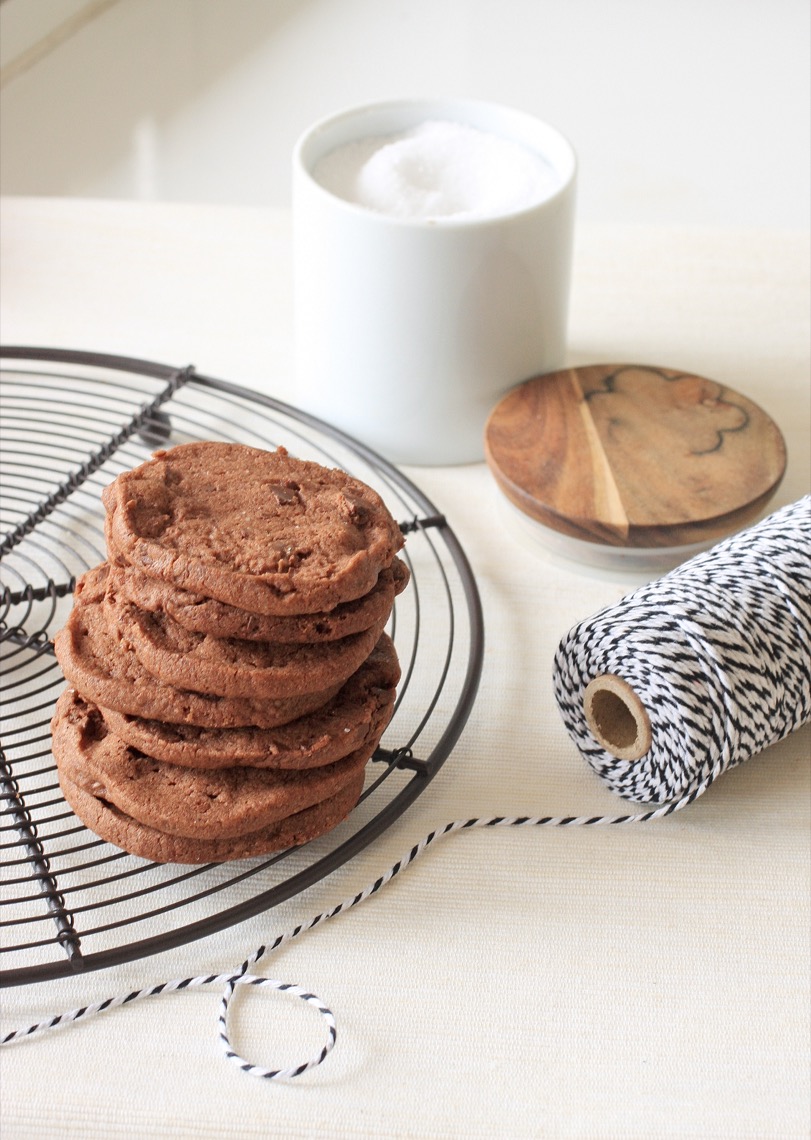
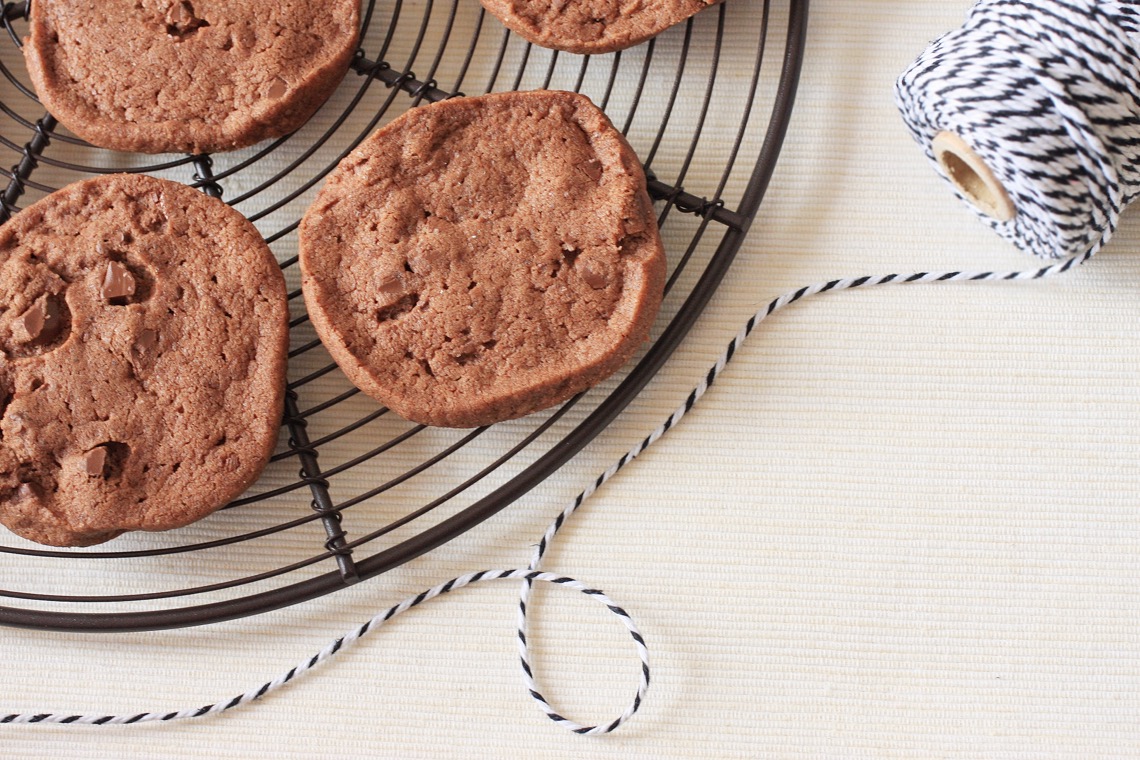
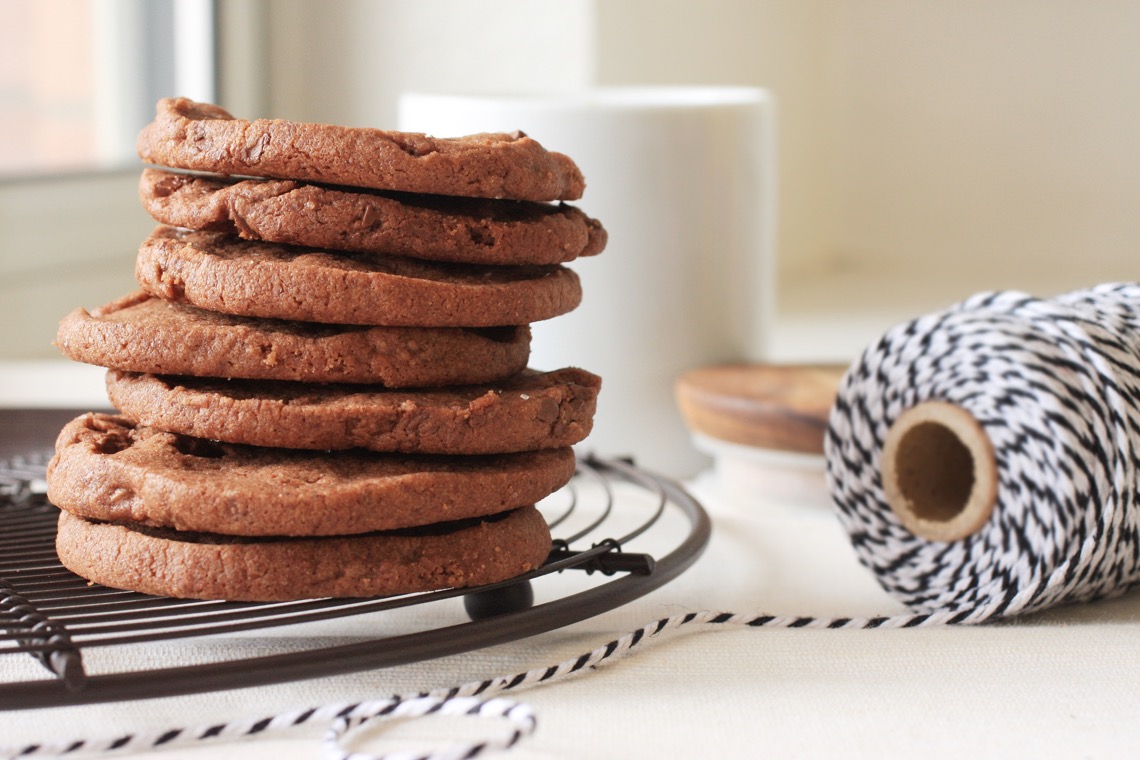
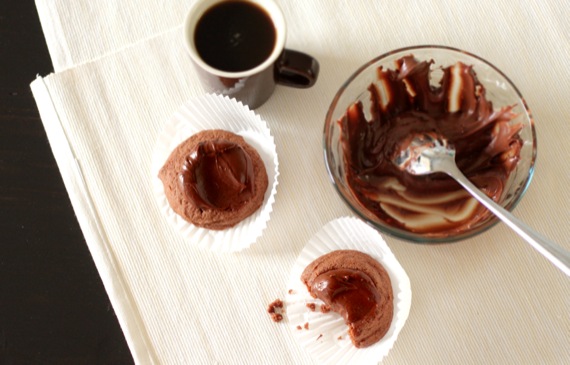
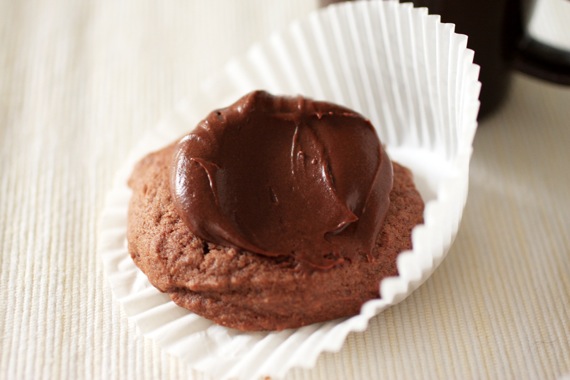
How about some soft, chewy, brownie-like cookies topped with a decadent, fudgy frosting? Sound good? Well, they are! They’re awesome, in fact. I wanted to make a rich, chocolaty cookie the other night for a party and these popped into my head. I used two of my favorite components- the Levain Bakery’s Giant Double Chocolate Cookies and Hershey’s Perfect Chocolate Frosting. What a combo!! Since I left the chocolate chunks out of the cookies, the texture and taste was more like a homemade brownie – dark, chewy, and fudgy. Smear a little of that awesome chocolate frosting on top and WOWEE, what a cookie!
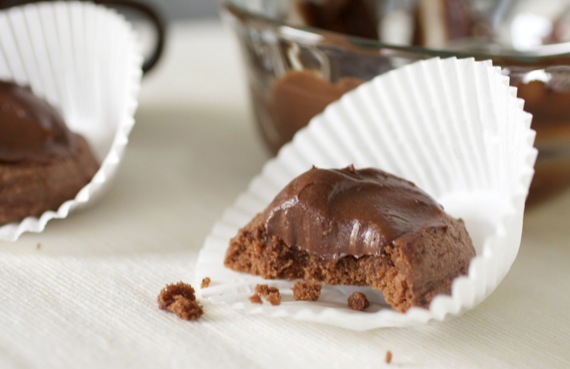
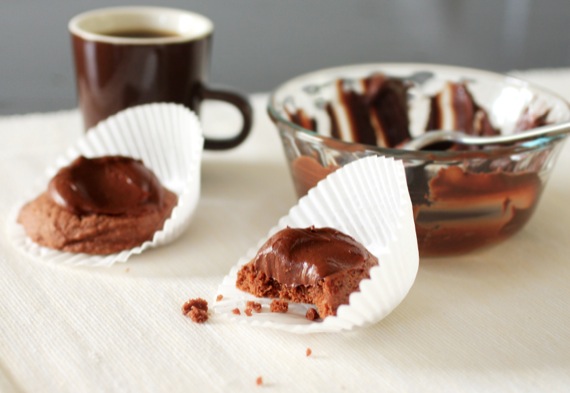
Needless to say, these were a big hit at the party. Luckily, there were some left over, so Joel and I could enjoy them over the next couple of days!
Brownie Thumbprints with Fudgy Chocolate Frosting
1 cup (2 sticks) cold, unsalted butter, cubed
1 1/4 cup sugar
2 large eggs
1/2 cup dark cocoa powder
2 1/4 cups all-purpose flour
1/4 teaspoon coarse salt
1 teaspoon baking powder
Preheat the oven to 350˚. Line baking sheets with parchment paper or silicone baking mats. In the bowl of an electric mixer, combine the butter and sugar. Beat together on medium-high speed until light and fluffy, 2-3 minutes. Blend in the eggs one at a time, scraping down the bowl as needed. Mix in the cocoa powder until well blended. Add the flour, salt and baking powder to the bowl and mix on low speed just until incorporated. Transfer the dough to a work surface and knead briefly by hand to be sure the ingredients are well combined. Using a cookie scoop or small spoon, scoop out the dough and roll into 1 1/2 inch balls. Place on the cookie sheet and flatten slightly using the bottom of a glass or measuring cup. Bake for about 10 minutes. Remove from oven and gently press the back of a teaspoon into the top of each cookie to make an indentation (that’s where the frosting will go). Cool completely.
For the Frosting**
1/4 cup (1/2 stick) butter, melted
1/3 cup HERSHEY’S Cocoa
1 1/2 cups powdered sugar
splash milk
1/2 teaspoon vanilla extract
Stir melted butter into cocoa. Add powdered sugar, then milk, beating to spreading consistency. Stir in vanilla. (Makes approximately 1 cup frosting)
Using a spoon, place a small dollop of frosting on each cooled cookie. Makes approximately 3 dozen cookies.
**feel free to double the frosting recipe if you prefer lots of frosting on your cookies. Keep in mind, however, these are very rich and don’t need too much.
Recipe source: Sing For Your Supper original idea; cookie recipe from Levain Bakery; frosting recipe from Hershey’s.
P.S. I must apologize for my outburst earlier. When I first wrote this post, there was a full moon occuring. Say what you will, but it just does something to me, y’all. That same night, I lost my temper because my pen wasn’t working. My pen, people. *sigh*
Well, friends, the time has finally come for our little family of 3 to take the plunge and do something highly stressful, chaotic, yet very important and hopefully very memorable…
…take our first vacation. That’s right. Very soon, we’ll load up our little CR-V and head for the Texas coast. We’ll be renting a small condo on the beach for 3 nights and I’d be lying if I said I wasn’t totally nervous.
What if I forget the blankie/paci/sippy cups?
What if Cassidy hates the beach?
What if she’s not able to sleep in the pack-n-play at night?
What if I don’t properly sunscreen her and she gets sunburned?
What if she steps on a jelly fish?
What if a creepy sunken ship washes up on shore and my worst nightmare comes to life??
Ok, so that last one is probably a bit of a stretch, but you get the idea. I’m a vacation-stresser anyway (meaning, I usually ruin our vacations with my constant worrying that something will go wrong, when what I don’t realize is that my worrying IS the something that goes wrong.), so naturally when a 19 month-old is involved, I take the stressing to a whole new level. However, I’ve done a good bit of researching tips for taking toddlers to the beach and I feel like I’ve got most of my bases covered, at least. So I guess we’ll just cross our fingers and hope for the best! 🙂

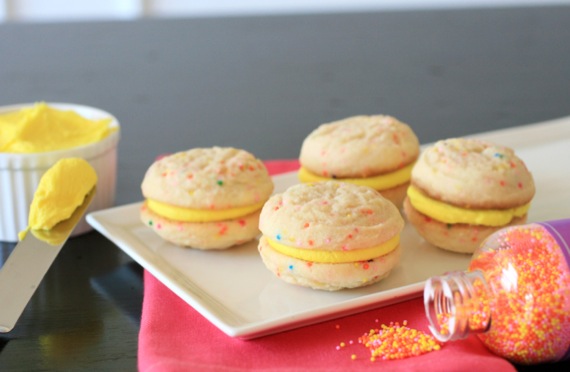
Now, onto these cookies! Who doesn’t love sandwich cookies, right? Soft, chewy cookies filled with sweet, buttery frosting? Yes, please! Our music minister and his family recently celebrated 10 years of service at our church- that’s a big deal! So the church threw them a little party and the choir volunteered to bake cookies. I didn’t want to bake just ANY old cookies for Matt and Caryn, and I decided nothing screams ‘celebration’ like funfetti, so these funfetti sandwich cookies were born! They disappeared pretty quickly, too, so I guess people liked them! Caryn, Matt- if you’re reading this, congratulations again! We love you!
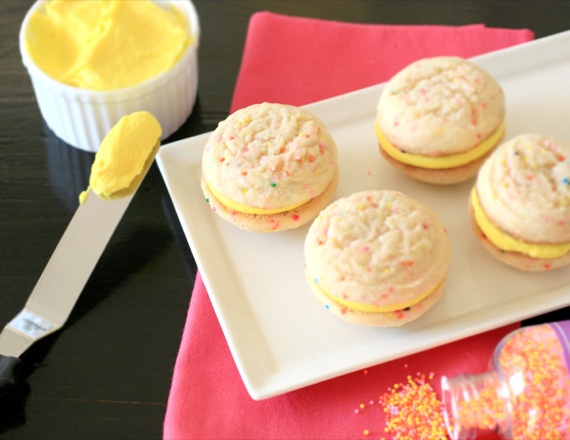
Funfetti Sandwich Cookies
2 cups all-purpose flour
1/2 teaspoon salt
1/2 teaspoon baking powder
1 stick plus 2 tablespoons (10 tablespoons) unsalted butter, at room temperature
1 cup sugar
1 large egg
1 large egg yolk
1 teaspoon pure vanilla extract
1/4 teaspoon almond extract
Colorful sprinkles
For the buttercream:
1 stick unsalted butter, at room temperature
3-4 cups confectioners’ sugar
1 teaspoon vanilla extract
1/4 teaspoon almond extract
pinch salt
splash milk (optional)
yellow food coloring
Preheat the oven to 350 degrees. Line two baking sheets with parchment paper or silicone mats.
Whisk the flour, salt, and baking powder together.
Working with a stand mixer fitted with a paddle attachment, or with a hand mixer in a large bowl, beat the butter at medium speed until smooth. Add the sugar and continue to beat for about 2 minutes, until the mixture is light and pale. Add the egg and yolk and beat for another minute or two; beat in the vanilla and almond extract. Reduce the mixer speed to low and steadily add the flour mixture, mixing only until it has been incorporated. Slowly stir in the sprinkles.
Using a teaspoon or small cookie scoop, scoop out the dough, roll into balls, and place on the baking sheets; press down gently to flatten slightly.
Bake the cookies for 8-9 minutes. The cookies should feel firm, but they should not color much, if at all. Cool completely.
To make the buttercream, beat the butter on medium speed until smooth. Add in the powdered sugar a little at a time until desired consistency is reached (it should be fairly think, but easily spread or piped.). Add in the vanilla extract, almond extract and salt. If icing is too thick, stir in a little milk. Gently stir in as much food coloring as you want to make it the desired color of yellow.
Pipe or spread the buttercream on half of the cookies; place other half of the cookies on top to make sandwiches. Makes approximately 17-20 sandwich cookies.
Recipe source: cookie recipe adapted from Dorie Greenspan; buttercream is a Sing For Your Supper original
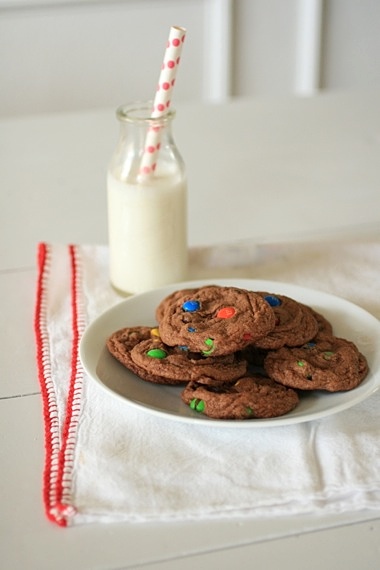
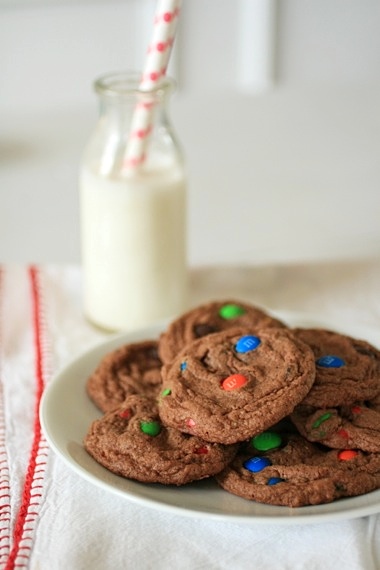
There’s a joke (sort of funny, sort of not) in our family now that these are “tornado cookies”, because I baked them the day of the tornado last month. Chuckle. Sort of.
These are some seriously good cookies. It’s a marriage of two awesome cookies- chewy M&M cookies and rich chocolate sugar cookies. Yeah baby. I used Martha Stewart’s recipe for chocolate sugar cookies (which would’ve been awesome on their own), and since I was craving M&M cookies, threw some M&Ms in. I was verrrrry happy with the results! Chewy and deeply chocolaty with the nice crunch of M&Ms. I can’t wait to make these again; hopefully minus the tornado this time. 😉

Chocolate M&M Sugar Cookies
1 1/2 cups all-purpose flour
1/2 cup good-quality unsweetened cocoa powder
1 teaspoon baking powder
1/2 teaspoon salt
1 teaspoon corn starch
1/2 cup (1 stick) unsalted butter, softened
1 1/2 cups sugar
1/2 cup vegetable shortening, substitute 1/2 cup unsalted butter, melted and cooled
1 large egg
1 1/2 teaspoons pure vanilla extract
1 1/2 cups M&Ms
Preheat oven to 375. Whisk together flour, cocoa powder, baking powder, salt, and corn starch in a medium bowl; set aside.
Put butter and sugar into the bowl of an electric mixer fitted with the paddle attachment. Mix on medium-high speed until pale and fluffy. Mix in shortening (or additional butter). Add egg and vanilla; mix until creamy. Reduce speed to low. Gradually add flour mixture, and mix until just combined. Using a wooden spoon, stir in the M&Ms.
Drop dough by tablespoon-size scoops onto baking sheets lined with parchment paper, spacing about 2 inches apart. Bake until edges are firm, 9-11 minutes. Let cool on sheets on wire racks. Cookies can be stored in an airtight container up to 2 days. Makes approximately 36 cookies.
Recipe source: adapted from Martha Stewart’s Cookies cookbook
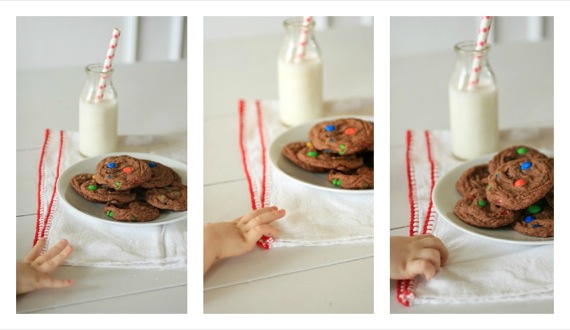
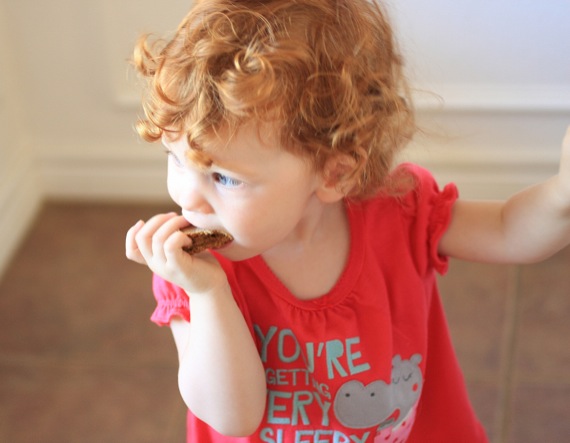
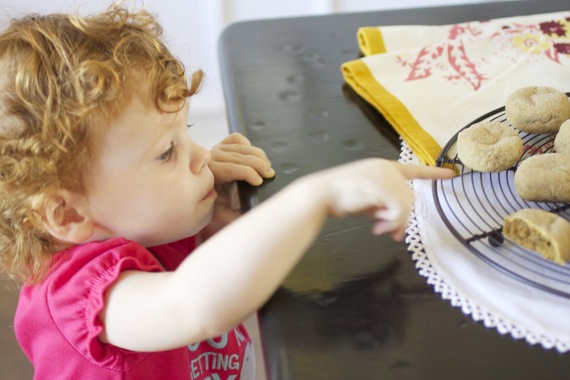
Cassidy was obviously a fan. 🙂


