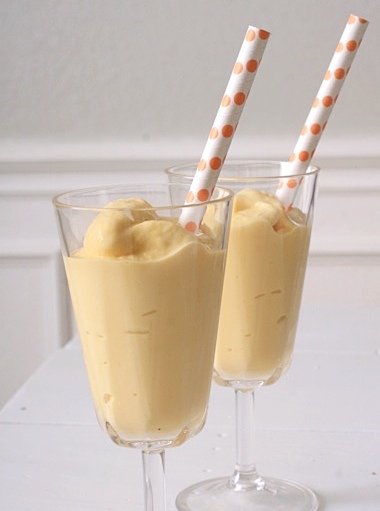
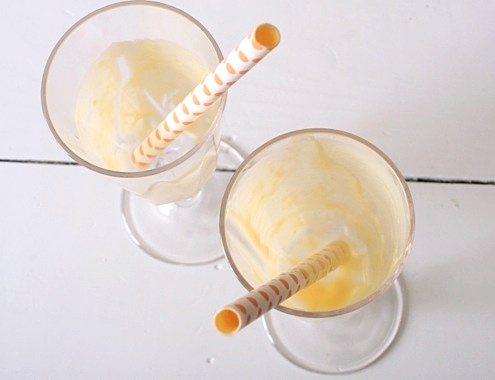
A loooong time ago, when Joel and I lived in our apartment in North Dallas, we used to eat at an Indian restaurant (my first Indian food experience was there, actually!). They had this delicious drink called a mango lassi. It was like a mango smoothie and we loved it! You may ask yourself, “what exactly is a ‘lassi’?”, well, to the best of my knowledge, it’s a smoothie made with fruit, yogurt, milk, and honey. Sounds good, right? Well it is!
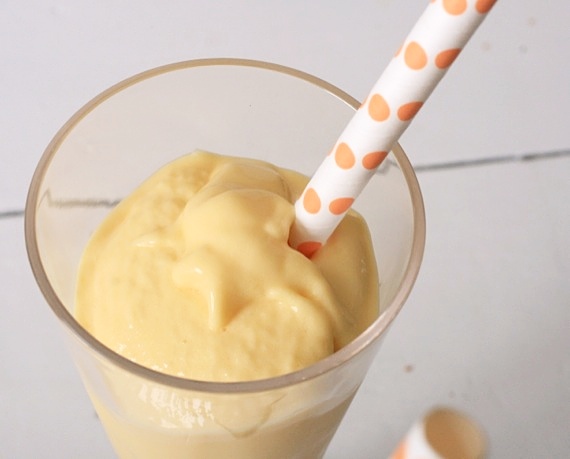
I love that these are made with fat-free yogurt, so they’re pretty much guilt-free! You can use any fruit you like, although I believe mango is the most common. I’m going to try strawberry next, then probably peach or blueberry since Cassidy loves blueberries so much. She loved the mango flavor, though! This was a great “dessert” after a healthy meal and I felt great about feeding it to my baby. I know these will be a popular beverage this summer, since it’s so light and refreshing!
Mango Lassi
2 cups mango, chopped (I used frozen mango, which saves so much time!)
1/2 cup nonfat greek yogurt
1 cup milk
1 tablespoon honey
1/2 teaspoon vanilla extract
Blend all ingredients in a blender until smooth (if you’re using frozen mango, it may be pretty thick, almost like frozen yogurt). Serve immediately. Serves about 4.
Recipe source: Sing For Your Supper original

They may not seem like much, but in the early 1900’s, flavored sodas (and ice cream sodas) became quite popular. So popular in fact, uptight teetotalers declared them “immoral” and banned them on Sundays. Sheesh. Nowadays, us Americans sure love a good ice cream soda, or “float” as it’s also referred to. I definitely do, but for some reason tend to forget about them. Until a few days ago when I saw a delicious looking chocolate soda on Amy Bakes Everything– it was so tempting, I just had to make my own! Of course I couldn’t resist adding a healthy scoop of Blue Bell vanilla ice cream to mine. 😉

The possibilities with sodas are endless! All you need is a flavored syrup (chocolate, caramel, strawberry, etc…) and a little soda water and you’re just about set! You simply MUST have whipped cream and a cherry on top, though! And it wouldn’t be the worst thing in the world to throw a little ice cream in there too. 😉 We had SO much fun making and drinking these- they’re perfect for parties or even a little something for a late night sweet tooth!

Old Fashioned Chocolate Sodas
-inspiration from Amy Bakes Everything
You’ll need:
chocolate syrup, such as Hershey’s
whipped cream (yes, I used Redi-Whip. It was awesome.)
maraschino cherries
vanilla ice cream
club soda or seltzer water
colored straws (these aren’t required, but it sure tastes better through a pretty pink straw) 🙂
Place a little chocolate syrup in the bottom of your glass (I ended up using around 1/4 cup per glass- we like ’em chocolaty!), top with one scoop of ice cream. Pour the soda water over slowly and stir (you may want to add a little more soda water after stirring if the foam deflates a little). Top with whipped cream and a cherry. Enjoy with a pretty pink straw.

Mmm, fizzy chocolate…..


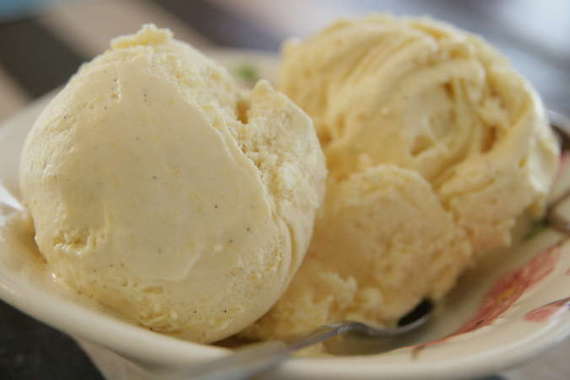
Why, hello summer! Thanks for showing up this year. I’m just thrilled that you’re here (however, I’m not so much thrilled about the sunburn you gave me yesterday…just sayin’). It’s officially HOT outside. Like, already in the upper 90’s this week. Our pool has pretty much reached bathtub temperatures. Is it just me, or did summer just sort of come out of nowhere? A couple of weeks ago it was rainy, windy and slightly chilly even….then BAM! Sweltering heat. No warning. Good thing I have an ice cream maker- take THAT, summertime! Ice cream makes everything better. Especially cheesecake ice cream. Especially cheesecake ice cream with strawberry puree swirled in it! This is David Lebovitz’s recipe and it’s rich, thick, incredibly creamy and oh-so satisfying in the summertime heat. Trust me- make it. Your sweating husband will thank you.

Strawberry Cheesecake Ice Cream
–The Perfect Scoop by David Lebovitz
8 ounces cream cheese, cut into small pieces
1 lemon
1 cup sour cream
1/2 cup half and half
2/3 cup sugar
pinch of salt
Zest the lemon directly into a blender or food processor, then add the cream cheese, sour cream, half and half, sugar and salt and puree until smooth.
Chill the mixture thoroughly in the refrigerator, then freeze it in your ice cream maker according to the manufacturer’s instructions.
Strawberry Sauce
1 1/2 pounds strawberries, rinsed and hulled
1/4 cup sugar
1 teaspoon freshly squeezed lemon juice
Puree the strawberries with the sugar and lemon juice in a food processor until smooth. Press the puree through a strainer to remove the seeds.
To finish the ice cream:
Place half of the ice cream in a container, then spoon in some of the strawberry sauce; repeat layers, then gently swirl with a spoon. Store in the freezer until ready to serve.


You may have remembered me saying that I got myself a copy of David Lebovitz’s The Perfect Scoop recently. Well, obviously I just love it…I’ve already made quite a few treats from it and they’ve all been totally delicious. But I have to say that this one takes the cake. I completely fell in love with gelato when I first tried it in Germany a few years ago, and then again in Italy (it just doesn’t get better than that…big scoops of gelato at a cute little street cafe on the Amalfi Coast) and we were lucky enough to live less than 5 minutes away from a great gelato shop for two years. So I make/eat the stuff whenever I can!

When I first got this book, this gelato recipe was the very first one that I marked to try. It didn’t take long for me to give it a go, either. This is definitely one of those recipes that requires a lot of time to make – not just a “throw it all into the ice cream machine” kind of recipe; but it was totally worth all the extra effort – totally and completely.

This particular recipe is called Gianduja Gelato – Gianduja (pronounced jahn-doo-yah) basically means hazelnut and chocolate. Considering I have an undying love for this combination, of course I was over the moon for this gelato. It’s so amazingly creamy and chocolatey with a good amount of hazelnut flavor. Perfect, in my opinion! My hubby went nuts for it too. I know this is a recipe I’ll be making over and over again for years to come.

Gianduja Gelato
-David Lebovitz
1 1/2 cups hazelnuts, toasted
1 cup whole milk
2 cups heavy cream
3/4 cup sugar
1/4 teaspoon coarse salt
4 ounces milk chocolate, finely chopped
5 large egg yolks
1/8 teaspoon vanilla extract
Rub the hazelnuts in a kitchen towel to remove as much of the papery skins as possible, then finely chop them in a food processor or blender.
Warm the milk with 1 cup of the cream, sugar, and salt in a saucepan.
Once warm, remove from the heat and add the chopped hazelnuts. Cover and let steep at room temperature for 1 hour.
Put the milk chocolate pieces in a large bowl. Heat the remaining 1 cup cream in a medium saucepan until it just begins to boil. Pour it over the milk chocolate pieces and stir until the chocolate is completely melted and smooth. Set a mesh strainer over the top.
Pour the hazelnut-infused milk through a strainer into a medium saucepan, squeezing the nuts firmly with your hands to extract as much of the flavorful liquid as possible. Discard the hazelnuts.
Rewarm the hazelnut-infused mixture. In a separate medium bowl, whisk together the egg yolks. Slowly pour the warm hazelnut mixture into the egg yolks, whisking constantly, then scrape the warmed egg yolks back into the saucepan.
Stir the mixture constantly over medium heat with a heatproof spatula, scraping the bottom as you stir, until the mixture thickens and coats the spatula. Pour the custard through the strainer and stir it into the milk chocolate mixture. Add the vanilla and stir until cool over an ice bath.
Chill the mixture thoroughly in the refrigerator, then freeze it in your ice cream maker according to the manufacturer’s instructions.
Toasting Nuts
Preheat the oven to 350°F.
Spread the nuts in an even layer on an ungreased baking sheet.
Bake the nuts in the oven for 10 to 12 minutes, stirring them once or twice while baking so they toast evenly. To see if they’re done, snap one in half: it should be lightly golden brown throughout.
Let the nuts cool completely before using unless the recipe indicates otherwise.

(That’s my hubby enjoying his gelato). 🙂 This is seriously some of the best ice cream I’ve ever made…if you have an ice cream maker, you should totally give this one a try! You’ll fall in love with the chocolate/hazelnut combo, I guarantee!
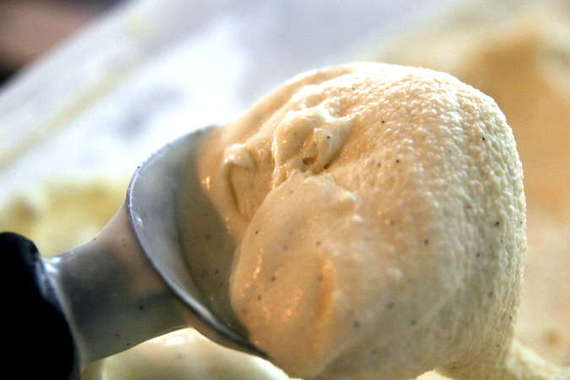
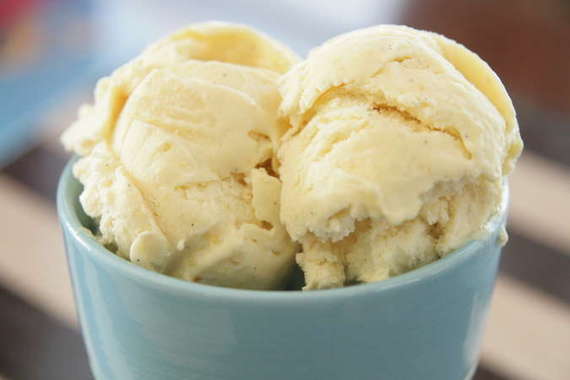
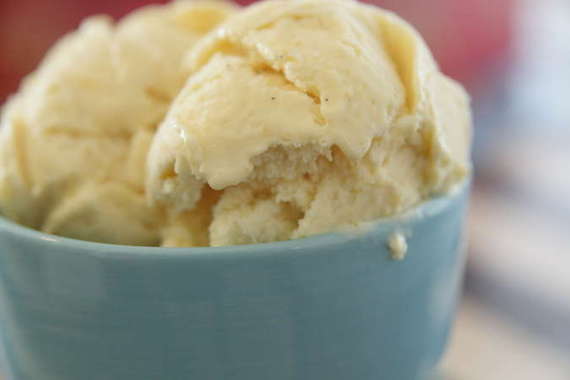
It seems like I’ve been making so much ice cream lately, I’ve got it coming out of my ears! Not that I mind, really…what better time than Summertime to have fun making all kinds of delicious homemade ice creams?! This time around it’s Dorie’s plain Vanilla – thick, smooth and creamy. I’ve been saving it for my mother and sister’s visit this week (it’s my sister’s birthday today!! Happy Birthday, big sister!!), so hopefully we can all dig in tonight after cake! I did manage to sneak a taste while I was taking pictures, and wowee – this is some tasty ice cream!! And believe me, it’s anything but plain! I put in a tiny little splash of Grand Marnier, and I think that really gave it a nice, rich flavor to compliment the vanilla. I think my mom and sister will really enjoy this!!
This weeks’ choice is brought to you by Lynne of Cafe LynnyLu – go check out her fantastic looking recipes and photos; while you’re at it, be sure and get the recipe for this delicious ice cream!
And, as I said a few days back, get ready for some new and exciting things here at Sing For Your Supper! Hopefully it will all come together soon!! Yipppee!!
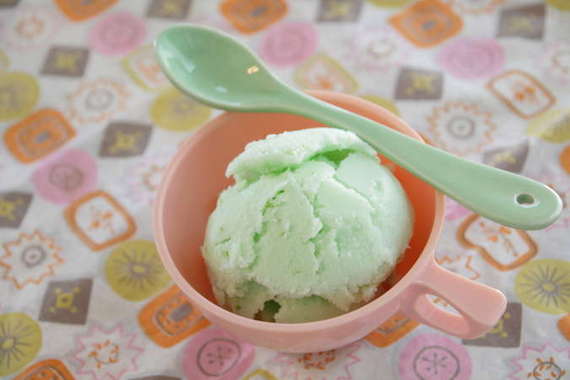
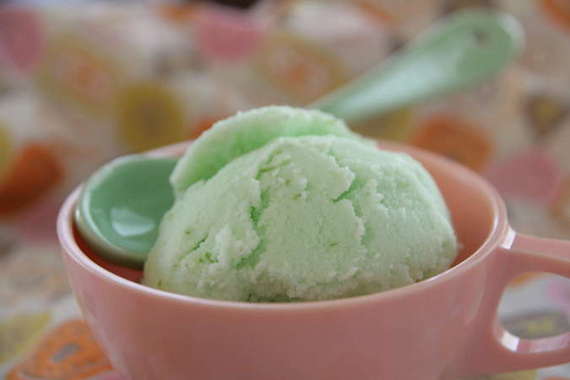
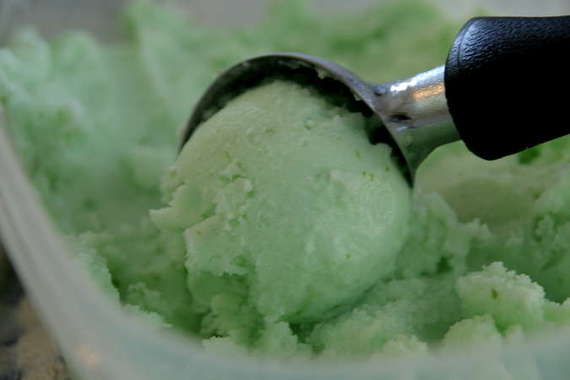
Mmm, lime sherbet…everybody loves it; it’s pretty, it’s refreshing, it’s delicious. But I never ate it as a kid; for years I thought I wasn’t allowed. How silly is that? It started when I was a little girl (I don’t know how old – probably somewhere around 6-8ish) and my grandmother (Nana), my sister and I were at our favorite ice cream shop. I was eyeing the pretty, bright green lime sherbet – it looked so good! I really wanted a big scoop, unfortunately, I had on a brand new dress, and Nana knew I’d end up with bright green sherbet all over it. So, she urged me to pick another flavor of ice cream instead. For whatever reason, since then, I always thought there was something wrong with the lime sherbet and that I shouldn’t eat it (I was a very gullable child…). It took years before I even tried it! Finally, once I did, I loved it! So tart and creamy!
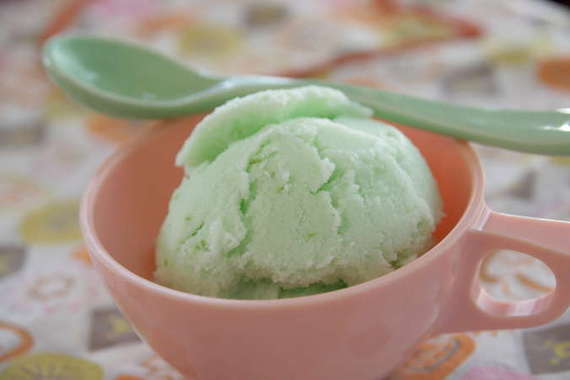
So, the other day, I found myself with a few leftover limes and decided lime sherbet would be the perfect way to use them up! I used David Lebovitz’s recipe for Lemon Sherbet, using limes instead, and it turned out great! I’m really enjoying his book, The Perfect Scoop – it’s so great to have in the summertime! In case you’re wondering why my sherbet is green, I added a few drops of green food coloring, just so it would look like the pretty lime sherbet I saw in the ice cream shop that time! I love the color!!
Lime Sherbet
-David Lebovitz – The Perfect Scoop
3 cups whole milk
3/4 cup sugar
1 lime, preferably unsprayed
6 tablespoons freshly squeezed lime juice (from 2 to 3 limes)
In a medium, nonreactive saucepan, mix 1 cup of the milk with the sugar. Grate the zest of the lime directly into the saucepan. Heat, stirring frequently, until the sugar is dissolved. Remove from the heat and add the remaining 2 cups milk, then chill thoroughly in the refrigerator.
Stir the lime juice into the milk mixture. If it curdles a bit, whisk it vigorously to make it smooth again. Freeze in your ice cream maker according to the manufacturer’s instructions. Makes about 1 quart (1 liter).
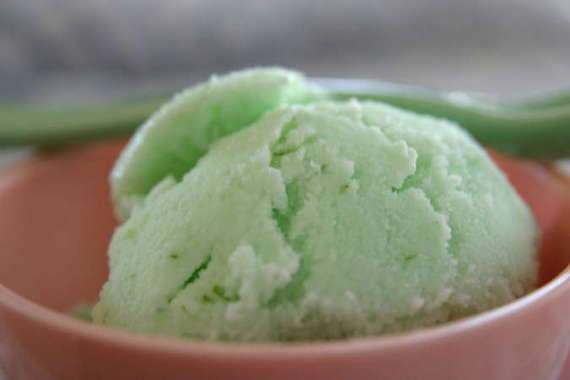
This was so refreshing and delicious. And loved that it’s so much lighter than ice cream, so I feel a little less guilty eating it. A perfect summer treat!
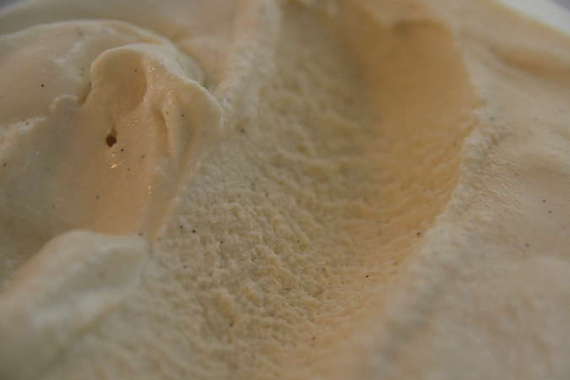
Yep. Today’s my birthday. The big two-five. I can now rent a car. My insurance goes down a little. I can justify eating ice cream cake. Those are a couple of good things I guess. The bad things – I’m five years from thirty. Halfway to fifty….dear Lord. It seemed like just yesterday I was just graduated from college, turning twenty-two, getting married….jeez. You blink and three years go by. My birthday’s been great so far – had my family over for a little party (complete with my own ice cream cake!) this past weekend, went out to dinner last night with hubby’s parents to my favorite restaurant, and tonight hubby and I are trying a new oyster bar – and of course, I’ve gotten some great gifts! Anyway, this post isn’t really about my birthday – it’s about Dorie’s Honey Peach Ice Cream. The greatest frozen treat ever concocted. I mean, yeah, my birthday is pretty important, but not quite as important as honey peach ice cream; this is serious ice cream, ya’ll……
I’ve made this once before, last summer, and totally fell in love. It’s peachy, incredibly creamy, and the honey gives it a smoothness and flavor that totally set it apart from all other ice creams. I’m completey sold on this ice cream. It’s my all-time favorite. Dorie talks about her love of ice cream in her book, Baking From My Home to Yours (the book we bake from) – and you can make any of her recipes and tell right off that this woman knows her ice cream. The Blueberry Sour Cream is to die for, and of course the Honey Peach is amazing…I can’t wait to give the others a try!

To make this, basically you just boil your milk mixture and your honey/peach mixture, then blend it all together in a blender and throw it in your ice cream maker. Coudn’t be easier – or more delicious. Dorie reserves a few chunks of peaches to toss in the ice cream mixer at the last minute, but I personally wasn’t a fan of the frozen peach bits last time, so I just pureed all the peaches and enjoyed it much more this time. My parents were visiting, so they got to sample it and really loved it. This is one of those recipes I’ll make every single summer from now on.
Do yourself a (big) favor right now and check out Tommi’s blog – Brown Interior, and get the recipe for this amazing ice cream! And THANK YOU, Tommi, for picking one of my absolute favorite Dorie recipes for my birthday!! This ice cream was the cherry on top of a great birthday!
And P.S. – a BIG thank you to my good buddy Andrea, for showing my how to (finally) use my camera….it’s amazing how all those little buttons actually DO something! 🙂


