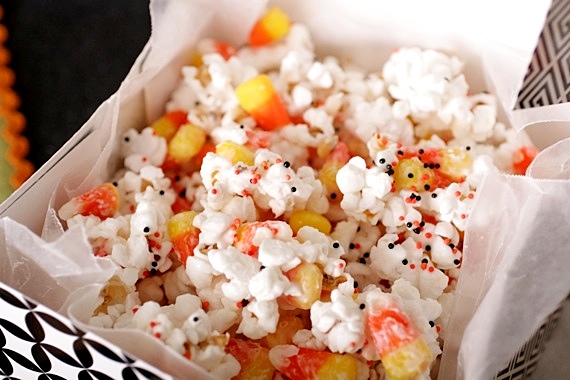
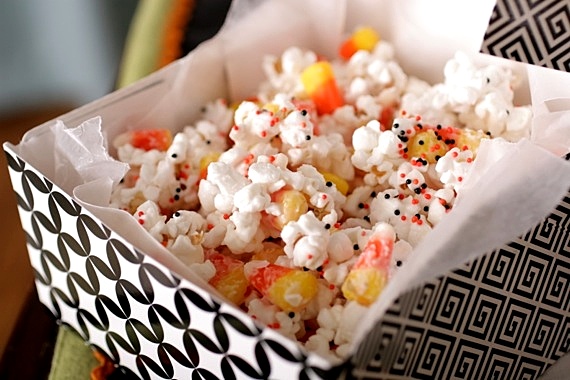
During the Halloween season, there’s nothing better than being snuggled up on the couch, watching Halloween movies and eating fun snacks (well, unless you’re a kid, in which case trick-or-treating is pretty hard to beat!). We make it a tradition every year to watch our favorite Halloween movies- Disney’s Icabod Crane (the cute animated version with Bing Crosby narrating), Hocus Pocus, Young Frankenstein, It’s the Great Pumpkin, Charlie Brown and of course, my all-time favorite- The Nightmare Before Christmas (ok, so I watch that one pretty much year ’round…). And watching those great movies just wouldn’t be the same without some kind of yummy snack; like this popcorn. It’s just a simple mixture of popcorn and candy corn coated in white chocolate bark and Halloween sprinkles. Nothing hard or complicated, just fun and downright yummy! Perfect for parties, trick-or-treaters or movie-watching! Whatever you make to snack on this Halloween, I hope you have a wonderful, FUN, safe time with your friends and family! Happy Halloween!!!
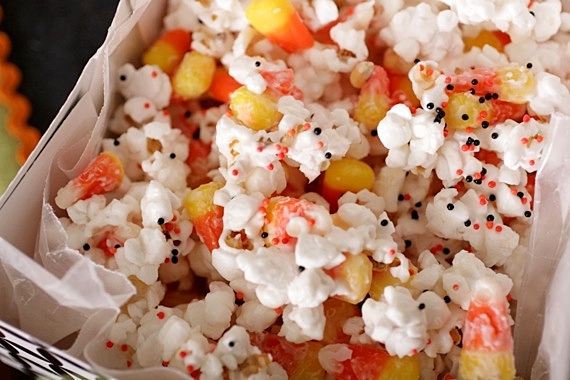
Halloween Popcorn
2 bags microwave popcorn, popped
1 bag candy corn
1 16-ounce package white chocolate bark*
Halloween sprinkles
wax paper
Place the popped popcorn and candy corn in a very large bowl (you need plenty of room to stir the popcorn). Melt the white chocolate bark in the microwave in 30 second increments, stirring after each time, until melted. Drizzle over the popcorn and candy corn and stir to coat each piece of popcorn. Pour the mixture over wax paper and spread into an even layer. Sprinkle with Halloween sprinkles and allow to cool for at least 15-30 minutes. Break into pieces. Serves 6-8.
*I know I’ll get questions about this: white chocolate bark (or white chocolate candy coating) can be found in your regular grocery store on the baking aisle with the chocolate chips and nuts.
Recipe source: Sing For Your Supper original (however, this isn’t exactly a new concept- I’m sure it’s been done many times before me)
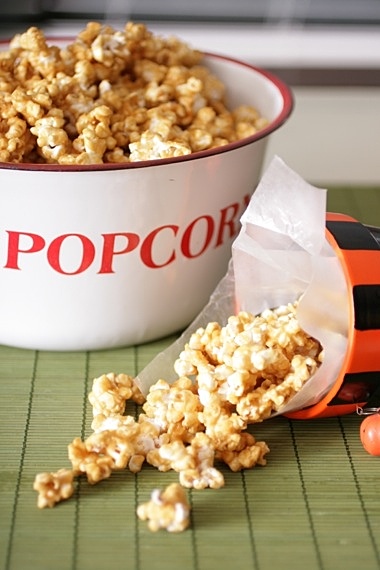
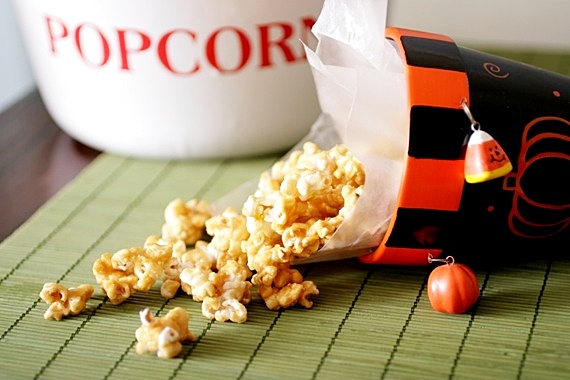
I guess this pregnancy has me really digging caramel, because I feel like I’ve been making lots of caramel-y treats lately even though I’m normally not a huge fan. Hey, there are worse things to crave! Last week I had a whole afternoon to myself and thought I’d try my hand at homemade caramel corn. I’ve made it once before, but with my mom’s help (in fact, I believe it was during the Halloween season and we munched on our homemade caramel corn while watching Halloween movies!) and lucky for me, she wrote the recipe down for me! Yay! So I got in the kitchen and whipped up this delicious caramel corn- man, oh MAN! What a TREAT! This was rich, buttery and most importantly, good ‘n crunchy! I took a big bag to work and none of us could stop munching on it! I will most definitely be making this again; probably on Halloween, in fact. A perfect snack to munch on while watching Hocus Pocus! 🙂
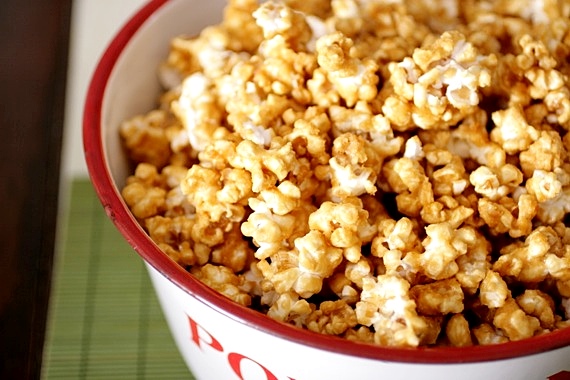
Caramel Corn
6 quarts popped corn (3 bags microwave popcorn- I used Tender White)
2 cups brown sugar
1 cup (2 sticks) butter
1/2 cup light corn syrup
1 teaspoon salt
1 teaspoon vanilla
1 teaspoon baking soda
Preheat oven to 250 degrees. Cook brown sugar, butter, corn syrup and salt in a large saucepan over medium-high heat. Bring to a boil and cook for 5 minutes, stirring constantly. Remove from heat and stir in baking soda and vanilla. Pour over popcorn and stir to coat. Place popcorn in a large roasting pan or spread out over two baking sheets lined with greased foil. Bake, stirring every 15 minutes for about 45 minutes. Caramel corn will be crunchy (with no sogginess) when done. Let cool and break into pieces. Makes enough to serve a large crowd- approximately 10-12 people.
Recipe source: my mom
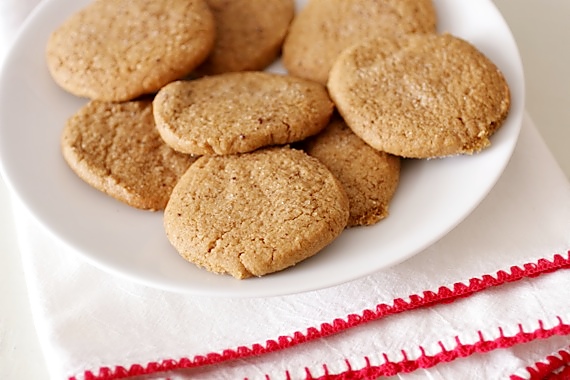
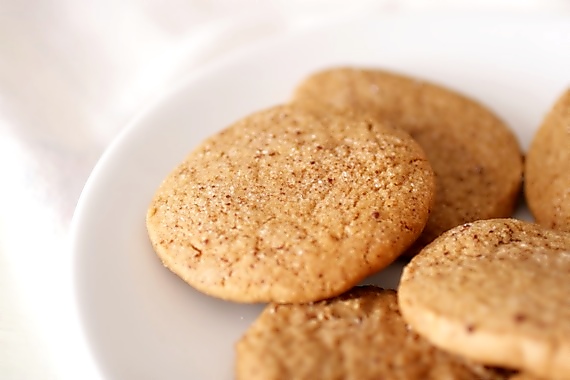
While visiting my Nana a couple of weeks ago, I was flipping through a Better Homes and Gardens cookbook that had come with one of her latest magazines. It was nothing but cookies, so of course I was finding recipes left and right I wanted to try. The first one to catch my eye was one for sugar and spice espresso cookies. Sounds great, right? Well, they really are! I came home and immediately baked up a batch of these cookies! The verdict: we loved them (even Joel, who isn’t crazy about coffee!)! Just a teensy bit chewy with a good amount of crunch and the coffee flavor is nicely complimented by the cinnamon. They tasted like cinnamon coffee, which happens to be one of my favorite fall treats. I loved the way my house smelled while these were baking, too! I marked the recipe with a little star and put it in my recipe box, which means I’ll definitely be making these over and over again!
Sugar and Spice Espresso Cookies
2 tablespoons, plus 1 teaspoon instant espresso powder
1 tablespoon hot water
1/2 cup (1 stick) butter, softened
1/4 cup shortening
1 1/4 cups sugar
1/2 cup packed brown sugar
1 teaspoon baking powder
1 teaspoon ground cinnamon
1/2 teaspoon salt
1 egg
1 teaspoon vanilla
2 cups flour
In a small bowl, combine the 2 tablespoons espresso powder and water, stirring until coffee powder is dissolved. Set aside.
In the bowl of a mixer fitted with the paddle attachment (or using a hand mixer), combine the butter and shortening; beat for 30 seconds. Add 1 cup of the granulated sugar, the brown sugar, baking powder, cinnamon, and salt. Beat until combined, scraping down the sides of the bowl occasionally. Beat in the egg, vanilla and coffee mixture. Slowly add the flour a little at a time until fully incorporated.
Divide the dough into thirds. Shape each portion into a 7-inch log. Wrap each log in plastic wrap and chill about 2 hours or until dough is firm enough to slice.
Preheat oven to 375 degrees. Cut logs into 3/8-inch slices. Place slices 2 inches apart on a cookie sheet lined with parchment paper. In a small bowl, stir together the remaining 1/4 cup sugar and 1 teaspoon espresso powder; sprinkle over slices. Bake for 9-10 minutes or until edges are golden brown. Makes approximately 48 cookies.
Recipe source: Better Homes and Gardens Best Ever Cookies recipe book
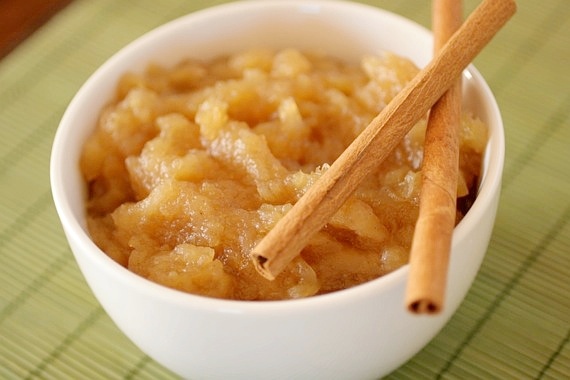
One of my very favorite things about fall is the smell of apples and spices cooking. It really puts me in the perfect “fall” state of mind…even if it is still 90+ degrees outside (we’ll get there, Dallas, we’ll get there!). The other night we had a nice “cold front” (86 degrees instead of the usual 97 or more), so I decided to whip up a quick pot of homemade applesauce. Joel and I both love applesauce, but when it comes to homemade, there’s no contest. The beauty of this recipe is, you can just throw it all in a big pot and leave it. And of course in the meantime, your house will smell amazing!
Homemade Applesauce
4 apples, peeled and cored (I used Red Delicious, but Honeycrisp or Pink Lady would be ideal)
1/2 cup brown sugar, packed
pinch salt
juice of one lemon
1/2 teaspoon cinnamon
1/4 cup water
Cut the apples into large chunks and put them in a heavy pot over medium heat; add the brown sugar, salt, lemon juice, cinnamon and water. Bring to a simmer and reduce heat to low. Cook, stirring occasionally, for about 45 minutes to 1 hour, until the apples are extremely soft and mushy. Using a potato masher or fork, mash the apples together until you have an applesauce-like consistency. Serves 4.
Recipe source: Sing For Your Supper
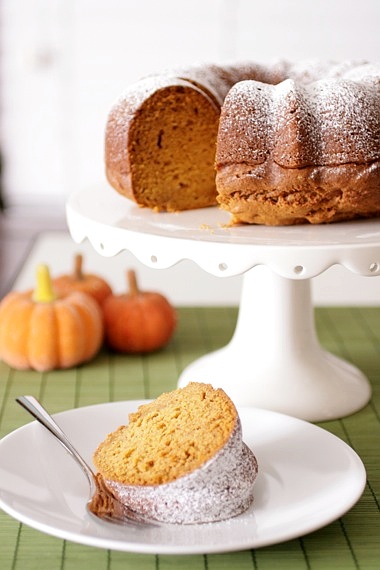
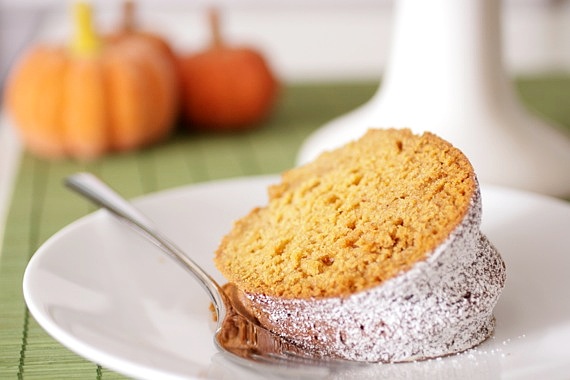
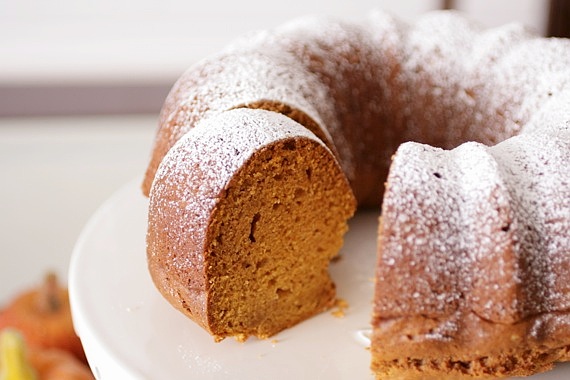
I waited as long as I could. I really did. But when we got that blast of glorious fall weather this weekend, I decided I couldn’t wait any longer; it was time to bring in fall! I’ve gotten out all my fall decorations, made soup, homemade applesauce (recipe to come!) and baked this pumpkin pound cake. And lemme tell ya- I feel GREAT! Nothing like a cool breeze and the smell of pumpkin and cinnamon to lift a girl’s spirits! Sure, it’s supposed to get back into the 90’s next week but for now, it’s fall outside and I’m enjoying every second of it. My mom is responsible for me baking this cake- she thought a pumpkin pound cake sounded great and charged me with finding a great recipe to try. I did a little searching and came up with exactly what I was looking for! The cake is delicious- not too sweet, super moist, dense and full of warm spices. I loved it with my morning coffee- the perfect combination!
Pumpkin Pound Cake
1 cup granulated sugar
1 cup brown sugar
1 cup canola oil
3 eggs
3 cups all-purpose flour
2 teaspoons baking soda
1 teaspoon ground cinnamon
1 teaspoon ground nutmeg
1/2 teaspoon salt
1/4 teaspoon ground cloves
1 package instant vanilla pudding mix
1 can (15 ounces) pumpkin puree
Confectioners’ sugar, for dusting
In a large bowl, combine sugar and oil until blended. Add eggs, one at a time, beating well after each addition. In a separate bowl, combine flour, baking soda, cinnamon, nutmeg, salt, cloves and pudding mix; add to egg mixture alternately with pumpkin, beating well after each addition.
Transfer to a greased bundt pan. Bake at 350 degrees for 60-65 minutes or until toothpick inserted near the center comes out clean. Cool for 10 minutes before inverting onto a wire rack. Remove from pan and cool completely. Dust with confectioners’ sugar. Serves 12-16.
Recipe source: Adapted from Taste of Home
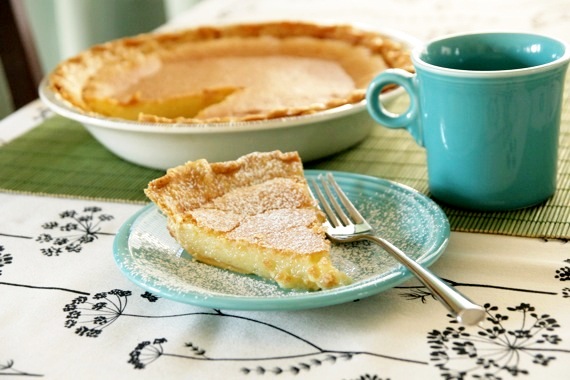
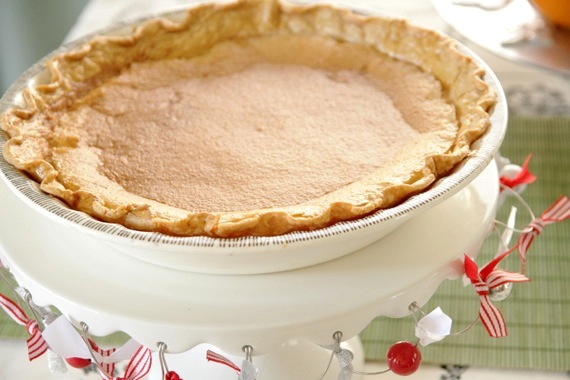
Continuing with my Thanksgiving-inspired week, I’ll post every man’s favorite: buttermilk pie. It really is man pleasin’. Really. Every male that has ever eaten this pie has gone ape for it. I don’t know if it’s the sugary-sweet filling or the creamy, buttery texture, but men seriously adore buttermilk pie. In fact, the primary reason I’m posting this right now is because my friend Michael recently sent me a text saying, “you need to make buttermilk pie!” Done and DONE, Mikey! It’s a holiday staple in our family, too. There has never been a holiday get-together that didn’t include this pie. In fact, every Thanksgiving and Christmas my mom is sure to make extra so that my dad will be able to have plenty of leftovers. This is one of Baba’s most famous and requested recipes and I’m so proud and happy to post it here for you. Make this part of your Thanksgiving dessert table- trust me.
Baba’s Buttermilk Pie
-old family recipe (really, really old!)
*makes 2 9-inch pies
2 9-inch pie crusts, unbaked
3 3/4 cups sugar
1/2 cup flour
1/2 teaspoon salt
1 teaspoon vanilla
6 eggs, beaten
1 cup (2 sticks) butter, melted
1 cup buttermilk
**a little lemon zest and a squeeze of juice is a nice addition, but my dad hates lemon in his buttermilk pies, so we’ve never really done it. I did this time and it really adds a nice, subtle tartness.
Mix sugar, flour and salt. Add eggs, butter, buttermilk and vanilla. Pour into two unbaked pie crusts and bake for 1 hour at 350 degrees (check them at 50 minutes- if they’re too jiggly put them back in for a few more minutes. They shouldn’t jiggle very much at all when they’re done). If the tops are getting too brown, cover loosely with foil for the remainder of baking time. Let cool for at least 1 hour before slicing.
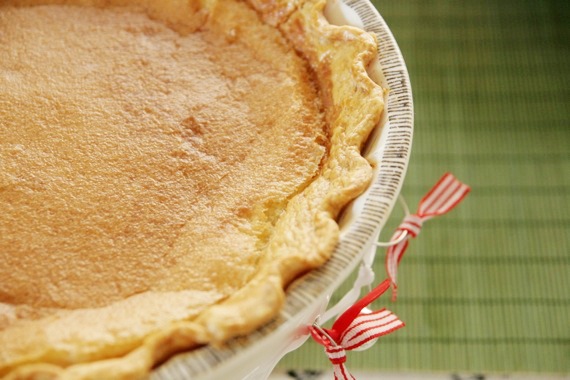
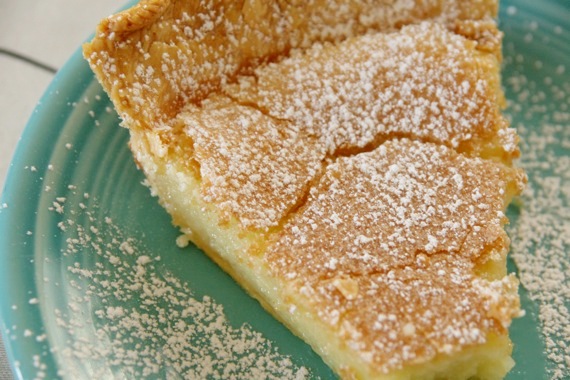
Now, to those of you thinking, “what the heck?! Buttermilk?!” Don’t worry- there isn’t even the slightest hint of buttermilk taste. It’s just sweet, thick, and buttery. A delicious Southern tradition. Man, it’s so great to live in the South. 😉
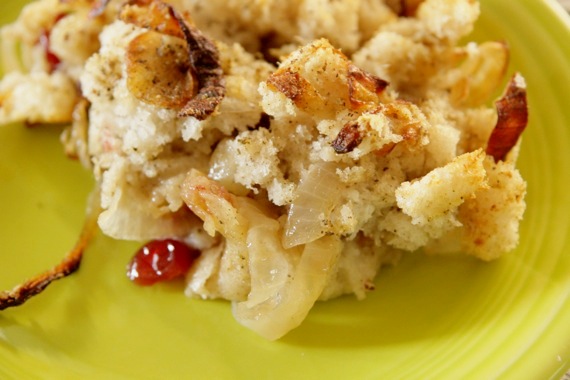
WOOO! It’s Thanksgiving food time! Now is the time everyone is planning menus, gathering delicious new recipes to try and calling their grandmas for the old tried and true recipes they just HAVE to have. So in honor of all that, I’ve decided to share a couple of excellent, easy Thanksgiving recipes with you this week. Starting with stuffing. Now, let’s get one thing straight- I am a Southerner. We don’t do ‘stuffing’; we do ‘dressing’. Made with cornbread. And we don’t put anything snooty in it, either. None of this Yankee-fied “chestnuts and sausage” business. Very straight-forward and very, very delicious. BUT, that doesn’t mean I can’t experiment with some delicious ideas before Thanksgiving! I do realize that the majority of my reader enjoy what my family calls “Yankee Stuffing”, and I need to stretch my boundaries a little, SO I made you some Yankee stuffing. It’s pretty good, too….for Yankee stuffing. 😉
Sourdough Stuffing with Caramelized Onions, Apples and Cranberries
-by me
(this only makes one 9 inch pan- you may want to double or triple it for a large crowd)
1 loaf sourdough bread, crusts removed and cut into cubes
2 stalks celery, chopped
1 medium onion, sliced into thin rings
1 small green apple, peeled and chopped
1/3 cup dried cranberries
1 1/2 teaspoons dried, ground sage
1 teaspoon salt
1/2 teaspoon pepper
1 1/4 cups chicken broth
In a medium skillet over medium heat, cook the onions in a little olive oil for about 15-20 minutes, or until soft and caramelized. Stir in the apples and celery. Cook for about 5 minutes (you don’t want the apples to get mushy- just fairly soft).
In a large bowl, combine the bread, onion/apple mixture, cranberries, sage and salt and pepper. Pour into a greased 9×9 baking dish then pour the chicken broth over the mixture. Bake in a 350 degree oven for 45-50 minutes.
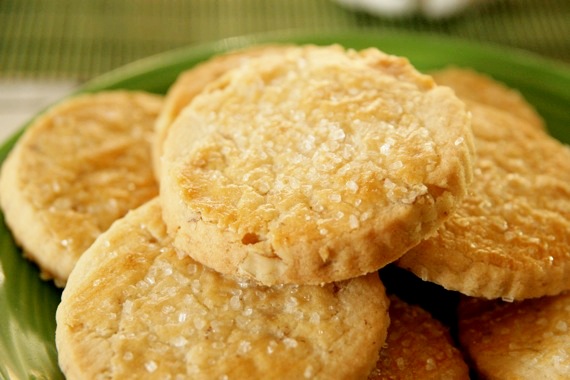
Listen up, dear readers, because I’m going to tell you how to be the most popular guy at work: bring cookies. Often. Think about it- everybody’s face immediately lights up when you announce, “I brought cookies!”, then they ‘ooh and ahh’ and talk about how delicious they are. Yep, nothing brightens up your co-workers’ work days like a fresh, homemade cookie. Cookies like these! I found these in Martha Stewart’s ‘Cookies’ and was intrigued by the use of maple syrup (I’ve really been into maple flavored treats lately!). They’re so crisp and delicious- my coworkers really, really enjoyed them! The coarse sugar on the top really adds an extra special touch, I think. These would be great after dinner with coffee or a hot cup of tea. Very delicate and all-around tasty.
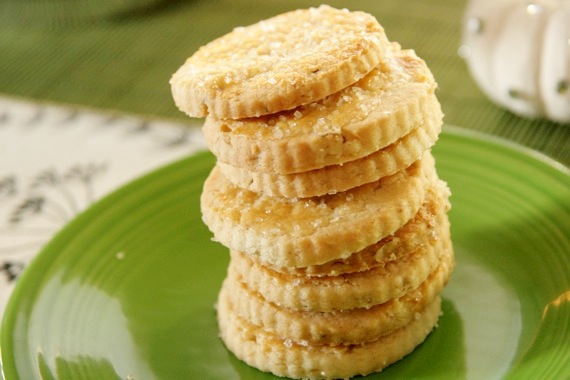
Maple-Walnut Shortbread
-slightly adapted from Martha Stewart Cookies
2 1/4 cups all-purpose flour, plus more for work surface
1/2 cup cake flour (not self-rising)
1/2 teaspoon salt
3/4 cup walnuts (about 2 1/4 ounces), finely chopped
1 cup (2 sticks) unsalted butter, room temperature
3/4 cup granulated sugar
1/4 cup pure maple syrup
1 large egg yolk
1 large egg, lightly beaten
coarse sugar, for sprinkling
Into a medium bowl, sift flours and salt. Whisk in 1/2 cup chopped walnuts, set aside.
In the bowl of an electric mixer fitted with the paddle attachment, cream butter and granulated sugar on medium-high speed until smooth and light, about one minute. Add the maple syrup and egg yolk; beat on medium speed until well combined. On low speed, gradually add flour mixture, beating until just combined. Dough should be smooth and pliable. Flatten into a disk. Wrap in plastic; chill until firm, 1 1/2 hours or overnight.
Preheat oven to 350 degrees. Line baking sheet with parchment paper.
On a lightly floured work surface, roll out dough to 1/4 inch thick. Cut out rounds using a two-inch cookie cutter; place one inch apart on prepared baking sheet. Brush tops with beaten egg and sprinkle the entire surface with coarse sugar.
Bake cookies, rotating baking sheet halfway through, until golden around the edges, 10 to 12 minutes. Transfer to a wire rack to cool. Store in airtight containers at room temperature up to four days. Makes approximately 2 dozen.
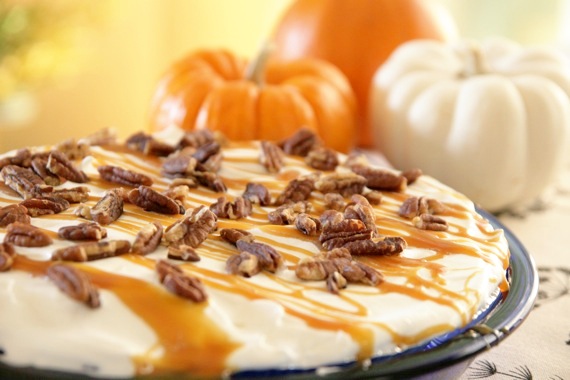
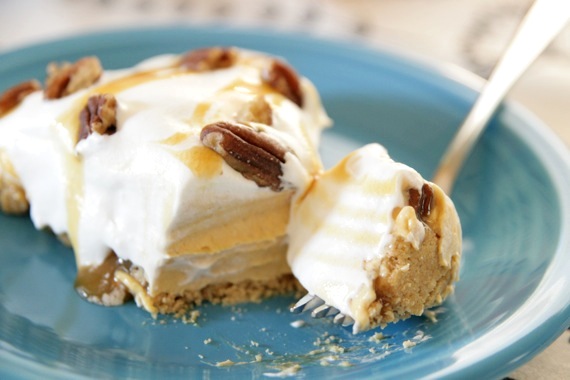
Let me start off by saying, this pie is delicious. Really, really delicious. Surprisingly delicious. After one taste, I sat there and finished off the entire slice before I was even finished photographing it! But before I go on any further, there’s something you should know about this pie. Here’s an email I recently received from a very, very sweet reader:
Amy, I’m one of your faithful followers and would like to make a request of you. We just recently found out that my dad is suffering from Multiple Myeloma (a cancer of the blood) and one of the side effects is diabetes. My dad loves his sweets and it’s been a little hard for him to make such a drastic adjustment to his diet. I would like to make him a tasty dessert that he would not believe was diabetic friendly. So now my request; sometime in the future could you post a diabetic recipe that I could make for my dad? I know that I can probably find literally thousands of recipes on the internet, but they wouldn’t have the thought and love put into them. Plus, if you make it and post it I know it will be AWESOME! Thanks so much for all the care you put into your blog. You are a very special person. Thanks again, Sheila
After reading Sheila’s touching email, there was absolutely NO way I was going to disappoint her. I immediately set out to find the most delicious, satisfying, ‘never-know-it’s-sugar-free’ recipe. That’s right. This pie is diabetic-friendly. And I am proud to say….YOU’D NEVER KNOW IT. After getting Sheila’s email, I emailed my Aunt Josie and got her best sugar-free recipe. My cousin Travis has diabetes, so Aunt Josie is a rockstar when it comes to flavorful, sugar-free cooking/baking. This pie is her favorite and now I can see why! It’s super easy, takes literally no time to put together and the pumpkin and spices really shine! What a crowd-pleaser! And just in time for Thanksgiving! So Sheila, I really hope your dad enjoys this pie…I sure enjoyed making it for you!
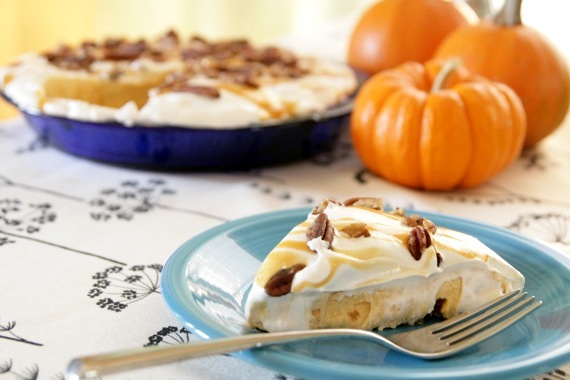
No-Bake Turtle Pumpkin Pie
-my Aunt Josie’s recipe
1/4 cup plus 2 tablespoons sugar free caramel ice cream topping, divided
1 graham cracker pie crust
1/2 cup plus 2 tablespoons pecan pieces, divided
1 cup cold 1% milk
2 packages (4-serving size) vanilla sugar-free, fat-free instant pudding
1 cup canned pumpkin
1 teaspoon ground cinnamon
1/4 teaspoon ground nutmeg
1/4 teaspoon ground cloves
1 tub (8 ounce) light whipped topping, thawed, divided
Pour 1/4 cup caramel topping into crust; sprinkle with 1/2 cup pecans.
Beat milk, pudding mixes, pumpkin, and spices with whisk until blended. Gently fold in 1 1/2 cup whipped topping. Spread into crust.
Refrigerate at least 1 hour. Top with remaining whipped topping and 2 tablespoons pecans. Drizzle with remaining 2 tablespoons caramel topping.
Nutritional analysis: (per one slice)
Calories – 165
Fiber – 2.7
Protein – 2
Total fat – 7
Carbohydrate – 23
**Josie notes that this pie is still a little high in carbs. So you might not want to go crazy and eat the whole thing yourself. 😉
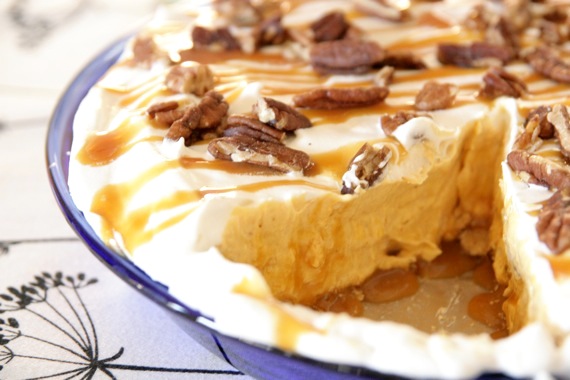
Mmm, just look at all that caramel oozing out…..*drool* Sheila, I sincerely hope this recipe makes your dad happy! And thank you for challenging me to try something outside of my comfort zone. I’m proud to say this is my very first diabetic-friendly recipe on Sing For Your Supper; hopefully there will be many more to come! Happy baking!
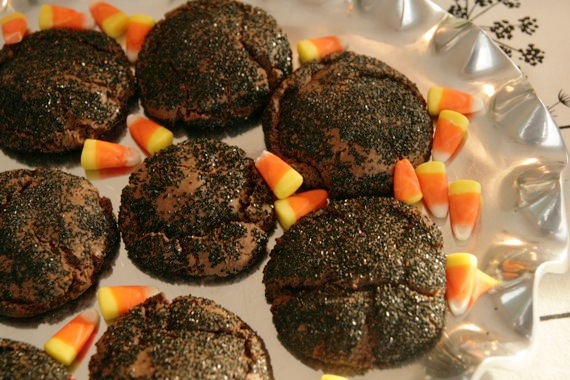
Ugly little things, aren’t they? Yep. Sometimes the best intentions can lead total failures. Like these cookies. I saw these Chocolate Pumpkin Spice Kiss Cookies on Barbara Bakes and immediately set out to make them. They looked totally delicious- soft chocolate cookies filled with a sweet pumpkin spice kiss in the center! YUM! Only thing is…I decided to get ‘creative’ and ended up with some really ugly, rather embarrassing cookies. Remember that time I said there are some recipes food bloggers shouldn’t mess with? Yeah, I totally should have taken my own advice here. I was in the Halloween spirit and thought I’d roll the cookies in some black decorating sugar before baking to give a ‘spooky’ effect. What I ended up with was charred hamburger patty cookies. FAIL.
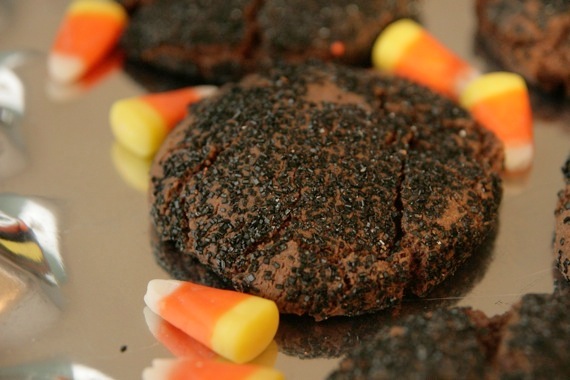
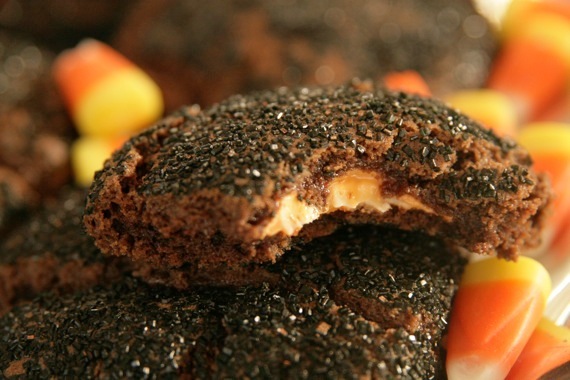
Seriously! Don’t they look like charred hamburger patties??! Not pretty. So, hubby and I had a good laugh over it and decided to go ahead and give them a try anyway…besides the fact that the black sugar turned our mouths and teeth black (eww!), these were actually really, really good! The chocolate cookie mixed with the spiciness of the pumpkin spice kiss was a great combination! Despite how delicious they were, I ended up throwing them out since I was too embarrassed to take them to work with me (I’d forever be ‘the weird lady who brought burnt meat cookies’– not something I’d enjoy!), BUT, I’ll most definitely make these again in the future…just without the black sugar. 😉
Chocolate Pumpkin Spice Kiss Cookies
–Barbara Bakes
2 1/2 cups flour all purpose flour flour
3/4 cup unsweetened cocoa
1 teaspoon baking soda
1 cup sugar
1 cup firmly packed brown sugar
1 cup butter, softened
2 teaspoons vanilla
2 eggs
48 Hershey’s Pumpkin Spice Kisses, unwrapped
In medium bowl, sift together flour, cocoa and baking soda.
In large bowl, combine sugar, brown sugar and butter; beat until light and fluffy. Add vanilla and eggs; beat well. Add flour mixture; blend well. If necessary, cover with plastic wrap; refrigerate 30 minutes for easier handling.
Heat oven to 375°F. For each cookie, with floured hands, shape about 1 tablespoon dough around 1 Hershey’s Pumpkin Spice Kiss, covering completely.
Place 2 inches apart on ungreased cookie sheets. (I always bake cookies on parchment paper.)
Bake at 375° for 7 to 10 minutes or until set and slightly cracked. Cool 2 minutes; remove from cookie sheets. Cool on wire rack for 15 minutes or until completely cooled.
I hope everyone has a wonderful, safe and FUN Halloween!!! 🙂


