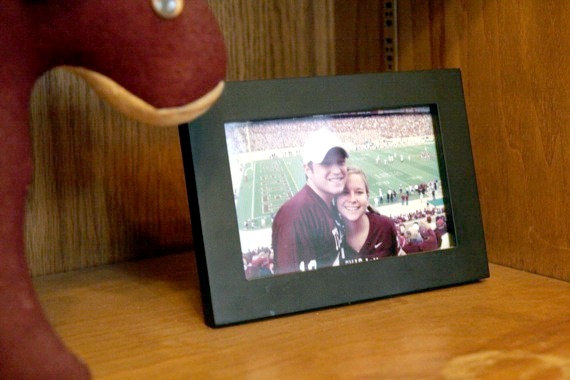
The weather is (slowly) changing from boiling hot to cool and crisp, every Saturday from here until Thanksgiving will be taken up with us either road-tripping to College Station, Tx or glued to the T.V., there’s an obscenely large, menacing maroon and white flag flying proudly in our front yard, and my husband has turned from being a mature, respectable man into a squealing 8 year-old child. This can only mean one thing: it’s Aggie football season, indeed. Yes, friends, my husband and I are Aggies. Big ones. My hubby went to school there and even though I didn’t (there’s no music program to speak of, hardly), I come from a family of proud Aggies. Therefore, every September, we get serious about Fightin’ Texas Aggie Football.

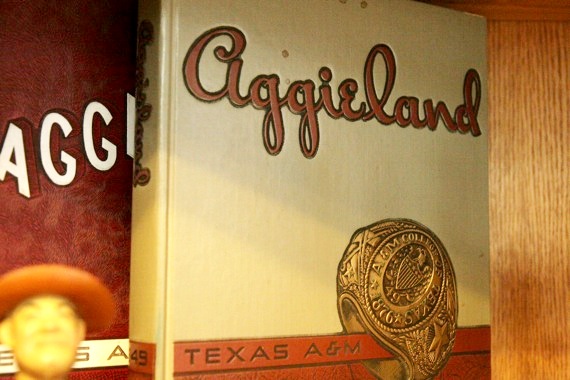
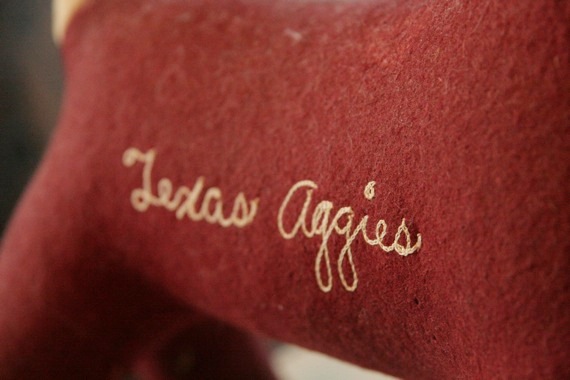
This is our “Aggie shelf” in the living room- these were my granddad’s belongings from his days at A&M – yearbooks, (very old) stuffed animals and lots, lots more. We’re so proud to display his things in our home; Joel, especially.
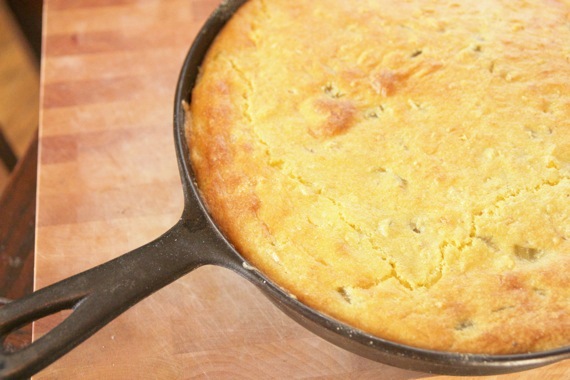
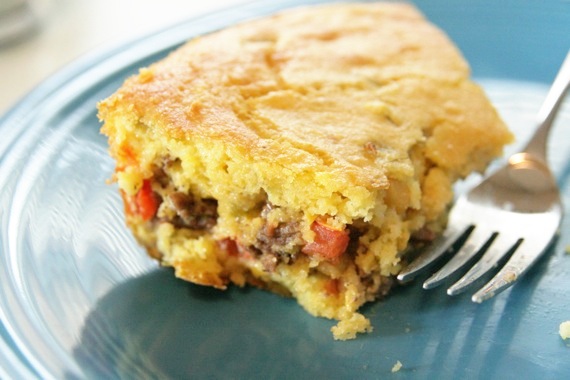
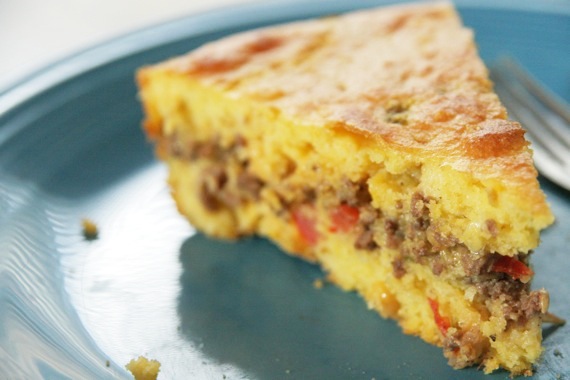
Football food is SO good (which, by the way, if you love it as much as I do, check out my “Football Food” tag! Lots of game-day goodies in there!). There’s nothing better than having some friends over to watch the game and eat good food – like this pie! It’s an old family favorite that gets made a lot around football season. I love the layer of spicy beef and cheddar cheese- it has SO much flavor! The good news is, this keeps really well in the fridge- just pop the leftovers back in the oven for 10 or 15 minutes and it’s just as moist and flavorful as it was the first day- maybe even better!
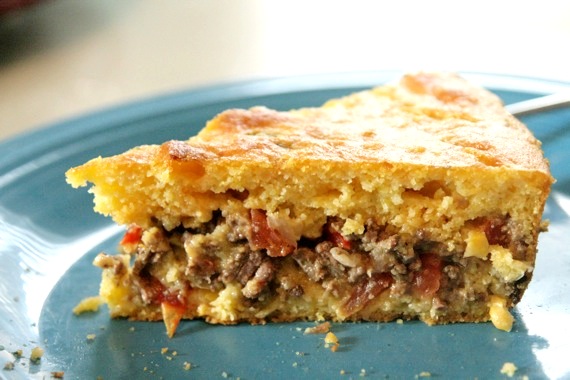
Game-Day Mexican Cornbread Skillet Pie
1 1/2 cups cornmeal
1 teaspoon salt
2/3 cup oil
1 cup sour cream
3 teaspoons baking powder
1 can cream style corn
2 eggs, slightly beaten
1 small can green chiles
2 cloves garlic, minced
1 onion, chopped
1 red bell pepper, chopped
2 roma tomatoes, seeded and chopped
1 pound lean ground beef
1 teaspoon cumin
1 teaspoon chili powder
1 teaspoon black pepper
1 teaspoon salt
dash cayenne pepper
1 cup shredded cheddar cheese
Preheat the oven to 350 degrees. Mix the first 8 ingredients in a bowl and set aside. In a medium pan, saute the onions, garlic and peppers over medium-high heat until soft. Add in the ground beef and cook through. Drain off grease and stir in the tomatoes, cumin, chili powder, black pepper, salt and cayenne pepper. Remove from heat.
Grease a cast iron skillet (or any oven-safe skillet) and sprinkle the bottom with a little cornmeal. Spread half of the cornbread mixture, followed by the beef mixture. Top with the cheddar cheese, then spread the remaining cornbread mixture over the top. Bake for 45-50 minutes, or until golden brown. Enjoy in front of the T.V. while cheering for your favorite football team! Serves 4.
Recipe source: Sing For Your Supper original (though technically I guess I can’t take credit since my mom has been making it for years!)
Gig ‘Em and God Bless! 😉
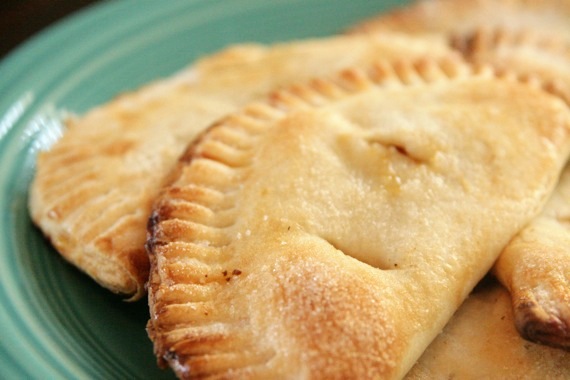
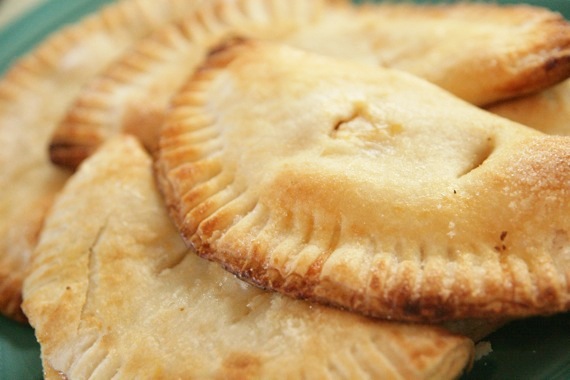
Fried pies are a very old thing. Old as in, my great-grandmother and her mother before her were making them for their kids’ lunch pails a loooong time ago. Anytime there was leftover fruit or pie crust, you made fried pies. Simple as that. They’re the perfect hand-held size with the perfect fruit-to-pastry ratio. A genius little invention, the fried pie. My mom makes them a lot now, too. She made these, in fact. You can use your favorite pie crust, or if you’re in a hurry you can use a refrigerated one. These are so simple, and since they’re baked instead of fried, you don’t get near as much of the fat (although, they sure taste good fried!). These are flaky, sweet, and full of delicious fruit filling- I love them. And I love their simplicity.
[Baked] Apricot Fried Pies
*the dough and assembly process is taken from The Pastry Queen (seen on Delish); the filling is my mother’s.
For the pastry:
1/2 cup (1 stick) unsalted butter, chilled
3 cups all-purpose flour
2 tsp baking powder
1 1/2 tsp salt
3/4 cup ice water
1 egg, beaten with a tablespoon of water (for egg wash)
Combine the flour, baking powder, and salt in a large bowl. Cut the butter into 1/2-inch cubes. Work the butter into the dry ingredients with a pastry cutter or your fingers until the mixture resembles cornmeal. Add the ice water and gently form the dough into a ball. Divide the dough into two halves.
For the Filling:
approx. 15 fresh apricots, pitted and cut into halves
1 cup sugar
water
Put the apricots and sugar in a large pot and fill with just enough water to cover them. Bring to a boil, then reduce heat and let simmer for at least 20 minutes, or until most of the water has cooked out and you have a thick fruit filling. Let cool.
To assemble the pies:
Preheat the oven to 375 degrees. Flour a smooth surface and roll out each half to 1/16-inch thick (just thicker than a tortilla) and cut into 5-inch rounds. Re-roll the scraps and cut additional rounds. Fill each round with 1 heaping Tablespoon of filling. Fold the dough into a half-circle; wet your fingers and press to seal the edges with water. Crimp the edges with the tines of a fork to seal the pies. Cut two 1/2-inch slits in each pie. Brush with the egg wash and sprinkle with a little sugar.
Bake on cookie sheets lined with parchment paper for 12-15 minutes, until golden brown. Makes approx. 12 pies.
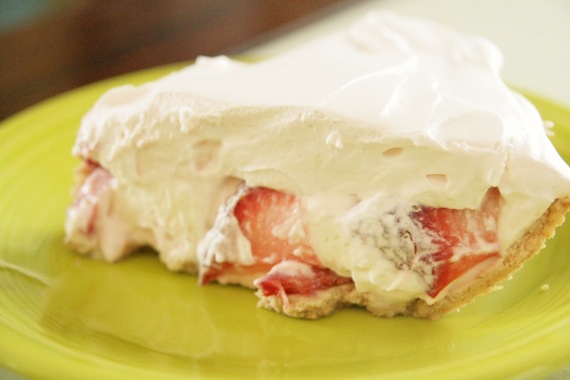
For August’s ‘You Want Pies With That?‘ challenge, Branny decided we should create a pie that represents our personality. How fun is that?! As soon as I saw her choice, I immediately started thinking about how I could come up with an A.D.D. pie. However, with us getting ready to go on a trip, and things being so busy and with me being so, well….A.D.D., it just didn’t work out for me to devote the time I needed for my A.D.D. pie (bummer- that would’ve been perfect). So instead, I asked my hubby what he thought was the best way to describe my personality; “sunny and bright”, he said with a smile (isn’t he sweet?). Although I’m not sure about “sunny and bright”….more like, “sunny and bright with a likely chance of severe thunderstorms”; I went to work on a pie that fit the bill. Somehow I ended up with a Strawberry-Lemonade Pie, then I took it a step further and came up with a Strawberry-Lemonade Cheesecake Pie. Muuuuch better (and really, really delicious!)! So anyway, this is the pie that best fits my personality (according to my husband….who is apparently blinded by love…).
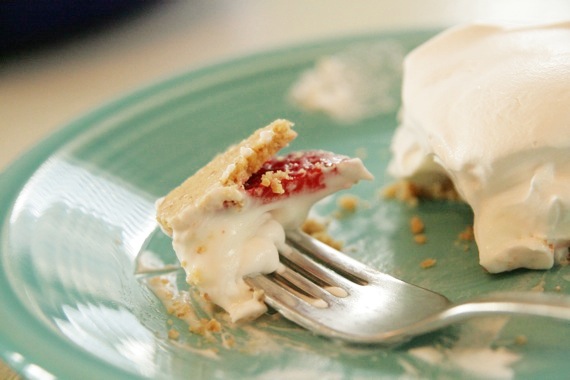
Sunny and Bright Strawberry-Lemonade Cheesecake Pie with Chambord Whipped Cream
For the pie:
1 graham cracker crust (your favorite recipe or store-bought)
1 8-oz. block of cream cheese, at room temperature
10-15 strawberries, hulled and sliced
juice of 2 large lemons
1/3 cup sugar
1 teaspoon vanilla extract
1/4 cup sour cream
1/2 cup heavy cream
splash orange liqueur, such as Triple Sec or Grand Marnier
For the Chambord Whipped cream:
1 cup heavy cream
1/3 cup sugar
1 tablespoon Chambord (Raspberry liqueur)
1 teaspoon vanilla extract
In the bowl of an electric mixer, add the cream cheese, sugar and sour cream and beat at medium speed for 2 minutes, until the cream cheese is smooth. Add in the lemon juice, vanilla extract and orange liqueur. Mix just until combined. Transfer to another bowl and use the mixer bowl to whip the cream. Beat the 1/2 cup heavy cream at medium speed until stiff peaks form. Gently fold the whipped cream into the cheesecake mixture. Refrigerate until needed.
To make the Chambord Whipped Cream Topping:
Beat the 1 cup of heavy cream, 1/3 cup sugar, Chambord and vanilla extract on medium speed until stiff peaks form. Refrigerate until needed.
To assemble:
In the prepared graham cracker crust, place half of the sliced strawberries in a single layer. Top with the cheesecake mixture; add another layer of sliced strawberries, then top with the Chambord whipped cream. Garnish with additional strawberries. Chill for at least 2 hours before serving. The pie is best served on the day its made.
*The liqueur is optional- it just adds a little extra flavor, but you can certainly leave it out if you want!
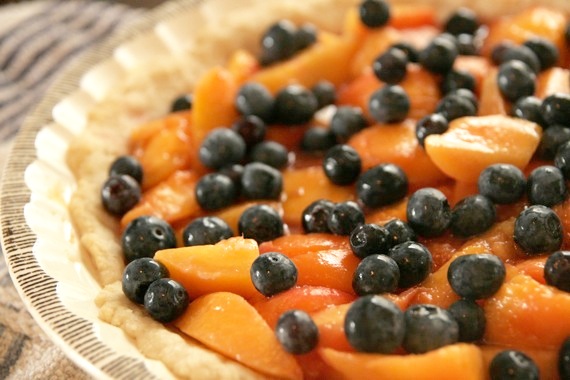
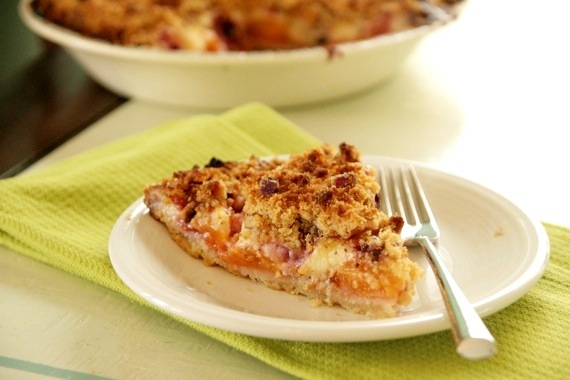
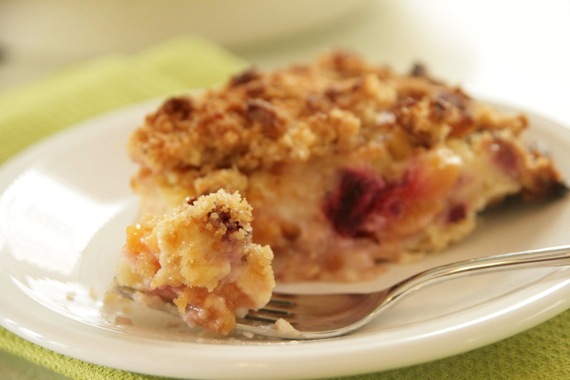
I absolutely, positively adore peaches. I can’t get enough of them. I guess it stems from my love of peach cobbler, or maybe it’s just because of their sweet, juicy, slightly tart nature. The best fruit, in my opinion. So naturally, when Erin of Milk and Honey, chose “Summer Fruit” for this month’s ‘You Want Pies With That?’ theme, I knew immediately that I would make a peach pie. No contest. In fact, I’ve been waiting a LONG time to make this pie! I saw this recipe on Taste of Home a loooong time ago, and have been waiting until peaches were in season to make it! Finally, the time came- thank my lucky stars! This is one FABULOUS pie. And I’m not just saying that- WOWEE! One bite and I knew I had a real winner of a recipe on my hands. The filling is thick and rich, but not at all too sweet. The topping is crisp, crumbly and slightly scented with cinnamon- it’s what gives a lot of the sweetness to the pie. YUM. I’ll most definitely be making this over, and over, and over again! I’m absolutely thrilled to submit this to July’s ‘YWPWT’ challenge!
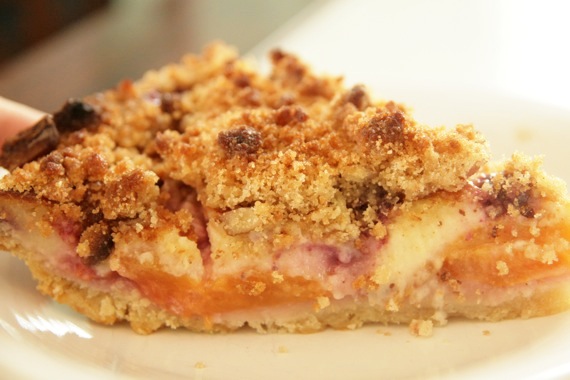
Peach-Blueberry Sour Cream Pie
-adapted from tasteofhome.com
Pastry for single-crust pie (9 inches)
3 cups sliced peeled peaches
1 cup fresh blueberries
2 tablespoons peach preserves or jam (I used plum)
1 cup sugar
1 cup (8 ounces) sour cream
3 egg yolks
1/4 cup all-purpose flour
1 teaspoon vanilla extract
TOPPING:
1/2 cup all-purpose flour
1/2 cup packed brown sugar
1/4 cup sugar
3 tablespoons chopped pecans
1/2 teaspoon ground cinnamon
1/4 cup cold butter, cubed
Line a 9-in. pie plate with pastry; trim and flute edges. In a large bowl, combine peaches, blueberries and jam. Transfer to pastry. In a small bowl, whisk the sugar, sour cream, egg yolks, flour and vanilla. Pour over peaches.
Bake at 425° for 30 minutes (keep an eye on it because it will brown quickly around the edges- you may need to cover them with foil if they’re getting too brown). Meanwhile, in a small bowl, combine the flour, sugars, pecans and cinnamon. Cut in butter until crumbly; sprinkle over pie.
Bake for 15-20 minutes or until a knife inserted in the center comes out clean and topping is golden brown. Cover edges with foil during the last 15 minutes to prevent over-browning if necessary. Cool completely on a wire rack for 3 hours before serving. Store in the refrigerator. Yield: 8 servings.
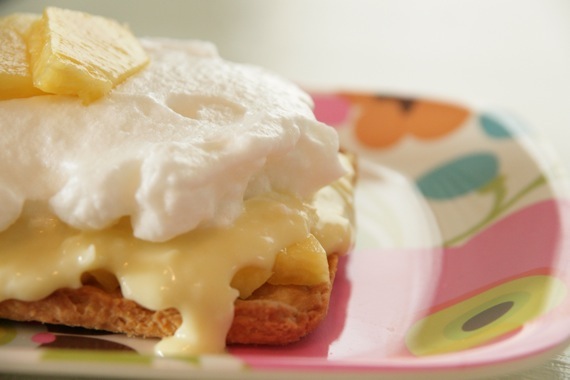
This month over at ‘You Want Pies With That?‘, the theme is “Summery Drinks”, chosen by Suz of You Can’t Eat What? and Sara of Cupcake Muffin. We were supposed to create a pie or a tart inspired by our favorite drink to sip by the pool during the summertime. My kind of theme!! It didn’t take long for me to figure out what kind of drink I’d be inspired by….I *love* piña coladas!! Creamy, smooth and “coconut-y” with a hint of dark rum. Bliss. I knew immediately that I’d use Dorie Greenspan’s recipe for Toasted Coconut Cream Tart as a base- that filling is insanely delicious!!! I sort of played around for awhile, then eventually came up with a delicious piña colada tart; the only thing I’d change for next time is topping it with whipped cream instead of meringue, as well as using canned crushed pineapple instead of fresh, since it’s a little sweeter. My custard was a little runny (I think I probably put in too much rum- oops!) but it still tasted amazing!
Piña Colada Tart
-adapted from Dorie Greenspan
2 cups whole milk
1/2 cup sugar
6 large egg yolks
1/3 cup cornstarch
pinch of salt
2 tablespoons dark rum
1/2 teaspoon vanilla extract
1 tablespoon pineapple juice
3 1/2 tablespoons cold unsalted butter, cut into small pieces
1 cup shredded sweetened coconut
2 cups chopped pineapple (fresh or canned- I used fresh, but next time I’ll probably use canned because it’s a little sweeter)
1 9-inch sweet tart shell, baked and cooled (recipe below)
Bring milk to a boil. In a large saucepan, whisk together sugar, yolks, cornstarch and salt until well blended. Whisk in 1/4 cup of hot milk to temper the yolks, then whisk in the rest of the milk. Continue whisking over medium heat and bring to a boil. Whisk an additional 1 or 2 minutes then remove from heat. Whisk in rum, pineapple juice and vanilla and let sit for 5 minutes. Then whisk in the butter, stirring until custard is smooth. Stir in the coconut. Transfer to a container, cover the surface of the custard with plastic wrap and refrigerate until cold.
Sweet Tart Dough
(makes one 9-inch crust)
1 1/2 cups all-purpose flour
1/2 cup confectioners’ sugar
1/4 teaspoon salt
1 stick plus 1 tablespoon very cold (or frozen) unsalted butter, cut into small pieces
1 large egg yolk
To make the dough: Put the flour, confectioners’ sugar and salt in the workbowl of a food processor and pulse a couple of times to combine. Scatter the pieces of butter over the dry ingredients and pulse until the butter is cut in coarsely – you’ll have pieces the size of oatmeal flakes and pea-size pieces and that’s just fine. Stir the egg, just to break it up, and add it a little at a time, pulsing after each addition. When the egg is in, process in long pulses – about 10 seconds each – until the dough, which will look granular soon after the egg is added, forms clumps and curds. Just before your reaches this clumpy stage, the sound of the machine working the dough will change – heads up. Turn the dough out onto a work surface.
Very lightly and sparingly – make that very, very lightly and sparingly – knead the dough just to incorporate any dry ingredients that might have escaped mixing.
To make a press-in crust: Butter the tart pan and press the dough evenly along the bottom and up the sides of the pan. Don’t be stingy – you want a crust with a little heft because you want to be able to both taste and feel it. Also, don’t be too heavy-handed – you want to press the crust in so that the pieces cling to one another and knit together when baked, but you don’t want to press so hard that the crust loses its crumbly shortbreadish texture. Freeze the crust for at least 30 minutes, preferably longer, before baking.
To bake the crust: Center a rack in the oven and preheat the oven to 375 degrees F. Butter the shiny side of a piece of aluminum foil and fit the foil tightly against the crust. Bake the crust 25 minutes, then carefully remove the foil. If the crust has puffed, press it down gently with the back of a spoon. Bake for another 3 to 5 minutes, then transfer the crust to a cooling rack; keep it in its pan.
To assemble: Spread the chopped pineapple on the cooled crust and top with custard. Top with meringue or whipped cream. Chill until ready to serve.
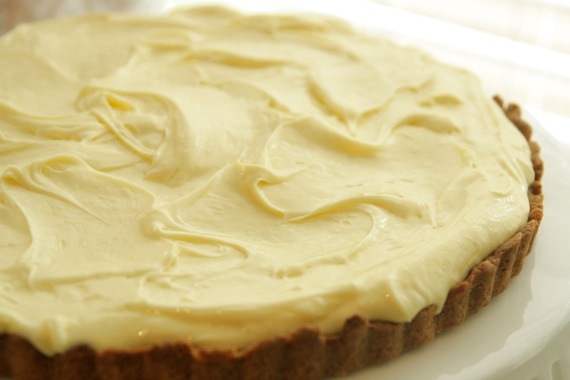
Back in 2008 when I first got my copy of Baking From My Home To Yours by Dorie Greenspan (aka: my idol), I took a pile of little sticky notes and went through the whole book marking the recipes I couldn’t wait to try. And of course, Dorie’s Lemon Cream Tart, the one she deems, “The Most Extraordinary Lemon Tart” was among the pages stuck with bright pink sticky notes. Well, here it is 2010 and I’m just now getting around to making this. Shame on me! I guess the reason it took so long is because the recipe calls for 2 1/2 sticks of butter…YIKES! For just hubby and me, that’s waaaaay too much butter! So, this Mother’s Day, I got my chance! We were having my family over for our annual Mother’s Day Brunch (but this year, we just did lunch) and my mom loves lemon desserts, so I decided this was the perfect opportunity to try the recipe out.
Unfortunately, the lemon cream took well over 45 minutes to make…you’re supposed to cook it (stirring constantly, mind you) until it thickens and reaches 180 degrees. I stirred and I stirred, then I stirred some more….then some more. At this point I was thinking one of those ridiculous Robo-stirrers would be ideal, then finally just decided to take it off the heat whether it was ready or not. Turned out fine in the end, but BOY, what a pain! The end result is a thick, creamy, extremely buttery lemon cream that tastes amazing on top of my favorite tart crust. I was really glad I made it, because everyone really liked it, but honestly, I’m not sure this one will be on the list for “go-to, no-fail” recipes. But for a special occasion like Mother’s Day, and a special mom like mine, it was perfect. Anything for Mommy! 🙂
Dorie Greenspan’s Lemon Tart
1 9-inch tart shell, fully baked and cooled (recipe below)
1 cup sugar
finely grated zest of 3 lemons
4 large eggs
1/2 cup freshly squeezed lemon juice (from 4 to 5 lemons)
2 sticks plus 5 tablespoons unsalted butter, at room temperature and cut into tablespoon-sized pieces
Getting Ready: Have an instant-read thermometer, a strainer and a blender (first choice) or food processor at hand. Bring a few inches of water to a simmer in a saucepan.
Put the sugar and zest in a large heatproof bowl that can be set over the pan of simmering water. Off the heat, rub the sugar and zest together between your fingers until the sugar is moist, grainy and very aromatic. Whisk in the eggs, followed by the lemon juice.
Set the bowl over the pan, and start stirring with the whisk as soon as the mixture feels tepid to the touch. Cook the lemon cream until it reaches 180 degrees F. As you whisk—you must whisk constantly to keep the eggs from scrambling—you’ll see that the cream will start out light and foamy, then the bubbles will get bigger, and then, as it gets closer to 180 degrees F, it will start to thicken and the whisk will leave tracks. Heads up at this point—the tracks mean the cream is almost ready. Don’t stop whisking or checking the temperature, and have patience—depending on how much heat you’re giving the cream, getting to temp can take as long as 10 minutes.
As soon as it reaches 180 degrees F, remove the cream from the heat and strain it into the container of the blender (or food processor); discard the zest. Let the cream stand, stirring occasionally, until it cools to 140 degrees F, about 10 minutes.
Turn the blender to high (or turn on the processor) and, with the machine going, add the butter about 5 pieces at a time. Scrape down the sides of the container as needed as you incorporate the butter. Once the butter is in, keep the machine going—to get the perfect light, airy texture of lemon-cream dreams, you must continue to blend the cream for another 3 minutes. If your machine protests and gets a bit too hot, work in 1-minute intervals, giving the machine a little rest between beats.
Pour the cream into a container, press a piece of plastic wrap against the surface to create an airtight seal and refrigerate for at least 4 hours or overnight. (The cream will keep in the fridge for 4 days and, or tightly sealed, in the freezer for up to 2 months; thaw it overnight in the refrigerator.)
When you are ready to assemble the tart, just whisk the cream to loosen it and spoon it into the tart shell. Serve the tart, or refrigerate ‘until needed.
Sweet Tart Dough
-Dorie Greenspan
1-1/2 cups all-purpose flour
1/2 cup confectioners’ sugar
1/4 teaspoon salt
1 stick plus 1 tablespoon (9 tablespoons)
very cold (or frozen) unsalted butter, cut into small pieces
1 large egg yolk
Put the flour, confectioners’ sugar and salt in a food processor and pulse a couple of times to combine. Scatter the pieces of butter over the dry ingredients and pulse until the butter is coarsely cut in—you should have some pieces the size of oatmeal flakes and some the size of peas. Stir the yolk, just to break it up, and add it a little at a time, pulsing after each addition. When the egg is in, process in long pulses—about 10 seconds each—until the dough, which will look granular soon after the egg is added, forms clumps and curds. Just before you reach this stage, the sound of the machine working the dough will change—heads up. Turn the dough out onto a work surface and, very lightly and sparingly, knead the dough just to incorporate any dry ingredients that might have escaped mixing.
To press the dough into the pan: Butter a 9-inch fluted tart pan with a removable bottom. Press the dough evenly over the bottom and up the sides of the pan, using all but one little piece of dough, which you should save in the refrigerator to patch any cracks after the crust is baked. Don’t be too heavy-handed—press the crust in so that the edges of the pieces cling to one another, but not so hard that the crust loses its crumbly texture. Freeze the crust for at least 30 minutes, preferably longer, before baking.
To bake the crust: Center a rack in the oven and preheat the oven to 375 degrees F.
Butter the shiny side of a piece of aluminum foil and fit the foil, buttered side down, tightly against the crust. (Since you froze the crust, you can bake it without weights.) Put the tart pan on a baking sheet and bake the crust for 25 minutes. Carefully remove the foil. If the crust has puffed, press it down gently with the back of a spoon. For a partially baked crust, patch the crust if necessary, then transfer the crust to a cooling rack (keep it in its pan).
To fully bake the crust: Bake for another 8 minutes or so, or until it is firm and golden brown. (I dislike lightly baked crusts, so I often keep the crust in the oven just a little longer. If you do that, just make sure to keep a close eye on the crust’s progress—it can go from golden to way too dark in a flash.) Transfer the tart pan to a rack and cool the crust to room temperature before filling.
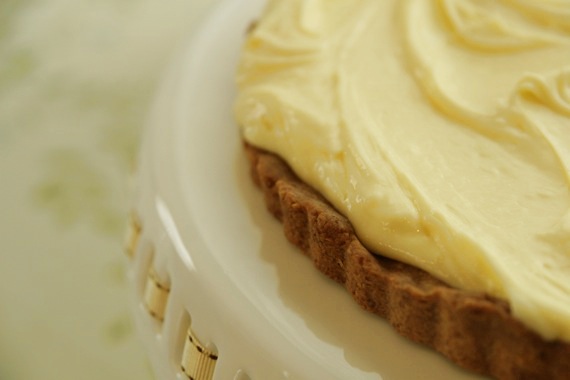
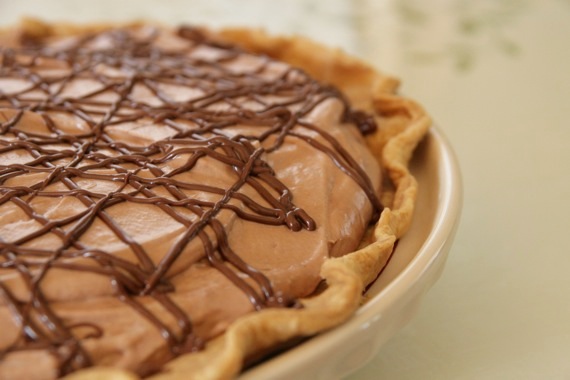
One question: are you ready for this??? Are you ready for the sheer awesomeness?? Love brownies? Love Nutella? Love pie??? How about a Brownie-Nutella Mousse Pie?! Golly, I’m getting excited all over again just thinking about it! This pie will seriously blow your mind- it did ours! In fact, it was so delicious, I felt the need to immediately text my sister to tell her just how awesome it was.
I wanted to try this idea out because I love to spread Nutella on my leftover brownies (yum) and I had seen this recipe floating around – I decided to sort of combine the two and ended up with the Brownie-Nutella Mousse Pie….thank you, Pie Gods. Thank you. The Nutella mousse in itself is out of this world – I had to force myself to stop eating with a spoon! The cream cheese really gives it a fantastic, rich flavor. And combine that with a brownie??? Pure heaven. You simply MUST try this.
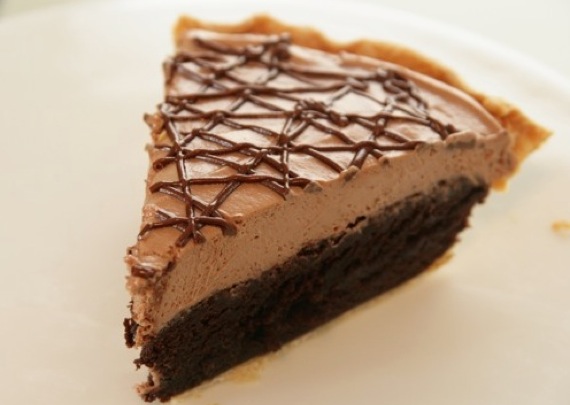
Blow Your Mind Brownie-Nutella Mousse Pie
1 9-inch pie crust, unbaked
1 box brownie mix (or homemade)
5 ounces cream cheese, softened (this is slightly more than half of an 8-oz block)
1/2 cup Nutella, plus more for drizzling
1/2 pint heavy whipping cream
2 tablespoons sugar
1 teaspoon vanilla
Preheat oven to 350 degrees. Make brownie batter as directed on the box and pour into a prepared pie crust. Bake for 35-45 minutes, or until a toothpick comes out clean. Let cool completely.
Using a mixer, whip the cream, sugar and vanilla until stiff peaks form. Transfer to another bowl and set aside.
In the same mixer bowl, mix Nutella and cream cheese until well combined. Spoon in 1/3 of the whipped cream and gently fold in. Repeat with remaining whipped cream- be careful not to stir- it won’t be as light and fluffy. Chill the mousse until the brownie layer is completely cooled.
When the pie is cooled, spread the Nutella mousse evenly over the brownie layer. Drizzle with remaining Nutella (either microwave it on low heat for a few seconds or heat it on the stovetop over low heat to thin it out slightly.) If you want, you can use a piping bag with a #3 tip to do this, or use a plastic bag with the tip snipped off. Serve and enjoy the brownie-Nutella awesomeness!!
**Don’t forget about my $60 giveaway– 3 more days to enter!!**
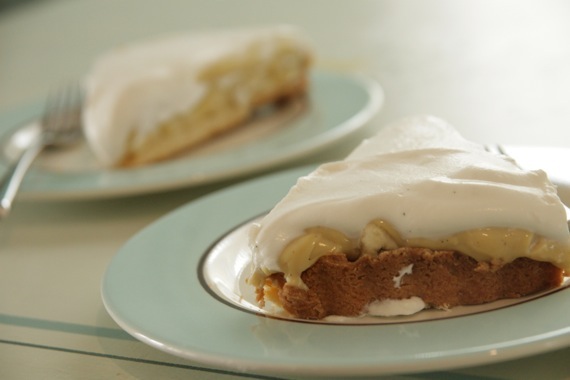
Woo Hoo!! ‘You Want Pies With That?’ is officially up and running again! And Jessica and I got to choose this month’s theme- “Spring”. Spring is fresh. New. What better theme to have in mind while making pies?! For some reason Banana Cream Pie instantly came to mind while I was pondering what pie I would make. It always makes me think of Spring for some reason. No idea why. But instead of the traditional pie form, I chose to kick it up a notch or two by making it into a tart and adding in a little dark rum to the pastry cream (yum!).
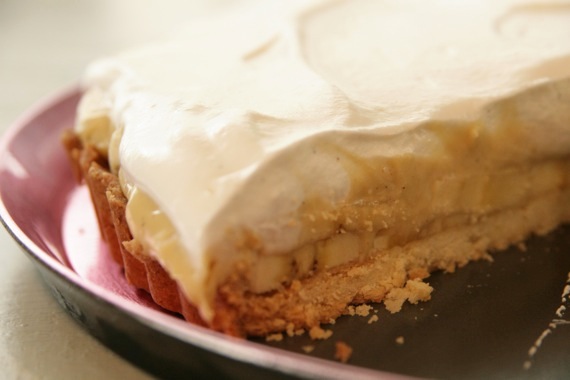
This is Dorie Greenspan’s recipe- and there are none better, in my opinion. The sour cream in the whipped cream topping sets it apart from any other would-be “awesome” banana cream pies. And I must say, the added rum in the pastry cream really sends it home- I was more than pleased with my tart! Fresh, fruity, creamy, slightly tangy – a perfect Spring pie, in my opinion! 🙂
Banana Cream Tart
-Dorie Greenspan
For the Custard
2 cups whole milk
6 large egg yolks
1/2 cup (packed) light brown sugar, pressed through a sieve
1/3 cup cornstarch, sifted
1/2 teaspoon ground cinnamon
pinch of salt
1 teaspoon pure vanilla extract
1 teaspoon dark rum
3 tablespoons cold, unsalted butter, cut into bits
3 ripe but firm bananas
1 9-inch single tart crust
For the Topping
1 cup cold heavy cream
2 tablespoons confectioners’ sugar, sifted
1 teaspoon pure vanilla extract (I used vanilla bean paste- that’s why you see the little specks in the topping)
2 tablespoons sour cream
To Make the Custard: bring milk to a boil. Meanwhile, in a large heavy-bottomed saucepan, whisk the yolks together with the brown sugar, cornstarch, cinnamon, and salt until well blended and thick. Whisking without stopping, drizzle in about 1/4 of the hot milk- this will temper, or warm the yolks so they won’t curdle- then, still whisking, add the remainder of the milk in a steady stream. Put the pan over medium heat and, whisking constantly (make sure to get into the edges of the pan), bring the mixture to a boil. Boil, still whisking, for 1 to 2 minutes before removing from heat.
Whisk in the vanilla extract and rum. Let stand for 5 minutes, then whisk in the bits of butter, stirring until they are fully incorporated and the custard is smooth and silky. You can either press a piece of plastic wrap against the surface of the custard to create an airtight seal and refrigerate the custard until cold or, if you want to cool the custard quickly put the bowl into a larger bowl filled with ice cubes and cold water and stir occasionally until the custard is thoroughly chilled, about 20 minutes. (If it’s more convenient, you can refrigerate the custard, tightly covered, for up to 3 days.)
When you are ready to assemble the tart, peel the bananas and cut them on a shallow diagonal into 1/4-inch-thick slices.
Whisk the cold custard vigorously to loosen it, and spread about one quarter of it over the bottom of the crust- it will be a thin layer. Top with half of the banana slices. Repeat, adding a thin layer of pastry cream and the remaining bananas, then smooth the rest of the pastry cream over the last layer of bananas.
To Make the Topping: Working with a stand mixer fitted with the whisk attachment or with a hand mixer in a large bowl, beat the cream until it just starts to thicken. Beat in the confectioners’ sugar and vanilla and continue to beat until the cream holds firm peaks. Switch to a rubber spatula and fold in the sour cream.
To Finish: Spoon the whipped cream over the filling and spread it evenly to the edges of the custard. Serve, or refrigerate until needed.
Sweet Tart Dough
(makes one 9-inch crust)
1 1/2 cups all-purpose flour
1/2 cup confectioners’ sugar
1/4 teaspoon salt
1 stick plus 1 tablespoon very cold (or frozen) unsalted butter, cut into small pieces
1 large egg yolk
To make the dough: Put the flour, confectioners’ sugar and salt in the workbowl of a food processor and pulse a couple of times to combine. Scatter the pieces of butter over the dry ingredients and pulse until the butter is cut in coarsely – you’ll have pieces the size of oatmeal flakes and pea-size pieces and that’s just fine. Stir the egg, just to break it up, and add it a little at a time, pulsing after each addition. When the egg is in, process in long pulses – about 10 seconds each – until the dough, which will look granular soon after the egg is added, forms clumps and curds. Just before your reaches this clumpy stage, the sound of the machine working the dough will change – heads up. Turn the dough out onto a work surface.
Very lightly and sparingly, knead the dough just to incorporate any dry ingredients that might have escaped mixing.
Butter the tart pan and press the dough evenly along the bottom and up the sides of the pan. Don’t be stingy – you want a crust with a little heft because you want to be able to both taste and feel it. Also, don’t be too heavy-handed – you want to press the crust in so that the pieces cling to one another and knit together when baked, but you don’t want to press so hard that the crust loses its crumbly shortbreadish texture. Freeze the crust for at least 30 minutes, preferably longer, before baking.
To bake the crust: Center a rack in the oven and preheat the oven to 375 degrees F. Butter the shiny side of a piece of aluminum foil and fit the foil tightly against the crust. Bake the crust 25 minutes, then carefully remove the foil. If the crust has puffed, press it down gently with the back of a spoon. Bake for another 3 to 5 minutes, then transfer the crust to a cooling rack; keep it in its pan.
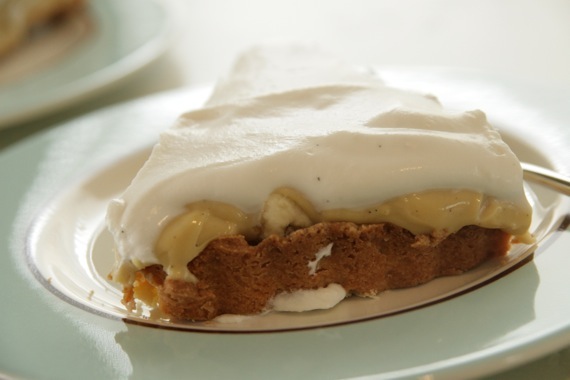
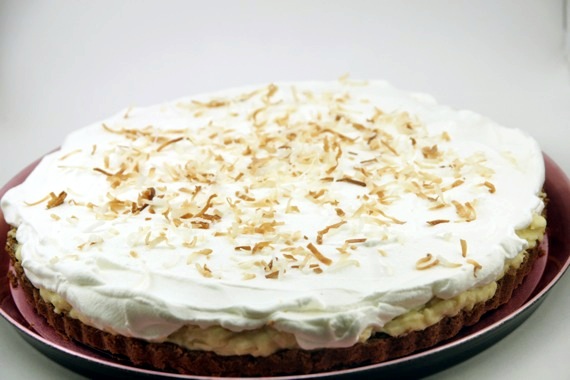
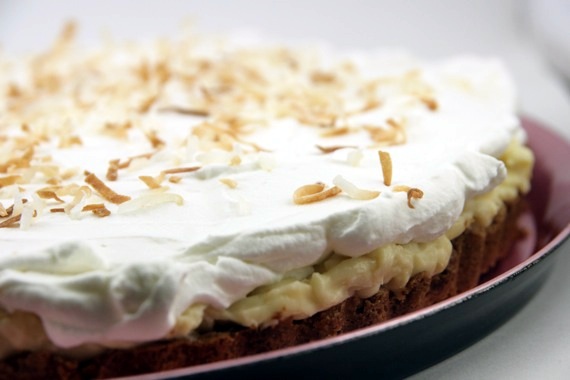
This tart was last week’s Tuesdays with Dorie pick, but since my mother was coming to visit for her birthday, I wanted to wait and make it then. And let me tell you, this tart is worth the wait! I don’t even like coconut cream pie, but this….oh, this is something so delicious and special. I absolutely loved it. We all did. Something about the combination of that salty/sweet/buttery crust with the thick, rum-infused pastry cream and the whipped cream on top is just pure heaven! My mom (the honored guest) said it was better than any coconut cream pie she’d ever had. That’s all the acclaim I needed! This one will definitely be re-visited again and again! This was chosen by Beryl of Cinemon Girl – I owe you one, Beryl! Thanks for one heck of a pick!! (I’m posting the recipe here since I’m posting so late- just thought I’d save time!)
Toasted Coconut Custard Tart
-Dorie Greenspan
For the Custard:
2 cups whole milk
1/2 cup sugar
6 large egg yolks
1/3 cup cornstarch
pinch of salt
2 tablespoons dark rum
1 teaspoon vanilla extract
3 1/2 tablespoons cold unsalted butter, cut into small pieces
1 cup shredded sweetened coconut, toasted
1 9-inch sweet tart shell, baked and cooled (recipe below)
For the topping:
1 cup cold heavy cream
3 tablespoons confectioners’ sugar, sifted
1 teaspoon dark rum
1/2 teaspoon vanilla extract
Bring milk to a boil. In a large saucepan, whisk together sugar, yolks, cornstarch and salt until well blended. Whisk in 1/4 cup of hot milk to temper the yolks, then whisk in the rest of the milk. Continue whisking over medium heat and bring to a boil. Whisk an additional 1 or 2 minutes then remove from heat. Whisk in rum and vanilla and let sit for 5 minutes. Then whisk in the butter, stirring until custard is smooth. Stir in the toasted coconut. Transfer to a container, cover the surface of the custard with plastic wrap and refrigerate until cold.
To make the topping, use a stand mixture with whisk attachment or a hand mixer to whip the cream to medium peaks. Add the confectioners’ sugar and beat to firm peaks. Whip in rum and vanilla.
To assemble the tart, whisk the custard vigorously to loosen it then scrape into the crust. Spoon the whipped cream over the tart and spread evenly to the edge of the custard. Sprinkle with additional toasted coconut.
Sweet Tart Dough
(makes one 9-inch crust)
1 1/2 cups all-purpose flour
1/2 cup confectioners’ sugar
1/4 teaspoon salt
1 stick plus 1 tablespoon very cold (or frozen) unsalted butter, cut into small pieces
1 large egg yolk
To make the dough: Put the flour, confectioners’ sugar and salt in the workbowl of a food processor and pulse a couple of times to combine. Scatter the pieces of butter over the dry ingredients and pulse until the butter is cut in coarsely – you’ll have pieces the size of oatmeal flakes and pea-size pieces and that’s just fine. Stir the egg, just to break it up, and add it a little at a time, pulsing after each addition. When the egg is in, process in long pulses – about 10 seconds each – until the dough, which will look granular soon after the egg is added, forms clumps and curds. Just before your reaches this clumpy stage, the sound of the machine working the dough will change – heads up. Turn the dough out onto a work surface.
Very lightly and sparingly – make that very, very lightly and sparingly – knead the dough just to incorporate any dry ingredients that might have escaped mixing.
To make a press-in crust: Butter the tart pan and press the dough evenly along the bottom and up the sides of the pan. Don’t be stingy – you want a crust with a little heft because you want to be able to both taste and feel it. Also, don’t be too heavy-handed – you want to press the crust in so that the pieces cling to one another and knit together when baked, but you don’t want to press so hard that the crust loses its crumbly shortbreadish texture. Freeze the crust for at least 30 minutes, preferably longer, before baking.
To partially bake the crust: Center a rack in the oven and preheat the oven to 375 degrees F. Butter the shiny side of a piece of aluminum foil and fit the foil tightly against the crust. Bake the crust 25 minutes, then carefully remove the foil. If the crust has puffed, press it down gently with the back of a spoon. Bake for another 3 to 5 minutes, then transfer the crust to a cooling rack; keep it in its pan.
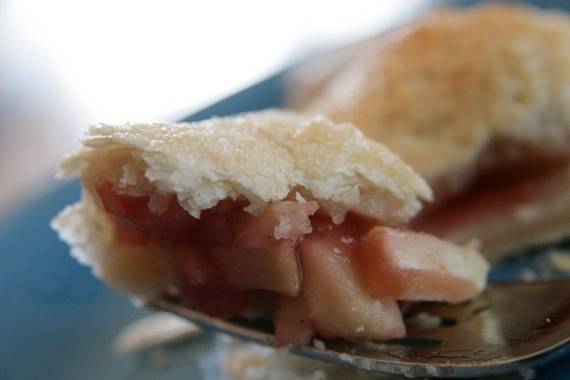
This week’s pick is Flaky Apple Turnovers, chosen by Julie of Someone’s In The Kitchen. I love apple turnovers (honestly, my favorite kind is the store-bought frozen kind that comes with the little triangle of frosting….mmm…), so I was excited to see these on this month’s line-up. Basically the filling is just chopped apples, sugar and cinnamon; but Dorie says you can also add a little jam, so I added some homemade peach preserves as well as homemade plum jam. I was really glad I did this because it added a lot of extra flavor.
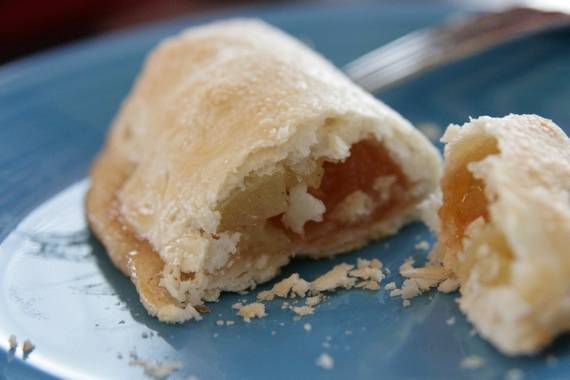
It was nice to have a dessert involving apples (I’m finding myself getting a little tired of chocolate lately…weird!) just as the weather has started getting a little cooler and “Fall-y”. If you’d like the recipe for these turnovers, check out Julie’s blog! Go make you some flaky apple turnovers and enjoy the weather!!
