The swim suit section of clothing stores have been replaced with back-to-school clothes; at my local Wal-Mart, the shelves that were once lined with plastic Tiki-themed party decorations, ice chests and cute plastic outdoor dishes are now filled with school supplies as far as the eye can see, and kids everywhere have that familiar look of wide-eyed dread on their faces. This can only mean one thing – the new school year is upon us and summer as we know it is in its last days. My sister and all of my teacher friends all have to go back to school next week, and pretty much all of them are doing their darndest to enjoy their last few days of freedom. I guess I feel kind of guilty because I too, am a teacher…but the best kind of teacher- a voice teacher. I teach like, 3 days a week and I don’t even go in until after noon. How awesome is that? (ok, ok, I’ll stop rubbing it in your faces…..neener, neener, neener!! Hehe, ok now I’m done, I promise!)

I know a lot of people are bummed that the summer is just about over, so I thought I should post something that reminds us all of a good old fashioned summer; and really, what’s more perfect than warm apple pie with a big scoop of ice cream? Not much…

I know apple pie is probably better enjoyed around the Fourth of July, but I figured it’s one of those desserts that works all summer long! I actually made this a couple of weeks ago for my in-laws and grandmother-in-law, Meme. Meme and I sat together and enjoyed big, warm slices of pie with homemade vanilla ice cream…we really enjoyed our pie!! Meme loved it so much, I sent some home with her for her coffee the next morning. Seriously, this was some of the best pie I’ve ever had in my life…and no surprise, it’s Dorie Greenspan’s recipe. She never fails me! This was actually the first time I’d ever brushed my pie crust with cream before baking it, and I was super happy with the result – I’ve never gotten a more beautiful crust!

For those of you teachers out there who are trying to squeeze everything you can out of these last days of summer, I highly recommend making yourself a big, beautiful apple pie. Enjoy a big slice out on your front porch at night and watch the fireflies…savor every moment, because the next day, you should probably start getting all your school supplies ready! Hehehe, sorry, just couldn’t resist! 😉
All-American Apple Pie
-Dorie Greenspan
9-inch double crust pie dough (recipe below)
4 pounds (about 6 very large) apples
3/4 cup sugar
Grated zest of 1 lemon
2 tablespoons quick-cooking tapioca
1/4 tsp salt
1/2 tsp ground cinnamon
1/8-1/4 teaspoon freshly grated nutmeg (I omitted)
2 tablespoons graham cracker crumbs
2 tablespoons cold unsalted butter, cut into bits
For the Glaze (optional, but highly recommended!)
Milk or heavy cream
Decorating (coarse) or granulated sugar
Butter a 9-inch deep-dish pie plate.
On a well-floured surface (or between wax paper, or plastic wrap), roll out one piece of the dough to a thickness of about 1/8 inch. Fit the dough into the buttered pie plate and trim the edges to a 1/2 -inch overhang. Roll the other piece of dough into a 1/8-inch-thick and slip it onto a baking sheet lined with parchment or a silicone mat. Cover both the circle and the crust in the pie plate with plastic wrap and refrigerate for about 20 minutes, while you preheat the oven and prepare the filling. (The crusts can be well covered and kept refrigerated overnight).
GETTING READY TO BAKE: Center a rack in the oven and preheat the oven to 425 degrees F. Peel, core and slice the apples into slices about 1/4 inch thick. Put the apples into a large bowl and add the sugar, lemon zest, tapioca, cinnamon, nutmeg and salt. Toss everything together really well. Let the mix sit for about 5 minutes, until juice starts to accumulate in the bottom of the bowl.
Remove the pie plate and top crust from the refrigerator and put the pie plate on a baking sheet lined with parchment or a silicone mat. Sprinkle the crumbs evenly over the bottom of the crust and then turn the apples and their juices into the crust. The apples will heap over the top of the crust. Pat them into an even mound. Dot the apples with the bits of cold butter.
Very lightly moisten the rim of the bottom crust with water, then center the top crust over the apples. Either folds the overhang from the top crust under the bottom crust and crimps the crust attractively, or presses the top crust against the bottom crust and trim the overhang from both crusts even with the rim of the pie plate. If you’ve pressed and trimmed the crust, use the tines of a fork to press the two crusts together securely.
Use a sharp paring knife to cut about 6 slits in the top crust. Use the wide end of a piping tip to cut a circle out of the center of the crust as a steam vent. If you’d like, brush the top crust with a little milk or cream and sprinkle it with sugar (I used cream and it turned out absolutely gorgeous!).
Bake the pie for 15 minutes. Lower the oven temperature to 375 degrees F, and bake the pie for another 50 to 60 minutes (total baking time is between 65 and 75 minutes), or until the crust is gorgeously browned and the juices bubble up through the top crust. After about 40 minutes in the oven, if the top crust looks as if it’s browning too quickly, cover the pie loosely with a foil tent.
Transfer the pie to a rack and let it rest until it is only just warm or until it reaches room temperature.
Good For Almost Everything Pie Dough
-Dorie Greenspan
For a 9-inch double crust:
3 cups all-purpose flour
1/4 cup sugar
1 1/2 tsp salt
2 1/2 sticks very cold (frozen is fine) unsalted butter, cut into tablespoon-size pieces
1/3 cup very cold (frozen is even better) vegetable shortening, cut into 4 pieces
About 1/2 cup ice water
Put the flour, sugar and salt in a food processor fitted with a metal blade; pulse just to combine the ingredients. Drop in the butter and shortening and pulse only until the butter and shortening are cut into the flour. Until you have some pieces the size of fat green peas and others the size of barley. Pulsing the machine on and off, gradually add about 6 table spoons of the water add a little water and pulse once, add some more water, pulse again and keep going that way. Then use a few long pulses to get the water into the flour. If, after a dozen or so pulses, the dough doesn’t look evenly moistened or form soft curds, pulse in as much of the remaining water as necessary, or even a few drops more, to get the dough that will stick together when pinched. Big pieces of butter are fine. Scrape the dough out of the work bowl and onto a work surface.
Divide the dough in half. Gather each half into a ball, flatten each ball into a disk and wrap each half in plastic. Refrigerate the dough for at least 1 hour before rolling.

It’s that time again! Here is my monthly “You Want Pies With That?” blog entry! This month’s theme is “Nuts About Pie”, chosen by Jaque of Daisy Lane Cakes. We could make any kind of “nutty” pie we wanted – at first I thought about doing a really tasty pecan pie or some other kind of pie chock full of nuts. However, my hubby doesn’t like nuts at all, especially in pies, so I had to get creative. Late one night as I was trying to fall asleep, this idea popped into my head and I loved it! I present to you, the Elvis FlufferNutter Pie.

For those of you who are wondering what the heck fluffernutter is, I’ll explain. Take the fluffernutter sandwich, for instance – two slices of bread: on one side, marshmallow fluff, on the other side, peanut butter; put the two slices together and voila! Fluffernutter! I thought a pie made out of peanut butter and marshmallow fluff would be great, but then I decided adding bananas would make it extra special! Plus, I could “Elvis-ize” it that way (since Elvis was quite fond of his peanut butter and banana sandwiches!)! Perfect!
I started with a plain ‘ol pie crust (blind baked), topped it with a layer of sliced bananas, then a layer of peanut butter mousse, and topped it off with marshmallow fluff and more bananas. Not your normal, run-of-the-mill pie, but hey, it was still darn tasty! I was actually surprised at how good this tasted. My good friend Courtney is staying with us for a few days, and she helped me make the pie and served as my honorable taste-tester. We both really enjoyed our slice!

Elvis FlufferNutter Pie
1 9-inch pie crust, blind-baked
3 bananas, thinly sliced
3/4 cup smooth peanut butter (not natural)
8 ounces cream cheese, softened
1/4 teaspoon cinnamon
1/2 pint heavy cream
1/4 cup powdered sugar
2 tablespoons milk
1 jar marshmallow fluff
In a stand mixer fitted with a whisk, beat the heavy cream and powdered sugar until firm peaks form. Transfer to another bowl and refrigerate until needed. In the same mixer bowl with the paddle attachment, beat the cream cheese until light and fluffy; add the peanut butter, cinnamon and milk and continue to beat until mixed. Gently fold in the whipped cream.
Place the sliced bananas in a single layer on the baked (and cooled) pie crust, then top with the peanut butter mousse. Spread a layer of marshmallow fluff and top with additional bananas. Refrigerate until ready to serve.
*Peanut butter mousse adapted from Dorie Greenspan

This was an incredibly fun pie to make…and eat! We really enjoyed it! Head on over to the You Want Pies With That? page in the next few days and check out everybody’s fantastic, nutty pies!
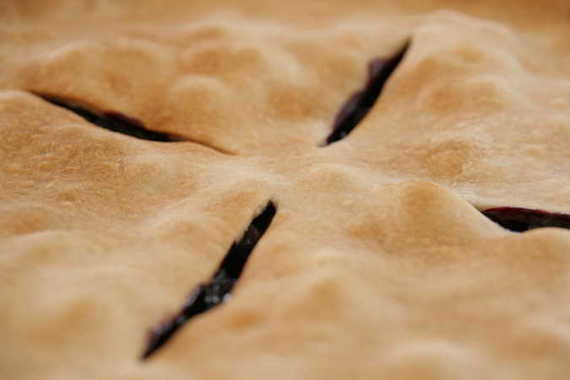
Believe it or not, I had never had blueberry pie until I made this one a couple of weeks ago! Weird, isn’t it? Blueberry pie is just one of those All-American type desserts, I think – it sounds so summery and delicious. I had tons of juicy, fresh blueberries from the farmers market and decided a double-crusted blueberry pie would be the most perfect way to use them!
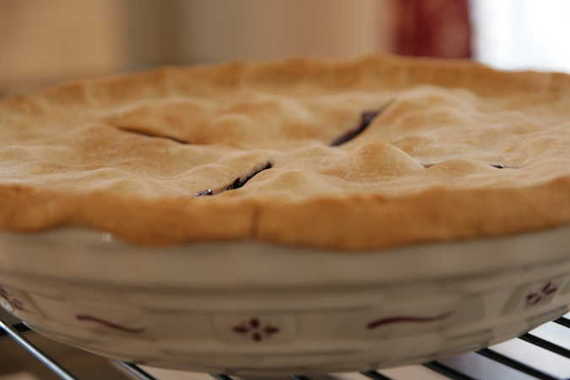
I decided to use Dorie Greenspan’s recipe for both the pie filling and the crust – her pie crust is to die for! However, after following her recipe exactly, my pie still (as always, it seems) turned out very runny and soupy! I emailed Dorie about it and she replied (how cool is that?!), suggesting adding a little extra cornstarch if needed, but usually, you can never know how much juice your berries will give off, so there’s no way to prepare for a runny pie. I could care less about the runny pie now….I got an email from Dorie and that’s all that matters!!
Double Crusted Blueberry Pie
-Dorie Greenspan
Double Crust pie dough, chilled (recipe below)
2 1/2 pints fresh blueberries
1 cup of sugar, or a little more, to taste, plus more for dusting
1/2 cup all purpose flour
Pinch of salt
Coarsely grated zest of 1/2 lemon
Squirt of fresh lemon juice, or a little more, to taste
1/4 cup dry bread crumbs (you can use packaged unseasoned crumbs)
1 large egg, beaten with 1 tsp of water, for egg wash
Sugar, for dusting
Butter a 9-inch pie plate (Dorie uses a standard Pyrex pie plate).
Working on a well-floured surface (or between wax paper or plastic wrap), roll out one piece of the dough to a thickness of about 1/8 – inch. Fit the dough onto the buttered pie plate and trim the edges to a ½ inch overhang. Roll the other piece of dough into a 1/8 inch thick circle and place it on a baking sheet lined with parchment or a silicone mat. Cover both the circle and the pie plate with plastic wrap and refrigerate while you pre-heat the oven and prepare the filling.
Position a rack in the lower third of the oven and pre-heat the oven to 425 degrees F.
Put the berries in a large bowl and gently stir in the sugar, flour, salt, zest and juice; let sit for about 5 minutes. Taste the filling and add more sugar and/or lemon juice, if needed.
Remove the pie shell and top crust from the refrigerator. Sprinkle an even layer of the breadcrumbs over the bottom of the shell. Give the filling a last stir and turn it into the crust.
Using your fingertips, moisten the rim of the bottom crust with a little cold water. Center the top crust over the filling and gently press the top crust against the bottom. Either fold the overhang from the top crust under the bottom crust and crimp the edges attractively or press the top crust against the bottom crust and trim the overhang from both crusts even with the rim of the pie plate. If you’ve pressed and trimmed the crust, use the tines of a fork to press the two crusts together securely. Using a small, sharp knife, cut 4 slits in the top crust crust and cut a circle out of the center, then lift the plate onto the baking sheet. (If you have time, refrigerate the pie for about 30 minutes. The pie can also be wrapped airtight and frozen for up to 2 months. Glaze and sugar it before you put it in the over and add at least 15 minutes to the baking time).
Brush the top crust with the egg wash, then sprinkle the crust with a little sugar, just to give it sparkle.
Bake the pie for 30 minutes. Reduce oven temperature to 375 degrees F, and bake the pie for another 30 minutes or so (total baking time is about an hour) or until the crust is a beautiful golden brown and the filling is bubbling up through the slits. If the crust seems to be browning too quickly, make a loose foil tent for the pie.
Transfer the pie to a rack and let it cool and settle for at least 30 minutes before serving.
Good for Almost Everything Pie Dough
For a 9 inch Double Crust
3 cups all purpose flour
1/4 cup sugar
1 1/2 tsp salt
2 1/2 sticks very cold unsalted butter, cut into tbsp size pieces
1/3 cup very cold vegetable shortening, cut into 4 pieces
About 1/2 cup ice water
Put the flour, sugar, and salt in a food processor fitted with a metal blade, pulse just to combine the ingredients. Drop in the butter and shortening and pulse only until the butter and shortening are cut into the flour. Don’t overdo the mixing- what you’re aiming for is to have some pieces the size of fat green peas and others the size of barley. Pulsing the machine on and off, gradually add about 6 tbsps of the water- add a little water and pulse once, add some more water, pulse again and keep going that way. Then use a few long pulses to get the water into the flour. If, after a dozen or so pulses, the dough doesn’t look evenly moistened or form soft curds, pulse in as much of the remaining water as necessary, or even a few drops more, to get a dough that will stick together when pinched. Big pieces of butter are fine. Scrape the dough out of the bowl and onto a work surface.
Divide the dough in half. Gather each half into a ball, flatten each ball into a disk and wrap each half in plastic. Refrigerate the dough for at least 1 hour before rolling (if your ingredients were very cold and you worked quickly, though, you might be able to roll the dough immediately: the dough should be as cold as if it had just come out of the fridge).
To Roll Out the Dough: Have a buttered 9 inch pie plate at hand.
You can roll the dough out onto a floured surface or between sheets of wax paper or plastic wrap or in a rolling slipcover. If you’re working on a counter, turn the dough over frequently and keep the counter floured. If you are rolling between paper, plastic or in a slipcover, make sure to turn the dough over often and to life the paper, plastic, or cover frequently so that it doesn’t roll into the dough and form creases.
If you’ve got time, slide the rolled out dough into the fridge for about 20 minutes to rest and firm up.
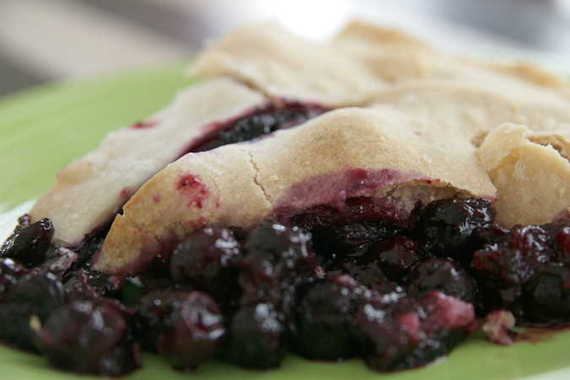
This was sooooo good! We especially loved it with a big scoop of vanilla ice cream on top! I think I’ll probably be making this every summer from now on – it just doesn’t seem like summer without a blueberry pie!
If you’ve happened to look over to the right on my side bar, you’ll have noticed there’s a new badge – a cute little “You Want Pies With That?” badge! I’m so excited to be a part of a new online baking group! Very similar to Tuesdays with Dorie, except this is once a month, and it’s all about pie! I love pie. I mean really love pie. Did you ever see that movie Waitress, with Kerri Russell? Well, that’s what this group is based off of – Kerri Russell’s character makes up all kinds of amazing pies all the time, and so that’s what we do, too! Once a month, somebody picks a theme – like, this month’s theme is “Taste of Summer” – and then we all create our own ingenious pie based on that! How fun!! Here’s the site where you can go and look at all the amazing pies everyone has created.
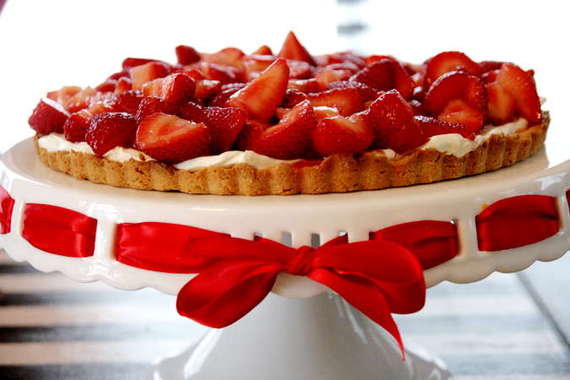
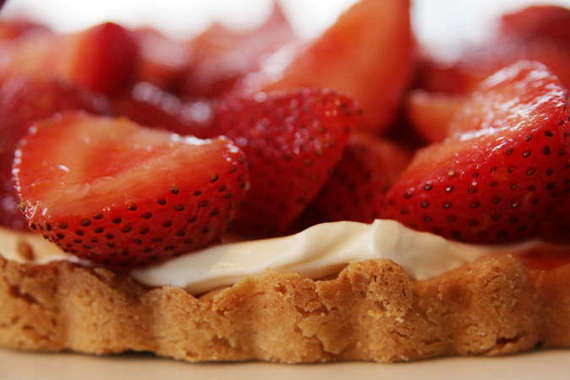
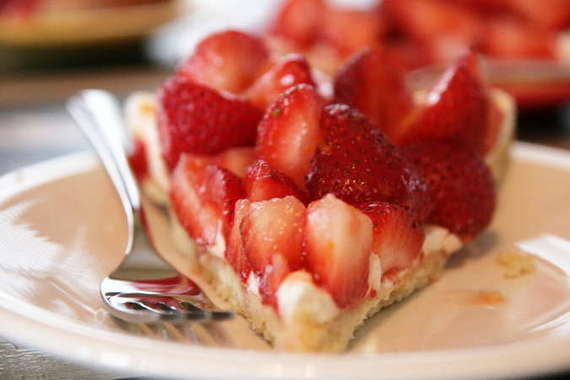
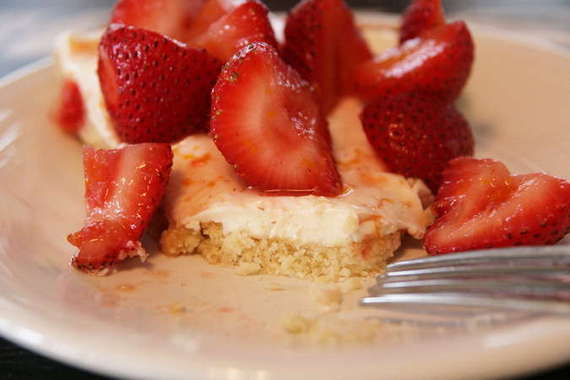
And here’s my “pie”. “Boozy Summer Strawberry Tart”. This was actually inspired by my hubby’s Aunt Judy – she suggested I toss strawberries with a little Amaretto Liqueur (YUM!); but I took it a little further and used a little splash of Grand Marnier, some orange zest and a squeeze of fresh orange juice; spread a cream cheese mixture over Dorie Greenspan’s Sweet Tart Crust, and topped it all off with the strawberries. I was a little worried since I was completely flying by the seat of my pants, but this ended up being one fantastic tart!
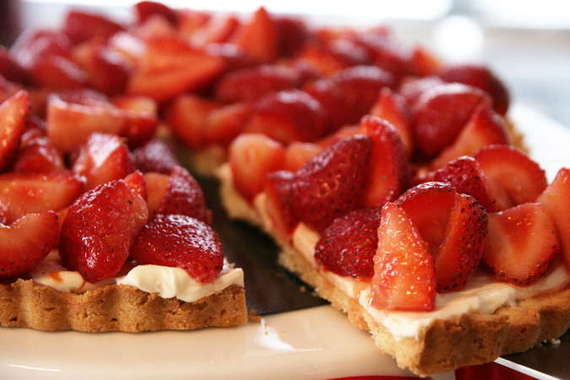
My good friend and fellow opera singer Amanda was visiting that day, so I decided to use her as my guinea pig. She absolutely loved the tart – she said it reminded her of something she ate once in Europe in a professional pastry shop (Yippee!). She thought it was the perfect summer dessert. Hubby and I both loved it too – so light and creamy and fresh. The Grand Marnier really gave the strawberries a fantastic flavor. This is definitely going to be a go-to dessert from now on! I’m so proud – my first ever, entirely made up dessert was a success! I am SO excited to be a part of this fun little group and can’t WAIT to see what fun kinds of pies lie ahead!
Boozy Summer Strawberry Tart
For the berries and cream cheese mixture:
2 regular sized containers fresh strawberries
1-2 tablespoons Grand Marnier Liqueur
1 8-oz package cream cheese, at room temperature
1 heaping tablespoon sour cream
1 teaspoon vanilla extract
1 tablespoon plus 1/2 tablespoon sugar (one tablespoon for the berries, and 1/2 tablespoon for the cream cheese mixture)
zest of half an orange
squeeze of fresh orange juice
Hull and cut the strawberries in half, length-wise and place in a large bowl with Grand Marnier, orange zest, juice and 1 tablespoon of the sugar. Toss to coat all the berries, then cover and place in the refrigerator for at least 1 hour (I left mine in for about 3 hours).
To make the cream cheese mixture, place the softened cream cheese in the bowl of a stand mixer (you can do all this with a hand mixer) and beat at medium speed until the cream cheese is smooth. Add in the sour cream, vanilla and sugar and continue to beat on medium-low speed until everything is mixed in and smooth. Refrigerate until needed.
For the tart crust:
1 1/2 cups all-purpose flour
1/2 cup confectioner’s sugar (powdered sugar)
1/4 tsp. salt
1 stick plus 1 tablespoon (9 tablespoons) very cold (or frozen) unsalted butter, cut into small pieces
1 large egg yolk
Put the flour, confectioners’ sugar and salt in a food processor and pulse a couple of times to combine. Scatter the pieces of butter over the dry ingredients and pulse until the butter is coarsely cut in–you should have some pieces the size of oatmeal flakes and some the size of peas. Stir the yolk, just to break it up, and add it a little at a time, pulsing after each addition. When the egg is in, process in long pulses–about 10 seconds each–until the dough, whisk will look granular soon after the egg is added, forms clumps and curds.
Turn the dough out onto a work surface and , very lightly and sparingly, knead the dough just to incorporate any dry ingredients that might have escaped mixing. Butter a 9-inch fluted tart pan with a removable bottom. Press the dough evenly over the bottom and up the sides of the pan, using all but one little piece of dough, which you should save in the refrigerator to patch any cracks after the crust is baked. Don’t be too heavy-handed–press the crust in so that the edges of the pieces cling to one another, but not so hard that the crust loses its crumbly texture. Freeze the crust for at least 30 minutes, preferably longer, before baking. Center a rack in the oven and preheat the oven to 375 degrees F.
Butter the shiny side of a piece of aluminum foil and fit the foil, buttered side down, tightly against the crust. (Since you froze the crust, you can bake it without weights.) Put the tart pan on a baking sheet to bake the crust for 25 minutes. Carefully remove the foil. If the crust has puffed, press it down gently with the back of a spoon. For a partially baked crust, patch the crust if necessary, then transfer the crust to a coking rack (keep it in is pan). To fully bake the crust: Bake for another 8 minutes or so, or until it is firm and golden brown. (Keep a close eye on the crust’s progress–it can go from golden to way too dark in a flash). Transfer the tart pan to a rack and cool the crust to room temperature before filling.
To Assemble:
Spread the cream cheese mixture evenly on the tart crust. Add the strawberries on top. Serve immediately and enjoy!
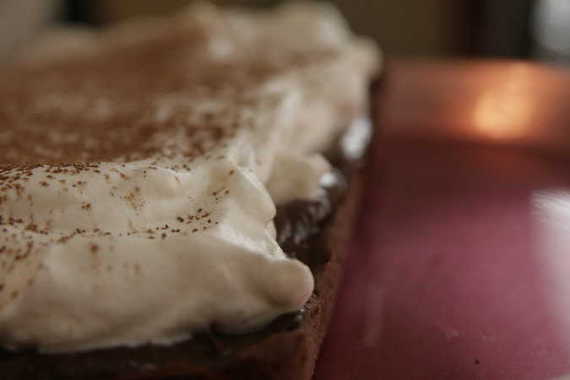
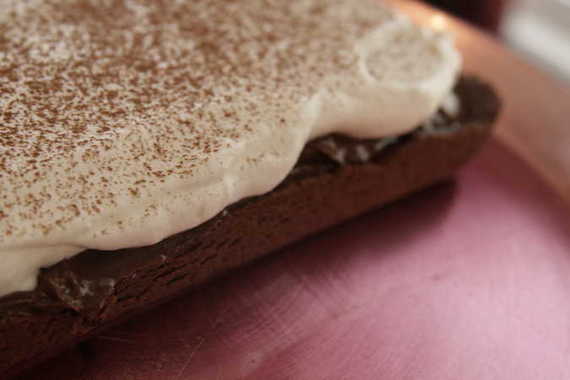
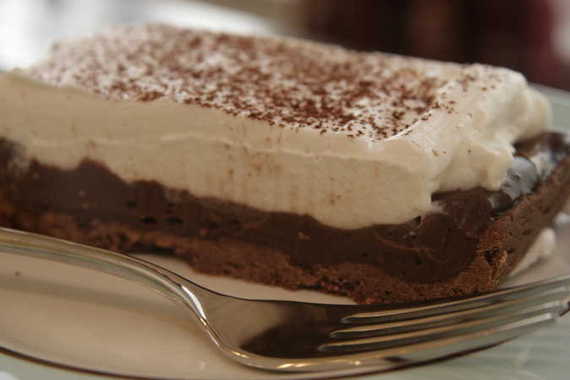
Here’s another perfect example of Dorie taking a classic, well-loved recipe and tweaking just slightly to make it extra fancy and extra special. You might say she “Dorie-fies it”. Gosh, I’m so clever. Anyway, this is Dorie’s Chocolate Cream Tart, chosen by Kim of Scrumptious Photography, one of my very favorite food blogs. Do yourself a favor and check out her blog – her pictures will make you drool all over your keyboard. I was really glad to see this recipe chosen because I’m a biiiiiiiiiiiiig fan of chocolate cream pie, especially, ESPECIALLY my mama’s. She doesn’t waste time with that meringue stuff – she whips up some heavy cream to pile on top. Now that’s how pie should be done, folks. So of course, I was pleased to see that Dorie does the same thing with her Chocolate Cream Tart – so basically, this is just my mom’s chocolate cream pie, but with a tart crust instead of a pie crust. Perfect!
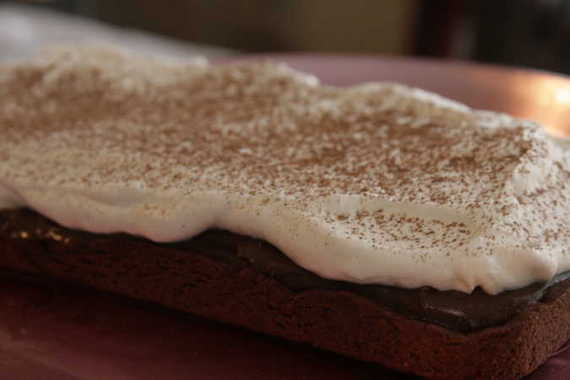
I came *this* close to using Dorie’s Sweet Tart Dough (the most heavenly crust ever known to man), but decided to follow the rules and use the chocolate tart dough that’s called for instead. I was kind of sorry I did, actually – it was a little too bitter for me, plus I felt like it needed something non-chocolate to balance out the chocolate filling. It was still good, though. I also cut the recipe in half and baked it in a loaf pan lined with parchment so I could just pull it right out and spread the filling and whipped cream on it. Ok, so let me get to the verdict – this was GOOD. I mean really good. So good I stood there in the kitchen licking every last bit of the chocolate filling off of spoons, whisks, bowls, and fingers. I added a little sour cream to the whipped cream topping (just like in the banana cream pie a couple of weeks back) and it really added a lot of extra flavor. All in all, this was a DELICIOUS dessert. We both loved it. Was it as good as my mom’s? Well, no, but I never really expected it to be, either. 🙂
This would be absolutely perfect to serve for company – its tart status brings it up a couple of notches in “fanciness”, but it tastes like something out of your grandma’s comfy kitchen. Perfect! Head on over to Kim’s blog and get the recipe – your spouse will thank you.

Yummy, yummy, yummy!! Thanks, Kim, for choosing a WINNER!
Ok, maybe not so much “Queen” – that would probably be Dorie, huh? Ok how about Princess?? Lady-In-Waiting? Court Jester?……..No? Ok fine. Just forget it, then….
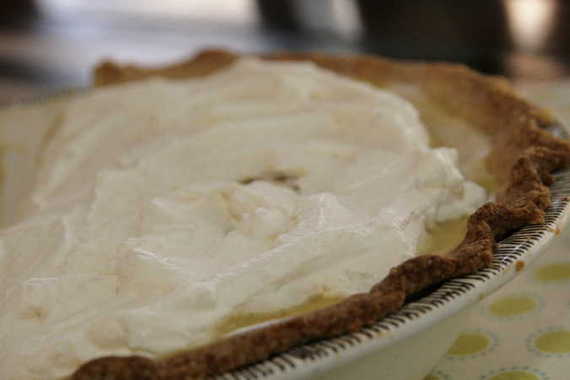
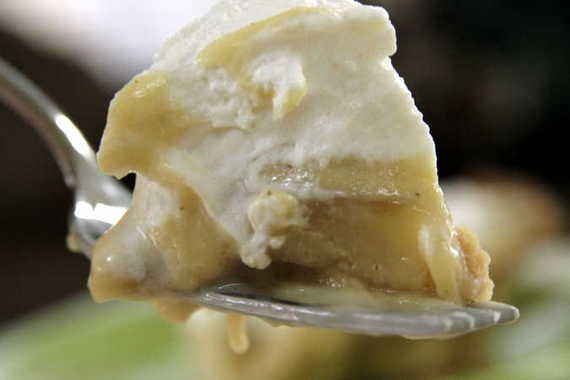
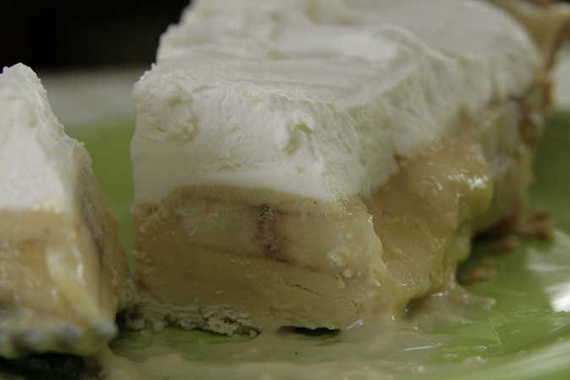
The day has finally come, my friends. The day when I, myself, lil ‘ol me gets to choose the recipe for Tuesdays with Dorie. When I got the email reminding me my turn was coming up, you would’ve thought I’d won a Tony award or something- I was so excited! In fact, there may have been some girlish squealing involved….maybe. It didn’t take long for me to decide – I flipped through the book two or three times, called everybody I could think of, and finally chose the Banana Cream Pie – nothing fancy, new-fangled or trendy. Just classic, good old fashioned pie. I love pie. Probably more than I love most desserts. It’s simple. It’s homey. It’s classic. Kinda like me, I guess. Funnily enough, my good ‘ol hubby doesn’t really like pie! HA!
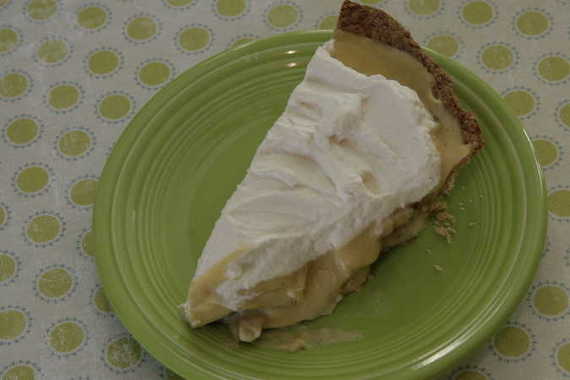
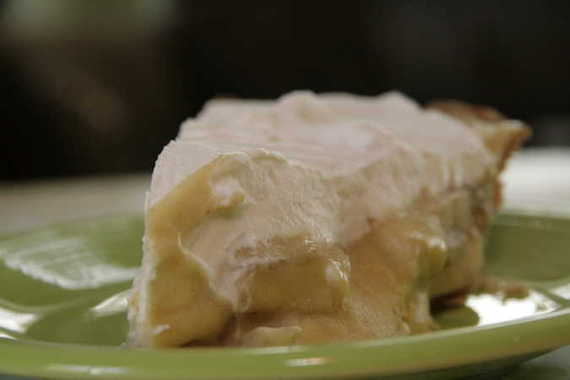
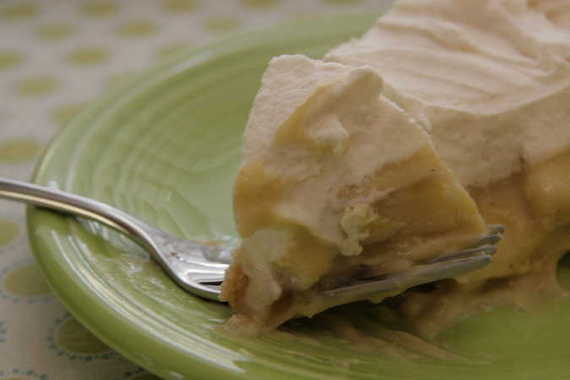
Believe it or not, this was my first ever banana cream pie – actually, my first cream pie, too! I love this recipe because it’s the way my great-grandmother made her cream pies- by slowly stirring the pastry cream over the stove top to get a rich, velvety pie filling. And I loved that little dash of cinnamon and nutmeg; it really gave it something special! And the sour cream in the topping…WOW. I think the topping may have been my favorite part!

I think the most important part about this pie is the crust. In my opinion, a pie is only as good as its crust and by-gosh, by-golly this crust recipe is as good as it gets! It’s simple and takes maybe 10 minutes to make. And it’s sooooo worth it, believe me! So don’t flake out on the crust (I’m so punny)- trust me, you want it with this pie!
To give this pie the ultimate taste test, I decided to make it for my parents last week. Everybody loved it. Loved the filling, loved the crust – it was a hit and I was very satisfied! Even hubby, who doesn’t really like pie loved it – yippee! I hope all the other TWD bakers had as much success with this recipe as I did.
This is where I would normally say, “If you would like the recipe, head over to so-and-so’s blog, yadda yadda…” , but today I get to post the recipe to share with everybody! So, ahem, if you would like the recipe for this delicious, awe-inspiring pie, just SCROLL DOWN, BABY!! 🙂
Banana Cream Pie
-Dorie Greenspan (AKA: The Queen)
For the Custard
2 cups whole milk
6 large egg yolks
1/2 cup (packed) light brown sugar, pressed through a sieve
1/3 cup cornstarch, sifted
1/2 teaspoon ground cinnamon
1/8 teaspoon freshly grated nutmeg
pinch of salt
1 teaspoon pure vanilla extract
3 tablespoons cold, unsalted butter, cut into bits
3 ripe but firm bananas
1 9-inch single crust made with Good for Almost Everything Pie Dough, fully baked and cooled
For the Topping
1 cup cold heavy cream
2 tablespoons confectioners’ sugar, sifted
1 teaspoon pure vanilla extract
2 tablespoons sour cream
To Make the Custard: bring milk to a boil. Meanwhile, in a large heavy-bottomed saucepan, whisk the yolks together with the brown sugar, cornstarch, cinnamon, nutmeg and salt until well blended and thick. Whisking without stopping, drizzle in about 1/4 of the hot milk- this will temper, or warm the yolks so they won’t curdle- then, still whisking, add the remainder of the milk in a steady stream. Put the pan over medium heat and, whisking constantly (make sure to get into the edges of the pan), bring the mixture to a boil. Boil, still whisking, for 1 to 2 minutes before removing from heat.
Whisk in the vanilla extract. Let stand for 5 minutes, then whisk in the bits of butter, stirring until they are fully incorporated and the custard is smooth and silky. You can either press a piece of plastic wrap against the surface of the custard to create an airtight seal and refrigerate the custard until cold or, if you want to cool the custard quickly (as I always do) put the bowl into a larger bowl filled with ice cubes and cold water and stir occasionally until the custard is thoroughly chilled, about 20 minutes. (If it’s more convenient, you can refrigerate the custard, tighly covered, for up to 3 days.)
When you are ready to assemble the pie, peel the bananas and cut them on a shallow diagonal into 1/4-inch-thick slices.
Whisk the cold custard vigorously to loosen it, and spread about one quarter of it over the bottom of the piecrust- it will be a thin layer. Top with half of the banana slices. Repeat, adding a thin layer of pastry cream and the remaining bananas, then smooth the rest of the pastry cream over the last layer of bananas.
To Make the Topping: Working with a stand mixer fitted with the whisk attachment or with a hand mixer in a large bowl, beat the cream until it just starts to thicken. Beat in the confectioners’ sugar and vanilla and continue to beat until the cream holds firm peaks. Switch to a rubber spatula and fold in the sour cream.
To Finish: Spoon the whipped cream over the filling and spread it evenly to the edges of the custard. Serve, or refrigerate until needed.
Good for Almost Everything Pie Dough
– makes enough for a 9-inch single crust –
1 1/2 cups all-purpose flour
2 tablespoons sugar
3/4 teaspoon salt
1 1/4 sticks very cold (frozen is fine) unsalted butter, cut into tablespoon-size pieces
2 1/2 tablespoons very cold (frozen is even better) vegetable shortening, cut into 2 pieces
About 1/4 cup ice water
Put the flour, sugar and salt in a food processor fitted with a metal blade; pulse just to combine the ingredients. Drop in the butter and shortening and pulse only until the butter and shortening are cut into the flour. Don’t overdo the mixing—what you’re aiming for is to have pieces the size of fat green peas and others the size of barley. Pulsing the machine on and off, add 3 tablespoons of the water—add a little water and pulse once; add some more water and pulse again; and keep going that way. Then use a few long pulses to get the water into the flour. If after a dozen or so pulses, the dough doesn’t look evenly moistened or form soft curds, pulse in as much of the remaining water, or even a few drops more, to get a dough that will stick together when pinched. If you’ve got big pieces of butter, that’s fine. The dough is ready and should be scraped out of the work bowl and on to a smooth work surface.
Shape the dough into a disk and wrap it. Refrigerate the dough at least 1 hour before rolling. (If the ingredients were very cold and you worked very quickly, you might be able to roll the dough immediately—you’ll know: the dough will be as cold as if it had just come out of the fridge.) The dough can be kept in the refrigerator for up to 5 days or frozen for up to 1 month.
Have a buttered 9-inch pie plate at hand. You can roll the dough out on a floured surface or between sheets of wax paper or plastic wrap or in a rolling slipcover. If you’re working on the counter, turn the dough over frequently and keep the counter floured. If you’ve got time, slide the rolled out dough in the fridge for about 20 minutes to rest up and firm up.
To Fully Bake a Single Crust: Preheat the oven to 400°F. Butter the shiny side of a piece of aluminum foil (or use nonstick foil), fit the foil, buttered side down, tightly against the crust and fill with dried beans or rice or pie weights. Put the pie plate on a baking sheet and bake the crust for 25 minutes. Carefully remove the foil and weights and, if the crust has puffed, press it down with the side of a spoon (or lightly prick the crust). Return the pie to the oven and bake for about 10 minutes more, or until the crust is golden brown. Transfer the pie plate to a rack and cool to room temperature before filling.
I’d like to thank all of the TWD bakers for baking with me this week – and Dorie, for being so friggin’ amazing! I hope everybody enjoyed the pie!
Happy Baking,
Amy
Tuesdays with Dorie Holiday “Twofer” Pie: a blend of pumpkin and pecan
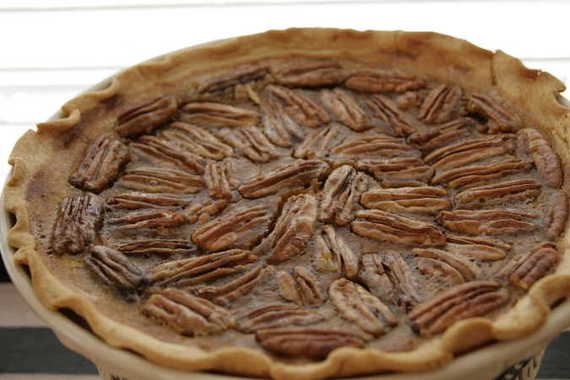
Happy Thanksgiving, ya’ll! (I know – you’re probably wondering why I’m blogging on Thanksgiving evening instead of enjoying family time….well, I figured blogging about pie might be a little more fun than watching A&M get slaughtered by Texas….hubby isn’t happy.) This week’s TWD recipe was chosen by Vibi of La Casserole Carree. As I said before, it’s a Holiday “Twofer” pie – a layer of pumpkin pie and a layer of pecan. Extremely tasty. The dark rum added a whole lot of flavor.
Holiday Twofer Pie
-Dorie Greenspan
1 9-inch unbaked pie crust
For the Pumpkin Filling:
1 cup canned unsweetened pumpkin puree
2⁄3 cup heavy cream
1⁄2 cup (packed) light brown sugar
1 large egg
1 large egg yolk
2 tsp. dark rum
1⁄2 tsp. pure vanilla extract
1⁄2 tsp. ground cinnamon
1⁄4 tsp. ground ginger
1⁄4 tsp. salt
For the Pecan Filling:
1⁄2 cup light or dark corn syrup
1⁄4 cup packed light brown sugar
2 tbsp. unsalted butter, melted
1 egg
1 egg yolk
1⁄2 tsp. pure vanilla extract
1⁄4 tsp. ground cinnamon
1⁄8 tsp. salt
1 1⁄2 cups (about 7 oz.) pecan halves or pieces
For the pumpkin filling: Pulse all ingredients together in a food processor. Leave filling in bowl.
For the pecan filling: In a bowl, whisk together all ingredients except pecans until smooth.
Preheat oven to 450°. Roll dough out to a 12″ circle on a floured counter, turning dough over frequently; keep counter floured. Slide dough into the fridge for about 20 minutes to rest and firm up. Fit dough into a buttered 9″ pie plate; cut excess dough to a 1⁄4″–1⁄2″ overhang. Fold dough under itself, so that it hangs over the edge just a tad, and flute or pinch the crust to make a decorative edge.
To assemble: Give the pumpkin filling one last quick pulse, then remove bowl, rap it on counter to debubble batter, and pour filling into crust. Top pumpkin filling evenly with pecans, then pour over pecan filling. Poke down any pecans that float to the top and aren’t covered with filling. Bake pie for 10 minutes. Reduce oven temperature to 300° and bake for another 35–40 minutes, or until it is evenly puffed and a slender knife inserted into the center comes out clean. Transfer pie to a cooling rack and let it stand until it is just warm or until it reaches room temperature.
Here are just a few more Thanksgiving pictures! Enjoy!
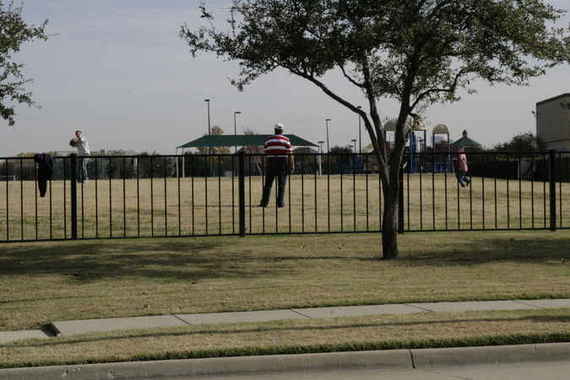
Hubby, brother-in-law, nephew and Daddy playing football across the street.
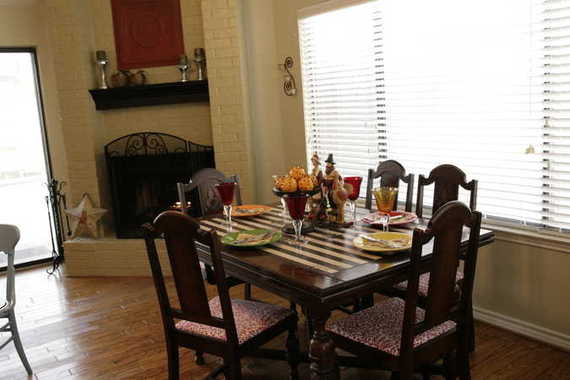
My Thanksgiving Table
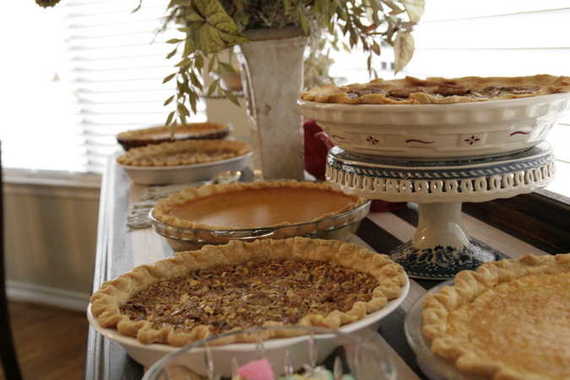
Pies galore! Pumpkin, pecan, buttermilk, and of course, my TWD pie.
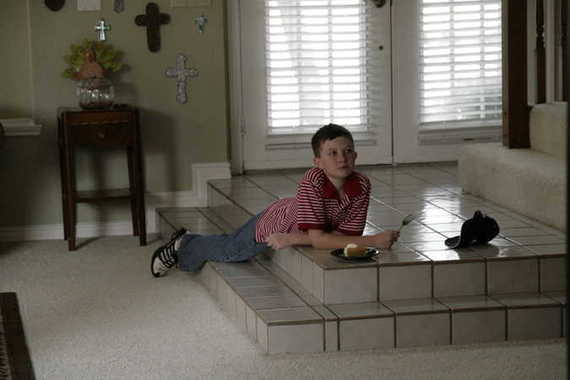
Nephew having his pie on the floor! Silly boy!
It was a great day! Hope everyone else had a wonderful Thanksgiving! On to the Christmas decorating!!
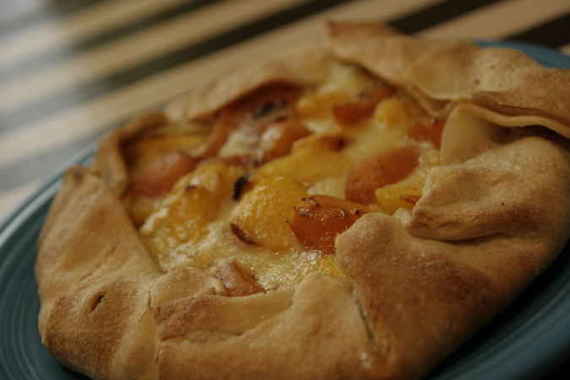
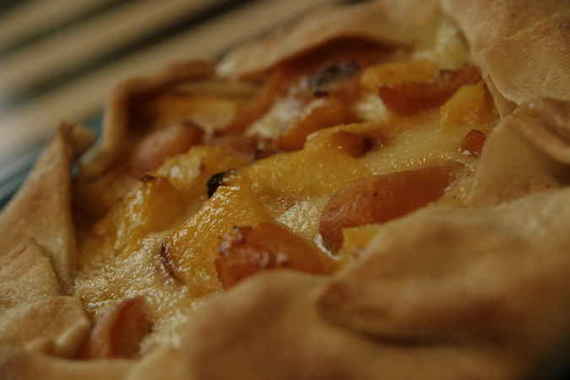
This week’s recipe was Dorie’s Summer Fruit Galette (delicious!) chosen by Michelle of Michelle In Colorado Springs. Lately, over at TWD, we’ve started doing things a wee bit differently; for instance, now we’ve started being informed of the chosen recipes for the entire month, instead of one week at a time. I think I’m the only person out of the entire group who doesn’t really cozy up to this idea. Call me crazy, but I enjoy finding out one recipe at a time – its like a little weekly surprise! It sure makes Mondays a little more enjoyable, I’ll say that! But, I understand most of the members’ reasonings for wanting this new method- going to the grocery store sucks. Let’s just come right out and say it. Nobody likes to go more than they absolutely have to, so by finding out the whole month’s TWD recipes, it allows us to go the the store one time and get everything we need for the whole month of baking. I get it. No judgement here, ladies. That’s why I didn’t make a peep when the idea was proposed…I’m just one of those weird people who like the spontaneity, I guess. I don’t have to have it, though….therefore, no gripes from SingForYourSupper!
Anyway, this galette rocked, in my fruit-and-pie-crust-lovin’ opinion! It starts with Dorie’s perfect Pie Crust, followed by apricot jam, graham cracker crumbs, plenty of fresh sliced summer fruit, such as nectarines, plums, apricots, peaches…(whatever your heart desires! I used nectarines and apricots), then topped with a surprisingly yummy pastry creme and baked….pure delicious, people! If you would like the recipe, and trust me, you do, you can visit Michelle’s blog and she’ll fix you right up! As always, you can see TONS more galettes on the other TWD members’ rockin’ blogs here.
I hate to say it, but this was the first recipe of Dorie’s that I just flat out did not care for – at all! I thought the day would never come when I would dislike, hate even, one of Dorie’s recipes, but there really is a first time for everything, I guess.
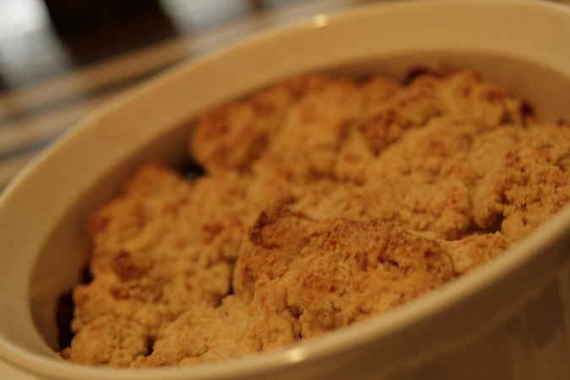
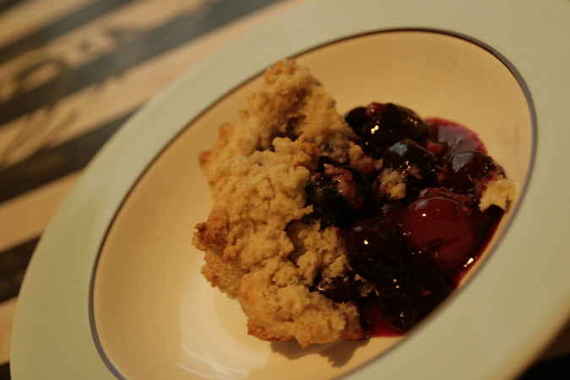
This week’s recipe was Cherry Rhubarb Cobbler, chosen by Amanda of Like Sprinkles on a Cupcake. To start with, I wasn’t too enthusiastic about another biscuit topping “cobbler” (not that it matters what I think – all that matters is the person who chose it, and if she wanted cobbler, than by gosh, cobbler is what she’ll get!), but its a cobbler containing rhurbarb….I think I’ve actually seen rhubarb in person once in my whole life around these parts….but not now apparently – the stuff is darned near impossible to find – so it would be a cherry rhubarb cobbler minus the rhubarb. Maybe that’s why mine was so unappealing – who knows. (At least it looks good, right?)
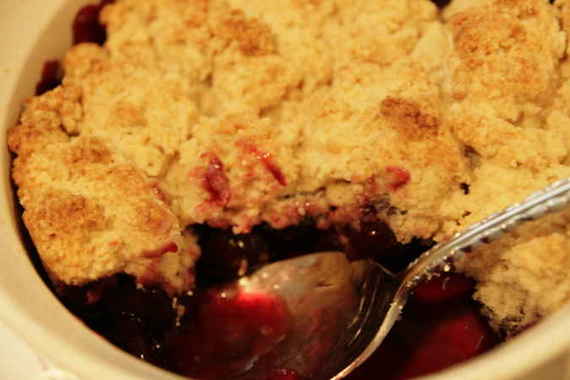
I bought a truck load of fresh cherries at my farmers market and was all excited to get home and start on my cherry cobbler. Until I realized I had no cherry pitter thingie. Great. I read on the TWD website that you could use a chopstick instead….so there I was in my kitchen, using a chopstick to try to pit my cherries. Five minutes into the process, it looked like I had murdered a small animal or something – bright, red cherry juice – EVERYWHERE. My face, my hair, my clothes, my walls, my hands – my fingers are still stained!- but I managed to get all those @#$%^&! cherries pitted, alright. During the whole process I kept thinking, “this had better be the best cherry cobbler known to man, or else I’m going to be really upset!” Against my better judgement, I decided to go ahead and make the biscuit topping instead of using a different topping like I did last time (the TWD gods were not amused at that), and hope for the best. I pulled it out of the oven and it looked delicious – juicy and red with a nicely browned crumbly topping. The taste, however wasn’t near as good as it looked. Both hubby and I were disappointed in the topping – it tasted like flour and nothing else – and the cherry filling was just “ok”. Now that could be due to the lack of rhubarb – so I won’t judge that part too much. Either way, it didn’t get eaten. And I was disappointed that I made something of Dorie’s that I didn’t care for. I guess it happens though – she can’t make everyone happy 100% of the time. So, there’s always next week (Summer Fruit Galette) and I’m particularly excited about it! Stay tuned!
This week’s recipe was Dorie’s Double Crust Blueberry Pie, chosen by Amy of South In Your Mouth. I think pretty much all of us at Tuesdays With Dorie loved this pick and thought it was perfect for the 4th of July Holiday! I was really excited to try this recipe for two reasons: 1.) I’ve never had a blueberry pie before and 2.) I’ve actually never made my own piecrust! I couldn’t wait to get started…..only there were hardly ANY blueberries to be had in my grocery store. I don’t know if there’s a “blueberry shortage” or what, but it was near impossible for me to find fresh blueberries (unless I was willing to spend a fortune…which I wasn’t, thank you very much!). So, I had planned on using frozen blueberries; that is, until my good buddy Jessica, over at My Baking Heart invited me to come blackberry picking with her and her mother! YEE HAW! I’d never gone pickin’ for anything before, so I decided fresh blackberries would be delicious!! We got TONS of ripe, delicious blackberries (sorry, Jess sent me the pictures, but I couldn’t figure out how to get them onto my blog, so if you want to see pics from our little outing, go visit her blog – she’s got ’em up!) and came home and made our pies.
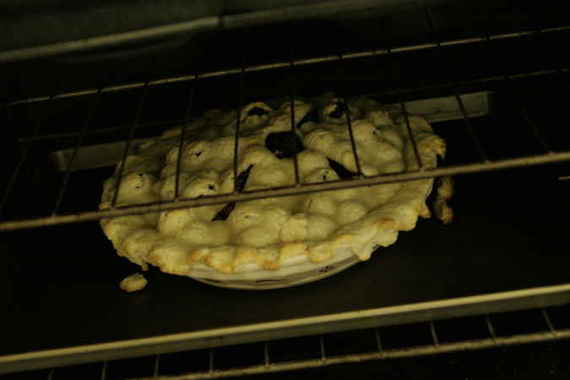
Unfortunately, I had a bit of trouble with my pie crust. I don’t know if I didn’t let it chill long enough before baking or what, but something just didn’t seem right as it was in the oven (as you can see by the picture above!) My crust was MELTING OFF!! It was the strangest thing! Not only that, but it burned rather quickly, too, even covered with foil. However, it was still delicious! I took the pie to my mom and dad’s house for the 4th of July weekend and the crust was a big hit. The blackberry filling was good…just very, very, VERY runny. I guess blackberries weren’t the wisest choice here. We ended up having to eat it with spoons! However, it was still pretty tasty with my mom’s homemade vanilla icecream over the top of it!
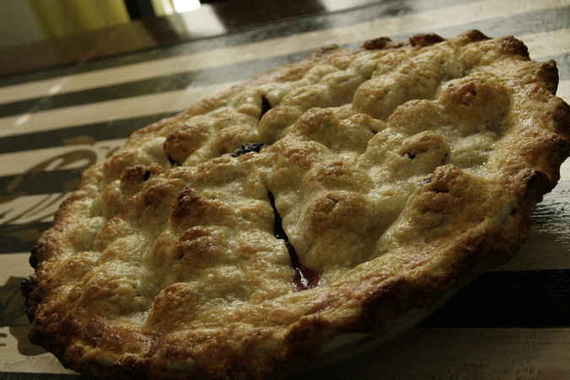
Sorry for the crappy pics….I didn’t get ANY good ones of the inside of the pie, mostly because its “innards” were running all over the place and hardly looked suitable for a close-up. Regardless of the appearance of this pie, it was really tasty and my whole family enjoyed it! Nex time, I’ll definitely try it with the fresh blueberries, though!


