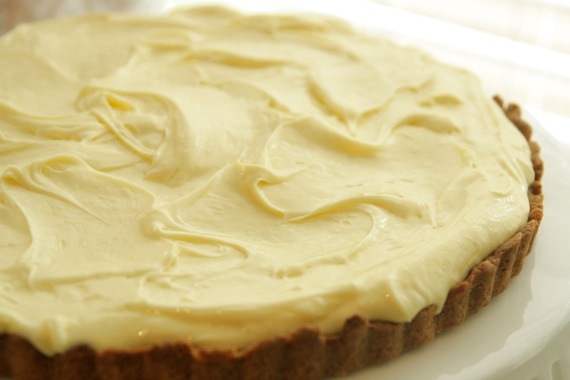
Back in 2008 when I first got my copy of Baking From My Home To Yours by Dorie Greenspan (aka: my idol), I took a pile of little sticky notes and went through the whole book marking the recipes I couldn’t wait to try. And of course, Dorie’s Lemon Cream Tart, the one she deems, “The Most Extraordinary Lemon Tart” was among the pages stuck with bright pink sticky notes. Well, here it is 2010 and I’m just now getting around to making this. Shame on me! I guess the reason it took so long is because the recipe calls for 2 1/2 sticks of butter…YIKES! For just hubby and me, that’s waaaaay too much butter! So, this Mother’s Day, I got my chance! We were having my family over for our annual Mother’s Day Brunch (but this year, we just did lunch) and my mom loves lemon desserts, so I decided this was the perfect opportunity to try the recipe out.
Unfortunately, the lemon cream took well over 45 minutes to make…you’re supposed to cook it (stirring constantly, mind you) until it thickens and reaches 180 degrees. I stirred and I stirred, then I stirred some more….then some more. At this point I was thinking one of those ridiculous Robo-stirrers would be ideal, then finally just decided to take it off the heat whether it was ready or not. Turned out fine in the end, but BOY, what a pain! The end result is a thick, creamy, extremely buttery lemon cream that tastes amazing on top of my favorite tart crust. I was really glad I made it, because everyone really liked it, but honestly, I’m not sure this one will be on the list for “go-to, no-fail” recipes. But for a special occasion like Mother’s Day, and a special mom like mine, it was perfect. Anything for Mommy! 🙂
Dorie Greenspan’s Lemon Tart
1 9-inch tart shell, fully baked and cooled (recipe below)
1 cup sugar
finely grated zest of 3 lemons
4 large eggs
1/2 cup freshly squeezed lemon juice (from 4 to 5 lemons)
2 sticks plus 5 tablespoons unsalted butter, at room temperature and cut into tablespoon-sized pieces
Getting Ready: Have an instant-read thermometer, a strainer and a blender (first choice) or food processor at hand. Bring a few inches of water to a simmer in a saucepan.
Put the sugar and zest in a large heatproof bowl that can be set over the pan of simmering water. Off the heat, rub the sugar and zest together between your fingers until the sugar is moist, grainy and very aromatic. Whisk in the eggs, followed by the lemon juice.
Set the bowl over the pan, and start stirring with the whisk as soon as the mixture feels tepid to the touch. Cook the lemon cream until it reaches 180 degrees F. As you whisk—you must whisk constantly to keep the eggs from scrambling—you’ll see that the cream will start out light and foamy, then the bubbles will get bigger, and then, as it gets closer to 180 degrees F, it will start to thicken and the whisk will leave tracks. Heads up at this point—the tracks mean the cream is almost ready. Don’t stop whisking or checking the temperature, and have patience—depending on how much heat you’re giving the cream, getting to temp can take as long as 10 minutes.
As soon as it reaches 180 degrees F, remove the cream from the heat and strain it into the container of the blender (or food processor); discard the zest. Let the cream stand, stirring occasionally, until it cools to 140 degrees F, about 10 minutes.
Turn the blender to high (or turn on the processor) and, with the machine going, add the butter about 5 pieces at a time. Scrape down the sides of the container as needed as you incorporate the butter. Once the butter is in, keep the machine going—to get the perfect light, airy texture of lemon-cream dreams, you must continue to blend the cream for another 3 minutes. If your machine protests and gets a bit too hot, work in 1-minute intervals, giving the machine a little rest between beats.
Pour the cream into a container, press a piece of plastic wrap against the surface to create an airtight seal and refrigerate for at least 4 hours or overnight. (The cream will keep in the fridge for 4 days and, or tightly sealed, in the freezer for up to 2 months; thaw it overnight in the refrigerator.)
When you are ready to assemble the tart, just whisk the cream to loosen it and spoon it into the tart shell. Serve the tart, or refrigerate ‘until needed.
Sweet Tart Dough
-Dorie Greenspan
1-1/2 cups all-purpose flour
1/2 cup confectioners’ sugar
1/4 teaspoon salt
1 stick plus 1 tablespoon (9 tablespoons)
very cold (or frozen) unsalted butter, cut into small pieces
1 large egg yolk
Put the flour, confectioners’ sugar and salt in a food processor and pulse a couple of times to combine. Scatter the pieces of butter over the dry ingredients and pulse until the butter is coarsely cut in—you should have some pieces the size of oatmeal flakes and some the size of peas. Stir the yolk, just to break it up, and add it a little at a time, pulsing after each addition. When the egg is in, process in long pulses—about 10 seconds each—until the dough, which will look granular soon after the egg is added, forms clumps and curds. Just before you reach this stage, the sound of the machine working the dough will change—heads up. Turn the dough out onto a work surface and, very lightly and sparingly, knead the dough just to incorporate any dry ingredients that might have escaped mixing.
To press the dough into the pan: Butter a 9-inch fluted tart pan with a removable bottom. Press the dough evenly over the bottom and up the sides of the pan, using all but one little piece of dough, which you should save in the refrigerator to patch any cracks after the crust is baked. Don’t be too heavy-handed—press the crust in so that the edges of the pieces cling to one another, but not so hard that the crust loses its crumbly texture. Freeze the crust for at least 30 minutes, preferably longer, before baking.
To bake the crust: Center a rack in the oven and preheat the oven to 375 degrees F.
Butter the shiny side of a piece of aluminum foil and fit the foil, buttered side down, tightly against the crust. (Since you froze the crust, you can bake it without weights.) Put the tart pan on a baking sheet and bake the crust for 25 minutes. Carefully remove the foil. If the crust has puffed, press it down gently with the back of a spoon. For a partially baked crust, patch the crust if necessary, then transfer the crust to a cooling rack (keep it in its pan).
To fully bake the crust: Bake for another 8 minutes or so, or until it is firm and golden brown. (I dislike lightly baked crusts, so I often keep the crust in the oven just a little longer. If you do that, just make sure to keep a close eye on the crust’s progress—it can go from golden to way too dark in a flash.) Transfer the tart pan to a rack and cool the crust to room temperature before filling.


I’ve made this recipe before as well and it does take quite a lot of stirring but the end result is worth it. So delicious!
[Reply]
Comment by Jen — May 12, 2010 @ 1:14 PM
Hmm…looks familiar! 🙂 It does take quite a bit of stirring, Dorie posted this article with some tweaks for making the cream that won’t break your arm from all the whisking. It’s a little long, but I think it’s worth reading.
Here it is: http://doriegreenspan.com/2008/05/the-most-extraordinary-lemon-tart-re-thunk.html
[Reply]
Michal Reply:
December 22nd, 2016 at 6:45 PM
Sadly, this link is broken.
Dorie’s site no longer has that article.
[Reply]
Comment by Brittany Elise — May 12, 2010 @ 1:24 PM
This is the cream filling I used in last month’s Do You Want Pies with That. So worth all the stirring!!!
[Reply]
Comment by Katrina — May 12, 2010 @ 1:38 PM
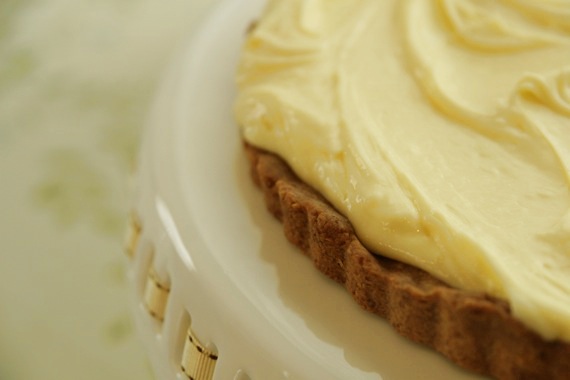
P.S. Where did you get your pie stand? I’ve been looking everywhere for one that can have a ribbon put throught the scallops and have had absolutely no luck. Thanks in advance.
[Reply]
Comment by Katrina — May 12, 2010 @ 1:40 PM
looks delicious!
[Reply]
Comment by Kathy @ The Sugar Queen — May 12, 2010 @ 3:21 PM
Brittany- thank you! I had actual already made this, then just the other day found this article! I wish I had read it sooner!
Katrina- I got the cake stand at a place called HomeGoods (http://www.homegoods.com/index.asp), aka: my most favorite store EVER!!! 🙂
-Amy
[Reply]
Comment by amy — May 12, 2010 @ 3:28 PM
Wonderful dessert! Thank you for making it. (How I LOVE that crust!!).
[Reply]
Comment by Mother — May 12, 2010 @ 7:03 PM
Your tart looks absolutely perfect and ethereal!! Wow. I would love all of it right now. I’m so hungry!
[Reply]
Comment by Memoria — May 12, 2010 @ 7:04 PM
Wow – that pastry cream really does look extraordinary!!
[Reply]
Comment by Katie — May 13, 2010 @ 9:09 AM
Thanks for the link! I think I may have found my new favorite website.
[Reply]
Comment by Katrina — May 13, 2010 @ 9:22 AM
Your tart look stunning. Dorie’s recipes never disappoint.
[Reply]
Comment by Eliana — May 14, 2010 @ 12:33 PM
Wow, that lemon cream looks amazing! Very simple, too.
[Reply]
Comment by Zoe @ Z's Cup of Tea — May 14, 2010 @ 8:29 PM
Looking at the recipe again, I only noticed something now: how much sugar for the lemon cream?It’s in the instructions, but not listed with the other ingredients.
[Reply]
Comment by Zoe @ Z's Cup of Tea — May 17, 2010 @ 1:38 PM
You’re absolutely right, Zoe- thank you!! I changed it- it calls for 1 cup sugar! So glad you noticed that!
-Amy
[Reply]
Comment by amy — May 17, 2010 @ 2:27 PM
Hi!
love your tarts… so pretty to look n must be yummy to eat.
Loved surprising my friends with these 🙂
Lemon Cake, Lemon Tarts ~ Happy Anniversary Shikha & Sujith n Surprise for Sharad
Cheers,
The Variable, Crazy Over Desserts – Nachiketa
Catch me on facebook @ Crazy Over Desserts
[Reply]
Comment by nachiketa — May 25, 2010 @ 3:27 AM