Making baby food at home is a practice very near and dear to my heart, so when I asked you all if it was something you cared about, then received such an enthusiastic response…I couldn’t WAIT to share with you! So, just for you mommies out there, I’ve put together a detailed post with everything you need to know about making healthy, safe, and delicious baby food at home for your sweet little ones!
Now, there are lots of myths out there about making your own baby food at home; so let’s just get past those right now:
Myth #1: making homemade baby food is hard. This couldn’t be more wrong. Not only is homemade baby food incredibly easy (I’ll show you how); it’s fun! I actually really enjoy making baby food at home. During all the stress of our move, I switched to store-bought for a little while and wasn’t too fond of the experience. Now that I’m back to homemade, things are much better and we’re all happier! You don’t need fancy recipes- just steam it, puree it, and store it. That’s it.
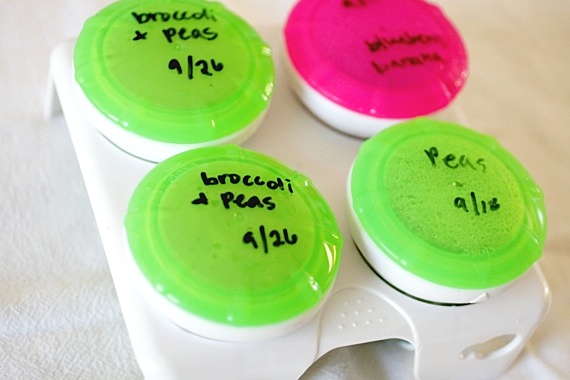
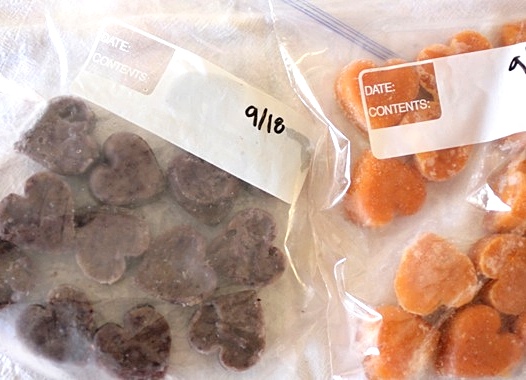
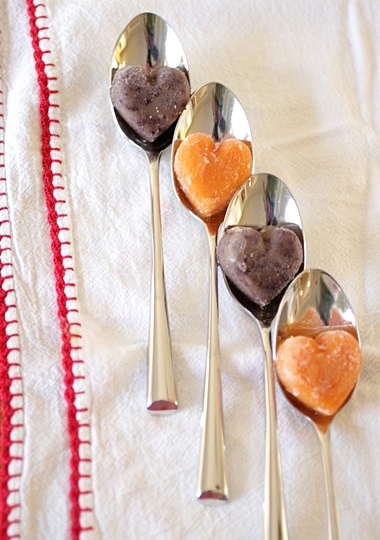
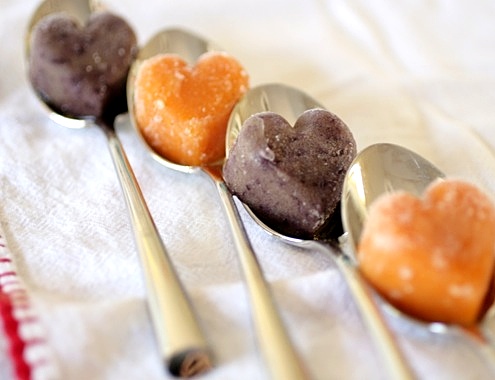
Myth #2: you need fancy, expensive equipment to make baby food at home. WRONG. I’m sure those little gadgets that are specially designed for the sole purpose of making baby food are great (too bad they cost a fortune…), but let me tell you now- save your money! All you need to make baby food at home is a vegetable steamer basket, a food processor (or blender), and a few ice cube trays for freezing (I have a couple of silicon heart-shaped ice cube trays that I like to use from time to time). The one special piece of equipment I did go out and buy was this baby food storage kit. I like it because it’s really easy, dishwasher safe, and each cup is the perfect portion size for Cassidy.
Myth #3: making homemade baby food is more expensive. Tooooootally not true! I buy mostly frozen vegetables, which are never more than around a dollar a bag, and I can usually get around 6 or 7 servings out of each bag. I can get over 8 2-ounce jars out of one sweet potato! With store-bought, depending on what kind you buy, you may spend anywhere from .75 – $1.75 a serving. Yikes!
Now, I’m not here to preach at you. If you prefer store-bought, hey, that’s fantastic. There is absolutely nothing wrong with store-bought baby food! I just happen to a.) enjoy making it, b.) appreciate knowing exactly what I’m feeding my daughter, and c.) like saving my pennies. So, without further ado, here are my best tips and methods:
Why I love store-bought frozen fruits and vegetables: I prefer frozen because not only are they pre-washed, chopped, and ready to go, they’re picked and frozen at the peak of their ripeness, which means they retain pretty much all of their vitamins and minerals. Plus, you can always get certain out-of-season vegetables year round!
Fresh is always a great option, but since I hate peeling, seeding, and chopping certain vegetables, I prefer to buy frozen. You can always buy fresh, then freeze for later use. I like to stock up on fresh fruits and vegetables at Costco, then bring them home to prep and freeze for later use. Call me crazy, but I actually kind of enjoy prepping for baby food making. Oh, and here’s a little tip: if you’re going to freeze bananas for later use, peel them, toss them with a little lemon juice, then place in an airtight ziploc baggie; that way they won’t get slimy and brown. Works every time!
Ok, now that we’ve got a few of the logistics out of the way, let’s make baby food!
Begin by preparing your fruits or vegetables. If you’re using frozen, just throw ’em in the steamer basket; since they come pre-washed and chopped, you’re good to go. Fresh may require peeling/seeding. If you’re using fruits, no cooking is necessary (except for apples and pears- I like to soften those up a bit first).
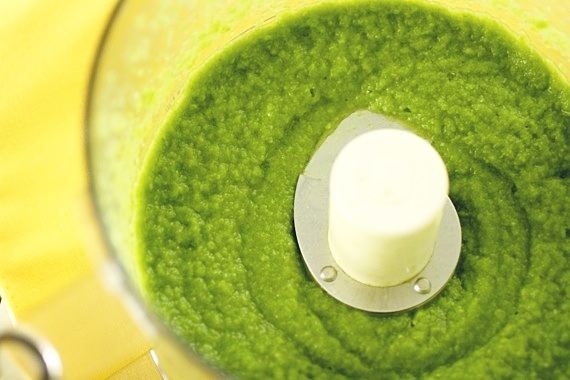
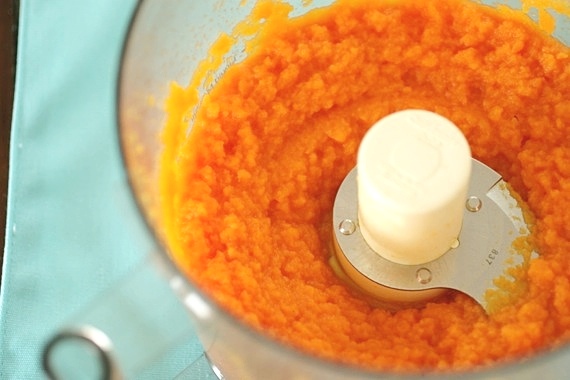
Steam your vegetables on medium-high heat. Depending on the vegetable, I steam mine for around 10-15 minutes, just until they’re good and soft. Harder veggies like sweet potatoes, rutabagas, and butternut squash may take up to 30 minutes. Once they’re fork tender, carefully (it’s hot!) put them in the food processor or blender (or if you’re really old school, a food mill) and pulse until smooth. Keep the steaming liquid close by in case your puree is too thick. I like to pulse the snot out of mine to make extra sure there are no lumps.
No seasoning is needed- most fruits and vegetables taste great on their own. However, I do like to add a pinch of cinnamon to my sweet potatoes for a little extra something. 😉
Once you’ve reached your desired consistency, set it aside to cool down a bit. Then carefully spoon the baby food into clean ice cube trays (perfectly portioned at 1 ounce each!) or freezer safe baby food containers. If you’re using ice cube trays, cover tightly with plastic wrap before freezing. And that’s it! When you’re ready to serve, pop it in the microwave for about 30 seconds to 1 minute and that’s it! Baby food!
The flavors I’ve made so far are: peas, green beans, summer squash, blueberry/banana, prunes*, sweet potato with cinnamon, pears, strawberry/banana, avocado, and broccoli. (NOTE: Cassidy’s doctor told me not to make carrots or spinach at home, due to possible high levels of nitrates [which I found out only after I had made an entire batch…]. Baby food companies screen all their baby foods for nitrates before selling them, so it’s a safer bet to just buy your carrot and spinach baby food. Safety first! Just FYI.) All super easy, all heartily approved by miss Cassidy herself (as pictured below)!
*If you’re going to make prunes (hey, some babies need a little extra fiber, if you know what I’m sayin’…), you’ll need to steep them in boiling water for 5-10 minutes before pureeing, just to plump them up a bit. Same with dried cranberries or raisins.
So, there you have it! Easy, right? I hope this has all been helpful to some of you, and please don’t hesitate to email me with any questions! I love to hear from you! Now get out there and make some baby food at home! 🙂



I was eagerly waiting for this post. Thank you! I made homemade baby food for my first daughter and gave her mainly carrots! I had no idea about the nitrates. Shocking. I also froze them in ice cube trays and then soon afterwards found out about BPA in plastic, so this time around its store bought carrots and the freezer safe baby food containers for the rest. Thanks for the tips and I love the picture of Cassidy enjoying her prunes:)
[Reply]
Comment by Heather — October 18, 2012 @ 5:43 AM
Good news – this is wrong!
“Baby food companies screen all their baby foods for nitrates before selling them, so it’s a safer bet to just buy your carrot and spinach baby food. Safety first! Just FYI.)”
Baby food companies may screen but they do NOT remove nitrates. Nitrates are naturally occurring and cannot be removed by any company.
The AAP notes that babies under 3 months of age should not have home prepared “nitrate” veggies (or any food at all)
“Because vegetables, including green beans, carrots, squash, spinach and beets, can have nitrate levels as high or higher than that of well water, infants should not eat these foods until after age 3 months.”
You can read more about Nitrates and Homemade Baby Food at http://wholesomebabyfood.momtastic.com/nitratearticle.htm
LOVE your heart shaped baby food cubes too 🙂
[Reply]
amy Reply:
October 18th, 2012 at 10:21 AM
How interesting, thanks for letting me know!
[Reply]
devon zukowski Reply:
November 8th, 2012 at 7:11 PM
just a note: the earliest babies should be eating “solids” is 4 months!!
[Reply]
amy Reply:
November 8th, 2012 at 10:09 PM
Yep!
[Reply]
Comment by Maggie — October 18, 2012 @ 10:11 AM
Great post! I made all of my oldest son’s baby food, and eagerly plan to do the same for #2! Super easy, and so much more appetizing! Thanks for sharing; Cassidy is adorable!
[Reply]
Comment by Tiffany — October 18, 2012 @ 1:21 PM
What an informative post! I was pretty lucky with my daughter and she jumped straight from breast milk to solid food, totally skipping purees. But I would have wanted to make my own if she had been willing. I think this happened because she started on solids pretty late.
[Reply]
Comment by Loretta | A Finn In The Kitchen — October 18, 2012 @ 2:50 PM
Thanks for the post. I also make my son’s food, and love the cookbook Baby Love. It has some great recipes and tips.
[Reply]
amy Reply:
October 19th, 2012 at 9:53 AM
I think I may have that book too! I need to find it! Haha!
[Reply]
Comment by Caldwell Price — October 18, 2012 @ 4:10 PM
What a fantastic post and just in time because I started prepping food for Elena, too. I didn’t know that fact about carrots and spinach, and those were vegetables I wanted to introduce next. What a great momma you are for making healthy foods for Cassidy!!!!
[Reply]
amy Reply:
October 19th, 2012 at 9:54 AM
Thanks, Krystal! I enjoy it so much and I know you will too! I haven’t delved into meat yet, but I will soon! I’m a bit nervous about that one!
[Reply]
Comment by Krystal R {Mrs. Regueiro's Plate} — October 18, 2012 @ 5:01 PM
I cannot wait until the day I have a reason to make homemade baby food! And seriously, Amy, if making homemade baby food will mean my kids is as cute and happy as yours, I’m so in!
[Reply]
amy Reply:
October 19th, 2012 at 11:46 AM
You’re so sweet, Kelsey. 🙂
[Reply]
Comment by Kelsey — October 19, 2012 @ 11:31 AM
If you use organic carrots, the nitrates are minimized. Such fun making baby food!
http://wholesomebabyfood.momtastic.com/nitratearticle.htm#.UIGVFWt5mK0
[Reply]
amy Reply:
October 19th, 2012 at 1:43 PM
So glad to know this! Thanks, Annie!
[Reply]
Comment by Annie — October 19, 2012 @ 1:03 PM
Great information! I loved making babyfood. I used to make babyfood with meat and it was so much nicer than the jarred babyfood, ugh they smell horrible!! All I did was cook chicken or turkey or whatever and grind it really fine, and then mix it with a puree like applesauce or sweet potato.
[Reply]
Comment by Amy B — October 20, 2012 @ 6:12 PM
Awesome job! I made all my daughter’s food when she was a baby, I loved finding new flavors to make for her to try! I bought all my fruits and veggies at the local organic store and still saved a ton of money! Have fun! 🙂
[Reply]
Comment by Jenni — October 24, 2012 @ 7:53 PM
I used to make a stew of chicken, rice, and veggie. Mix it all together. Baby doesn’t know the difference and you have one dish instead of three.
[Reply]
Comment by sarah jane — November 8, 2012 @ 12:03 PM
[…] there not be unpronounceable ingredients in my food). I get lots of emails asking me to post more baby food recipes, and I know there are lots of mothers out there who are looking for good meals to feed […]
Pingback by Feeding Your One Year-Old… | A Little Something Lovely — March 6, 2013 @ 4:25 PM
I did some research on the carrot/spinach nitrate scare and found this: http://www.drgreene.com/mythbusting-carrots-nitrates-homemade-baby-food/
Good advice from the doc, but I always like to do a little homework myself! I thought I’d share in case any mommas would still like to try homemade carrot and spinach purée without feeling terrible!
[Reply]
Comment by Jami — January 14, 2014 @ 11:24 PM
A good amount of good guidance on this great site, want
to have a steam shower unit in my bathroom
[Reply]
Comment by home steam cabin — February 11, 2014 @ 6:01 AM