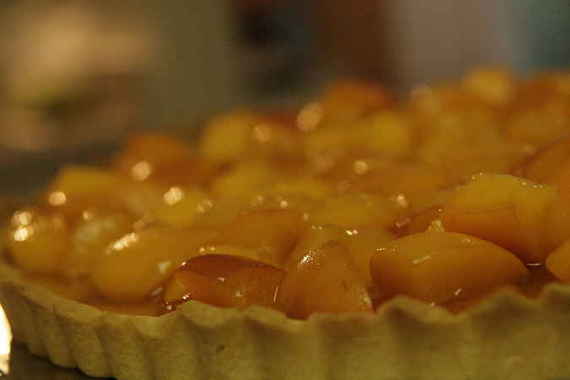
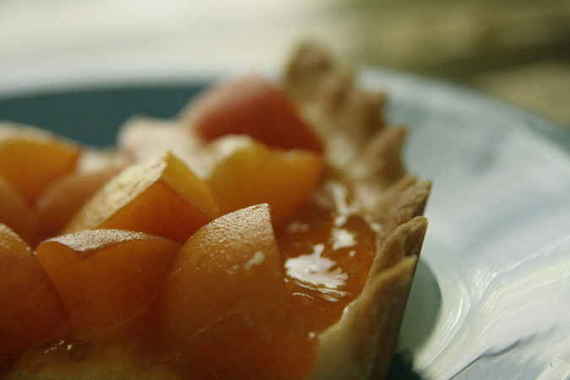
Obviously, I didn’t do this week’s recipe exactly as called for. Marie of A Year From Oak Cottage chose La Palette’s Strawberry Tart. I love strawberries – especially in the summer – but for some reason I just wasn’t in the mood for strawberries that day. And as I was trying to think of a substitute fruit, its like there was a little voice in my head chanting, “apricots! apricots! apricots!” Ok then, fine. I’ll do apricots. Good thing I did, too, because this turned out beautifully!!
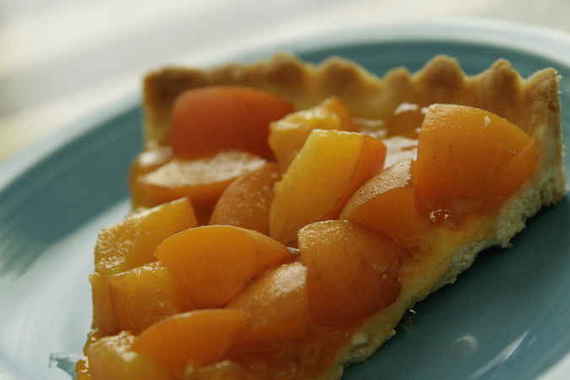
I tossed my apricots with a little sugar, some fresh lime juice and a splash of coconut rum and let them macerate for about an hour. I spread my (amazingly delicious!) tart shell with a thick layer of good apricot jam, dumped on my apricots and dug in! WOW was this good!!! Honestly, my favorite part was the tart shell….it was like a shortbread cookie!! However, the apricot part was pretty darned tasty, if I do say so myself!
Sorry, but I won’t be posting Dorie’s recipes on my blog anymore – there are just too many of us (Tuesdays with Dorie members) now, and we wouldn’t want Dorie’s book sales to go downhill!! (Sorry Dorie!!) So, if you would like the recipes….buy the book!! Trust me, its the best cookbook you’ll ever own and you’ll be GLAD you bought it!!!
Ok, so you’re probably wondering, “what’s with the dorky ‘Rachael Ray-esque’ title?” Well, this week’s TWD recipe (Peanut Butter Torte, chosen by Elizabeth of Ugg Smell Food) was sort of two-fold for me. As always, it was another baking adventure that pushed me to try things out of my comfort zone, but it also served as a celebratory (or celebra-torte-y, if you will….hehe) cake for me. Allow me to steer away from the subject of TWD for a second:
As sort of a “second job”, I sing in the chorus of a nearby opera company every summer. Last summer was my first season with them and the opera we did (called Falstaff) had a teeny-tiny chorus role. The chorus was on stage for a total of 5 minutes, maybe. This year, however, is different – this year we’re doing Puccini’s Turandot and the chorus plays a significant role in the opera…we’re on stage practically the entire time! Woo hoo! So, the other night in rehearsal, we came to a part of the score where there was a small soprano solo. I wasn’t even paying attention because I just figured the director would give it to one of the ladies who had been in the company for a while. Out of nowhere, I heard the director say my name, and as I looked up, sure enough, he was pointing right at me (This would be the part that, if I were telling you this story in person, I’d be jumping up and down and screaming). So, after I had sort of gotten a grip on reality and my face had turned four shades of red, it finally occurred to me, “omigoshomigoshomigosh I just got a solo! I just got a solo! I just got a SOLO!” Now, this is a pretty big opera company, mind you; and I’m just a lowly chorus mignon; so hopefully you can understand my excitement.
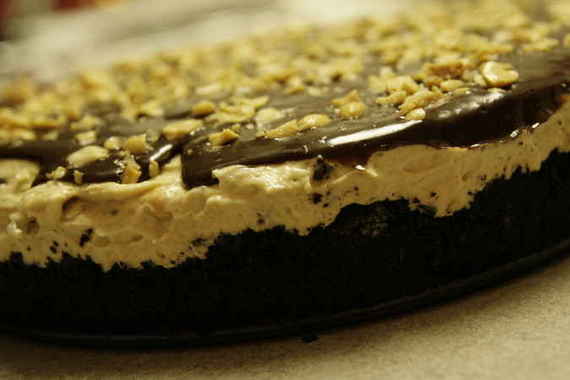
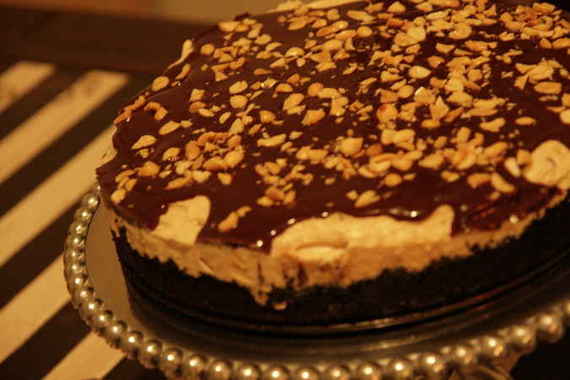
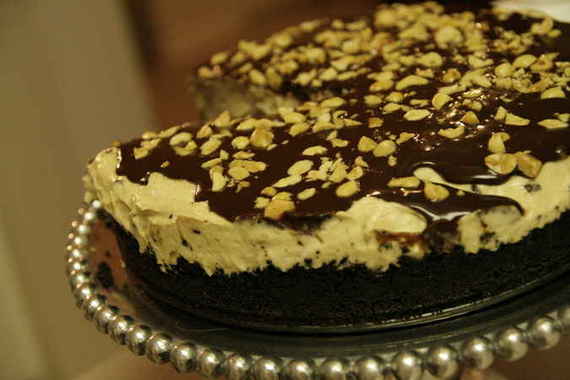
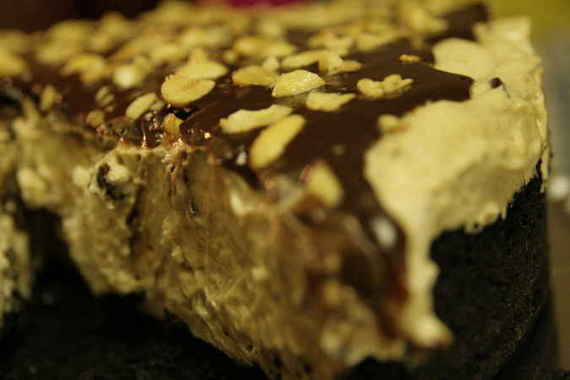
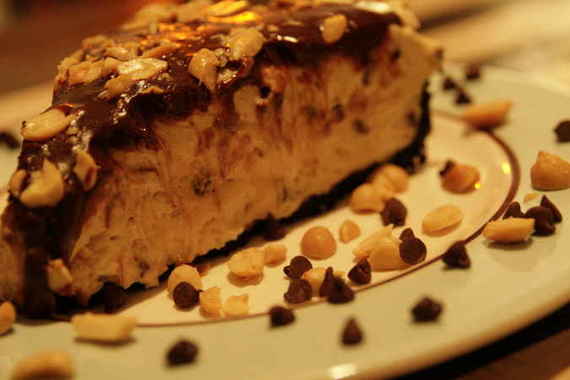
So, anyway, when something big like that happens, I always make some kind of fun dessert or meal to celebrate (last year, when I auditioned and made the opera company for the first time, I made cranberry white chocolate cookies); well I was already making the Peanut Butter Torte for Tuesdays with Dorie and that’s pretty fun, fancy dessert, so I thought, “I’ll just make this as a ‘congratulations to me’ dessert!” And that’s just what this torte is; something to celebrate with! I don’t think I would make this for anything other than a celebration or a big dinner party – its one of those desserts you only need to eat once a year, if not less – its chock full of fat and calories (but worth every bite, in my chubby opinion). You could always halve the recipe, though, if you wanted to make it for two or even four. However you make it, though – its darned delicious. The espresso powder gives it a slight coffee taste, which just adds mountains of flavor to the peanut butter mousse filling. I also loved the crunch of the peanuts and chocolate chips – and that oreo crust….heaven!
This was the perfect (don’t worry, I’ll say it normal this time-) celebratory dessert – and from now on, whenever I make this delectable peanut butter torte, I’ll always look back and think on the time I got my first solo with a big opera company!
Peanut Butter Torte
1 1/4 c. finely chopped salted peanuts (for the filling, crunch and topping)
2 teaspoons sugar
1/2 teaspoon instant espresso powder (or finely ground instant coffee)
1/4 teaspoon ground cinnamon
Pinch of freshly grated nutmeg
1/2 c. mini chocolate chips (or finely chopped semi sweet chocolate)
24 Oreo cookies, finely crumbed or ground in a food processor or blender
1/2 stick (4 tablespoons) unsalted butter, melted and cooled
Small pinch of salt
2 1/2 c. heavy cream
1 1/4 c confectioners’ sugar, sifted
12 ounces cream cheese, at room temperature
1 1/2 c salted peanut butter – crunchy or smooth
2 tablespoons whole milk
4 ounces bittersweet chocolate, finely chopped
Getting ready: center a rack in the oven and preheat the oven to 350°F. Butter a 9-inch Springform pan and place it on a baking sheet lined with parchment or a silicone mat.
Toss ½ cup of the chopped peanuts, the sugar, espresso powder, cinnamon, nutmeg and chocolate chops together in a small bowl. Set aside.
Put the Oreo crumbs, melted butter and salt in another small bowl and stir with a fork just until crumbs are moistened. Press the crumbs evenly over the bottom and up the sides of the spring form pan (they should go up about 2 inches on the sides). Freeze the crust for 10 minutes.
Bake the crust for 10 minutes, then transfer it to a rack and let it cool completely before filling.
Working with a stand mixer fitted with the whisk attachment or with a hand mixer in a large bowl, whip 2 cups of the cream until it holds medium peaks. Beat in ¼ cup of the confectioners’ sugar and whip until the cream holds medium-firm peaks. Crape the cream into a bowl and refrigerate until needed.
Wipe out (do not wash) the bowl, fit the stand mixer with the paddle attachment if you have one, or continue with the hand mixer, and beat the cream cheese with the remaining 1 cup confectioners’ sugar on medium speed until the cream cheese is satiny smooth. Beat in the peanut butter, ¼ cup of the chopped peanuts and the milk.
Using a large rubber spatula, gently stir in about one quarter of the whipped cream, just to lighten the mousse. Still working with the spatula, stir in the crunchy peanut mixture, then gingerly fold in the remaining whipped cream.
Scrape the mouse into the crust, mounding and smoothing the top. Refrigerate for at least 4 hours, or overnight; cover with plastic wrap as soon as the mousse firms.
To Finish The Torte: put the chopped chocolate in a heatproof bowl and set the bowl over a saucepan of simmering water. Leave the bowl over the water just until the chocolate softens and starts to melt, about 3 minutes; remove the bowl from the saucepan.
Bring the remaining ½ cup cream to a full boil. Pour the cream over the chocolate and , working with a a rubber spatula, very gently stir together until the ganache is completely blended and glossy.
Pour the ganache over the torte, smoothing it with a metal icing spatula. Scatter the remaining ½ cup peanuts over the top and chill to set the topping, about 20 minutes.
When the ganache is firm, remove the sides of the Springform pan; it’s easiest to warm the pan with a hairdryer, and then remove the sides, but you can also wrap a kitchen towel damped with hot water around the pan and leave it there for 10 seconds. Refrigerate until ready to serve.
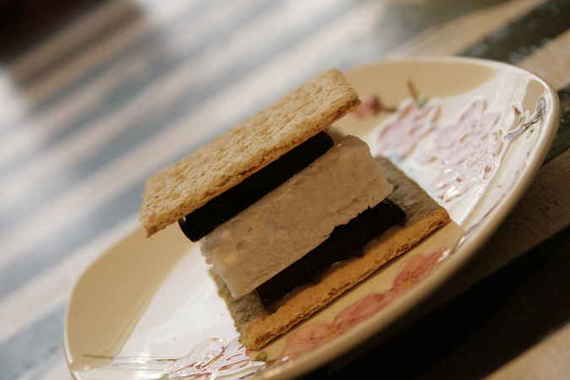
So, here it is – my very first Tuesdays with Dorie post. Pretty darn exciting, if you ask me. I’ve really been itching to join for weeks now, but for whatever reason I haven’t until now. I was super nervous about this week’s recipe, being that its my first ‘TWD’ post, and I wanted to “make a good impression”, so to speak, but also because its MARSHMALLOWS! For the love of Pete- marshmallows? For a girl who likes to make cute little cookies, easy-peasy brownies and cakes, and the occasional flan, tart, or other “slightly-more-challenging” dessert, marshmallows are like……….woah.
Now, for those of you who are wondering, “what the heck is Tuesdays with Dorie?!” – its a group of people (mostly women) who love to bake and love Dorie Greenspan’s new cookbook Baking: From My Home to Yours. Every week, a member of the group chooses one of Dorie’s (amazing) recipes for the group to make; then everyone makes the recipe and posts it in their cooking blog on Tuesdays. Sorry if I’ve just confused you….just go to the website if you still need more answers. tuesdayswithdorie.wordpress.com/
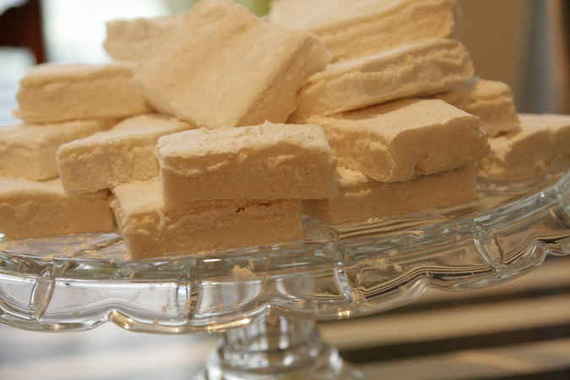
I’m not sure why I imagined marshmallows were so difficult to make – aside from being slightly tedious, they turned out to be fairly easy. I know a few people had encountered some problems with the marshmallows separating, or the egg whites deflating; I didn’t seem to have either of these issues – I guess I just got lucky this time around. I read a lot of the comments on the Tuesdays with Dorie website, which gave me a few helpful tips (like what to do with the extra tablespoon of sugar). So all-in-all, I’d say my first shot at marshmallows turned out to be a success!
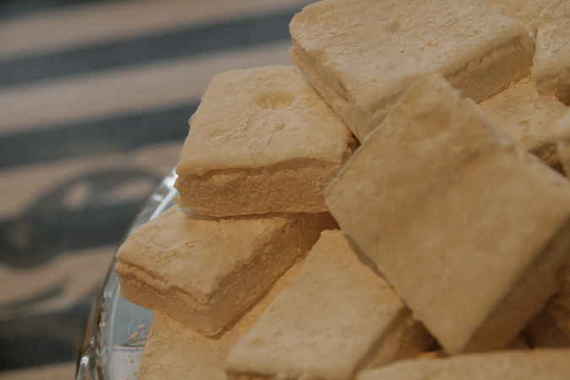
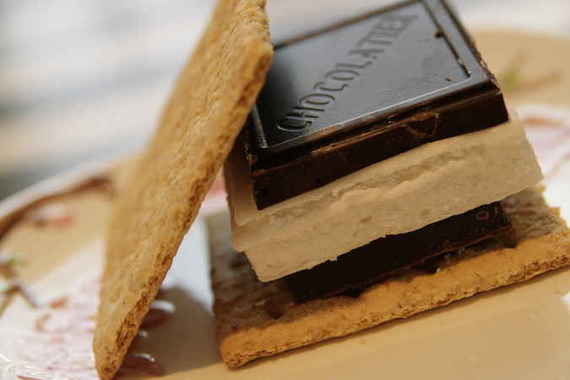
So many people made so many great “tweaks” and personal touches to the recipe – to see everyone’s results, go here. Since I wasn’t totally familiar with this recipe, I decided to keep it simple and not do anything fancy to mine. The only adjustment I made was substituting half of the vanilla with coconut extract – just for a little extra flavor. Just a tip – these are pretty tasty in a s’more!
Homemade Marshmallows
(any changes I made are in Italics)
Makes about 1 pound marshmallows
About 1 cup potato starch (found in the kosher foods section of supermarkets) or cornstarch
2 tablespoons light corn syrup
2 1/4-ounce packets unflavored gelatin
3 large egg whites, at room temperature
3/4 cup cold water
1 tablespoon pure vanilla extract
1 1/4 cups plus 1 tablespoon sugar
GETTING READY: Line a rimmed baking sheet — choose one with a rim that is 1 inch high (I used a 9×13 pan so my marshmallows would be nice and tall) — with parchment paper and dust the paper generously with potato starch or cornstarch. Have a candy thermometer at hand.
Put 1/3 cup of the water, 1 1/4 cups of the sugar and the corn syrup in a medium saucepan over medium heat. Bring the mixture to a boil, stirring until the sugar dissolves. Once the sugar is dissolved, continue to cook the syrup — without stirring — until it reaches 265 degrees F on the candy thermometer, about 10 minutes. (I didn’t have a candy thermometer and wasn’t interested in buying one – so I just did without. I just let the syrup cook for about 7-10 minutes, and it turned out fine)
While the syrup is cooking, work on the gelatin and egg whites. In a microwave-safe bowl, sprinkle the gelatin over the remaining cold water (a scant 7 tablespoons) and let it sit for about 5 minutes, until it is spongy, then heat the gelatin in a microwave oven for 20 to 30 seconds to liquefy it. (Alternatively, you can dissolve the gelatin in a saucepan over low heat.)
Working in the clean, dry bowl of a stand mixer fitted with the whisk attachment or in another large bowl with a hand mixer, beat the egg whites on medium-high speed until firm but still glossy — don’t overbeat them and have them go dull. (This is where I added the extra tablespoon of sugar that wasn’t ever called for in the original cooking directions)
As soon as the syrup reaches 265 degrees F, remove the pan from the heat and, with the mixer on medium speed, add the syrup, pouring it between the spinning beater(s) and the sides of the bowl. Add the gelatin and continue to beat for another 3 minutes, so that the syrup and the gelatin are fully incorporated. Beat in the vanilla.
Using a large rubber spatula, scrape the meringue mixture onto the baking sheet, laying it down close to a short end of the sheet. Then spread it into the corners and continue to spread it out, taking care to keep the height of the batter at 1 inch; you won’t fill the pan (unless you use a 9×13 like I did, then you will indeed fill the pan). Lift the excess parchment paper up to meet the edge of the batter, then rest something against the paper so that it stays in place (I use custard cups).
Dust the top of the marshmallows with potato starch or cornstarch and let the marshmallows set in a cool, dry place. They’ll need about 3 hours, but they can rest for 12 hours or more.
Once they are cool and set, cut the marshmallows with a pair of scissors or a long thin knife (I used a pizza cutter – it worked beautifully). Whatever you use, you’ll have to rinse and dry it frequently. Have a big bowl with the remaining potato starch or cornstarch at hand and cut the marshmallows as you’d like — into squares, rectangles or even strips (as they’re cut in France). As each piece is cut, drop it into the bowl. When you’ve got 4 or 5 marshmallows in the bowl, reach in with your fingers and turn the marshmallows to coat them with starch, then, one by one, toss the marshmallows from one hand to the other to shake off the excess starch; transfer them to a serving bowl. Cut and coat the rest of the batch.
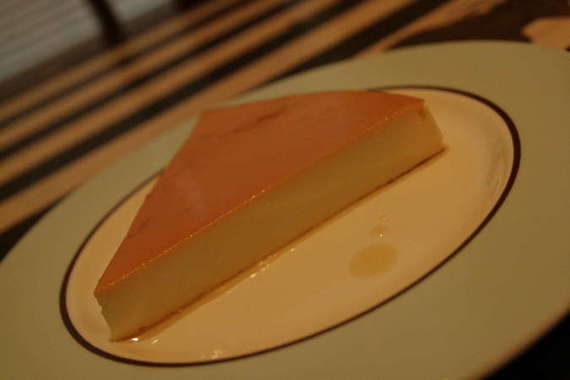
Since we were having Mexican food for dinner, I decided Flan would be a great dessert. I’ve made it before, using a recipe I found on allrecipes.com and it was delicious, but since I just got Baking: From My Home to Yours by Dorie Greenspan this week (pretty much the best cookbook I’ve ever owned), I decided to try Dorie’s recipe.
I know this was one of the recent “Tuesdays with Dorie” recipes, but unfortunately, my sweet little blog didn’t exist yet, so I couldn’t partake in this delightful challenge (but I certainly enjoyed reading everyone else’s entries!). Maybe now that I have a blog, I’ll become the latest member of the “TWD” craze!
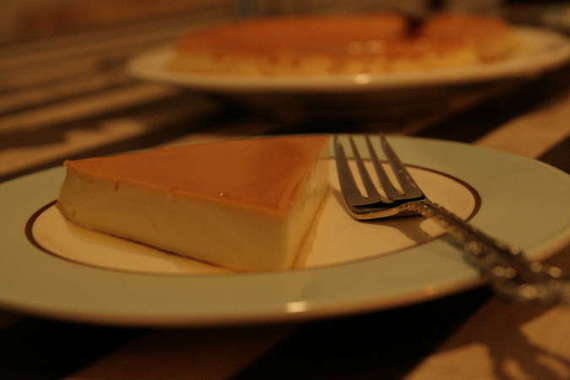
So, what can I really say about this recipe that most of you don’t already know? It’s delicate, it’s dainty, it’s downright delicious. It was the perfect end to a tasty Mexican dinner! Enough said!
Caramel Topped Flan
from Baking: From My Home to Yours by Dorie Greenspan
For the Caramel
1/3 cup sugar
3 tbsp water
squirt of fresh lemon juice
For the Flan
1-1/2 cups heavy cream
1-1/4 cups whole milk
3 large eggs
2 large egg yolks
Getting Ready: Center a rack in the oven and preheat the oven to 350 degrees F. Line a roasting pan or a 9-x-13-inch baking pan with a double thickness of paper towels. Fill a teakettle with water and put it on to boil; when the water boils, turn off the heat.
Put a metal 8-x-2-inch round cake pan-not a nonstick one-in the oven to heat while you prepare the caramel.
To Make the Caramel: Stir the sugar, water and lemon juice together in a small heavy-bottomed saucepan. Put the pan over medium-high heat and cook until the sugar becomes an amber-colored caramel, about 5 minutes-remove the pan from the heat at the first whiff of smoke.
Remove the cake pan from the oven and, working with oven mitts, pour the caramel into the pan and immediately tilt the pan to spread the caramel evenly over the bottom; set the pan aside.
To Make the Flan: Bring the cream and milk just to a boil.
Meanwhile, in a 2-quart glass measuring cup or in a bowl, whisk together the eggs, yolks and sugar. Whisk vigorously for a minute or two, and then stir in the vanilla. Still whisking, drizzle in about one quarter of the hot liquid-this will temper, or warm, the eggs so they won’t curdle. Whisking all the while, slowly pour in the remainder of the hot cream and milk. Using a large spoon, skim off the bubbles and foam that you worked up.
Put the caramel-lined cake pan in the roasting pan. Pour the custard into the cake pan and slide the setup into the oven. Very carefully pour enough hot water from the kettle into the roasting pan to come halfway up the sides of the cake pan. (Don’t worry if this sets the cake pan afloat.) Bake the flan for about 35 minutes, or until the top puffs a bit and is golden here and there. A knife inserted into the center of the flan should come out clean.
Remove the roasting pan from the oven, transfer the cake pan to a cooking rack and run a knife between the flan and the sides of the pan to loosen it. Let the flan cool to room temperature on the rack, then loosely cover and refrigerate for at least 4 hours.
When ready to serve, once more, run a knife between the flan and the pan. Choose a rimmed serving platter, place the platter over the cake pan, quickly flip the platter and pan over and remove the cake pan-the flan will shimmy out and the caramel sauce will coat the custard.
Yield: 6 to 8 Servings


