I hope everyone had a wonderful, happy Christmas! We certainly did – we witnessed our very first White Christmas (in Texas!)!! It was totally wonderful (except the part where we had to drive home on frozen highways…not so much fun…). The weather lately has been totally unbelievable and completely wonderful – I’m sitting here typing this post watching the snow fall outside again! It’s SO cool! And this time I’m very thankful to be watching it snow from the comfort of my home, instead of driving in it.
Anyway, this post is all about a wonderful tradition. Coffee cake. The coffee cake my family has eaten for breakfast every Christmas morning since the 80’s (at least!). It absolutely wouldn’t be Christmas without it. Yuuuuummmm. And yes, I realize Christmas is over, but I wanted to share the recipe because really, there’s nothing “Christmasy” about this cake. It’s just a simple, normal coffee cake that can be enjoyed any day of the year – we just choose to eat it on Christmas. But that doesn’t mean you have to!

(If you’re wondering why only half of it has pecans, hubby hates nuts, so I made it half and half….silly boy!)
This couldn’t be easier to make – 5 ingredients total. Just assemble the night before, let it sit out overnight and bake it the next morning, and you’ve got delicious, gooey, coffee cake! Too easy! You’ve got to try this one!
Overnight Coffee Cake
1 package frozen white dinner rolls (I use Rhodes brand)
1 package butterscotch pudding (not instant!)
1 cup chopped pecans
1 stick butter, melted
1/2 cup brown sugar
Spray a bundt pan with cooking spray and sprinkle chopped pecans over the bottom of the pan. Arrange the frozen rolls in the pan and sprinkle with the butterscotch pudding mix. Mix the melted butter and brown sugar together in a small bowl and pour over the frozen rolls. Grease a piece of foil and cover the pan; let sit out overnight (do not refrigerate).
The next morning, preheat the oven to 350 degrees. Bake the coffee cake for 30 minutes, covered loosely with foil. Let sit out for 10 minutes before inverting on to a platter and serving.

I really don’t recommend omitting the nuts – it just doesn’t turn out the same (as you can see on the left side of the cake…) – they’re really necessary, in my opinion. This is a wonderfully delicious breakfast treat – give it a try this weekend! It would make a great New Year’s Day breakfast!
I know -I’ve been a terrible TWD member lately. I haven’t participated in weeks…bad, I know. And I’ve missed it a lot, too – it seems like every week, something got in the way of me baking that week’s recipe. My students’ All-State Choir auditions have been going on for the past few weeks and that’s been distracting, not to mention my hubby starting a new job…not that I’m complaining or making excuses, even – I just felt I should at least let you know where I’ve been as far as TWD goes. But now I’m back, and that’s all that matters! And what a recipe to welcome me back on the wagon! Dorie’s Sweet Potato Biscuits…mmm, MMM!!

These were DE-licious. They start out the way all normal biscuits start out; but then you add in mashed sweet potatoes (canned, even!) and a pinch of nutmeg and cinnamon and you’ve got a slightly sweet, spicy, flaky biscuit that will knock your socks off! I made a little maple compound butter (just a fancy way of saying “butter with stuff mixed in” – saying it that way makes me feel important…) to spread on these bad boys and WOW – we seriously gobbled them all up. They couldn’t have turned out better, in my opinion. A lot of other TWD bakers said they were having issues with the biscuits baking up totally flat like cookies – I guess the biscuit gods were smiling down on me because mine seemed to rise perfectly. Thanks to Erin of Prudence Pennywise (seriously love her blog!) for choosing these wonderful biscuits! Go now and check out her blog – you’ll absolutely love her! Get the recipe for these babies while you’re there – make ’em for Saturday breakfast this weekend!

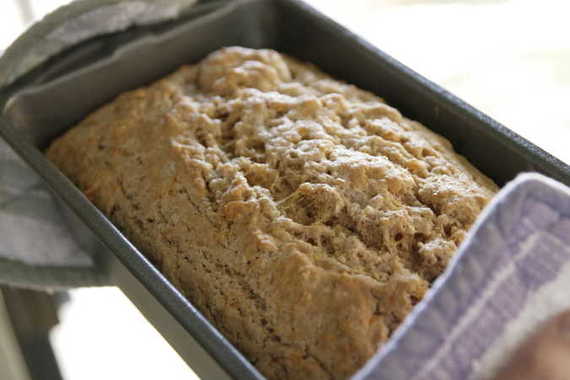
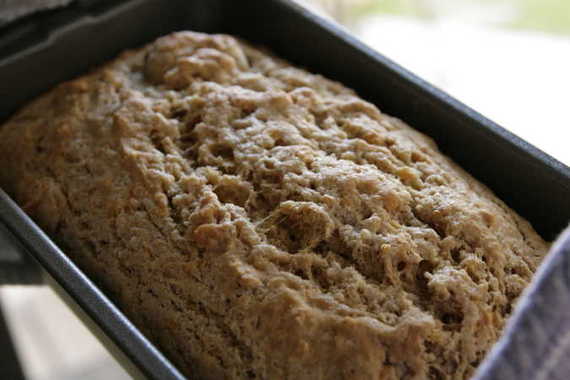
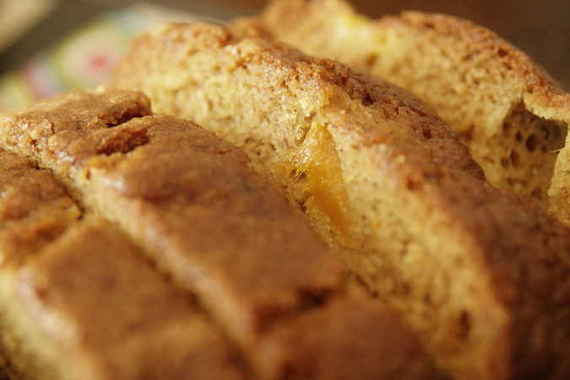
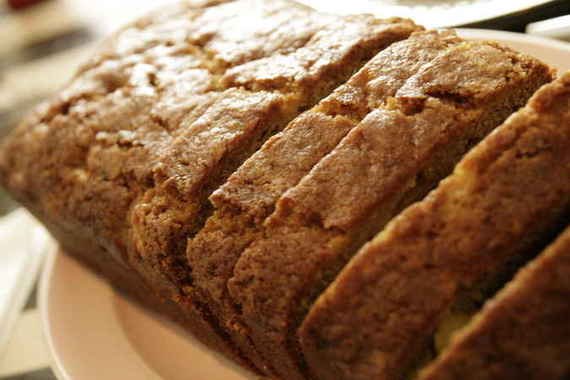
Ok, I know I’ve been sort of MIA lately…it’s been a busy couple of weeks (translation: I started teaching voice lessons last week and have 12 freshman girls…it’s not the easiest thing in the world trying to get someone to open their mouth wider when they obviously think you’re the biggest loser that ever walked the earth…). But anyway, here I am, back to normal (hopefully) and blogging on a regular basis again! Let me just take a couple of seconds to tell you about this bread…it’s seriously good. I was browsing allrecipes.com for zucchini bread and just wasn’t feeling all that impressed with the recipes. They all sounded pretty boring to me. So I finally just closed my eyes and picked one (sort of) and ended up with this recipe. I’m SO very glad I did, because this turned out to be really, really good!

The inside of the bread was soft and incredibly moist, with just a hint of spice (I don’t like an overpowering amount, so this was just right!), and the top of the loaf had sort of a crust on it that was crumbly and delicious – the top crust was by far my favorite part! I can tell you with complete honesty that I will most definitely be making this recipe over and over again! It’s just perfect for Fall….or for those of us who just have to pretend it’s Fall since it’s still a blazing 95 degrees outside…ugh.

Zucchini Bread
-allrecipes.com
3 cups all-purpose flour
1 teaspoon salt
1 teaspoon baking soda
1 teaspoon baking powder
3 teaspoons ground cinnamon
3 eggs
1 cup vegetable oil
2 1/4 cups white sugar
3 teaspoons vanilla extract
2 cups grated zucchini
1 cup chopped walnuts
Grease and flour two 8 x 4 inch pans. Preheat oven to 325 degrees F.
Sift flour, salt, baking powder, soda, and cinnamon together in a bowl.
Beat eggs, oil, vanilla, and sugar together in a large bowl. Add sifted ingredients to the creamed mixture, and beat well. Stir in zucchini and nuts until well combined. Pour batter into prepared pans. (I sprinkled a little brown sugar over the top before baking and it helped to create the nice crust!)
Bake for 40 to 60 minutes, or until tester inserted in the center comes out clean. Cool in pan on rack for 20 minutes. Remove bread from pan, and completely cool.
**Note: This recipe makes two loaves – I cut it in half and came out with one perfectly sized loaf.
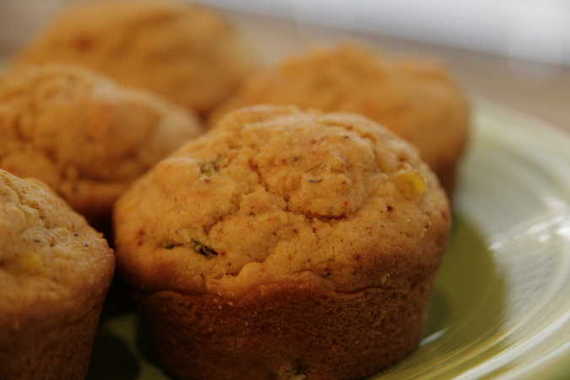
This week, Rebecca of Ezra Pound Cake chose Dorie’s Savory Corn and Pepper Muffins. And wow, these were GOOD. They’re sort of like my mom’s Mexican Cornbread, but with a few differences. I made these the other night with beef stew (*A little tip- next time you’re making beef stew, throw in a little red wine and transform it from good stew to GREAT stew!) and they were the perfect side to a great meal! I’m betting they’d also go great with chili!
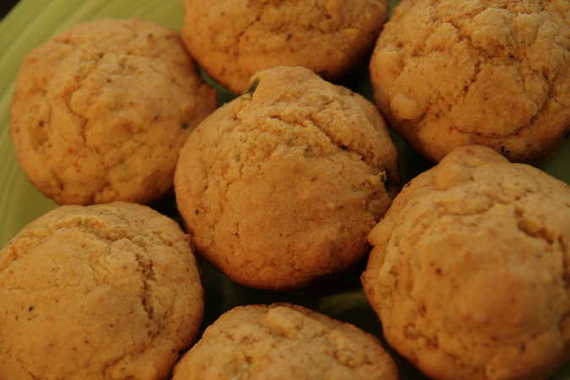
Here’s the run-down of key ingredients that make these corn muffins so special: cornmeal, corn kernals, Jalapeno peppers, red peppers, chili powder (lots of if!), black pepper and cilantro. Sooooo tasty! And actually, I didn’t even have cilantro, red peppers, or fresh Jalapeno – I just chopped up some pickled Jalapenos and threw them in and called it a day. They were still fantastic – plenty of little colorful tidbits in there, even without the cilantro or red peppers. I suggest you run over to Rebecca’s blog and get the recipe for these muffins – I guarantee they’ll really perk up your next meal!
Thanksgiving is upon us – one of my absolute favorite holidays. To me, Thanksgiving means having all of my family together, eating the best food we’ll eat all year long (I have to admit, the canned gelatinous cranberry sauce goo is my favorite part! And hubby’s too, incidentally – we so belong together!), and most importantly, the start of the Christmas holidays! The day after Thanksgiving is when we pull out the Christmas tree, ornaments, lights and our favorite holiday music and decorate our little hearts out! My favorite day of the year….seriously.
BUT – Thanksgiving isn’t just about food and family – it’s about giving thanks. The more I live, the more I learn just how much I have to be thankful for in my life. Especially this year. Allow me to take a moment to get real personal and share some of the things I am most thankful for (If you don’t want to take the time to read about my thankfulness, that’s cool- just scroll down and at least check out my bread!):
I’m thankful for my hubby. All the time. Even when we fight, because that means we’re a part of something worth fighting for. This past year has been the hardest of our married life, but we worked together and came through our troubles even stronger and more “together” than we started out.
A loving family – both my own and my husband’s. Especially my mommy. 🙂
My new house – it’s everything I ever dreamed of and I love being in it.
I’m thankful for Baba.
I’m thankful that I’ve already made my greenbean casserole – one less thing I have to do tomorrow.
The ability to sing. I would be one boring, plain-vanilla girl if I didn’t have my voice.
I’m thankful for my kitchen – it’s my favorite room in the house! I’ve made some wonderful meals and goodies in that kitchen!!
My blonde hair….seriously. I know it sounds silly, but this is my Thanksgiving list!
My friend Jessica – it’s nice to have a close friend again.
I’m thankful for my parents’ new house and all that goes along with it (no more Josephine – woo hoo!!!)
Of course there are tons of things I’m leaving out (our troops, the food on our table, our safety and health, etc) but there’s simply too many to list today, so I decided to keep it brief!
One last thing I’m thankful for is my cranberry orange bread….it’s delicious, it’s good with coffee….it’s good bread (even if the pictures aren’t!)!
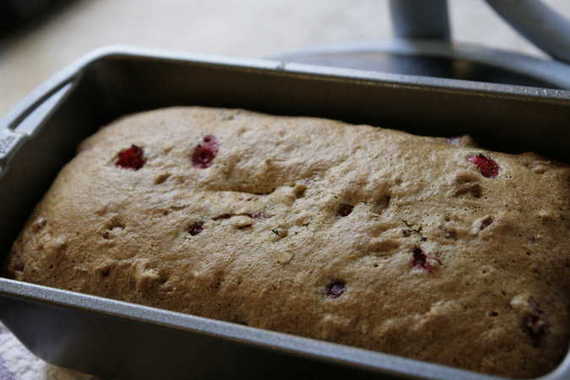
I first made this bread last year at Thanksgiving and it was a great success – not too sweet, nicely tart, and really tasty, so I decided to make it again – this time for hubby’s parents who came up to help us with some fix-it projects this week (thank ya’ll again!!).
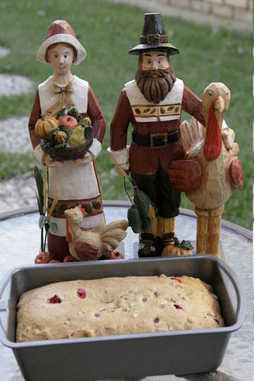
(and since it’s the Thanksgiving season, I thought I’d let the pilgrim people in on the bread action!)
Cranberry Orange Bread
-Allrecipes.com
2 cups all-purpose flour
1 cup sugar
1 1/2 teaspoons baking powder
1 teaspoon baking soda
1/2 teaspoon salt
1 egg
1/2 cup orange juice
Grated peel of 1 orange
2 tablespoons melted butter or margarine
2 tablespoons hot water
1 cup fresh or frozen cranberries
1 cup coarsely chopped walnuts (I used pecans)
In a large mixing bowl, combine dry ingredients. In another bowl, beat egg. Add orange juice, peel, butter and hot water. Add to flour mixture, stirring just until moistened. Gently fold in cranberries and walnuts. Spoon into greased 9-in. x 5-in. x 3-in. loaf pan. Bake at 325 degrees for 60 minutes or until toothpick inserted near the center comes out clean. Cool for 10 minutes before removing to a wire rack.
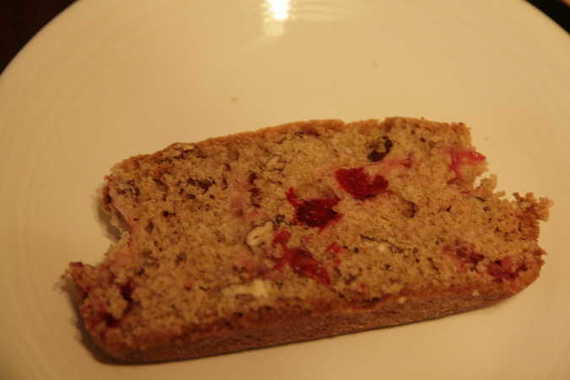
(Please, please, please forgive the horrible picture…..I was in a hurry and it was already dark!) 🙂
HAPPY THANKSGIVING, YA’LL!!!
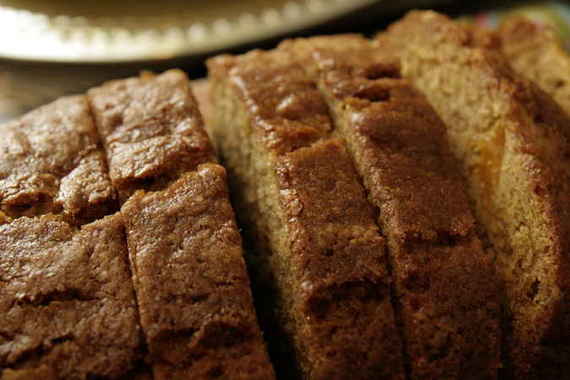
For my WC girls, this bread needs no introduction…in fact, this recipe has very quickly become everyone’s favorite on our cooking board! Let me just break it down for you: beer+cheese+bread= pure heaven in loaf form!! And one of the best things about it – its SUPER easy…and I mean it! I’m one of those weenie-cooks who runs away screaming from anything involving yeast…so this was perfect for me! No yeast – just beer!! And for those of you non-drinkers, don’t worry, the alcohol cooks out…no worries. I’ve made it twice in one week since discovering the recipe on Katie’s blog (ok, see how I did that just now? I made “Katie’s blog” a link….do us all a favor and click on it! You’ll find tons of wonderful, delish recipes!). This bread went great with our broccoli soup…and I have a feeling it’s going to go great with lots of my meals in the future. 🙂
Mmmm, look at all that cheesy, beer-y goodness!!!
Easy Cheesy Beer Bread
–Katie @ Good Things Catered
Ingredients:
2 c. all purpose flour
1 c. whole wheat flour
1/3 c. packed brown sugar
4 1/2 tsp baking powder
1 tsp salt
1 tsp garlic powder
1 c. shredded sharp cheddar
12 oz. bottle of lager or stout (I used Sam Adams Oktoberfest because Katie told me to) 🙂
2 Tbsp butter, melted
Directions:
-Preheat oven to 350 degrees and prepare loaf pan for baking.
-In large bowl, combine flours, sugar, baking powder, salt, and garlic powder.
-Whisk to combine well.
-Add cheese and whisk to combine.
-Slowly add beer to dry ingredients and stir lightly until combined.
-Knead dough lightly until it just comes together.
-Place into prepared loaf pan and pour melted butter over top.
-Place in oven to bake for 55-60 minutes, or until toothpick inserted into center of loaf comes out clean.
Oops – I forgot to include this recipe in the “For Mommy” post below….so, since I’m lazy and don’t want to go back and add it – I’ll just make a new post. And now that I think of it – I believe this bread is good enough that it deserves its own post! So there!
(Finally, some decent pictures!!) This recipe is great – I made it specially for my mom because she and my dad are on a “mango kick” right now and can’t seem to get enough mangos. I personally, thought it sounded a little odd, but as it turns out, this is a pretty tasty loaf!
Fresh Mango Bread
from Dorie Greenspan’s Baking: From My Home to Yours
3 large eggs
3/4 cup flavorless oil, such as canola or safflower oil (I used vegetable)
1 cup sugar
1 tsp baking powder
1 tsp baking soda
1 1/2 tsp ground ginger
1 tsp ground cinnamon
1/4 tsp salt
1/2 cup light brown sugar
2 cups diced mango
3/4 cup golden raisins (I omitted this)
grated zest of 1/2 a lime
1. Center a rack in the oven and preheat the oven to 350′. Butter an 8 1/2 x 4 1/2 inch loaf pan, dust the inside with flour and tap out the excess. Put the pan on an insulated baking sheet or on two regular baking sheets stacked one on top of the other.
2. Whisk the eggs and oil together.
3. In a large bowl, whisk together the flour, sugar, baking powder, baking soda, spices and salt. Rub the brown sugar between your palms into the bowl, breaking up any lumps, then stir it in.
4. Pour the wet ingredients over the dry, switch to s sturdy rubber spatula or wooden spoon and mix until blended. The batter will be very thick (really more like a dough than a batter) and not easily mixed, but persevere, it will soon come together.
5. Stir in the mango, raisins and zest. Scrape the batter into the pan and smooth the top with a rubber spatula.
6. Bake the bread for 1 1/2 hours, or until it is golden brown and a thin knife inserted into the centre comes out clean. (If the bread looks as if it’s getting too brown as it bakes, cover it loosely with a foil tent.)
7. Transfer the pan to a rack and cool 5 minutes before running a knife around the sides of the pan and unmolding. Invert and cool to room temperature right side up on the rack.
Mmmm, yummy!!! Go make some!
When I was a little girl, getting to go play at my great-grandmother’s house (whom we’ve always called “Baba”) was a huge treat for my big sister and me. Her house was always warm and inviting and she always had something fun for us to do, whether it was letting us rummage through her jewelry boxes, playing paper dolls, or making mud pies in the back yard. She also had a great talent for telling stories. One of our favorite things was sitting in the floor, listening to Baba tell funny stories from her childhood, or of she and her husband, or my personal favorite – Peter Rabbit.
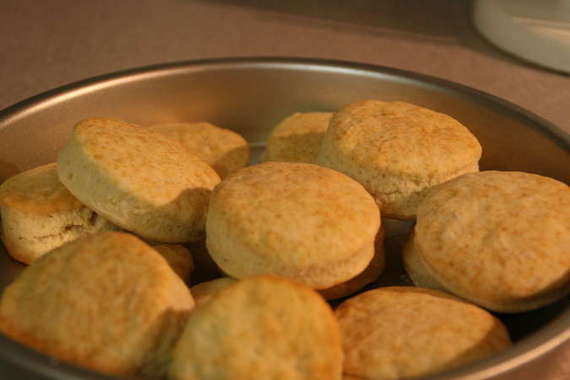
However, one of my fondest memories of afternoons at Baba’s house were spent sitting on her kitchen counter tops watching her make homemade buttermilk biscuits. Baba is one heck of a good cook – her fried chicken, coconut cake, and peach cobbler (especially her peach cobbler), and buttermilk biscuits, to name a few, cannot be matched. But, this post is just about her biscuits, so I’ll get back on track (but trust me, you’ll definitely be seeing many more of Baba’s recipes on here!). When I was a kid, I loved the taste of the raw biscuit dough, and she would let me have the little “scraps” that were leftover from cutting out the circles. Baba’s biscuits always tasted fantastic with breakfast or dinner, but my personal favorite way to eat them was with butter and sugar (sugardy butterdy biscuits, we called them as kids….I know, we were weird kids, I guess).
I’ve always been scared to re-create recipes of Baba’s; I guess because I know they’ll never be half as good as hers were (plus, there’s just something about a recipe made by your grandmother that makes it taste extra special). However, after some encouragement from my mother, I decided to try my hand at Baba’s buttermilk biscuits. Of course, as I suspected, they weren’t as good as hers, but they weren’t half bad, either……
Buttermilk Biscuits
adapted from The American Woman’s Cookbook
2 cups all purpose flour
½ teaspoon baking soda
1 teaspoon baking powder
1 teaspoon salt
2 tablespoons cold shortening (plus 2 more tablespoons for greasing pans)
1 cup cold buttermilk
Preheat oven to 450 degrees.
Sift all dry ingredients together
In a food processor, pulse shortening and flour mixture together until it resembles coarse meal. (or you can do it the old fashioned way- nix the food processor and cut the shortening in by hand)
Add the buttermilk and mix until dough forms a ball. (it will be sticky)
Dump the dough out of floured surface and form into a ball (you’ll need to add a little more flour to be able to do this – approx. 1 or 2 teaspoons)
roll dough out about ¾ of an inch thick; using a biscuit cutter, or round cookie cutter, cut out biscuits.
Place a tablespoon of shortening in a cake pan and let it melt in the oven for a minute or so (you’ll probably need two cake pans)
Place each biscuit in the warm cake pans after turning them in the melted shortening to coat.
Bake for 8-10 minutes or until golden brown.


