Let’s talk brownies for a sec. Homemade brownies. After all these years, I have to admit, I am STILL a from-the-box girl when it comes to brownies. I don’t know how they do it, but the boxed kind just seem to have the perfect balance of sweetness and texture. A balance that I can’t seem to achieve with homemade.
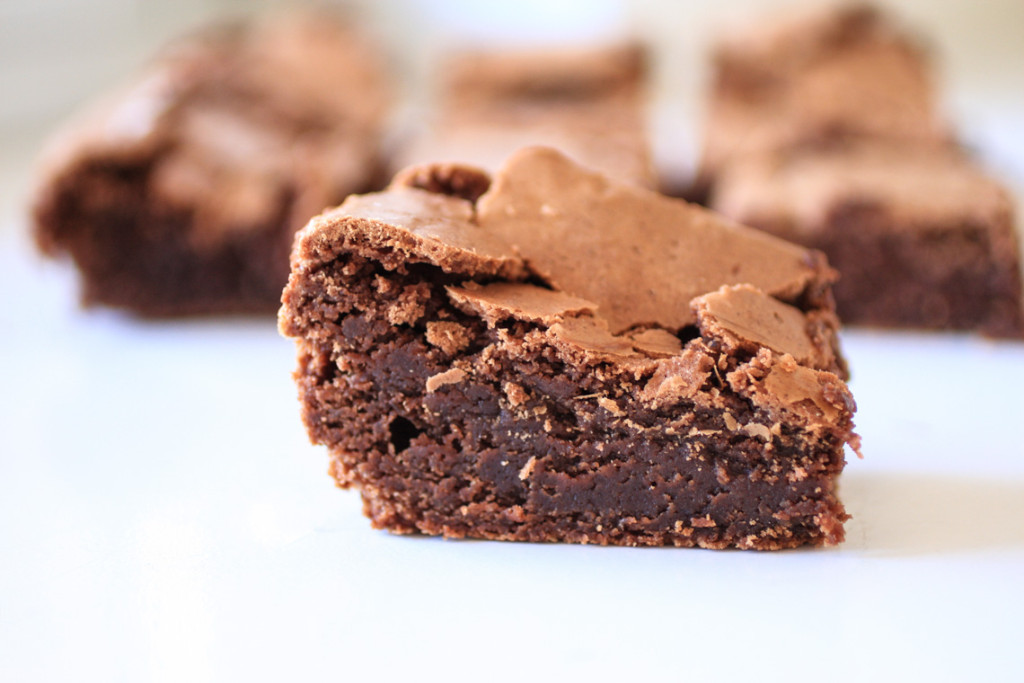
There are just so many different preferences when it comes to brownies. Cakey vs. fudgy, thick vs. thin, papery thin top crust vs. thick, etc. My perfect brownie is fudgy but not too fudgy; there has to be at least a little cakey-ness in there, and not too sweet. That seems to be the problem with most homemade recipes- too sweet.

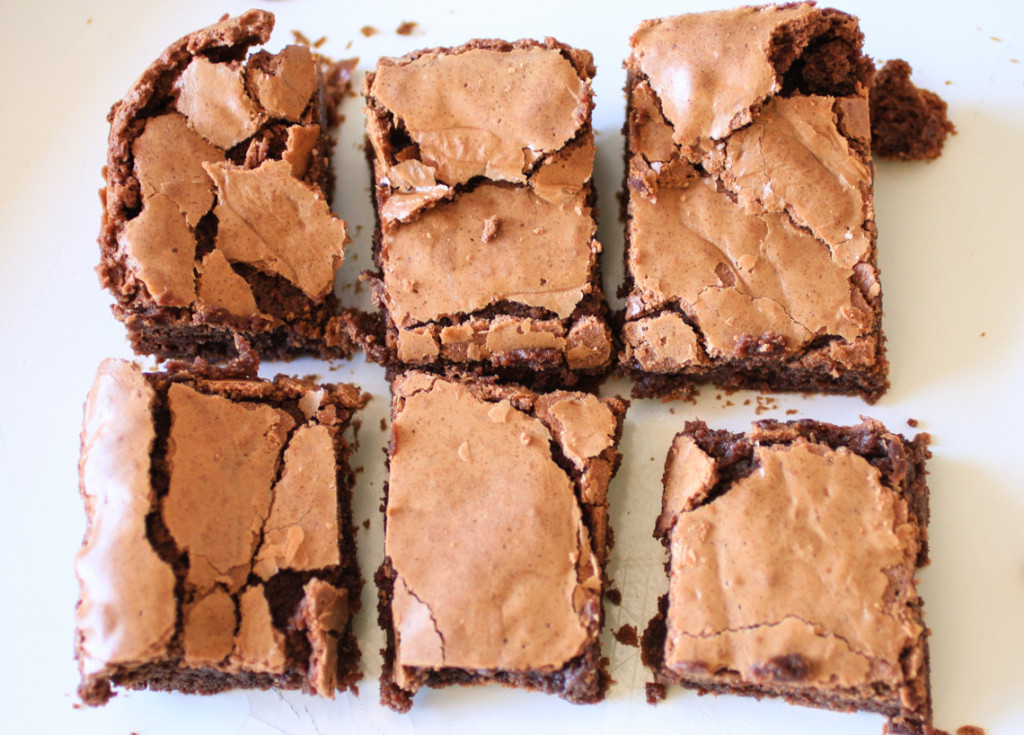
As you can probably tell by the pictures, these brownies are definitely fudgy. However, there is a slight cakey-ness to them, which I think is good. It’s a great balance, really. BUT, I’d still categorize these as FUDGY brownies. At first taste, I thought them too sweet, but after letting them cool completely, I decided they were great. Really great.
I’m thinking about trying a couple more homemade brownie recipes and comparing them; you know, just for fun. Stuff like that is fun to me. Any suggestions as to which recipe to try next? I think I’ll definitely revisit an old favorite- the King Arthur Flour recipe, which I remember as being pretty awesome. We’ll see. In the meantime, these are delicious.
Fudgy Homemade Brownies
1 cup semisweet chocolate chips
1 1/2 sticks (6 ounces) unsalted butter, cut into pieces
4 ounces unsweetened chocolate, chopped
1 1/2 cups granulated sugar
3 large eggs, plus 1 egg yolk
1 teaspoon vanilla extract
3/4 cup all-purpose flour
1/2 teaspoon salt
Preheat the oven to 350. Line an 9×9-inch baking pan with foil and grease foil.
In a large microwave-safe bowl, combine the chocolate chips, butter, and unsweetened chocolate. Heat in the microwave for 1 minute, then stir. Continue heating in 30-second intervals, stirring each time, until the mixture is melted and smooth but not scorched. Remove from the microwave and let cool slightly.
In the bowl of an electric mixer, beat the eggs and sugar on medium-high speed until light and thick, about 3 minutes. Beat in the vanilla extract. Stir in the cooled chocolate mixture with a spatula. Add the flour and salt, folding gently until combined.
Pour the batter into the prepared baking pan. Bake until a toothpick comes out with moist crumbs still attached, 35 to 40 minutes. Do not overbake. Let cool to room temperature. Serve at room temperature or chilled. Serves 9.
Recipe source: Handle The Heat (I increased the salt, but everything else is exactly her recipe. She does a fantastic job breaking down the ingredients and explaining the use for each one. Great post.)
Can you believe it?! My little bitty baby girl suddenly turned into a big 3 year old! WAAAHHHH!!! I’m not going to pretend there weren’t some tears shed. In fact, tucking Cassidy in that night, she wanted me to sing ‘Happy Birthday’ again and I was barely able to get through it. She kept asking, “Mommy are you sad?” Ha! No, baby girl; Mommy’s just having a minor freakout here…just ignore her. She found it pretty funny, actually. It’s just hard because, when I look at her, I still see my little fuzzy-red-headed baby girl, holding onto my fingers as I sing to her. OH GOSH. MUST STOP. MUST STOP NOOOOWWWWW. Yep. tears are here. I need to move on. Let’s move on.
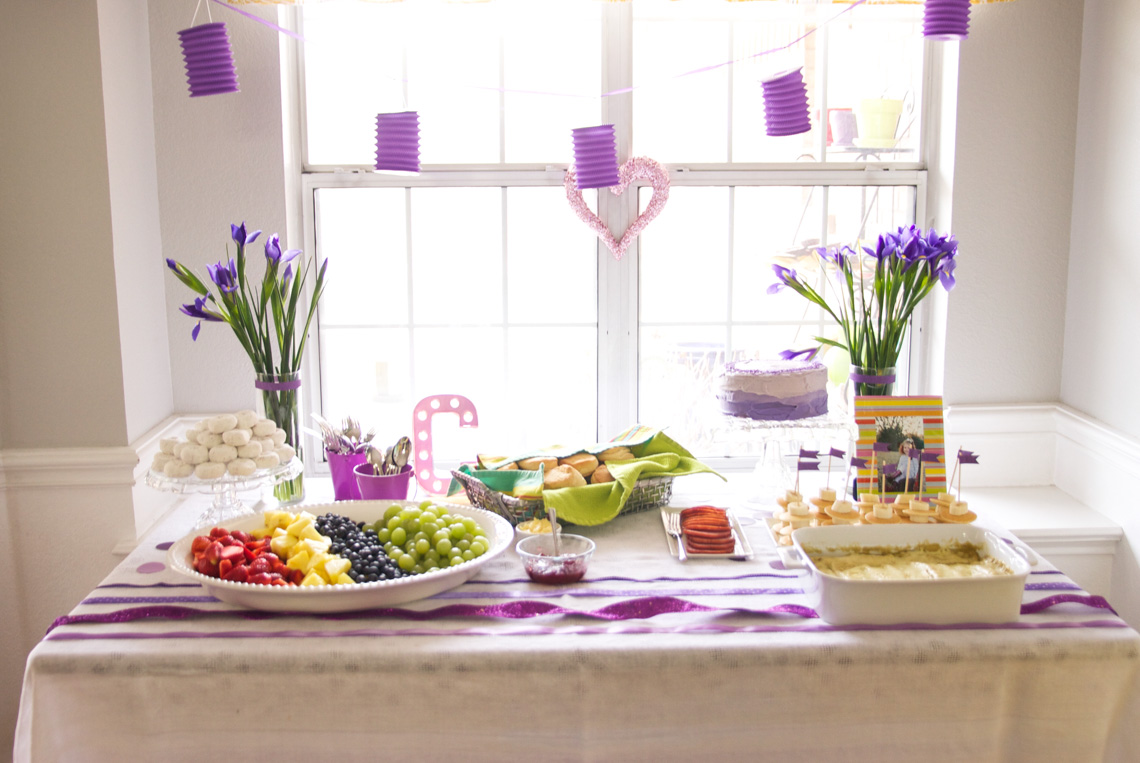
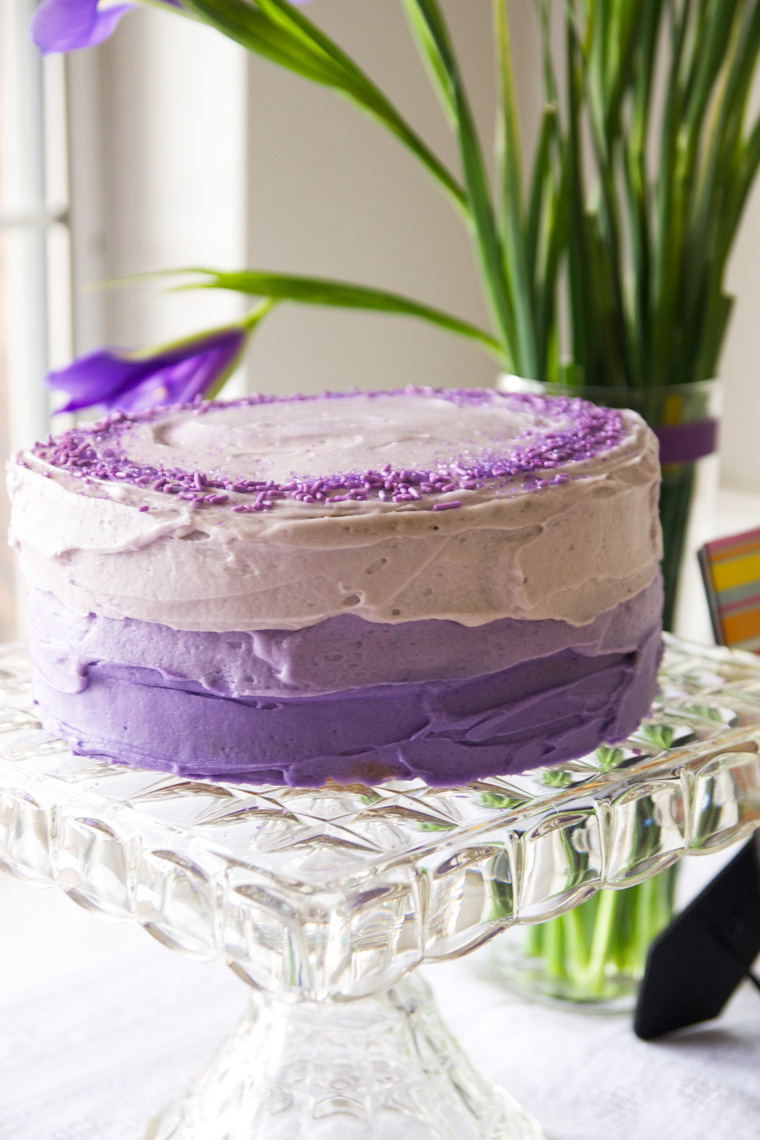
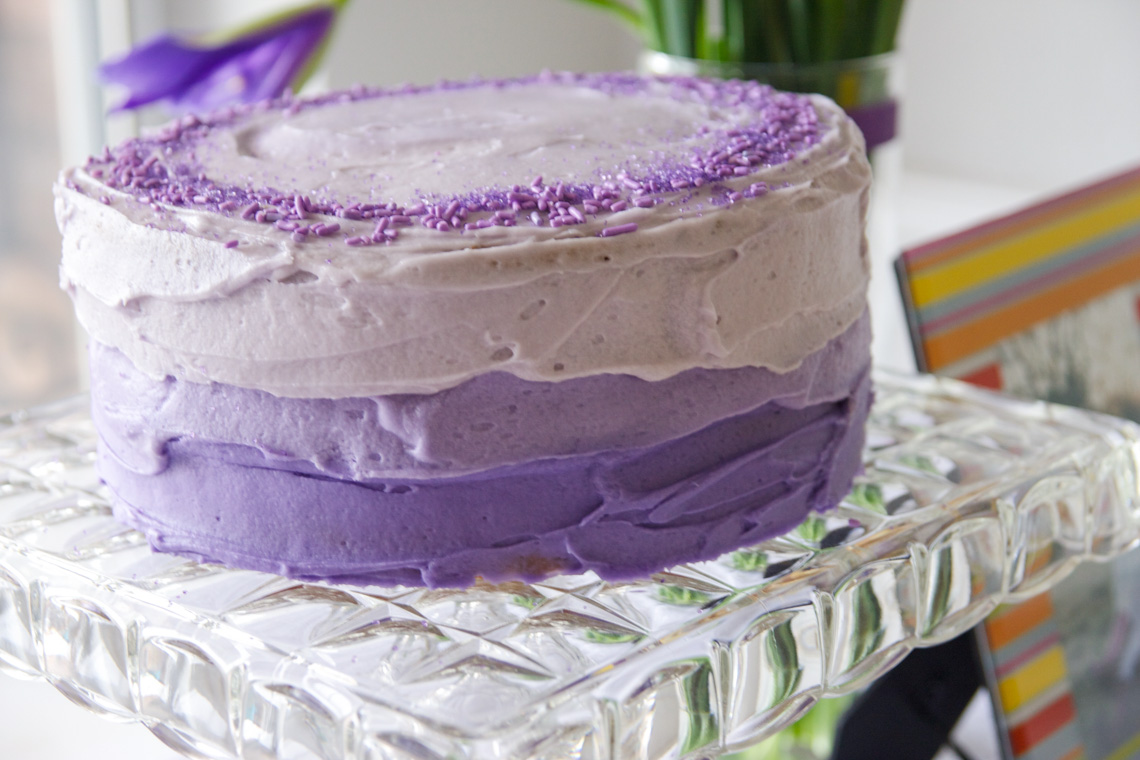
As you can see, we went with a purple theme. Nothing else; just…purple. That’s all she wanted. When I asked her what kind of party she wanted, thinking she’d probably say Doc McStuffins or Minnie Mouse (thank goodness she didn’t. I freaking HATE that ridiculous Mickey Mouse Clubhouse show), but all she said was “purple”. Easy enough! We decided to go with a brunch since she loves breakfast food so much and that way we’d have the whole rest of the day to ourselves. It was a lot more low-key than her past parties, but she still had all her favorite people there (i.e. her grandmothers), so she had a great time.
Here’s what we served:
Fruit platter
Sausage, egg, and green chile breakfast enchiladas (recipe coming soon)
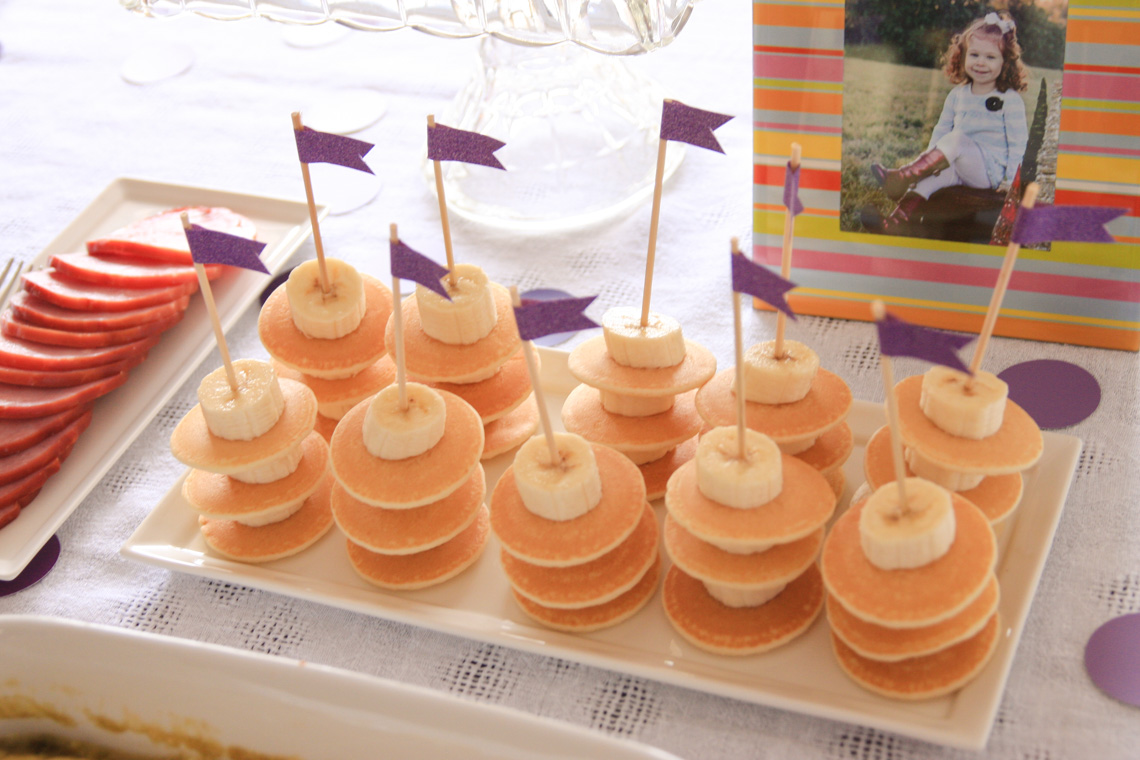
Mini pancake and banana skewers
Biscuits with honey butter, ham slices, honey, and jam
Powdered sugar donuts (duh)
Purple Ombre birthday cake
Mimosas
Coffee
As far as decorations, I just used a plain white tablecloth and draped it with different sizes and shades of purple ribbon. I also got a bunch of different purple paint samples and used my big round paper cut-out to make circles to put on the table. You couldn’t really see them in the pictures, unfortunately. The marquee ‘C’ came from Michael’s and I spray painted it purple. I bought the paper lanterns at Party City and used purple sparkly washi tape to liven up plain glass vases. I used the same washi tape to make little flags for the tops of the pancake skewers. All super easy, super quick stuff!
I was pretty proud of my ombre cake, considering my cake decorating skills are usually on par with a kindergartener’s. All I did for that was separate the frosting into 3 bowls and make each shade of purple slightly lighter than the last. Then I just started at the bottom and worked my way up, finishing with the lightest on top. Easy!

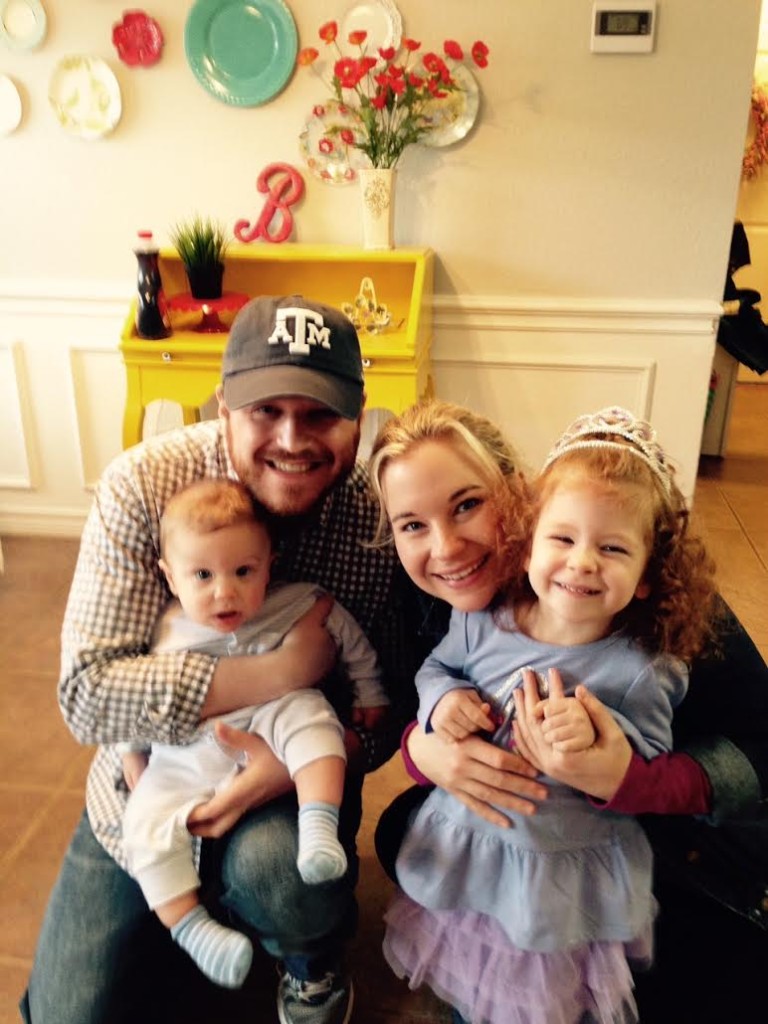
I didn’t get as many pictures as I wanted this year because I was running behind and everyone was hungry, so I snapped what I could and hoped they were somewhat acceptable. I would’ve liked a few more, but…whatever. Also, Cass was feeling a little overwhelmed with all the attention and picture-taking, so I was hardly able to get any of us as a family. But like I said, it was still a great time and she loved it, so I call it a success! I was really happy with the way it all turned out and I loved the purple theme! Soon it’ll be time to start planning Elliott’s first birthday! But let’s not think about that right now…no more tears today, please!
Before I start talking food, I just want to give a giant thanks to those of you who were so sweet about my last post. I was mostly being cheeky (not surprising, really), but I’d be lying if I said that wasn’t completely based on truth. I really appreciate the encouragement and support from you guys. What a great group of people you are!
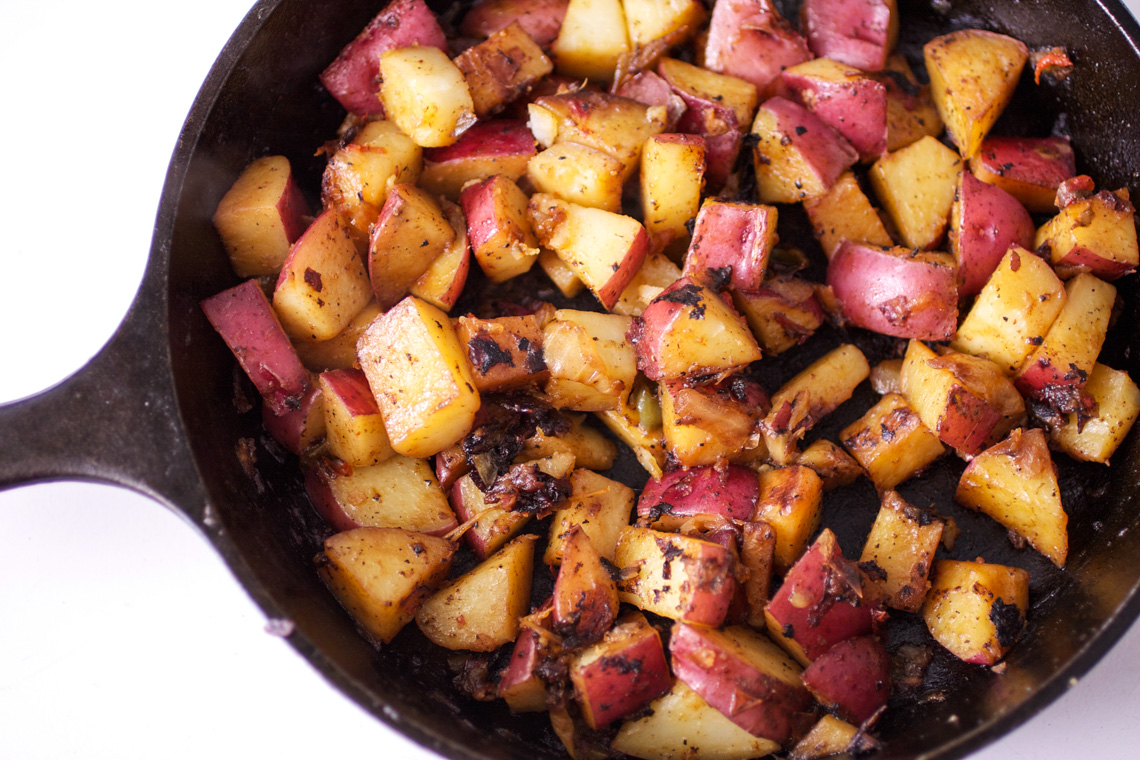
Now food. Potatoes are something I always have on hand. Always. I roast ’em, mash ’em, french fry ’em…let’s just say I think they’re pretty great. Something I love but never think to do is breakfast-style potatoes, aka skillet potatoes. So I just jumped right in and made some the other night to go along with ham and egg biscuits for dinner. They were so simple and had such a great flavor. I always keep chopped onions and peppers in my freezer, so throwing these together took hardly any effort. They’d also make a great base for a hash; just top them with any kind of meat (shredded roasted pork would be awesome), then a runny egg and you’ve got a meal! So versatile.
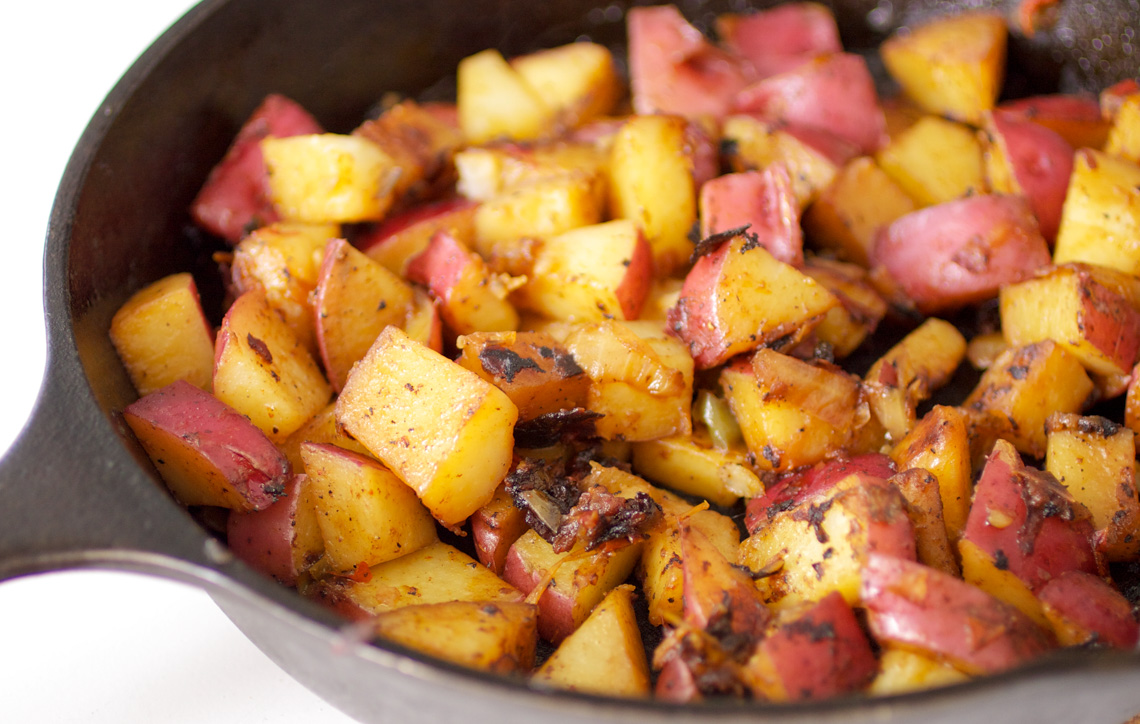
Skillet Potatoes
2-3 small/medium-sized red potatoes, cut into 1-inch chunks
1/2 a small onion, chopped
1/2 a bell pepper, chopped
1 tablespoon vegetable oil
salt and pepper
Heat the oil in a cast iron skillet over medium heat. Cook the onions and peppers for about 5 minutes, until beginning to soften. Add potatoes and season with salt and pepper. Cover and cook, stirring occasionally, for about 10-15 minutes, until the potatoes are soft. Keep an eye on them and make sure you stir them often so they don’t stick. Serves 3-4.
Sing For Your Supper original
Dear Blogger Mom:
I’d really love for you to tell me how you do this. Because, frankly, I don’t freaking know how you manage to keep posting perfect pictures of perfect meals day after day after day. I don’t. I am trying. I am. I try SO hard to cook original meals every night. I will happily admit, however, that I don’t do research to find out “what’s in”. I get that rainbow food is hot-hot-hot right now, but dangit, I don’t really have the time or the patience to lay all that crap out in perfect ROYGBIV order. You know why? Because 6 month olds don’t care if their food is ROYGBIV’d or not. They like it smashed up and in their mouths, thank you. And good luck getting my 3 year old to eat a purple potato. Just…good luck.
I love how the quality of your photos didn’t change one bit after you had kids. How’d you do that? Because my pictures….well, my pictures look like my 3 year old took them. It’s dark outside at dinnertime! Mama’s gotta use the flash! And yes, Joel bought me Lightroom for Christmas, but danged if I know how to use it! I’ve watched youtube videos but golly…this stuff is COMPLICATED! I have maybe 20-30 minutes of editing time each night and pretty bad ADD. Throw a glass or two of wine into the mix and we wind up with this scenario (try to imagine this in my voice, k?):
Edit, edit, edit…ok, this is going pretty good. ::sips wine::
Edit some more. Did I remember to cover Elliott up? What is this that Joel’s watching? Oh, some ridiculous Marvel show…WOAH THAT DUDE JUST GOT SHOT! This show is dumb.
Edit, edit, edit. ::sips wine:: You know what, I’m just gonna listen to some music while I work. Just to get the creative juices flowing. Man, I really love this new One Direction song. Everybody wanna steal my giiiiiiirl… Maybe I should preview the rest of their album. That won’t take long. Oooh, look, a youtube video about how two of them are secretly in love! I’ll just watch part of it. Wow, those guys are totally in love. Whoops, I just watched all 21 minutes of that video! Ok, Amy, FOCUS.
::sips wine:: Crap, I forgot to put the wet laundry in the dryer! Meh, I’ll just blog tomorrow…
See what I mean? I also love how you’re still able to put together those cool little lunches for your kids. You know, the little cups of hummus, the fresh-cut veggies, and the pizza with the cute faces on them? Super cute. My kid usually gets a pb&j or a grilled cheese. She hates hummus. Or like yesterday, how she only wanted two pieces of pita bread, some cherry tomatoes, and chocolate cake.
It’s really cool how you still find time to write thoughtful, interesting posts. My brain is so fried after 9 hours of wiping bottoms, cleaning dog vomit out of the carpet, brushing 8,000 tangles out of extremely curly hair, and getting everybody fed, cleaned up, pajama’d, teeth-brushed, bathed, read-to and sung-to, that I don’t have a single interesting thought left in my head. The only thing going through MY head at the end of the day is “MY BED! Haaaaaallelujah!” Even if I do have something interesting I’d like to sit down and type out right then (hey, it happens occasionally), as soon as I get the laptop turned on and type out ONE word, I hear the baby cry. Or Cass starts doing the pee-pee dance and it’s a mad dash to get to the potty in time. It’s amazing to me how you have carved out the time in your day to take time for this. Inspiring, really.
I also love those perfectly happy, content, smiling pictures you post on instagram, facebook, etc. of your happy babies. Or pictures of you and your kids doing some awesome craft together as a family. That’s cool. But you know what? I DON’T BUY IT. Not for one second. Nope. Those of you mom bloggers who just had babies, especially. I’m not buying for a single second that everything is as perfect and happy as it appears in your picture. I just went through the newborn phase and lemme tell ya- it sucked. Yes, of course there were so, so many of those happy, “I’m going to cry because I love you so much” moments. There were. But there were a lot more “I’m going to cry because I’m so dog tired and at this particular moment in time I pretty much want to strangle my husband and WHY WON’T THIS KID STOP SCREAMING AT ME?!” I get that nobody really wants to post those kinds of pictures on social media, but we all know they’re there. Even if you won’t admit it on your blog how tired you are. I know you are. It doesn’t mean we don’t love our babies and kids to absolute pieces…but I’m still not buying that things are as perfect as those perfect pictures you post on instagram.
And you know what? I’m pretty guilty of that too. I’ve been known to post a few “perfecthappyfamily” pictures here and there. Usually before all hell breaks loose and I end up with glitter literally covering my kitchen floor and my toddler’s hands.
I don’t mean for this letter to sound as snarky as it’s coming across. Really. I guess I just really get down on myself for my lack of motivation to actually sit down and make this stuff happen. I just don’t know how you do it, is all. Granted, my ad revenue fell to like, peanuts. My monthly checks went from a nice, hefty amount to…womp, womp. I know a lot of you make a LOT more money than me, so it’s more like an actual job for you to blog. You wouldn’t just skip out on your well-paying job, I get that. I guess I’m still just baffled at how you find the time for all this. Like, really- HOW DO YOU DO IT? Could you help a sister out and give me your secret? Nanny? Live-in maid? What? Maybe I’ll never know. Maybe I’ll never get on top again. Maybe my blog will just quietly drift off into obsoleteness. I’m pretty much there already. I don’t want to be, but nevertheless, I can’t seem to get into the groove again.
So, I guess just think of me…think of me tonight, while you’re posting beautiful pictures of beautiful meals. Because I’ll be right there with you, drinking wine, getting sucked into some dorky tv show, listening to boy bands, and trying, by gosh, to actually get something posted before I become completely irrelevant. Ugh. Send prayers. And wine.
Sincerely,
Crazy, maxed out, washed up blogger lady
So, first my kids were sick. For like, 3 weeks. Then Joel was sick (and ladies, I think we can all agree that “man colds” are the WORST). So, 3 weeks of snotty noses, sneezes, tissues, and Joel’s booming, earth-shaking cough. Then the delightful freaking polar vortex. With all that loveliness going on, nobody’s left the house, we’ve all been in rotten moods, and mama is TIRED.
Mama needed cake. Mama deserved cake. Preferably one with lots of deep, dark chocolate. Yeah, that’d be good.
So I just made one. A whole cake for me. Of course I shared, but deep down in my heart I knew it was my own, special “Amy cake”. Cake and I share a special bond, see.
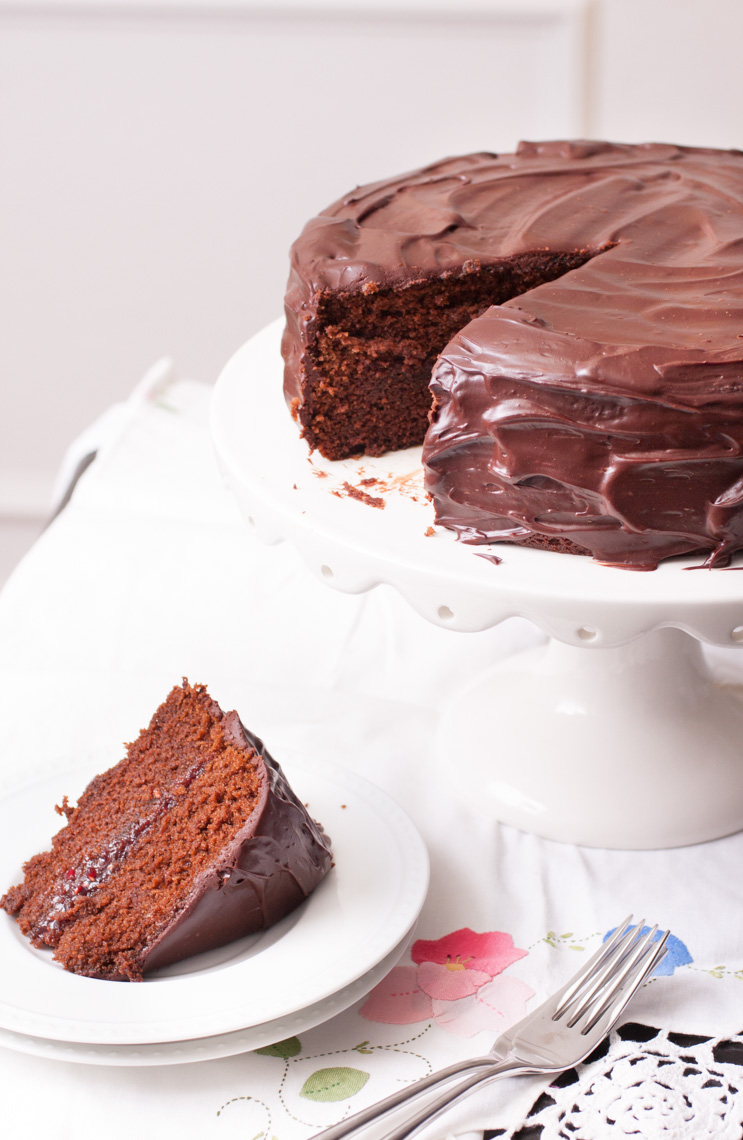
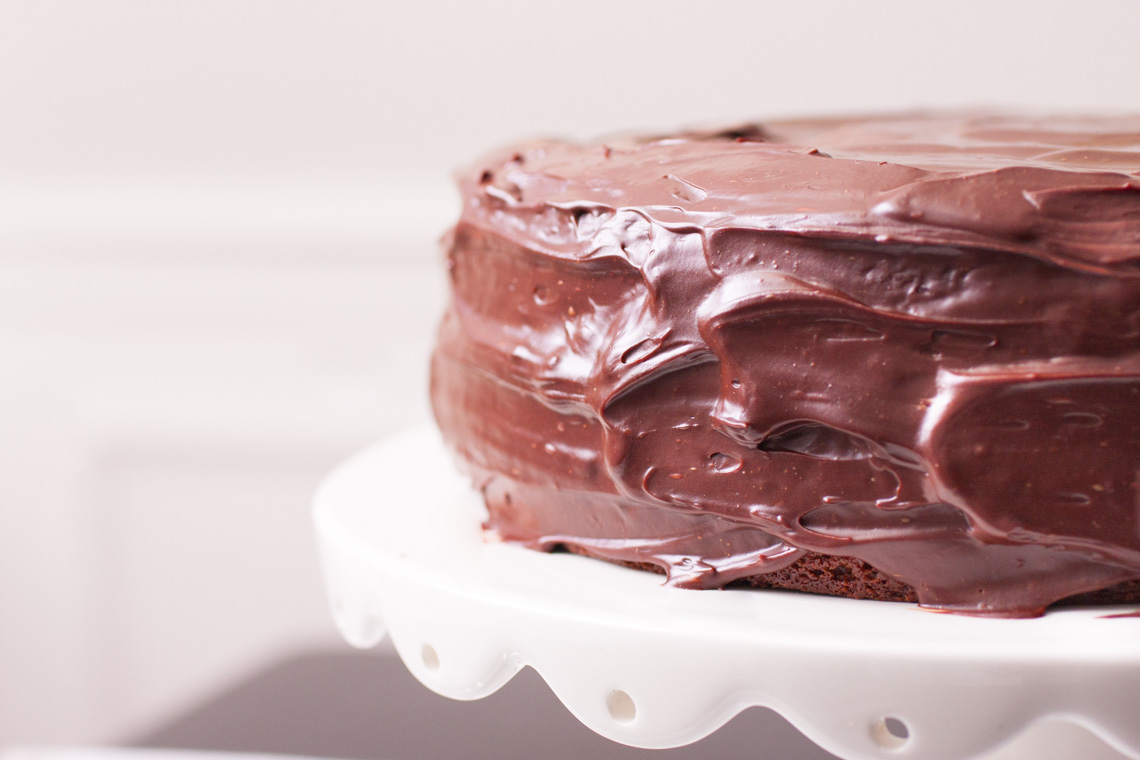
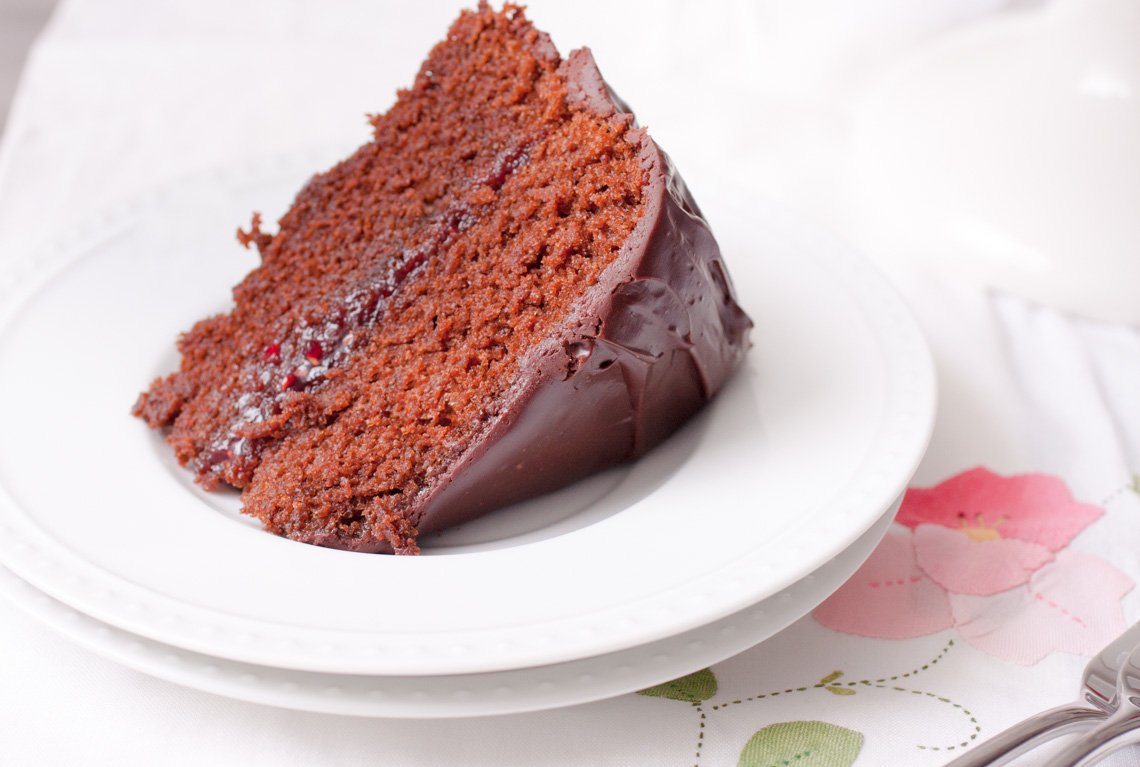
This particular cake is my favorite chocolate cake recipe- Hershey’s- filled with raspberry jam and topped with smooth, rich chocolate ganache. Not too shabby. I love the raspberry/chocolate combination (especially dark chocolate) so this cake is right up my alley. Just a little slice’ll do ya, though, since this is some heavy stuff! VERY rich!
Raspberry-Filled Chocolate Ganache Cake
2 cups sugar
1 3/4 cups all purpose flour
3/4 cup cocoa powder
1 1/2 teaspoons baking powder
1 1/2 teaspoons baking soda
1 teaspoon salt
2 eggs
1 cup milk
1/2 cup vegetable oil
2 teaspoons vanilla extract
1 cup boiling water
3/4 cup raspberry preserves
8 ounces dark chocolate, chopped
3/4 cup half and half
1/8 teaspoon salt
1 tablespoon sugar
Preheat the oven to 350 degrees. Grease and flour two 9-inch round baking pans.
Stir together sugar, flour, cocoa, baking powder, baking soda and salt in the bowl of an electric mixer fitted with the paddle attachment. Add eggs, milk, oil, and vanilla and beat on medium speed for 2 minutes. Gradually stir in boiling water (batter will be thin), then pour into prepared pans.
Bake 30 to 35 minutes or until toothpick inserted in center comes out clean. Cool 20 minutes; remove from pans to wire racks. Cool completely.
Heat raspberry preserves in a small saucepan over medium-high heat, until bubbling and slightly thickened; about 5 minutes. Let cool.
Heat half and half (you can also use cream if you want a richer ganache) over medium heat until almost at the boiling point. Pour over the chopped chocolate and stir until well-combined. Stir in sugar and salt. Let sit for about an hour, until thickened slightly. You could also refrigerate it for a few minutes to speed up the process; just not too long, or it’ll solidify.
Spread cooled raspberry preserves onto the bottom layer of cake, then top with second layer. Spread ganache all over the cake. Store in the refrigerator. Bring to room temperature before serving. Serves approximately 8-12.
Recipe source: adapted from Hershey’s.

So…this happened last week. I’ll spare you all the “my baby’s growing too fast! Wah!” stuff and just talk about what a joy it is to have a happy, chubby, giggling baby like Elliott. This kid….he’s seriously just the BEST. He’s so happy all the time. He adores his bouncer and spends a good chunk of his day there- sometimes he even falls asleep bouncing and takes a little catnap right there. Adorable.
He has his last feeding and goes to bed around 7:15, then sleeps until 7:00 or so. During the day he eats, bounces, naps a couple of times, snuggles with mommy, and rolls around/scoots across the floor. He’s *THIS* close to crawling; I feel like it’ll be any day now. He can really scoot, though, and he’s great at getting to where he wants to be. He can change directions super quickly and get across a room in no time.
This kid has a major appetite, so we’ve been working on solids for a few weeks now. Mostly just oatmeal, but I’ve been slowly introducing a couple of vegetables here and there. I really hate baby food and would love to do baby-led weaning if possible. We’ll see where that goes.
Elliott LOVES his big sister. LOVES. He cackles at her. Everything she does is just hilariously entertaining to him and he watches her every move. And she loves him. Cassidy is such a sweet little helper and loves making her brother laugh. I could just sit and watch them together all day. Oh wait, I do. 😉

[photo taken by my friend Cassandra]
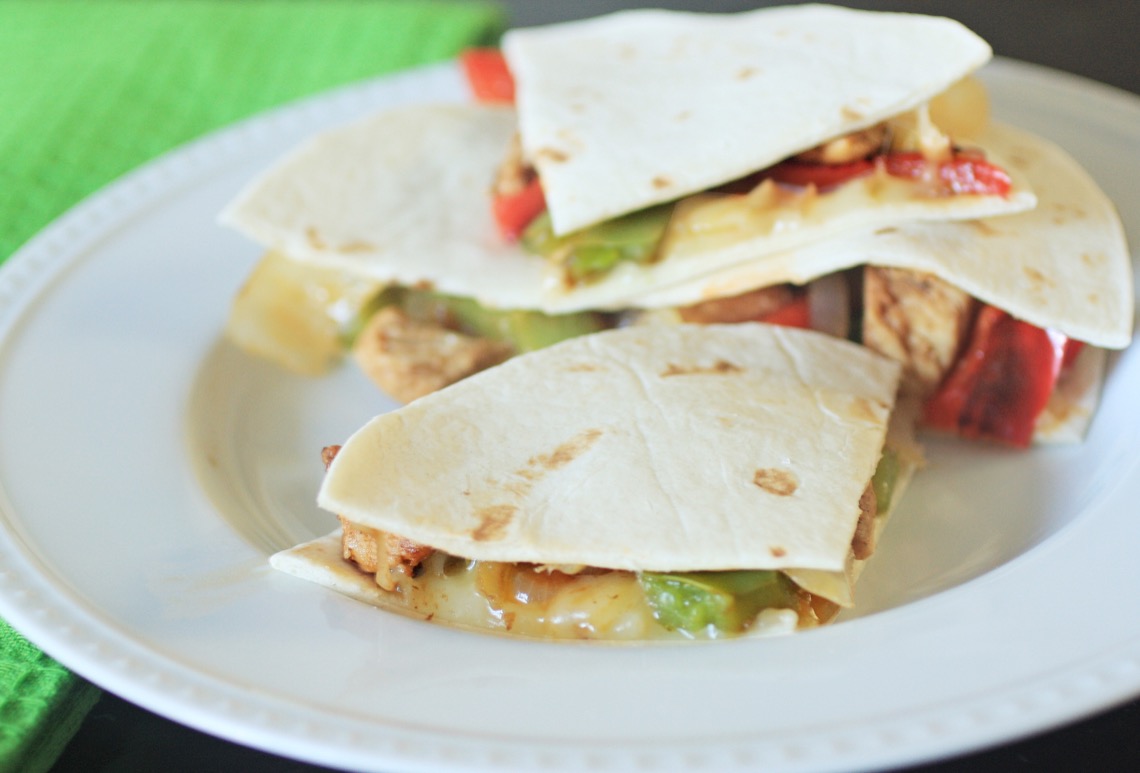
Moist, flavorful chicken, sautéed peppers and onions, and pepperjack cheese get cozy and melty inside toasty flour tortillas to make the ultimate quesadilla. Another weeknight winner!
I wish I had some funny, quirky story to share about something that happened to us recently, but in all honesty, NOTHING has happened to us lately (except sickness, and that’s anything but fun). In fact, the most exciting thing I’ve done this week is walk to the mailbox. And you can only do that once a day.
Yes, we’ve been confined to our house for like, a month (ok not quite that long), and I’ve HAD it. I need out. I need air. That’s why, this weekend, come hell or high water, we’re busting out. The kids are going to their grandparents’ house and Joel and I are going on a date. I don’t care if it’s 50 below outside. I’m going. Wish me luck.
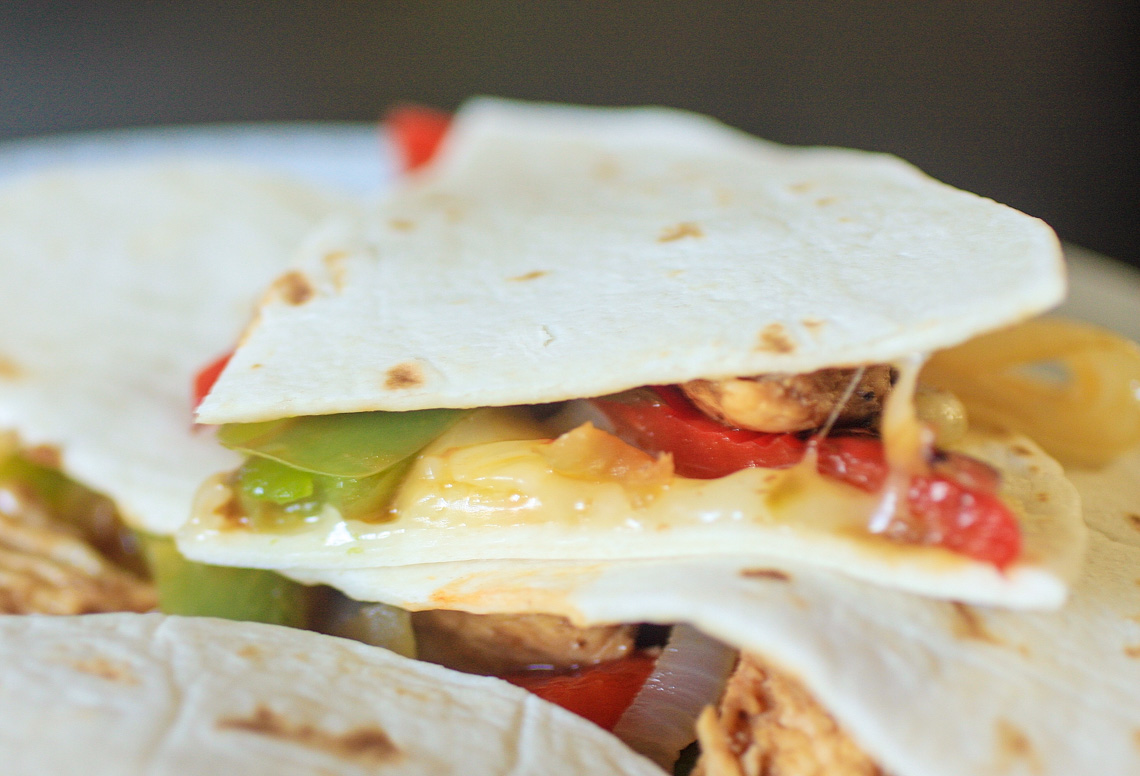
Anyway, these quesadillas. These are soooo good. So cheesy and full of flavor. There’s really not much else to say about them. Other than they’re perfect for busy weeknights or quick lunches. I use a liquid fajita marinade/seasoning called La Fabulosa that’s easily found in my local grocery stores here in Texas, but if you don’t have access to something like that, you can use any other kind of fajita seasoning or marinade. Easy, quick, super delicious. Boom.
Chicken Fajita Quesadillas
2 chicken breasts, cut into 1 inch chunks
2 bell peppers, cut into strips
1 onion, sliced into thin rings
1 tablespoon butter
1/4 cup water
1 teaspoon liquid fajita marinade/seasoning
salt and pepper
1 teaspoon brown sugar
flour tortillas
pepper jack cheese, shredded
Preheat the oven to 400 degrees. Melt butter in a large pan over medium-high heat. Cook the onions and peppers until beginning to soften; about 5-7 minutes. Transfer to a plate. Add the water to deglaze the pan and scrape up all the brown bits.
Add chicken and season with salt, pepper, liquid seasoning, and brown sugar. Cook until no longer pink, about 5 minutes.
Place the cheese, veggies, and chicken between 2 tortillas and bake for about 5 minutes, just to melt the cheese. Makes approximately 4 large quesadillas.
Sing For Your Supper original recipe

[source]
Happy New Year, friends! I hope everyone had as wonderful a Christmas as we did! Santa Claus left Cassidy a shiny red tricycle and Elliott a Mozart Cube (I couldn’t resist it; especially since it plays songs from 3 different operas I’ve been in). This year was just such a blast since Cassidy really ‘gets’ it now. She loved singing Christmas songs, baking cookies, watching A Charlie Brown Christmas (seriously, we watched that no less than 10 times…), and talking about Baby Jesus (that one was a bit over her head, but that’s ok). And she was SO excited for Santa to come visit. It was adorable.
New Year’s Eve was pretty anti-climactic since we were all starting to get sick. And we’ve all been sick since then- it’s made its way through each member of our family, but I think it’s finally on its way out. Ugh. Mama needs a break, let’s just say that.
Ok, so, New Year’s resolutions! Who does them? Not me, really. I always try, but I’m so flaky that I usually fizzle out about 2 weeks in. Usually my resolutions are all about being more assertive, planning less, and usually just freaking out less in general (if my routine or expectations get thrown off by even a little bit, look out.).
This year, instead of making personal resolutions I’ll never keep, I thought I’d get a fresh start with my blog. My blogging resolutions!
1.) Gain back all the bajillions of readers I lost when I took a massive hiatus. While I was pregnant and after having Elliott, I just sort of lost the will to blog. And nobody wants to read a blog that never gets updated, so there you go. I really regret letting it go so long and losing so many of you. I’ll getcha back, though! 😉
2.) Better my photography and editing skills. Joel bought me Lightroom 5 for Christmas and I’m really looking forward to learning the ins and outs of it.
3.) Putting more time and thought into my photos. I’m so lazy here. When I photograph food, there’s usually 2 other hungry people sitting around the dinner table just waiting to eat, so I don’t put much time or effort into styling or plating. I throw it on a plate, snap a few pictures and call it good. Then I wonder why my pictures suck….
4.) A new look. Eventually. I really want a facelift. I love the look of my blog and it’s served me well over the years, but it’s time for a fresh face. Plus, it’s pretty much the opposite of user-friendly, so there’s that.
5.) MAKE TIME. Period. I’m ready to jump back in and that means devoting TIME to blogging. I think I can do it! Maybe. Definitely. Yes, definitely.
Bring it, 2015! Cheers!
Golly, what a great time to get back into food blogging- nothing but Christmas cookies as far as the eye can see! I’m loving all this festive baking I’ve been doing. We can all thank Elliott for that, by the way, since he’s finally gotten to a point where he actually enjoys life outside of my arms. Tonight it’s just me, my laptop, and my thoughts (…and One Direction uh, I mean, um, Mozart…).
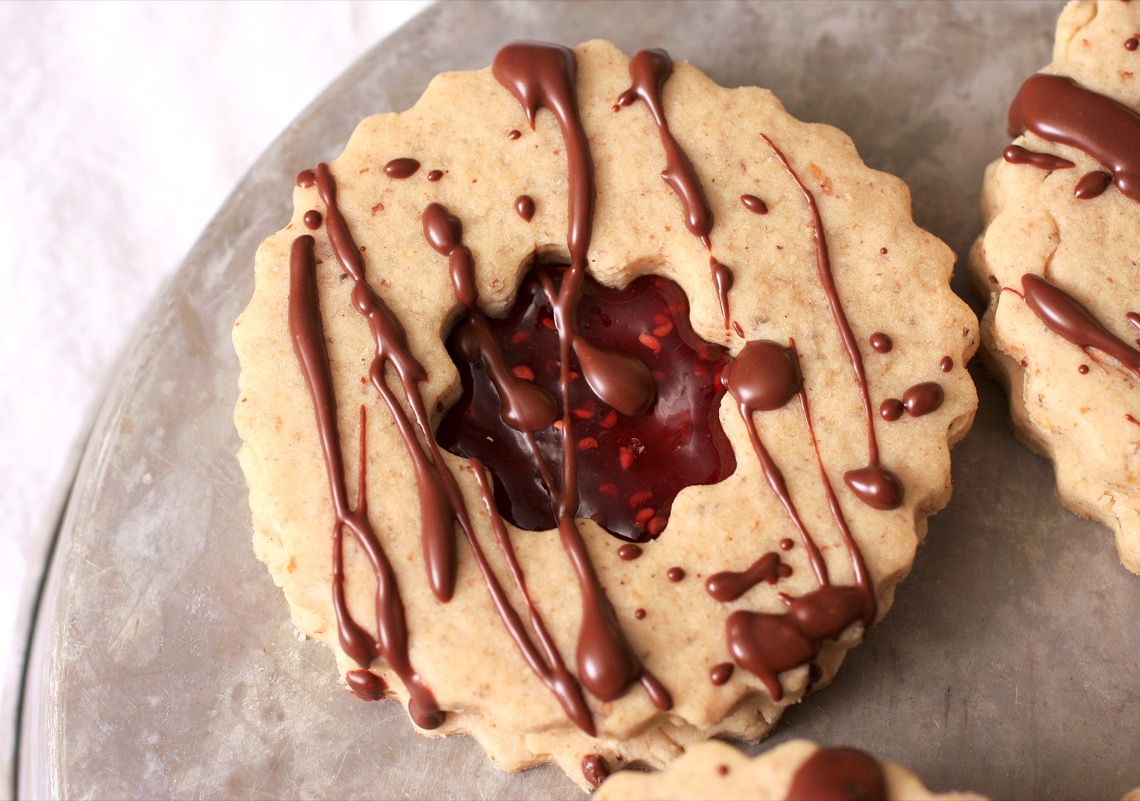
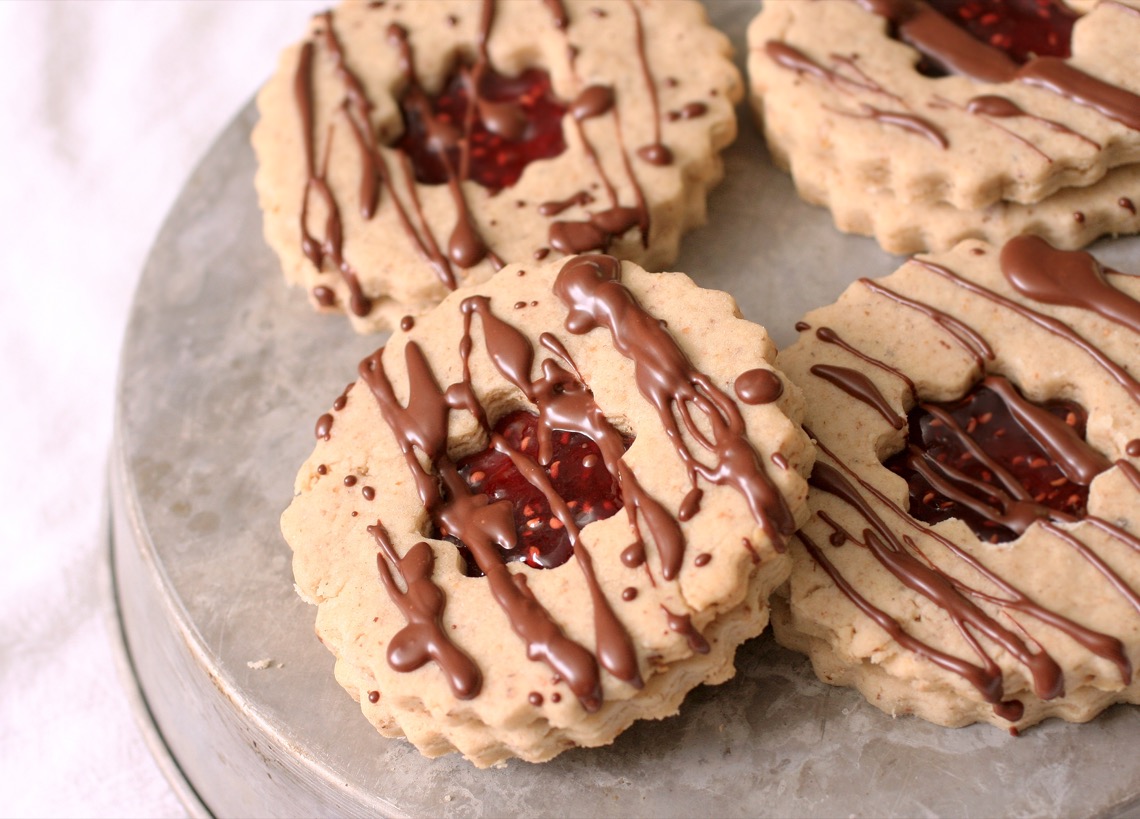
The last time I made Linzer cookies (like, 5 years ago), I wasn’t just super over-the-moon about them. Probably because I filled them with Nutella and I really feel this particular cookie needs a nice, tart jam filling to offset the richness of the cookie. So this time I chose my favorite jam- raspberry. I added a splash of Chambord (raspberry liqueur) to intensify its raspberriness. The chocolate drizzle was just icing on the cake, so to speak. I LOVE the raspberry/dark chocolate combo, so I knew this would be good. It was. Believe me. I’ve had way too many of these today.
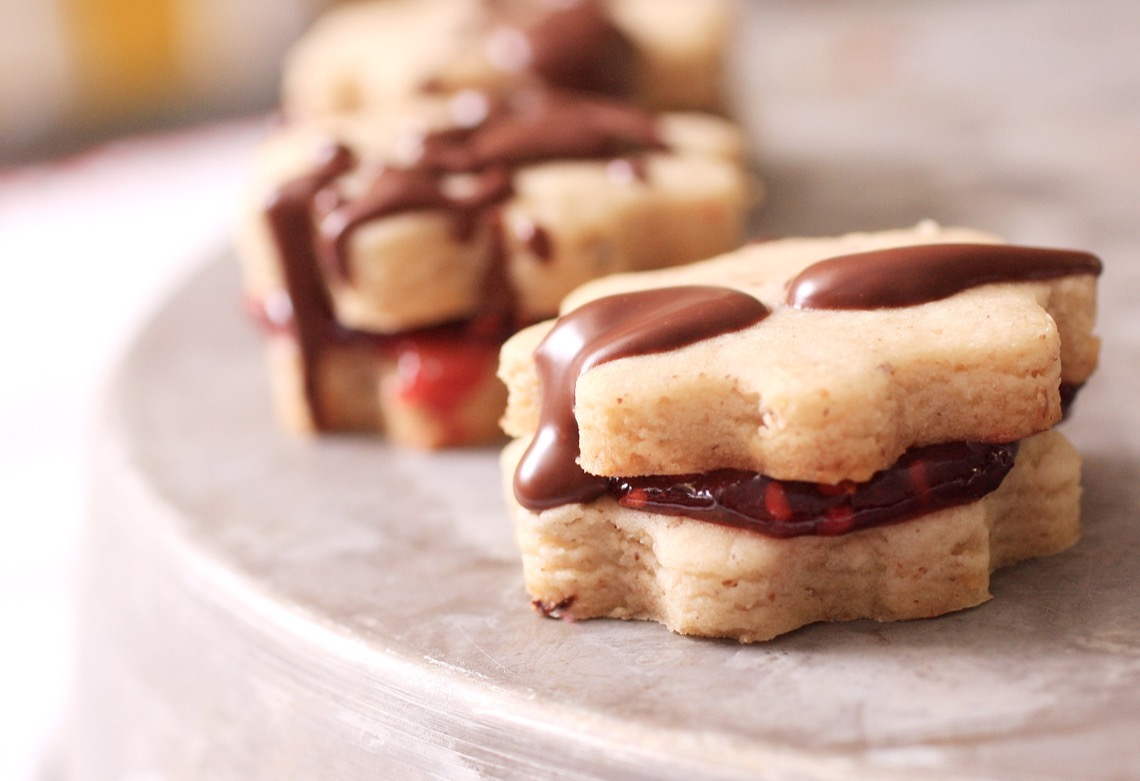
These are soft, but not chewy; crumbly, sandy, and nicely nutty. Such a fantastic cookie. I could literally eat these all day. And I did. I feel bad that my first encounter with Linzer cookies wasn’t as amazing as this go-round. I can’t wait to make these again (and I’ll still be jamming out to One Direction MOZART).

Chocolate-Raspberry Pecan Linzer Cookies
2 cups all-purpose flour, plus more for dusting
1/2 teaspoon baking powder
3/4 cup pecan halves, toasted
2 tablespoons confectioners’ sugar
1/4 teaspoon salt
1/8 teaspoon ground cinnamon
1/2 cup (1 stick) cold unsalted butter, cut into small pieces
1/4 cup granulated sugar
1 teaspoon pure vanilla extract
1 large egg
1/2 cup raspberry jam
splash raspberry liqueur, such as Chambord
1 ounce dark chocolate, chopped
Sift flour and baking powder into a bowl; set aside. Pulse pecans, confectioners’ sugar, salt, and cinnamon in a food processor until finely ground (but not wet); transfer to the bowl of an electric mixer fitted with the paddle attachment.
Add butter and granulated sugar; mix on medium speed until fluffy. Mix in vanilla and egg. Reduce speed to low. Gradually add flour mixture until combined.
Halve dough; shape into disks. Wrap in plastic and refrigerate until firm, at least 2 hours.
Preheat oven to 375 degrees. Working with 1 disk at a time, roll out dough on a lightly floured surface to 1/8 inch thick. Cut out squares (or circles, or flowers) with a 2-inch fluted cutter. Cut out centers of half the squares with a 1/2-inch flower cutter;
reroll scraps. Space 2 inches apart on ungreased baking sheets. Bake until pale golden, 8 to 10 minutes. Transfer to racks to cool.
Meanwhile, heat jam in a small saucepan over medium heat until reduced and thickened, about 7 minutes; stir in raspberry liqueur; let cool.
Heat the chocolate over a double boiler or in the microwave (just be sure to stir it every 30 seconds or so).
Spread jam onto uncut squares; top with cutout ones. Drizzle with chocolate. Makes approx. 10 sandwich cookies (since my cookie cutters were so huge, I only got 10 cookies, but if you use a smaller cutter, you’ll probably get closer to 12-14).
Recipe source: adapted from Martha Stewart ‘Cookies’
Crushed vanilla wafers, pecans, cocoa powder, and rum come together in no time to form the most sinfully delicious “grown-up goody”.
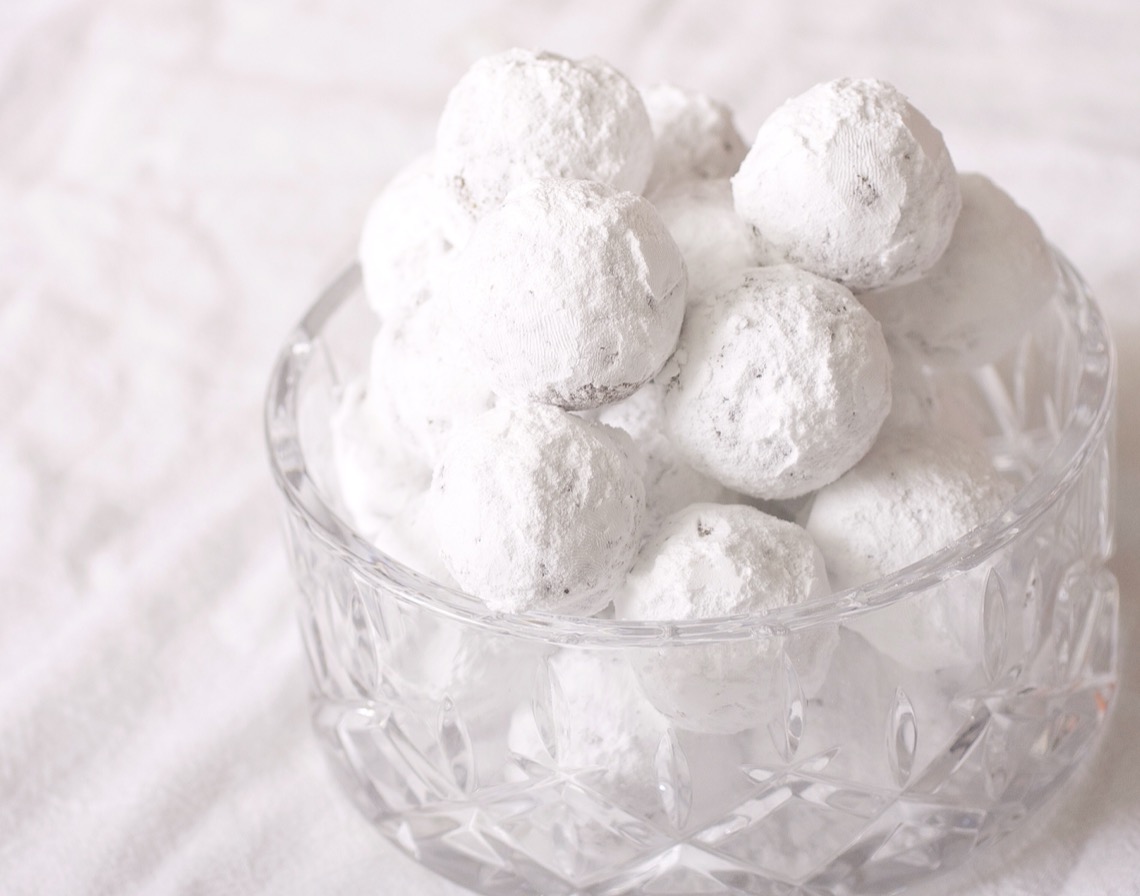
Oh boy, oh boy, oh BOY! Talk about unexpected! These little babies blew my socks off! Who knew vanilla wafers and rum could make such beautiful music together?! I certainly didn’t. I had little expectations when I set out to make these. The flavor combos just sounded funky to me, but since literally every single review on these was 4-5 stars, I had to just trust the recipe. I only tweaked it slightly and sure enough, those reviewers knew what they were talking about! I’m in LOVE, people!
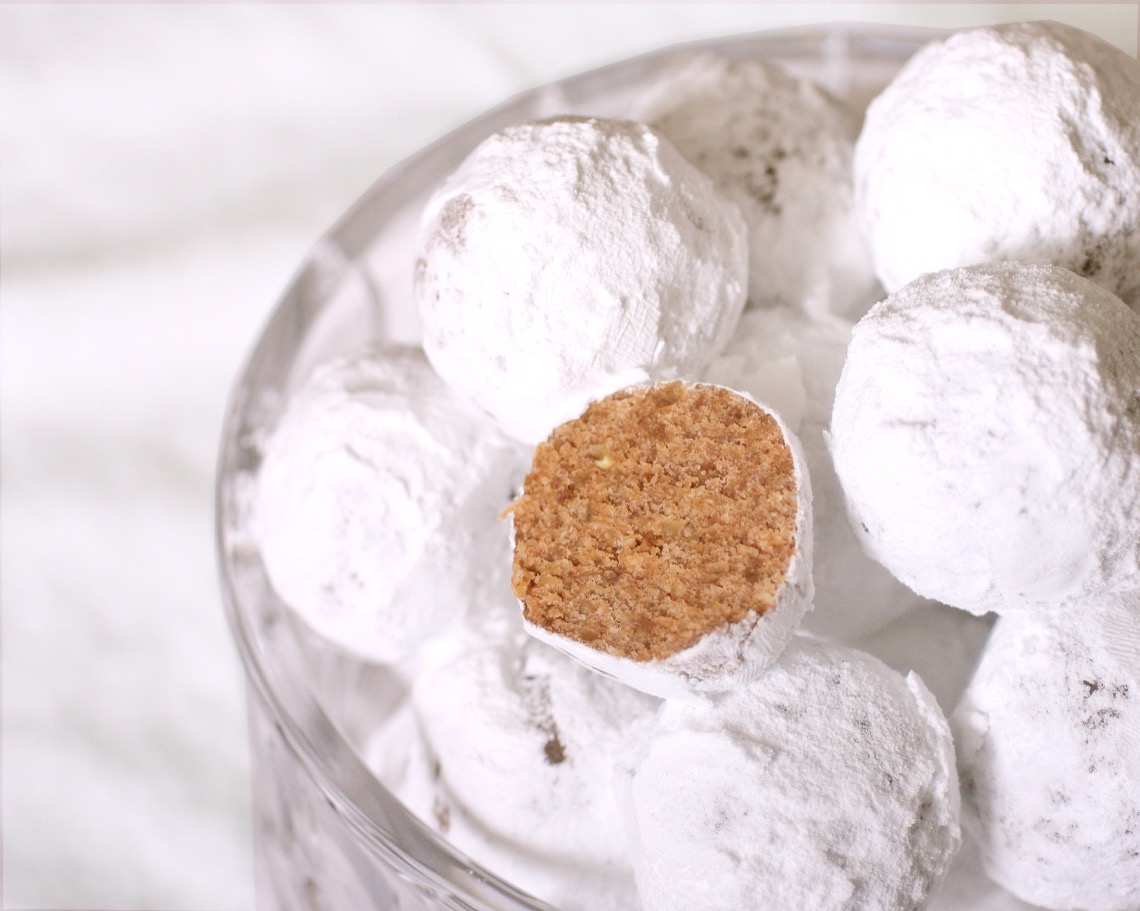
These are SO simple. All you need is a food processor and time. After you roll these into balls, you want to let them sit in the fridge for 2-3 days. That part is important. They won’t look all that appetizing until you roll them in powdered sugar, but lemme tell ya- they taste fantastic. The rum flavor is SO strong and amazing. I want to turn right around and make them again. They’re that good. These are definitely a “mommy and daddy deserve a little something after wrapping all those presents, wrangling all those kids, and decking all those halls” kind of treat.
No-Bake Rum Balls
11 ounce box vanilla wafer cookies
1 1/2 cups pecans, toasted
3/4 cup confectioners’ sugar, plus more for rolling
1/4 cup cocoa powder
1/8 teaspoon salt
1/2 cup dark rum
3 tablespoons light corn syrup
Combine the vanilla wafers, pecans, confectioners’ sugar, cocoa powder, and salt in the bowl of a food processor and pulse until cookies and pecans are ground up finely (it doesn’t have to be super fine, just enough that there aren’t any large chunks).
Transfer to a large bowl and add the rum and corn syrup, stirring until well-combined. Scoop out using a cookie scoop or teaspoon and roll into 1 inch balls with your hands. Place on a wax paper-line cookie sheet. Cover with plastic wrap and refrigerate for 2-3 days (the longer they sit, the better they’ll taste).
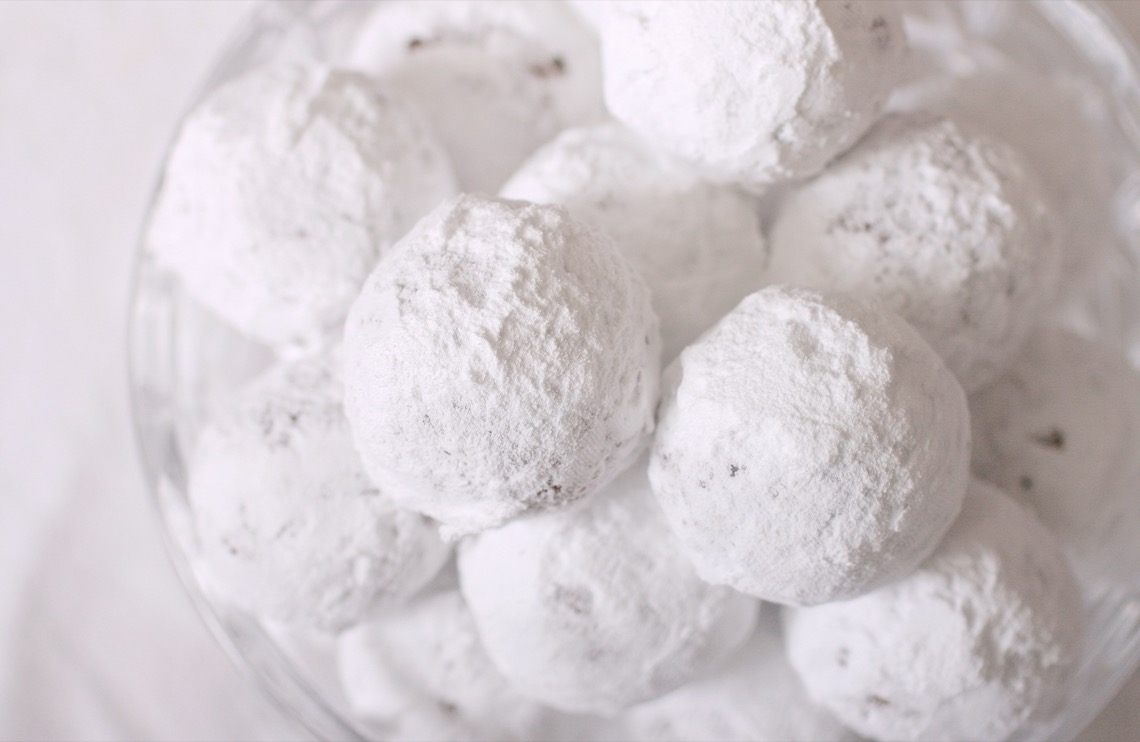
After chilling, roll the balls in confectioners’ sugar. You can serve them cold or at room temperature. Makes approx. 3 dozen
Recipe source: adapted from allrecipes.com


