I’m going to keep this short and sweet: dramatic 3 year old girls and teething 9 month olds are HARD, yo. Like, thank-the-Lord-and-pass-the-wine-and-xanax-we-survied-another-day HARD. These days, I can barely be expected to keep myself from getting in my car and driving to the nearest liquor store to buy out their entire inventory of tequila, let alone cook a decent dinner. Thank goodness for crockpots. Because, after my first cup of coffee and before the first meltdown of the day, there’s still a glimmer of hope. Like, I feel like I could accomplish anything right after that first cup of coffee. Got my energy; got my caffeine; I CAN COOK DINNER TONIGHT! Bring on those poopy diapers! Hit me with your best toddler tantrum! I GOT this! I’m gonna thaw that meat today, dangit!
Then it usually starts to go downhill around 9am. Clingy, crying baby. Whiny toddler. By the time naptime rolls around, I’m a shell of a human. Wishing I could crawl into the fetal position and pray for death.
Obviously, I’m kidding (sort of). My life is very full (sometimes). I’m a very happy mommy (except when I’m not). 😉 Really, though. If I’m being serious, of course life gets a little cray (ok, a LOT cray), but I wouldn’t have it any other way. On those freaking ridiculous days where I can’t be expected to function normally, this dinner is SO VERY EASY. And really, really good. Everybody will love it. And you can save yourself a little trouble. You deserve it. I know I do.
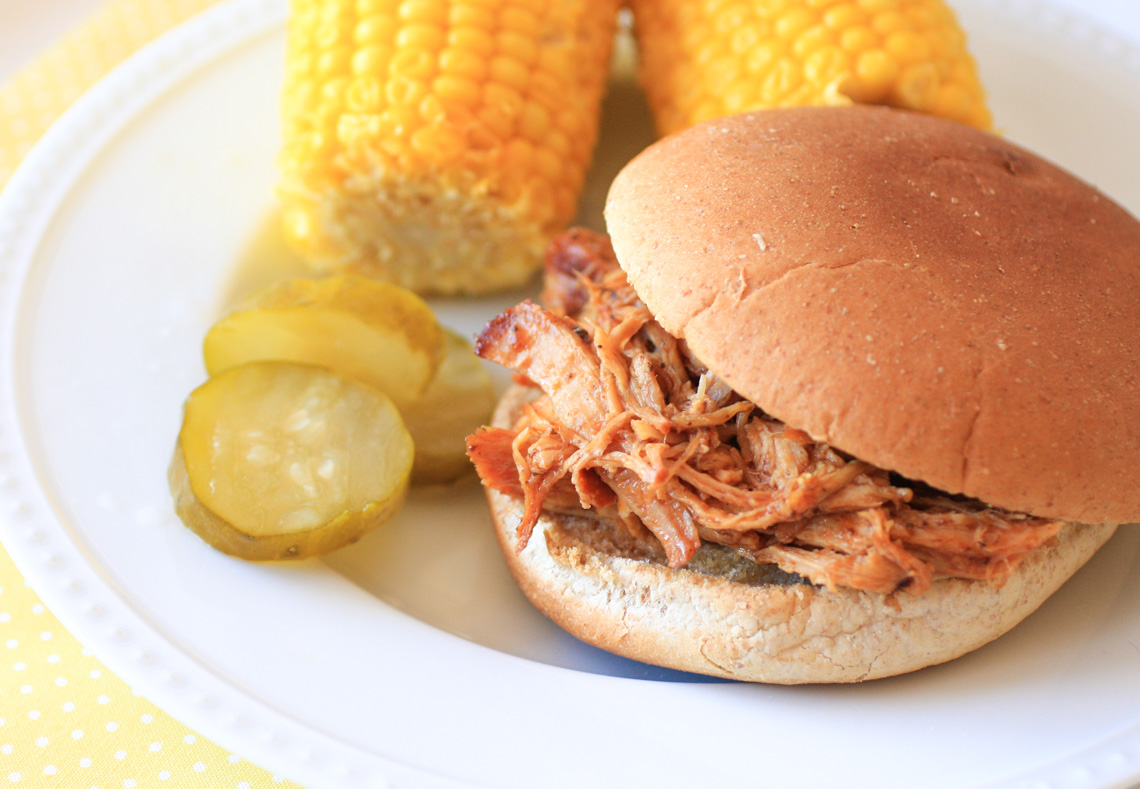
Pork. Dr. Pepper. BBQ sauce. Do it.
Dr. Pepper Pulled Pork
pork roast (about 2-3 pounds)
1 can Dr. Pepper
1/3 cup BBQ sauce
Put the pork roast, Dr. Pepper, and BBQ sauce in a slow cooker and cook on low for 6-8 hours. When the pork is very tender, shred with 2 forks and toss with the remaining cooking liquid. Serve on hamburger buns. Serves 4.
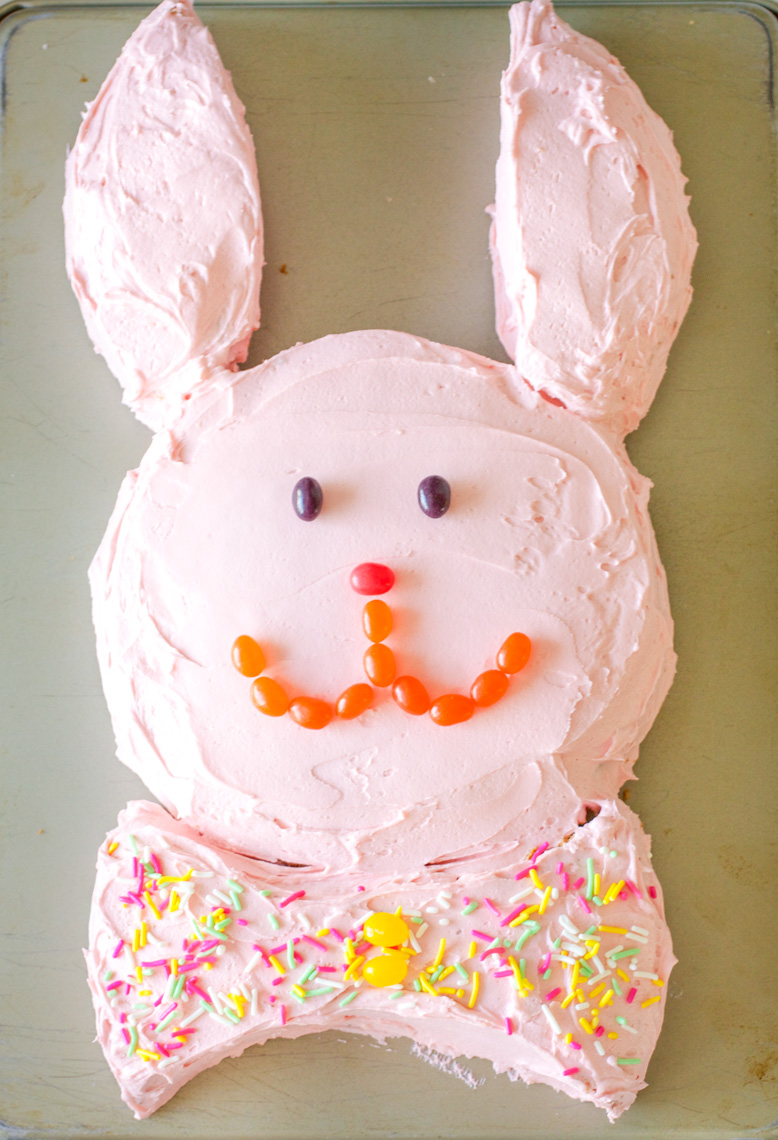
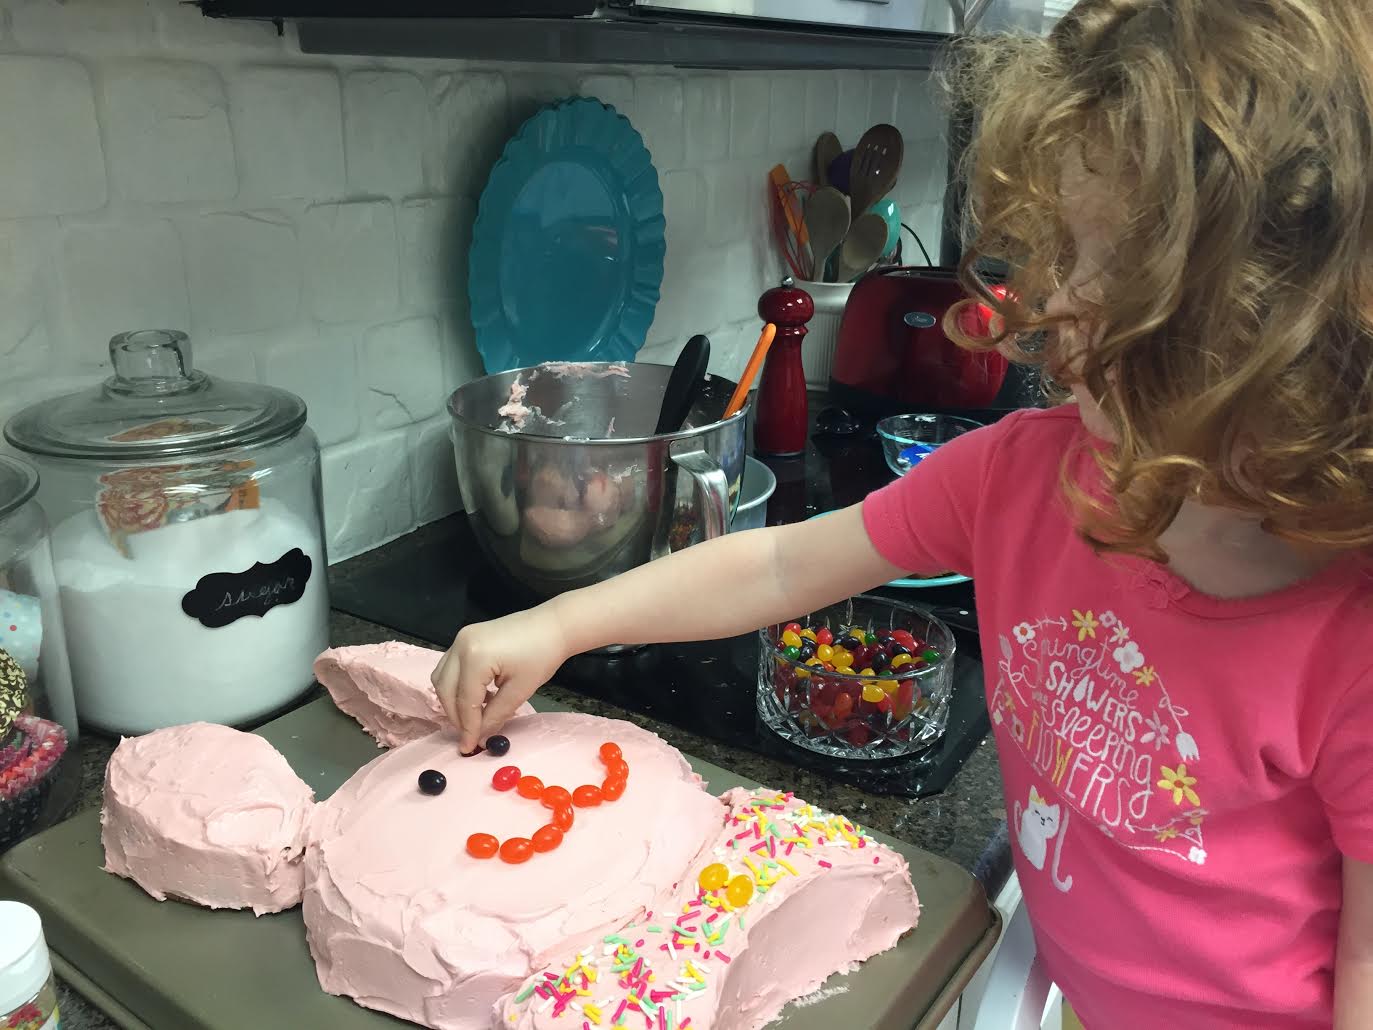
I don’t get tired of making this cake. Every Easter, this is what we do. We dye eggs, we read Easter books, we make an Easter bunny cake. Tradition! My mom always made this cake with us; now I make it with mine. It really couldn’t be easier- just a little bit of cutting, then simply frost and decorate! It’s so much fun for the kids to help with- the sprinkles, the jellybeans…such fun!
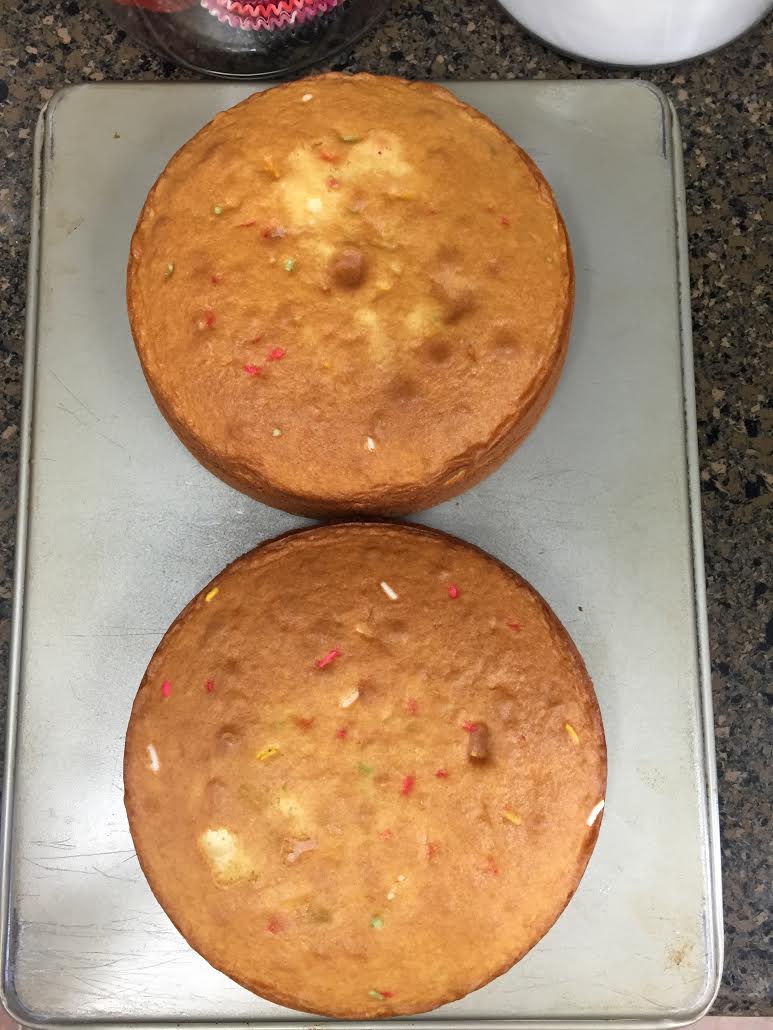
Just start with 2 round cakes (mine are 8 inches). I’m not including a recipe, because I take the easy road and just use a boxed mix. Funfetti is always good. 😉
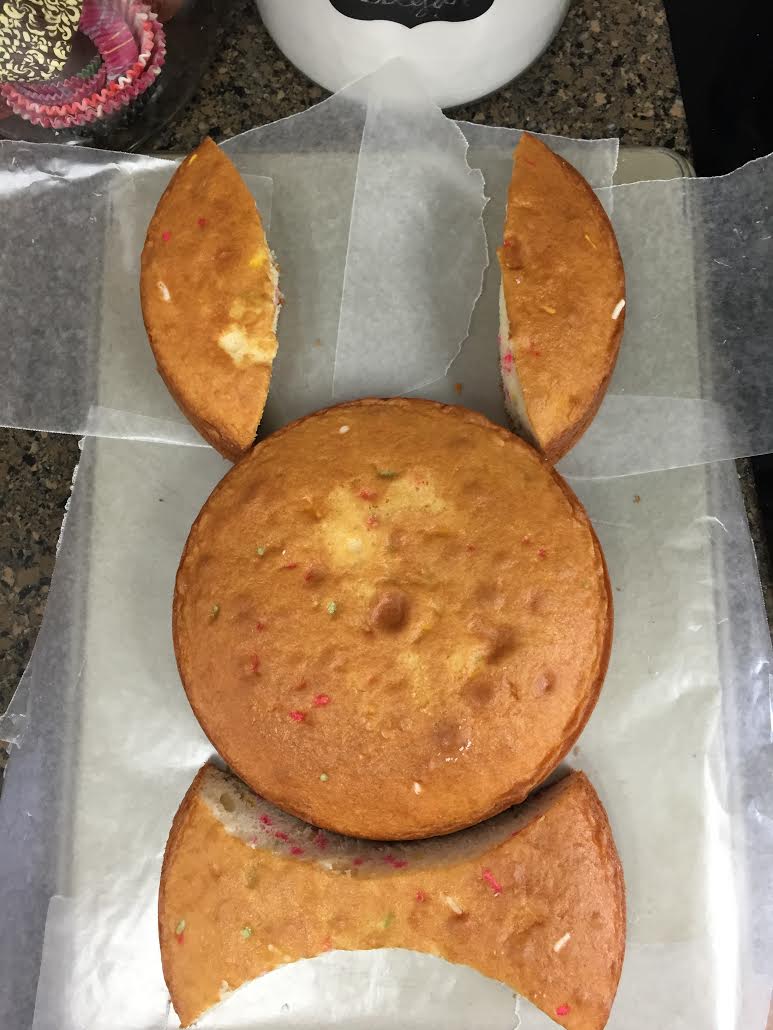
Then cut 2 football-shaped pieces out of each side. These pieces will be the ears and the bow tie. Then, simply frost and decorate! Simple and fun!


Here’s my frosting recipe:
Vanilla Buttercream
1 cup (2 sticks) unsalted butter, softened
6 cups confectioners’ sugar
1/4 cup milk
1 1/2 teaspoons vanilla extract
1/4 teaspoon almond extract
pink food coloring, if desired
Place the butter in a large mixing bowl. Add 4 cups of the sugar and then the milk, vanilla, and almond extract. On the medium speed of an electric mixer, beat until smooth and creamy, about 3-5 minutes. Gradually add the remaining sugar, 1 cup at a time, beating well after each addition (about 2 minutes), until the icing is a good spreading consistency. You may not need to add all of the sugar (or if you like it thicker, feel free to use more). Stir in a few drops of food coloring until the desired color is reached. Use the icing at room temperature and store in the refrigerator. If you’re not using it right away, allow it to set out at room temperature for 30 minutes to an hour before use.


Hello there! Sorry for the delay- Elliott is still teething, which means I barely trust myself to type out coherent sentences anymore. But, I’ll give it a go today, simply because I loooove this soup. Love it so much, I’ve made it several times over the past couple of months. It’s so rich and creamy and flavorful. I think you’re going to love it too!
One of the secrets to how rich and creamy this is, is the carrots. That’s right, carrots. They are pureed before they’re added in. That way, you get that nice, orangey color as well as an added thickness. Cool, huh? This is another of my friend Chris’ recipes. She made it for our bible study a while back and we all just loved it so much. I had to share it with you.
Tuscan Sausage and Tortellini Soup
1 onion, chopped
1 clove garlic, minced
1 tablespoon olive oil
1 15 ounce can crushed tomatoes
2 cups chicken stock
1 pound Italian sausage, browned and drained
1 teaspoon dried basil
1 1/2 cups cooked carrots (or 1 can)
1 pound cheese tortellini
1/2 cup heavy cream
salt and pepper
In a large pot over medium heat, cook the onions in the olive oil until translucent, about 5-7 minutes. Add the garlic and cook for another minute or so. Add the chicken stock, crushed tomatoes, sausage, basil, and salt and pepper. Let simmer while you puree the carrots.
In a food processor, puree the carrots until smooth. Stir into the soup. Add the tortellini and cook for about 8 minutes, until al dente. Stir in the heavy cream. Serves approximately 6.
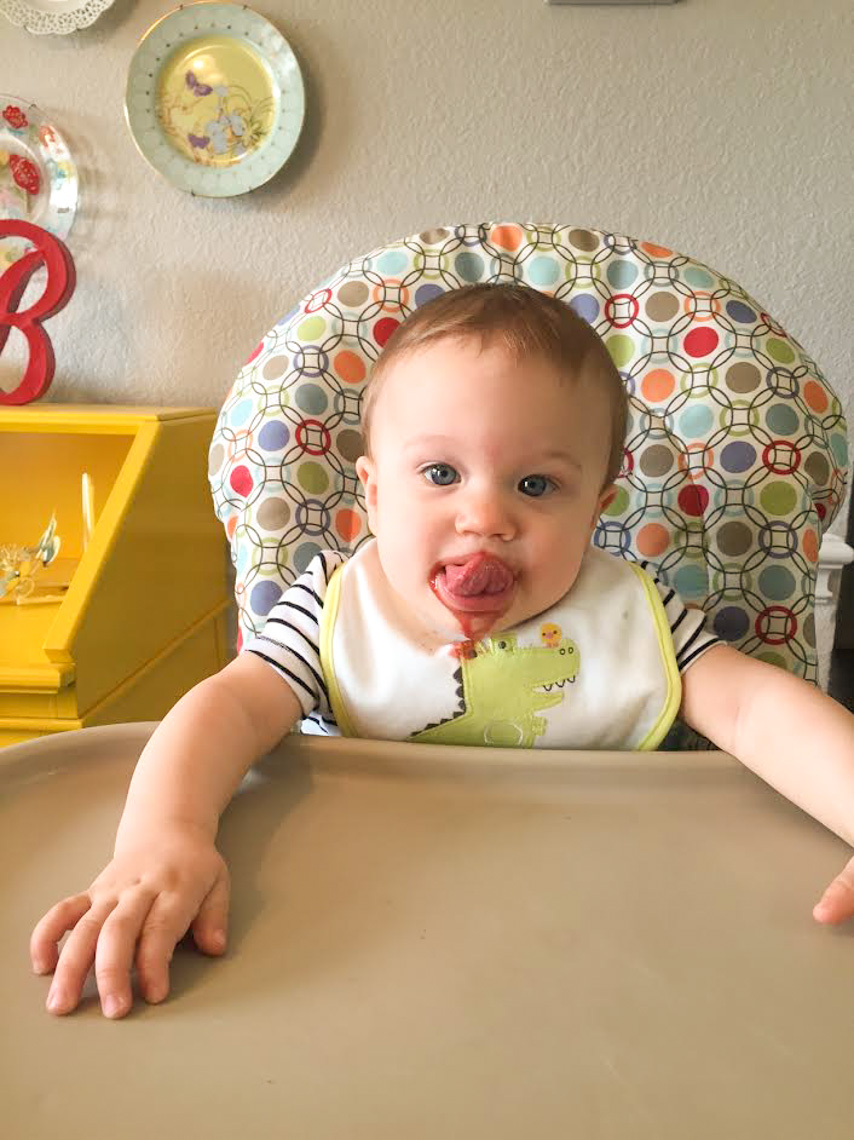
Look at that lil’ cutie pie! My big boy is 8 (well, almost 9 at this point) months old now!
I’m starting to understand what everyone was trying to tell me about boys being SO different from girls. My sweet, delicate Cassidy never really got into stuff or pushed the envelope once she started crawling. Elliott, on the other hand, is our little thrill-seeker. When we put him on the floor, he immediately makes a beeline for ZuZu’s and Izzy’s water bowls. If those aren’t available to him, he goes straight for the floor lamp and tries to climb it.
He pulls up on literally everything. Including my pants. While they’re on my legs. Which results in me getting pantsed. That’s always a fun surprise while I’m waiting for my coffee in the morning. Makes me feel like I’m 23 again…
If there’s an obstacle in his path, he doesn’t even pause, he goes over it. If I take my eyes off of him for a second, when I turn back around, sometimes all I’ll see are his feet going up in the air over a stool or a large toy. I never had to move breakable or valuable items from Cassidy’s reach when she was crawling. She just never messed with them. I can tell I’m going to have to move ALL that crap for the next ten years or so. I sense that Elliott’s going to have his eye on it. All of it.

As much of a sweet, snuggly Mommy’s boy as he is, he’s even MORE of a Daddy’s boy. This kid ADORES his Daddy! When Joel comes in from work, Elliott stops whatever he’s doing and heads straight for him. He loves the way Joel tosses him up in the air and plays “rough” with him. He loves the thrill, this one!
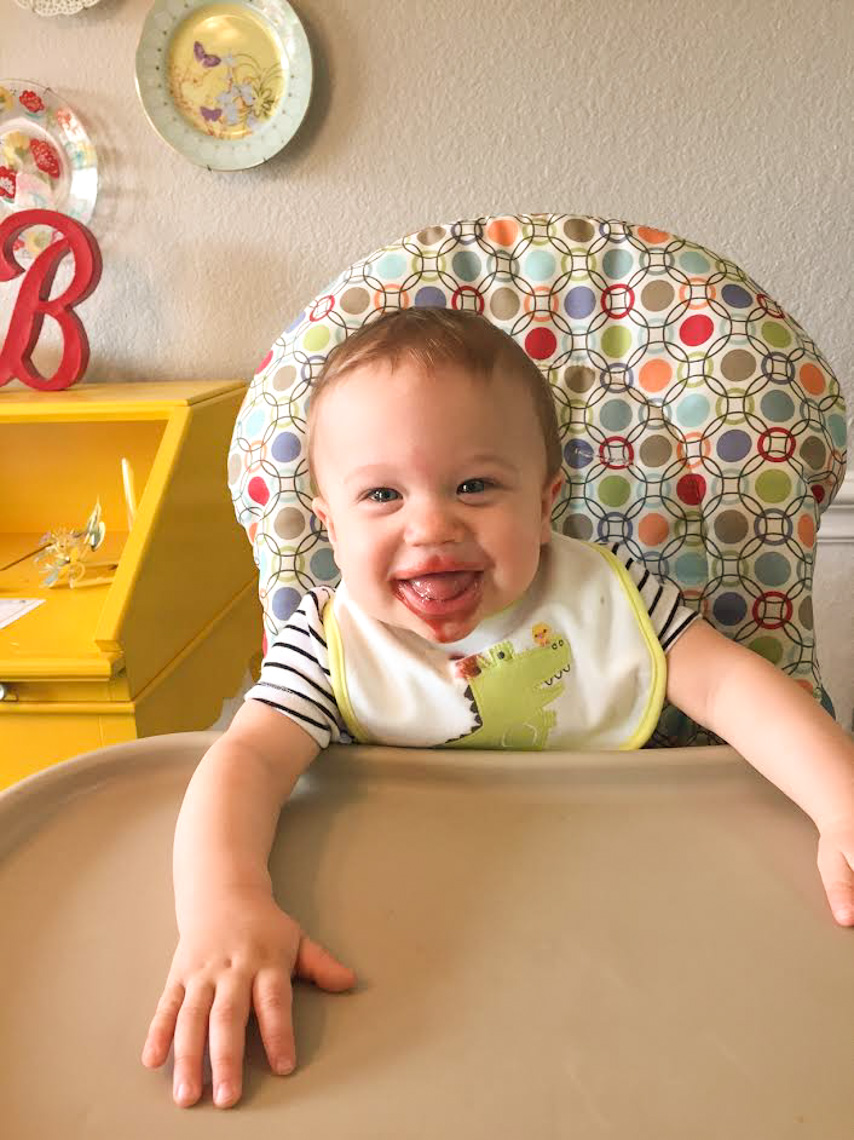
He’s doing awesome with solids. And he loves food, that’s for sure! Yogurt is his favorite, but he really eats pretty much every kind of baby food I give him. Pretty soon, we’ll start trying more textures, but for now, he’s only really interested in purees.
Sleep is still good. I don’t want to talk about it too much, so as not to jinx anything! 😉
Still no teeth. But judging by the vast amounts of wine we’ve gone through over the past couple of days, I’m thinking one or two are BOUND to pop through anytime (please, God, PLEASE).
Bottom line, I can’t get enough of this kid. He is SUCH a joy. Throw his precious sister in the mix and I get overwhelmed just thinking about how freaking blessed I am. I mean, I get these 2 great kids AND their dad just happens to be a hottie with a beard?! Doesn’t get much better than that, folks.
Ok, it’s been cold/rainy/snowy/icy for far too long now. One of the perks of being a Texan is only having to deal with like, 3 days of REAL winter. Well, we’ve had it for weeks now and I’m sick of it. My kids and I are sick of being stuck inside. We need sunshine, we need fresh air! Granted, the snow was lovely and Cassidy did enjoy playing in it. But dang, what a PAIN it is getting kids ready to play in the snow! I had to ask myself if it was really worth it. After we each got on our 8 layers of clothing, mittens, extra socks, boots, etc, I was already sweating like a pig. Cassidy ran around a little bit, built a couple of little snowmen, and made a snow angel before she got bored. Elliott looked on from his bouncer, happy as a clam, while I frantically snapped pictures with my phone. “Cassidy, get back in that snow and make another snow angel! If I’m going to go to all this trouble I’m getting some good shots out of it! NOW SMILE AND LOOK LIKE YOU’RE HAVING FUN!”

Cassidy was ready to go in after only 30 minutes or so, go figure. But I did get some pretty good pictures of my sweet babies having fun, so I guess it wasn’t a total waste. 😉
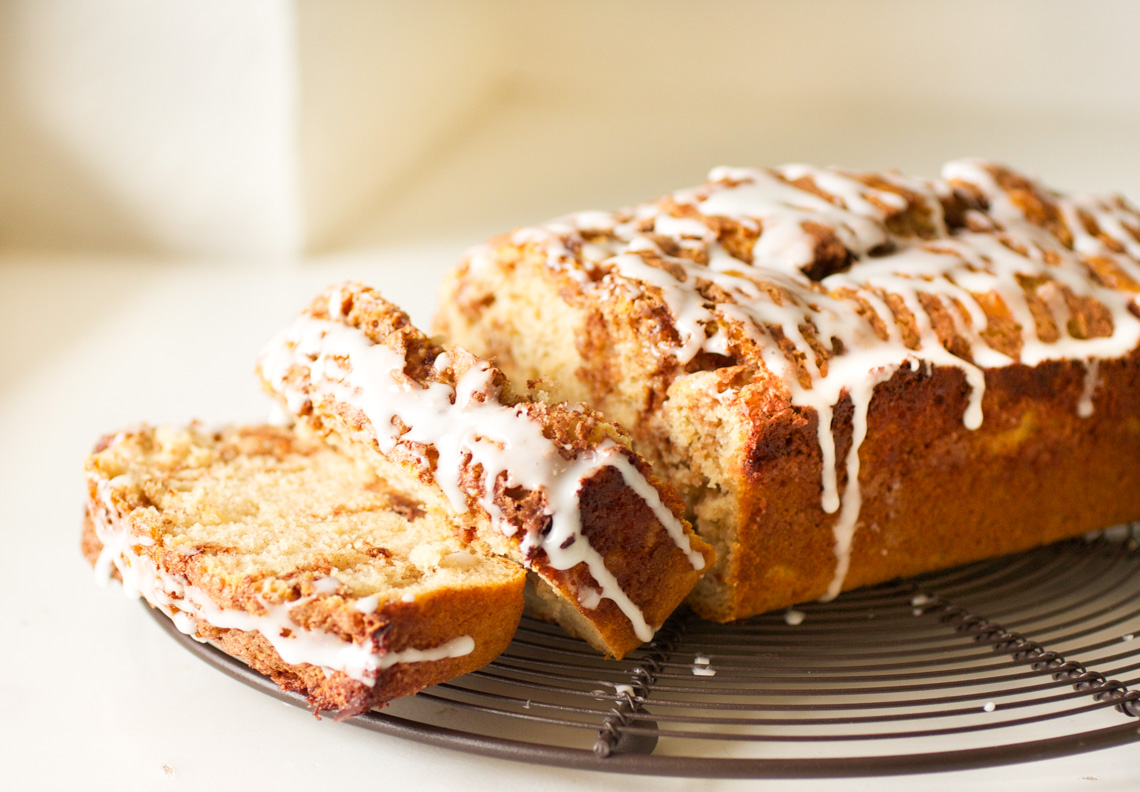
Anyway, Cinnamon Roll Bread! I always bake when it’s snowy and/or icy outside (it’s a thing), and I wanted something non-chocolatey and non-cake. I asked my friend Chris if she had any ideas and she sent me the link to this recipe. It’s really simple, really quick, and you probably already have everything you need in your fridge/pantry. It’s not too rich or sweet; it’s the perfect snack on a cold, snowy day. Have a slice with a cup of tea and try to make the best of all this freaking snow.
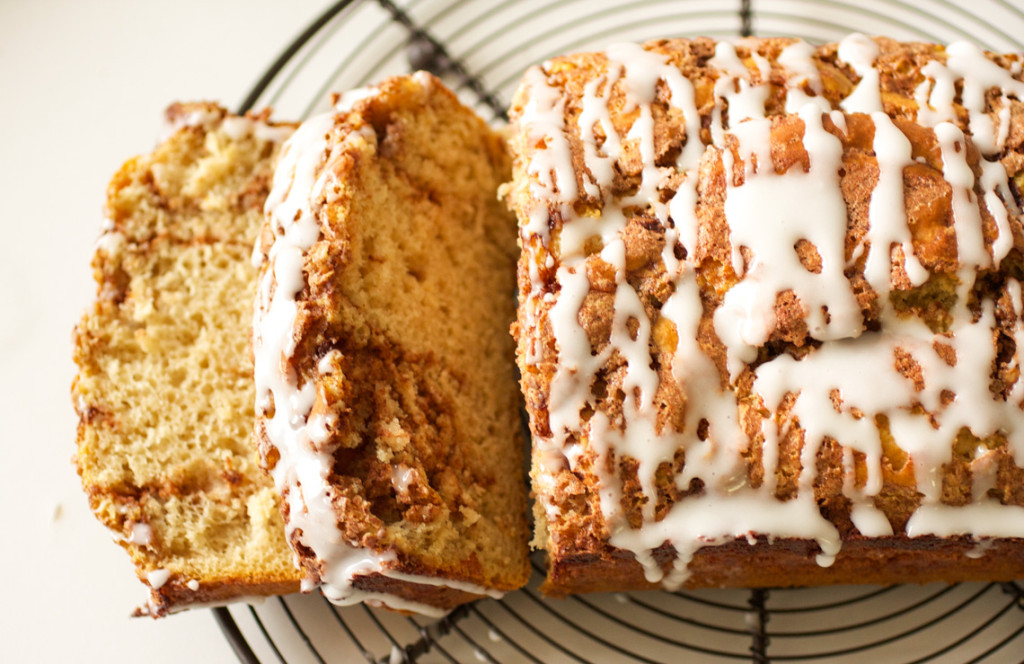
Cinnamon Roll Bread
2 cups all-purpose flour
1 tablespoon baking powder
1/2 teaspoon salt
1/2 cup sugar
1 egg at room temperature, lightly beaten
1 cup milk
2 teaspoons vanilla extract
1/3 cup sour cream
For the Cinnamon Swirl:
1/3 cup sugar
2 teaspoons cinnamon
1 1/2 tablespoons water
For the Glaze:
1/2 cup powdered sugar
1 tablespoon milk
Pre-heat our oven to 350 degrees and grease a 9×5 bread pan.
In a large bowl combine flour, baking powder, salt, and sugar. In a small bowl combine egg, milk, vanilla extract, and sour cream. Add the dry ingredients into the wet and stir to combine.
In a small bowl combine swirl ingredients together. Use a tablespoon to drop spoonfuls of the mixture over the bread, then use a knife to swirl the cinnamon mixture into the bread.
Bake for 45-50 minutes or until a toothpick inserted into the center comes out clean. Remove the bread from the oven and transfer it to a cooling rack to cool for 15 minutes.
Meanwhile, make the glaze. Remove the bread from the pan and allow it to continue cooling completely. When the bread has completely cooled, drizzle the glaze over the top. Serves 8.
Recipe source: Center Cut Cook
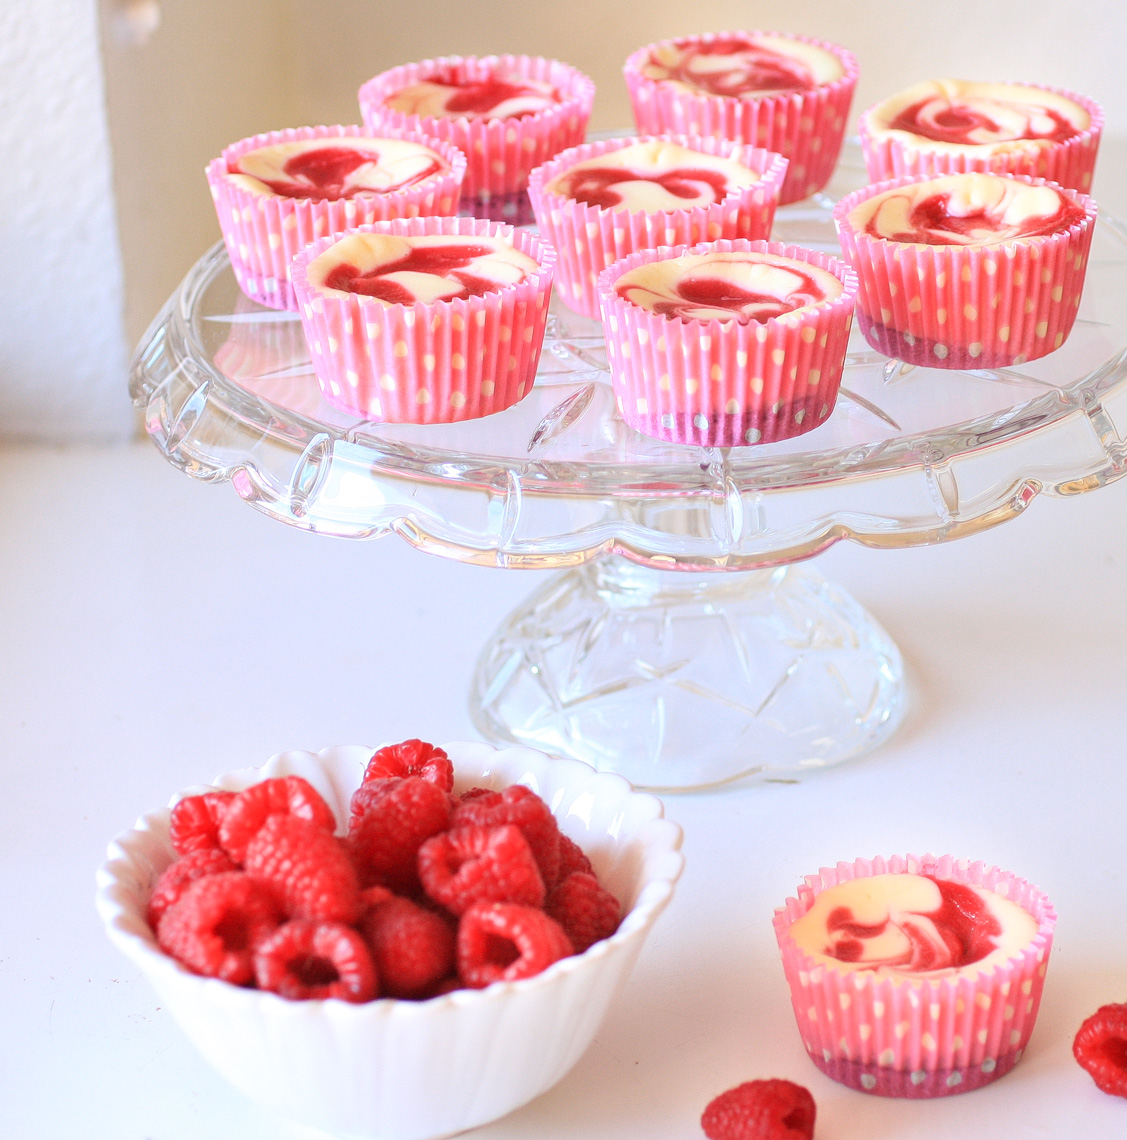
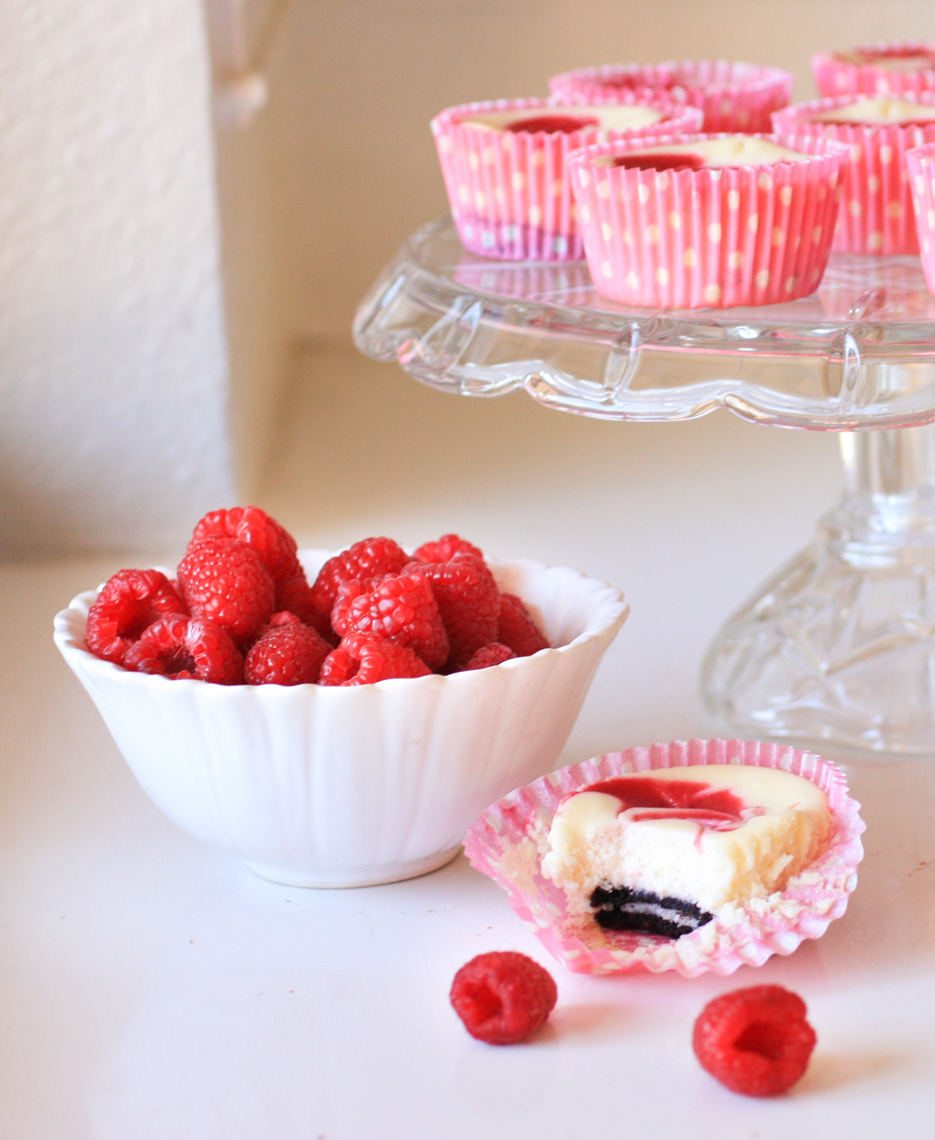
OK. I’ve got my cuppa tea (Yorkshire, with milk and honey!), got my fuzzy blanket, got my Taylor Swift going, and it’s QUIET and peaceful in this little corner of my bedroom- I’m happy. So let’s talk about CHEESECAKE. Raspberry cheesecake, to be more specific. Raspberry cheesecake with an Oreo as the crust. YES.
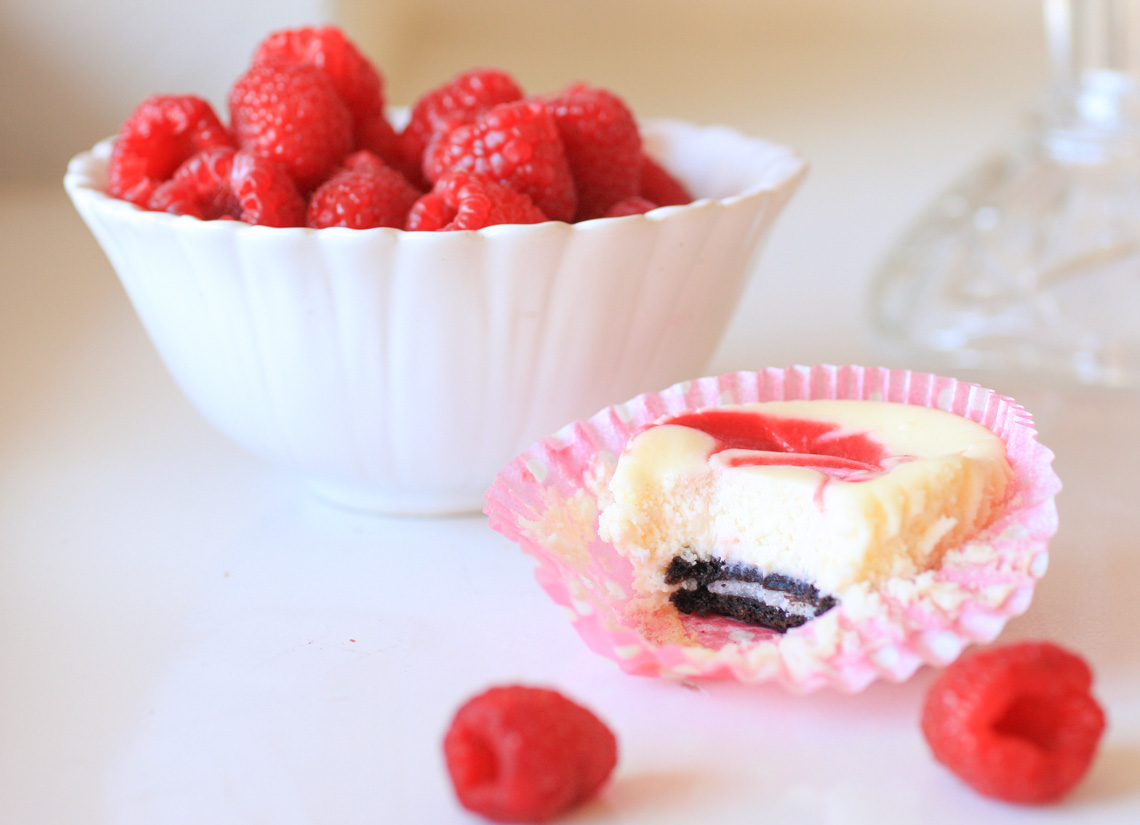
As much as I love plain ol’ cheesecake, I adore raspberry cheesecake. I guess because the tartness of the raspberry really cuts through that creamy richness of the cheesecake. And since Oreos are God’s food, why not add them in for good measure? You know, just in case this recipe wasn’t already awesome enough.

I made these cheesecakes for our Valentine’s Day dessert (Joel and I always stay in and cook dinner together. It’s tradition.). I usually make chocolate fondue or one of my all-time favorites, Gooey Chocolate Cakes, but due to the billions of brownie recipes I’ve made lately, I decided to go non-chocolate this year. It was a very good call. We inhaled these; even as full as we were, having just had steaks, baked potatoes, and wine. Another good call. We’re great decision makers, really.
Mini Oreo-Bottom Raspberry Cheesecakes
2 pounds (four 8-ounce boxes) cream cheese, at room temperature
1 1/3 cups sugar
1/2 teaspoon salt
2 teaspoons pure vanilla extract
4 large eggs, at room temperature
1 1/3 cups sour cream
6 ounces fresh raspberries
1 tablespoon raspberry jam
1 tablespoon sugar
36 Oreo cookies
Preheat the oven to 325 degrees. Line muffin pans with cupcake liners (you’ll need 36) and put an Oreo in the bottom of each.
Working in a stand mixer, preferably fitted with a paddle attachment, or with a hand mixer in a large bowl, beat the cream cheese at medium speed until it is soft and fluffy, about 4 minutes. With the mixer running, add the sugar and salt and continue to beat another 4 minutes or so, until the cream cheese is light. Beat in the vanilla. Add the eggs one at a time, beating for a full minute after each addition. Reduce the mixer speed to low and stir in the sour cream.
To make the raspberry swirl, pulse raspberries, jam, and sugar in a blender until smooth and pureed. Push through a fine mesh sieve to remove seeds.
Give the cheesecake batter a few stirs with a rubber spatula and spoon into the cupcake liners. Drop 3 small spoonfuls (about half a teaspoon) of raspberry puree on the top of each and swirl with a toothpick.
Bake for about 20-23 minutes, rotating the pans halfway through baking. They’ll puff up during baking, but as they cool they’ll level out again.
Let cool completely and refrigerate for at least 4 hours or overnight. Makes 36 cupcakes.
Recipe source: cheesecake from Dorie Greenspan’s Baking From My Home to Yours; raspberry swirl adapted from Annie’s Eats

Alrighty! Here they are, as promised- breakfast enchiladas. Flour tortillas filled with sausage, egg, and green chiles, then topped with green enchilada sauce and monterey jack cheese. Sounds pretty great, huh? Well they are! I got the idea from my uncle Steve who happens to be an awesome cook.
As I mentioned before, we served these at Cassidy’s Birthday Brunch a couple of weeks ago and they were a big hit. I think they’re perfect brunch fare- just “breakfast-y” enough with the sausage and eggs, and the green chiles, cheese, and green enchilada sauce add tons of great tex-mex flavor. These can also be assembled the night before and baked in the morning. It doesn’t get much easier than that! Can’t wait to make these again!

Sausage and Green Chile Breakfast Enchiladas
1 pound ground breakfast sausage (I used mild, but hot would be great too)
6 large eggs
1 4-oz can green chiles
salt and pepper
1 19-oz can green enchilada sauce
1 cup shredded monterey jack cheese
flour tortillas
Preheat oven to 350 degrees. In a skillet over medium-high heat, cook the sausage and drain off grease. Scramble the eggs. Combine the sausage, scrambled eggs, and green chiles in a large bowl. Season with salt and pepper to taste.
Spoon 1/2 cup of the enchilada sauce in the bottom of a 9×13 baking dish. Spoon a little of the sausage/egg mixture in a flour tortilla, roll up, and place in the baking dish. Repeat with remaining filling/tortillas. Top with the rest of the enchilada sauce and sprinkle with cheese.
Cover with foil and bake for 20-25 minutes, until bubbly. Serves 6.
Sing For Your Supper original
I opened my blogging dashboard today, just to look at some saved drafts, add some pictures, and just take care of some general bloggy housekeeping. There, on the middle of the page, sits a blank space, with the words, “what’s on your mind?”. Something about blank spaces bugs me. I have to type in them. Or doodle in them. Or write my name a bunch of times in different kinds of handwriting. Blank spaces appeal to me big time. My kid has a magna-doodle and she likes for me to draw “a big fish then a bowl around the fish and some water and some dots”, but I like to just sit and draw our names all over it. My name, her name, her brother’s name… I can’t stand blank spaces. So I fill them up. Either with my own thoughts, or a stupid doodle. I always feel better when it’s filled, though.
So as I looked at this blank space, I thought, “what IS on my mind?” You know what’s on my mind? Being 30. It wasn’t for a long time. I was big-fat-pregnant with my second kid when my 30th birthday hit, so I couldn’t drink, couldn’t eat tons of awesome food, couldn’t go too far from home (I was about to pop any day), couldn’t make it 30 minutes without peeing. So, my 30th just sorta flew under the radar. My family still came over and threw me a lovely party with an amazing cake, but with all the impending excitement of a new baby arriving any day, there wasn’t much time to sit and ponder turning 30 and what that meant for me. A couple of weeks later, I had Elliott and things got REALLY busy, so I just continued to sweep ’30’ under the rug. I didn’t even notice it for months.
So here we are, in a bit of a “lull” for awhile since Elliott is 7 months old and things have slowed down significantly. I mean, not too much, because…you know, red-headed 3 year old and mobile 7 month old. But I’ve had more time to think about it lately and frankly, 30 scares the ever-loving crap out of me. At first it was kind of like, “YEAH! I’m 30 and I’m awesome!!!”, but slowly over time it’s come around to “holy crap. I’m 30. Where did my life go? Am I middle aged now? Should I get a tattoo? Should I buy a ridiculous car? Or worse – a minivan? What do other middle aged moms do? WHAT IS MY LIFE?“
I mean, maybe not quite that dramatic, but still…my head is a little bit of a crazytown sometimes. Don’t get me wrong, I love my life just the way it is and wouldn’t change a thing (seriously), but here lately, 30 has been kicking my butt.
I mean, I have so many questions! Can I still wear skinny jeans? What do 30 year olds even wear? Do I have to stop listening to One Direction? What do 30 year olds listen to? Is there some sort of instruction manual for being 30? I NEED ANSWERS, 30.
I spent so much of my younger years wanting to be “grown up”. I wanted to be an adult. Well are you happy, self? You’re grown now. You’re freaking 30. Pretty glam, huh? Bring on the granny panties and anti-aging cream. 30 is like the gross, hairy guy at the gym- there are like, 12 treadmills to choose from, yet he chooses the one right next to you and his hairy elbow keeps bumping into yours and you’re like…ew. Yeah, that’s 30. Get away from me, 30. Just take your awkwardness and get away from me!
Part of it, I think, has been dealing with that **#$%^@&! leftover baby weight. 20 pounds. And it’s not even the poundage that’s bothering me, really. It’s the muffin top. And the bigger feet. And what the heck happened to my cute ankles?! I know Joel loves me exactly as I am. He tells me every day how beautiful I am (God love that man…). But I need to feel good about myself. I need to remember what it feels like to feel “cute” again. Is that even possible?
As I sit here and type this I look around in my bedroom and see the pictures on our walls of our family. Joel and me with the kids. Our kids are gorgeous, there are smiles on all of our faces, and we’re all happy. That’s what matters, believe me, I know that. And I am crazy happy with the twists and turns my life has taken. I always thought I’d be a successful opera singer by now. Well, I turned my back on that life, but look what I got instead- just, wow. I’m blown away by all the fun and giggles and love that fill this house. And let’s face it, I’m not giving up my beloved One Direction, my skinny jeans, or my blonde highlights. I’ll still do my grocery shopping with my headphones in. I’ll still belt out ‘Part Of Your World’ and fangirl the crap out of Leonardo DiCaprio. Turning 30 doesn’t have to mean giving up ME. I guess I needed to type all this out to come to that realization.
I know I’ll eventually work through this weirdness that is 30; I think I’m already well on my way to making peace with it. Maybe a little patience and acceptance is all I need. Patience and acceptance…and lots of wine. Cheers, 30.
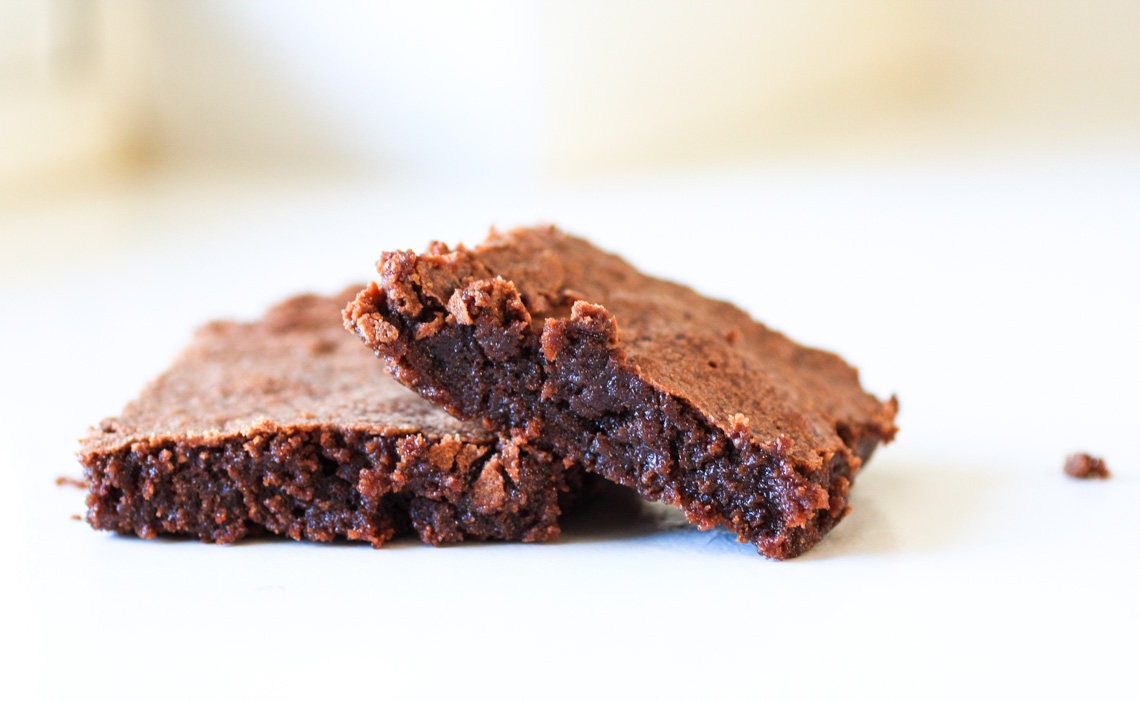
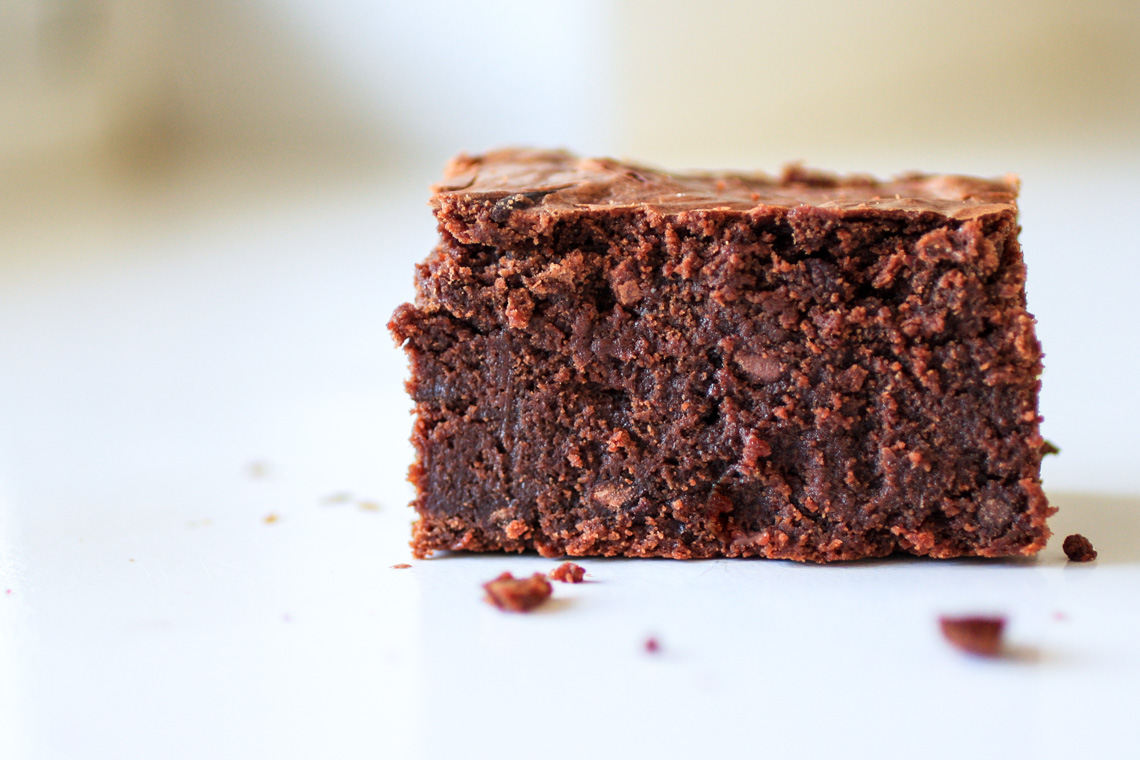
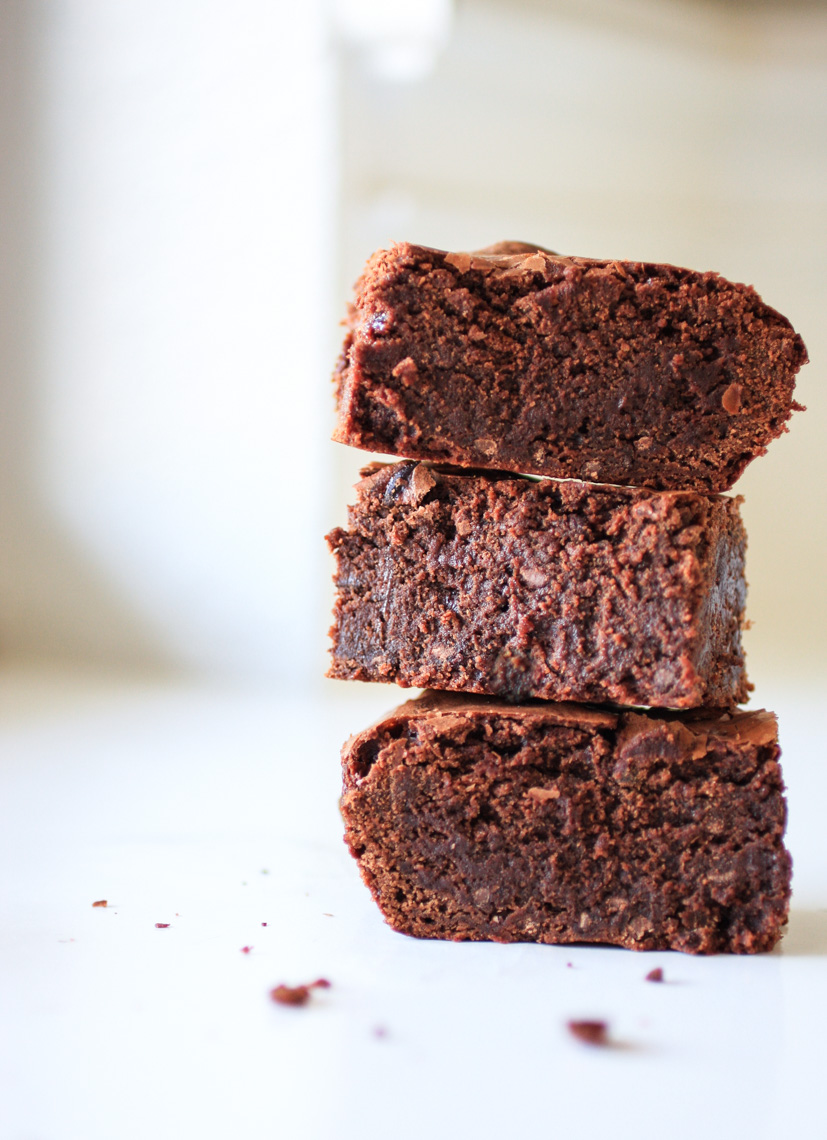
Ta-DAAAA!!! Here it is, my favorite brownie. The winner of the Great Brownie Comparison. This is HUGE! I never thought I’d find a homemade brownie recipe that excites me! If you’re just tuning in, over the last week, I’ve tried 2 other brownie recipes, one from another blogger and one from King Arthur Flour. While they were both really, really good, I couldn’t say they were THE brownies. The only recipe I’d ever need. The Big Enchilada.

Well here it is. The perfect brownie, suited to my personal brownie needs. Apparently, I have a lot of them. I NEED them to be fudgy. But not too fudgy. Maybe just a *touch* on the cakey side? But not really CAKEY, cakey. You know? And I really, really like them chewy. Chewy and fudgy. Can the two coexist? Yes they can, my friends, and here they do, in THIS brownie.
When I first started looking at recipes to compare, this one kept coming up, which was odd, because just looking at the ingredients/method, it was the LEAST exciting. I thought “there’s no way this brownie is going to be anywhere near the others”. For some reason, I decided to give it a try. It happened to be the ugliest brownie out of all 3 recipes, and was the most difficult to cut and photograph. They ugly. Let’s face it.
But one bite and Joel and I both decided this was our favorite. I guess I prefer them because they’re not too sweet. I know that sounds weird, but I don’t like a brownie that makes my teeth hurt. Nor was it too fudgy. It’s made with oil instead of butter, which adds to the moistness, as well as keeps it from being too rich. The method is totally straight-forward and lightening quick. There’s really no need to reach for a boxed mix anymore. This recipe comes together in minutes. It’s a real winner in my book and I’m so happy I decided to tackle this challenge!
So, to recap: CHEWY, FUDGY, NOT TOO SWEET. PERFECT.
My Favorite Brownies
1/2 cup vegetable oil
1 cup sugar
1 teaspoon vanilla extract
2 eggs
1/2 cup all-purpose flour
1/3 cup cocoa powder
1/4 teaspoon baking powder
1/4 teaspoon salt
Preheat oven to 350 degrees and grease a 9×9-inch baking pan.
In a medium bowl, mix together the oil, sugar, and vanilla. Beat in eggs one at a time. In a separate bowl, combine the flour, cocoa, baking powder, and salt and gradually stir into the egg mixture until well combined.
Spread the batter evenly into the prepared pan.
Bake for 20 to 25 minutes, or until the brownie begins to pull away from edges of the pan and a toothpick inserted into the center comes out with only a few moist crumbs (not raw batter). Let cool before cutting into squares. Serves 9.
Recipe source: ‘Mmm-Mmm Better Brownies’, from allrecipes.com

Ready for more brownies?! Hooray, 3 cheers for brownies! I have to say, I’m really sort of enjoying trying and comparing all these brownie recipes. If you’re just joining us, I’ve already shared one brownie recipe this week and I’m still going! I just think brownies are so personal, you know? One person’s “OMGTHISISTHEBESTEVER” may be another person’s “meh.”, which is what I’ve run into several times. I’ve tried several recipes over the years that have made me think, “really? So-and-so claims this is the best brownie ever??” This time around, I’ve chosen King Arthur Flour’s well-known recipe.

Probably nobody will remember this, but I have actually made this brownie recipe before, and claimed it to be the “best ever”. However, the reason I felt like I needed to not only revisit it, but also compare it to a few more different recipes is because I added a bunch of minty crap to it (jeez. Rookie). Yeah. I added mint extract and mint chips. Don’t get me wrong, I love mint/chocolate, but my older, wiser, 30 year old self now knows you don’t mess with a good brownie. No nuts. No minty crap. Just brownie. If I could go back in time, I’d flick myself for that one. Probably I’d also go ahead and tell myself to steer clear of dairy…a couple of reeeeally ugly situations could’ve been avoided that way.
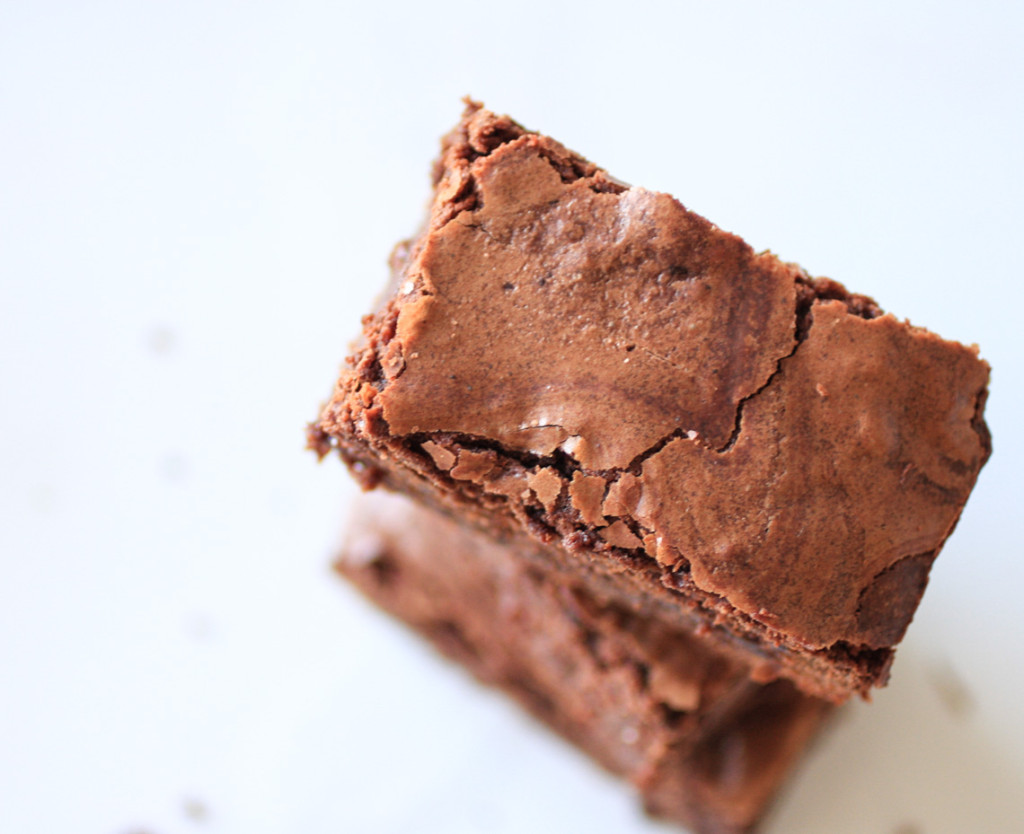
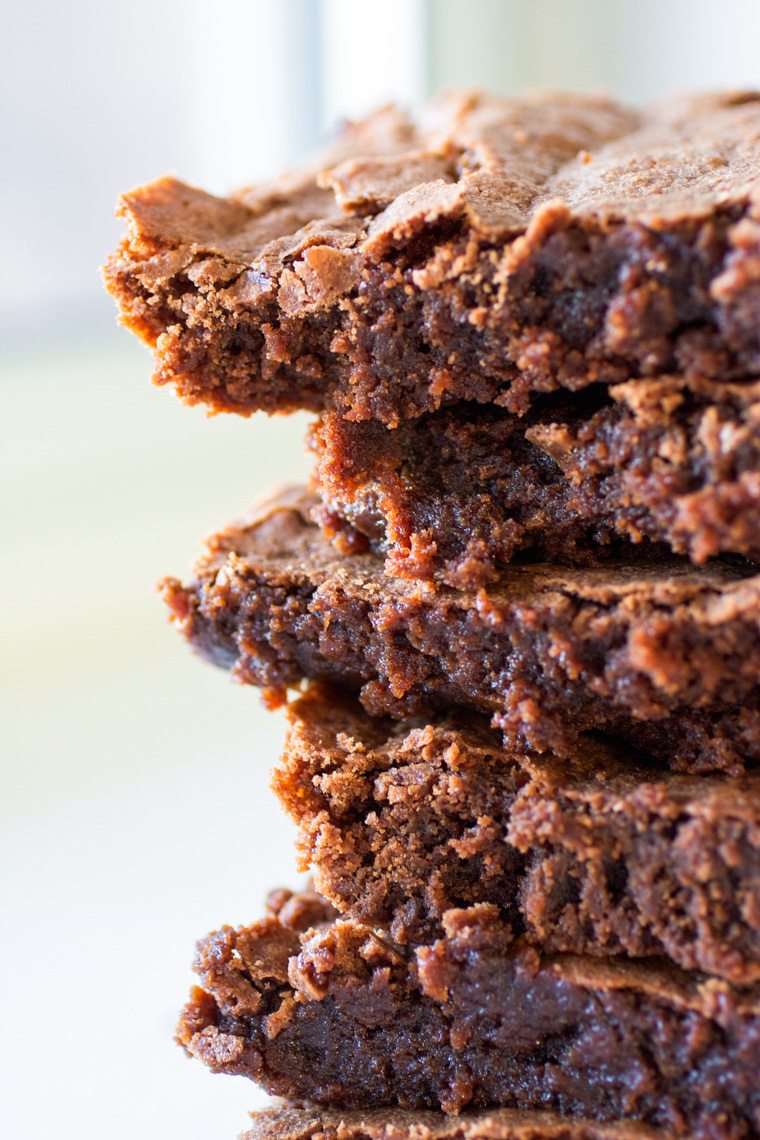
But seriously, though, just look at that perfectly paper-thin crust on top. What a beauty. The reason for that is because the butter and sugar are cooked first, allowing the sugar to mostly dissolve. That’s what gives you the lovely, thin crust. Paper-thin crust is very important to me.
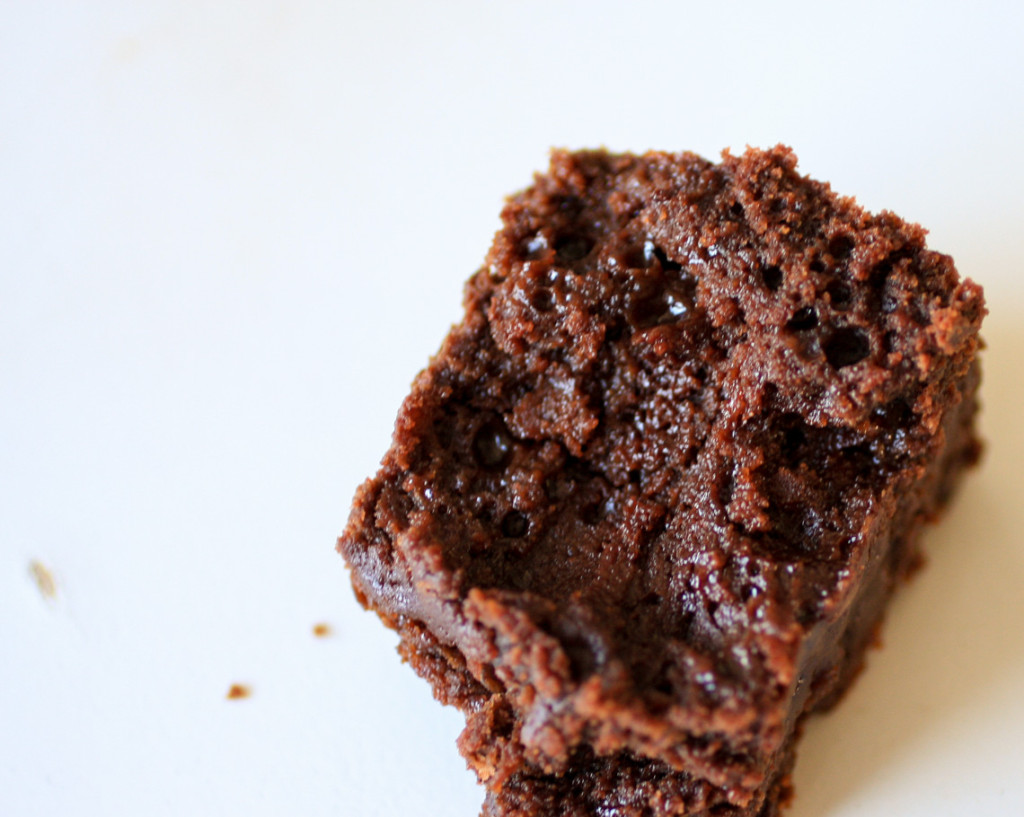
And even though the above picture is horrible, I wanted to include it to show you just HOW fudgy and rich these are on the inside. I hope you like rich brownies, because these are intensely dark and rich. And very sweet. I love the addition of espresso powder. There are 2 kinds of chocolate here- cocoa powder and semi-sweet chocolate chips. I personally love a brownie made with cocoa powder over one made with only melted chocolate, because it gives you that bitter bite that (in my opinion) adds more depth of chocolatey-ness. After one bite, I remembered immediately why ‘2009 Amy’ claimed them to be the very best. But there’s still one more recipe to try, isn’t there? 😉
King Arthur Flour Fudge Brownies
4 large eggs
1 1/4 cups cocoa powder
1 teaspoon salt
1 teaspoon baking powder
1 teaspoon espresso powder
1 tablespoon vanilla extract
1 cup (2 sticks) unsalted butter
2 1/4 cups sugar
1 1/2 cups all-purpose flour
2 cups chocolate chips
Preheat the oven to 350°F. Lightly grease a 9×13 pan (you can use a 9×9, just be sure to bake them longer).
In the bowl of an electric mixer, beat the eggs with the cocoa, salt, baking powder, espresso powder, and vanilla until smooth.
In a small saucepan set over medium-low heat, melt the butter, then add the sugar and stir to combine. Continue to heat briefly, just until the mixture is hot, but not bubbling; it’ll become shiny looking as you stir it. Heating the mixture to this point will dissolve more of the sugar, which will yield a shiny top crust on your brownies.
Add the hot butter mixture to the egg/cocoa mixture, stirring until smooth.
Add the flour and chips, again stirring until smooth. Note: If you want the chips to remain intact in the baked brownies, rather than melting in, let the batter cool in the bowl for about 20 minutes before stirring in the chips.
Pour the batter into the prepared pan and bake the brownies for about 30 minutes, until a toothpick inserted into the center comes out with only a few moist crumbs (you don’t want to see any raw batter). Note: if you’re baking in a 9×9 pan, you’ll need to bake them for closer to 40-45 minutes. Keep a close eye on them, though, being careful not to overbake. Serves 8.
Recipe source: King Arthur Flour