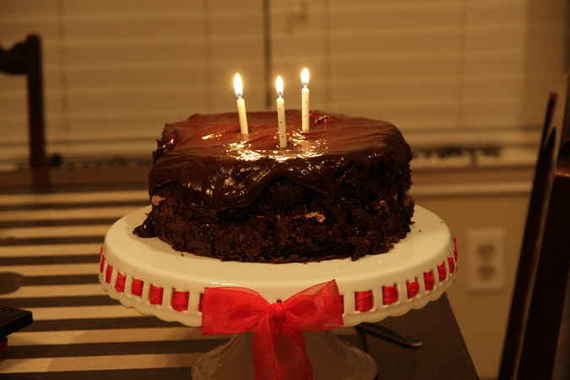
Ok, look, it was 8:30 last night, the sun had gone down hours ago, it was hubby’s birthday and we wanted cake PRONTO. So, yes, I took pictures in horrible lighting, yes, they look awful, yes, it looks like a doody cake….am I sorry? Not so much…..what the heck am I supposed to do when it gets dark so stinking early nowadays? I can’t take pictures of a half-eaten birthday cake! Ahem, anywhoo, I’ll stop ranting and continue with my birthday cake post…..
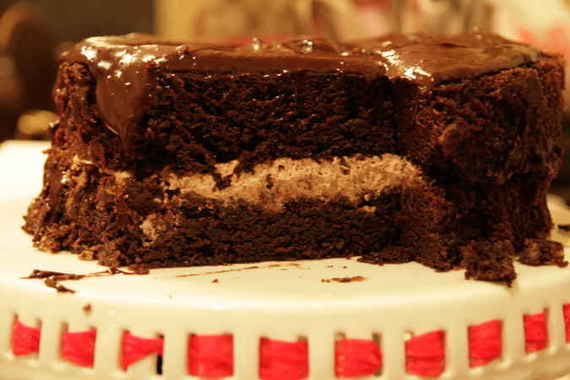
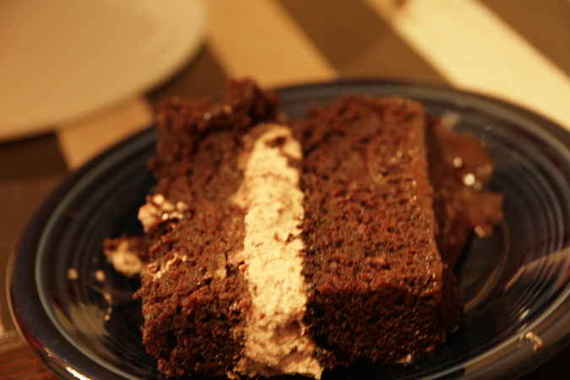
I’ll admit that even if my lighting had been adequate, this cake still would’ve looked like something you use to fertilize your lawn, rather than serve to your husband on his birthday. I greased the heck out of my cake pans and this suckers STILL stuck! Plus, trying to frost a cake after a few too many glasses of wine, with your husband giggling in the background is never going to be an easy task. Luckily, taste is all that matters, right? RIGHT?! Ok fine, so appearance has a little something to do with it as well, but even though my cake looked terrible, it tasted reeeeeally good!! The cake layers were so moist – I don’t think I’ve ever had a chocolate cake that was more moist than this one, honestly. I mean, almost brownie-like! Mmmmm…brownies. Anyway, I chose to halve the recipe for the ganache frosting/filling and use a layer of chocolate mousse in the middle – it seemed like a pretty good idea to me, but after tasting it, I think next time I’ll just stick to the recipe and use the ganache for the frosting and the filling. I think the mousse just made the cake too rich (yes, in my opinion there is such a thing!). This really is an awesome recipe, though – SO worth a try. And next time I’ll do my best to A.) make it prettier and B.) take pictures in better lighting!
Double Chocolate Layer Cake
Gourmet, March 1999
For cake layers
3 ounces fine-quality semisweet chocolate such as Callebaut
1 1/2 cups hot brewed coffee
3 cups sugar
2 1/2 cups all-purpose flour
1 1/2 cups unsweetened cocoa powder (not Dutch process)
2 teaspoons baking soda
3/4 teaspoon baking powder
1 1/4 teaspoons salt
3 large eggs
3/4 cup vegetable oil
1 1/2 cups well-shaken buttermilk
3/4 teaspoon vanilla
For ganache frosting and filling
1 pound fine-quality semisweet chocolate such as Callebaut
1 cup heavy cream
2 tablespoons sugar
2 tablespoons light corn syrup
1/2 stick (1/4 cup) unsalted butter
Special equipment: two 10- by 2-inch round cake pans
Make cake layers:
Preheat oven to 300°F. and grease pans. Line bottoms with rounds of wax paper and grease paper.
Finely chop chocolate and in a bowl combine with hot coffee. Let mixture stand, stirring occasionally, until chocolate is melted and mixture is smooth.
Into a large bowl sift together sugar, flour, cocoa powder, baking soda, baking powder, and salt. In another large bowl with an electric mixer beat eggs until thickened slightly and lemon colored (about 3 minutes with a standing mixer or 5 minutes with a hand-held mixer). Slowly add oil, buttermilk, vanilla, and melted chocolate mixture to eggs, beating until combined well. Add sugar mixture and beat on medium speed until just combined well.
Divide batter between pans and bake in middle of oven until a tester inserted in center comes out clean, 1 hour to 1 hour and 10 minutes.
Cool layers completely in pans on racks. Run a thin knife around edges of pans and invert layers onto racks. Carefully remove wax paper and cool layers completely. Cake layers may be made 1 day ahead and kept, wrapped well in plastic wrap, at room temperature.
Make frosting:
Finely chop chocolate. In a 1 1/2- to 2-quart saucepan bring cream, sugar, and corn syrup to a boil over moderately low heat, whisking until sugar is dissolved. Remove pan from heat and add chocolate, whisking until chocolate is melted. Cut butter into pieces and add to frosting, whisking until smooth.
Transfer frosting to a bowl and cool, stirring occasionally, until spreadable.
Spread frosting between cake layers and over top and sides. Cake keeps, covered and chilled, 3 days. Bring cake to room temperature before serving.
So you’ve all seen the lovely picture of our new house in one of the posts below…yay, shiny new house! We’ve been living here for almost two weeks now and its really become a “home” – all the furniture’s moved in, the rooms are painted, the pictures are hung, the hideous 80’s-esque sliding mirrored doors in the bathroom are gone (thank the Lord for that!). Everything is near perfect….except when it comes to photographing my food!!! In our old apartment, I had a perfect picture-taking area in my dining room; there was a window that provided exactly enough natural light – perfect for an amateur food blogger with little to no photography skills. So now I have my wonderfully large, formal dining area in my lovely new house- perfect for hosting a large dinner party….but there’s no place to take good pictures! I have plenty of windows, but by the time I get finished making dinner/baking for TWD, there’s not enough light coming through them. All I get is shadows. Boo!! Now I know I’m probably being a tad dramatic (its what I do best), and I’m sure after lots of experimenting I’ll eventually find an ideal spot for my food pics! Until then, I guess I’ll go ahead and post these fugly pictures….please don’t judge me.
Ok, I’ll get to the point of this post, which is obviously, my first TWD in my new kitchen!! YIPPEE!! So, Dimply Plum Cake, chosen by Michelle of Bake-En…this was “WOW-OHMYGOSH-BLOW-ME-AWAY GOOD“! Here’s the gist of the cake: sweet juicy plum halves are nestled down in a cake batter with brown sugar, orange zest and lots of vanilla…..sound good? Oh trust me, it is!
As I was reading through the recipe I was sort of thinking to myself, “oooh, you know, I bet the actual cake part of this won’t have a whole lot of flavor…hmmm, maybe I should add something to it…hmmm’“. I thought long and hard about adding a little something extra to the cake batter to give it some oomph; but in the end I decided not to because well, um, its Dorie, and she’s a freaking genius. Good thing I didn’t – the cake part (minus the plums) could’ve stood on its own two feet as far as I’m concerned! The orange zest and vanilla added so much flavor – and it was super moist! Oh-so-yummy!! The plums on top only added to the deliciousness – they got all soft and juicy…mmm. I loved this cake, people – LOVED it. In fact, I think I’d go so far as to say this is my favorite TWD recipe so far!
Its just too bad my pictures are so funky looking. All shadowy and weird. Promise you won’t write my blog off because of the steady stream of bad pictures that are inevitably headed your way….just accept me in spite of my hideous photo-taking skills. Don’t worry, they’ll get better – I promise!
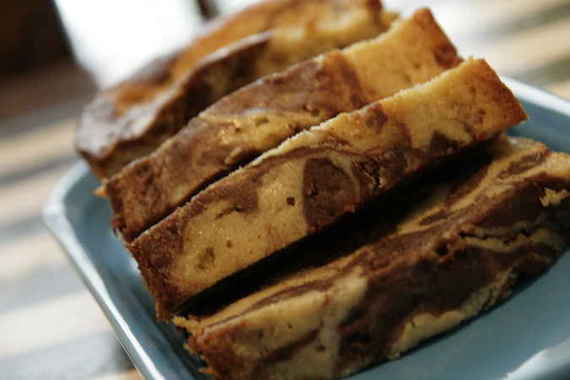
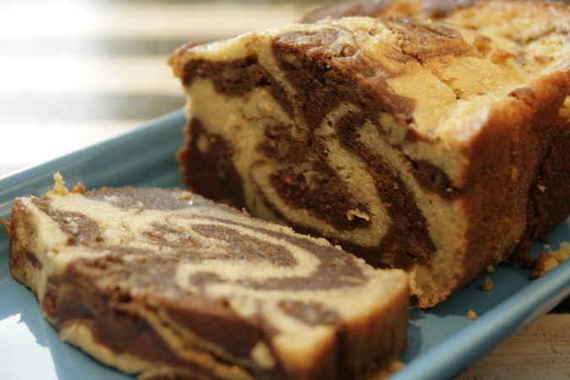
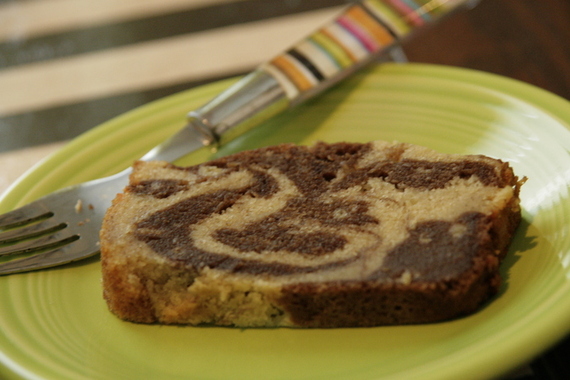
…but this cake is!! Tee hee, there’s my sad attempt at a little humor……ok enough of that! This week’s recipe was the Black and White Banana Loaf, chosen by Ashlee of A Year In The Kitchen, and I gotta say – the more I thought about it, the more I decided this was a fantastic pick! Way to go, Ashlee!! It seems like an awful lot of the picks lately have either been chocolatey and richer than rich or a fruit cobbler or some sort. (Don’t get me wrong, I love rich and I love me some cobbler, but I can only handle so much, right?) This cake..loaf..bread..whatever you want to call it absolutely hit the spot! It was slightly chocolatey, but not knock-your-socks-off-go-into-a-sugar-coma chocolatey – just a hint of chocolate, and it was the perfect amount. And the banana flavor was just strong enough, but not too strong – again, perfect. Both hubby and I (and hopefully my parents – I left half of the loaf with them!) thoroughly enjoyed it – it was the perfect amount of sweetness and really moist!
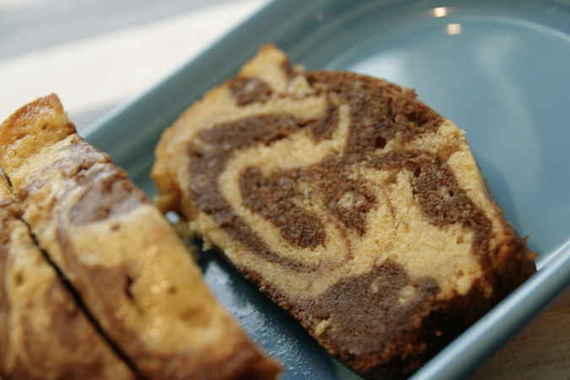
I got lucky and my marbling somehow turned out perfectly (well, in my opinion it did, at least!). Some of the folks at TWD had said their batter was too runny and that there marbling didn’t quite turn out, so naturally I was afraid the same thing would happen to mine, but I guess the baking gods were smiling upon me and my loaf!
If you want the recipe, head over to Ashlee’s blog and check out her take on the Black and White Banana Loaf. Also, check out our TWD site to see all the other fabulous bakers’ versions of this weeks’ recipe! I’m just gonna tell you right now – you want this recipe…its stinking GOOD.
Ok, I admit it – I, Amy-the-blogger, am a CHICKEN. There. I said it – now you know.
Last week, I excitedly went to check the Tuesdays with Dorie webpage to see what this week’s recipe would be….and there it was – “Madam Chow of Madam Chow’s Kitchen has chosen Pecan Honey Sticky Buns…” Oh grrrrrrreat. Brioche – my arch nemesis. I have tried (and failed miserably) making brioche before – Dorie’s Golden Brioche Loaves, as a matter of fact. After hours of mixing, rising, “slapping”, and countless phone calls to my mother (“ok, now am I doing this part right?”) I ended up with a rock-hard, greasy loaf of…well, let’s just say not brioche! So, needless to say, when I saw this week’s pick, I was a little nervous. Ok fine – I was shaking in my BOOTS, I admit it!! Go ahead, judge me all you want…I didn’t make the little Pecan Sticky Devils and I’m not sorry! On top having late night Turandot rehearsals almost every night and opening Saturday (which went awesome, by the way!! My solo went perfectly! Phew!), which didn’t leave any time for much else this week, I wasn’t prepared to stare failure in the face again so soon. So, I opted for the Almost Fudge Gateau instead.
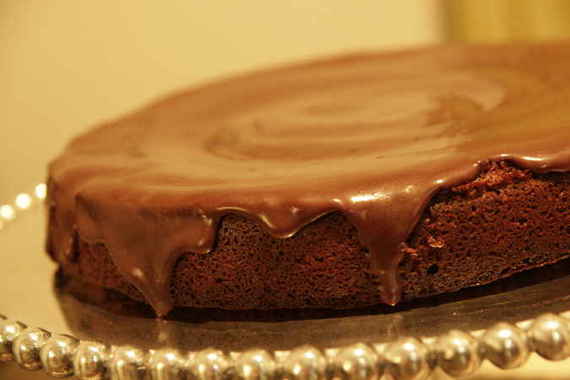
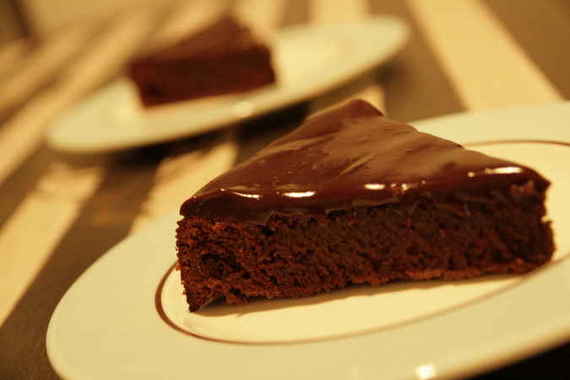
Lemme tell ya, this is one tasty little “cake”. I was shocked at how dense and fudgey it was, since it calls for beaten egg whites, which I thought would’ve made it light and fluffy. But, the title describes it perfectly – almost fudge! Not surprisingly, that’s why I chose the recipe from all of the past TWD recipes – anything with “almost fudge” in the title will win me over automatically every time! I will say, though – use a chocolate that you really, really enjoy, because the chocolate is the most predominant flavor in the cake. I used a pretty dark chocolate, so my cake was a little on the bitter side, but still very tasty. I might try it with a milk chocolate next time, just to see how it turns out.
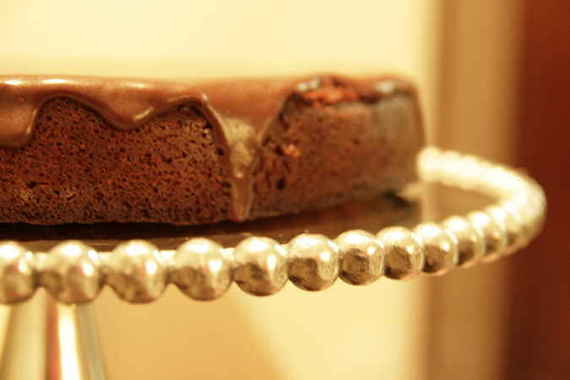
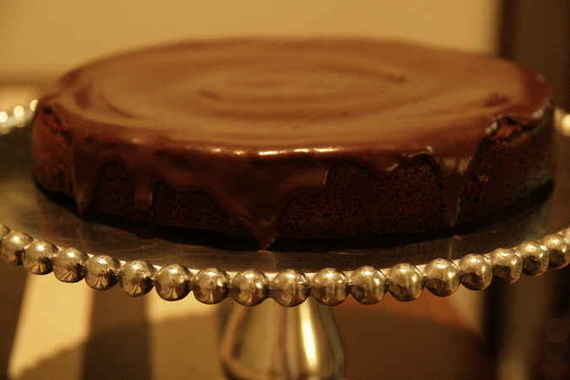
And definitely go with the optional glaze!! YUM! I can’t imagine this cake without the chocolate ganache on top of it! Ok, ok, so it is a bit of a chocolate overload, but hey, its delicious and its worth it!
Almost-Fudge Gâteau
5 large eggs
9 ounces bittersweet chocolate, coarsely chopped
1 cup of sugar
5 tablespoons unsalted butter, cut into chunks
2 tablespoons coffee or water
1/3 cup all-purpose flour
Pinch of salt
For the Glaze (optional)
4 ounces bittersweet chocolate, coarsely chopped
½ cup heavy cream
2 teaspoons light corn syrup
Getting Ready:
Center a rack in the oven and preheat the oven to 350 degrees F. Butter a 9-inch springform pan, line the bottom with parchment paper, butter the paper, dust the inside of the pan with flour and tap out the excess. Place the pan on a baking sheet lined with parchment or a silicone mat.
Separate the eggs, putting the whites in a mixer bowl or other large bowl and the yolks in a small bowl.
Set a heatproof bowl over a saucepan of simmering water and add the chocolate, sugar butter and coffee. Stir occasionally until the chocolate and butter are melted; the sugar may still be grainy, and that’s fine. Transfer the bowl to the counter and let the mixture sit for 3 minutes.
Using a rubber spatula, stir in the yolks one by one, then fold in the flour.
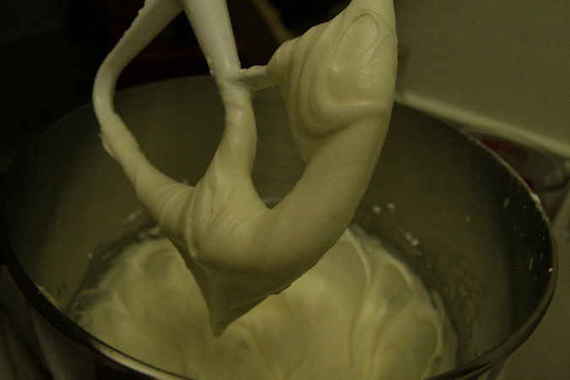
Working with the whisk attachment of the mixer or a hand mixer, beat the egg whites with the pinch of salt until they hold firm, but glossy peaks. Using the spatula, stir about one quarter of the beaten whites into the batter, then gently fold in the rest. Scrape the butter into the pan and jiggle the pan from side to side a couple of times to even the batter.
Bake for 35 to 45 minutes, or until the cake has risen evenly (it might rise around the edges and you’ll think it’s done, but give it a few minutes more, and the center will puff too) and the top has firmed (it will probably be cracked) and doesn’t shimmy when tapped; a thin knife inserted into the center should come out just slightly streaked with chocolate. Transfer the pan to a cooling rack and let the cake rest for 5 to 10 minutes.
Run a blunt knife gently around the edges of the cake and remove the sides of the pan. Carefully turn the cake over onto a rack and remove the pan bottom and the parchment paper. Invert the cake onto another rack and cool to room temperature right side up. As the cake cools, it may sink.
To Make the Optional Glaze:
First, turn the cooled cake over onto another rack so you’ll be glazing the flat bottom, and place the rack over a baking sheet lined with parchment or wax paper to catch any drips.
Put the chocolate in a small heatproof bowl.
Melt the chocolate over a pan of simmering water or in a microwave oven – the chocolate should be just melted and only warm, not hot. Meanwhile, bring the cream to a boil in a small sauce pan. Pour the hot cream over the chocolate and stir very gently with a rubber spatula until the mixture is smooth and shiny. Stir in the corn syrup.
Pour the glaze over the cake and smooth the top with a long metal icing spatula. Don’t worry if the glaze drips unevenly down the sides of the cake – it will just add to its charms. Allow the glaze to set at room temperature or, if you’re impatient, slip the cake into the refrigerator for about 20 minutes. If the glaze dulls in the fridge, just give it a little gentle heat from a hairdryer.
If you would like to visit the blogs of the TWD members who aren’t big whiney-baby-scaredy-pants chickens and check out their versions of Pecan Honey Sticky Buns, go here.
P.S. Don’t judge me.
Um….YUM. That’s pretty much all there is to say about these little cakes. Molten, gooey, chocolaty goodness oozing from the center of a dense, warm chocolate cake. (Ok, now do me a favor and wipe the drool off of your mouth.) These Gooey Chocolate Cakes have quickly become my favorite “I’m-craving-something-warm-and-chocolatey-and-I-need-it-NOW” desserts (They surpassed brownies and chocolate chip cookies long ago). When you cut into them, the warm gooey filling oozes out all over your plate. Its almost like sitting down and eating a bowl of raw cake batter (don’t deny it – you know you’ve always wanted to do it)….except so much better! And the fact that they only take about 13 minutes total to make…well, that would make any chocolate-craving-woman-on-the-edge jump for joy!

So, we’ve covered the fact that these cakes will satisfy even the most severe chocolate cravings, but they can also serve as a fancy “show off-y” dessert when you’re having company. I served these when I recently had some friends over for a nice sit-down meal and they were a HUGE hit. I’m pretty sure my guests were on the verge of licking their plates clean.

Gooey Chocolate Cakes
1/3 cup all-purpose flour
3 tablespoons unsweetened cocoa powder
¼ teaspoon salt
4 ounces coarsely chopped milk chocolate,
1 stick (8 tablespoons) unsalted butter, cut into 8 pieces
2 large eggs, at room temperature
1 large egg yolk, at room temperature
6 tablespoons of sugar
Getting ready: Center a rack in the oven and preheat the oven to 400 degrees F. butter (or spray – it’s easier) 6 cups of a regular-size muffin pan, preferably a disposable aluminum foil pan, dust the insides with flour and tap out the excess. Put the muffin pan on a baking sheet. (I discovered that there is just enough batter to perfectly fill 4 ramekins)
Sift the flour, cocoa and salt together.
Set a heatproof bowl over a saucepan of gently simmering water, put the coarsely chopped chocolate and the butter in the bowl and stir occasionally over the simmering water just until they are melted – you don’t want them to get so hot that the butter separates. Remove the bowl from the pan of water.
In a large bowl, whisk the eggs and yolk until homogeneous. Add the sugar and whisk until well blended, about 2 minutes. Add the dry ingredients and, still using the whisk, stir (don’t beat) them into the eggs. Little by little, and using a light hand, stir in the melted chocolate and butter. Divide the batter evenly among the muffin cups.
Bake the cakes for 13 minutes. (the first time I made these, 13 minutes was too long – they came out totally firm in the center. Now I bake them at 11 minutes and they’re perfectly runny and gooey every time.) Transfer them, still on the baking sheet, to a rack to cool for 3 minutes. (There is no way to test that these cakes are properly baked, because the inside remains liquid.)
Line a cutting board with a silicone baking mat or parchment or wax paper, and, after the 3-minute rest, unmold the cakes onto the board. Use a wide metal spatula to lift the cakes onto dessert plates.
Recipe source: Dorie Greenspan, Baking From My Home to Yours
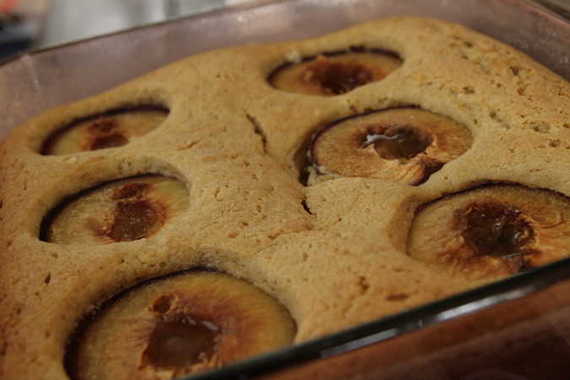
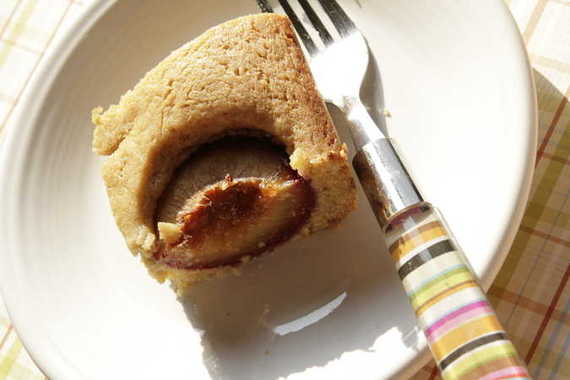
So, when I found out that this week’s TWD recipe (chosen by Caitlin of Engineer Baker ) was Fluted Polenta and Ricotta Cake, I was like, “what the heck is that?” My buddy Jessica and I were a little wary of making this cake for a couple of reasons: 1.) we’re not big fans of figs, and 2.) polenta?……in a dessert??? But after some encouragement from both of our moms and the decision to use another type of fruit, we decided to go for it! Try everything once, right? And plus- I mean, come on – if Dorie says its good, then you can bet it’ll end up in my kitchen!
You know, this cake was actually really tasty! I decided to use dried California apricots instead of dried figs, and they really went well with the polenta. I also forgot my lemon zest (one of those recurring “oops” moments that happen so frequently in my kitchen), but the tartness of the apricots made up for it nicely. My mom and dad happened to be visiting just as I had finished the cake, so I decided to use them as “guinea pigs”. They really loved it! Especially my mom (I ended up sending the whole rest of the cake home with her she enjoyed it so much!).
A lot of the TWD girls commented on there being almost too much sweetness to the finished product, so I only used 1/2 a cup as opposed to the 3/4 cup it calls for and it turned out perfectly sweet. All in all, this is a great recipe! I’m so glad I didn’t “wuss out” this week and skip it just because it sounded different. I’m proud of myself for trying something new and I think now my mom has a new favorite! Thanks Caitlin, for pushing me to try something new and “different”!
Fluted Polenta and Ricotta Cake
About 16 moist, plump dried Mission or Kadota figs, stemmed (I used dried apricots)
1 c. medium-grain polenta or yellow cornmeal
1/2 c. all-purpose flour
1 stick unsalted butter, melted and cooled
1 tsp baking powder
1 c. ricotta
1/3 c. tepid water
3/4 c. sugar (I only used 1/2 c.)
3/4 c. honey (if you’re a real honey lover, use a full-flavored honey such as chestnut, pine, or buckwheat)
Grated zest of 1 lemon
2 large eggs
Getting Ready: Center a rack in the oven and preheat the oven to 325 degrees F. Butter a 10 ½-inch fluted tart pan with a removable bottom and put it on a baking sheet lined with parchment or a silicone mat.
Check that the figs are, indeed, moist and plump. If they are the least bit hard, toss them into a small pan of boiling water and steep for a minute, then drain and pat dry. If the figs are large (bigger than a bite), snip them in half.
Whisk the polenta, flour, baking powder, and salt together. Working with a stand mixer fitted with the whisk attachment or with a hand mixer in a large bowl, beat the ricotta and water together on low speed until very smooth. With the mixer at medium speed, add the sugar, honey, and lemon zest and beat until light. Beat in the melted butter, then add the eggs one at a time, beating until the mixture is smooth. Reduce the mixer speed to low and add the dry ingredients, mixing only until they are fully incorporated. You’ll have a sleek, smooth, pourable batter.
Pour about one third of the batter into the pan and scatter over the figs. Pour in the rest of the batter, smooth the top with a rubber spatula, if necessary, and dot the batter evenly with the chilled bits of butter.
Bake for 35 to 40 minutes, or until a thin knife inserted into the center of the cake comes out clean. The cake should be honey brown and pulling away just a little from the sides of the panm, and the butter will have left light-colored circles in the top. Transfer the cake to a rack and remove the sides of the pan after about 5 minutes. Cool to warm, or cool completely.
You know, “oops” happens. Life would be pretty boring if there were no “oopsies” every now and then. Me, I think I’m probably the Ambassador of “oops”, when it comes to being in my kitchen (except when I have an “oops” moment, its not so much a quaint, lady-like “oops” that comes out of my mouth, so much as a steady stream of expletives, accompanied by flying pots and pans and poor Joel running for cover). I think, probably my biggest “oops” moment was the time I decided to try brioche. Yeah, BIG “oops” there (you know the saying, “when it rains, it pours”?). Now, slowly but surely, I’m getting to the point where “oops” moments are happening less and less frequently for me – I guess that means I’m improving. But every now and then, something will go wrong here and there. I’m only human, right?
So, this week’s Tuesdays With Dorie recipe was Bill’s Big Carrot Cake, chosen by Amanda of Slow Like Honey. Well, to be totally honest, I’m not a big fan of carrot cake; its encompasses everything I don’t particularly care for in a dessert- raisins…coconut…nuts. Don’t get me wrong, I don’t mind nuts in a dessert…but coconut, raisins and nuts – well that’s just too much for me to handle! But who am I to turn down a dessert challenge? Especially when its my second TWD recipe to make….I couldn’t have possibly chickened out on carrot cake! I decided since I wasn’t particularly fond of it, I would just send it to work with Joel the next day. Genius.
Now I know what you’re thinking – “if you don’t like raisins and coconut, why didn’t you just leave them out?” Because Dorie said to put them in there to begin with, that’s why! I don’t care how much I dislike something – if its good enough for Dorie, by gosh, its good enough for me! Obviously, she knows what she’s doing, and I (obviously) don’t. Therefore, if she says it tastes good, that’s how I’m going to make it. Plus, I’m a purist – I like to follow recipes pretty darn closely, and if it tastes bad, well, then I’ll know for next time. So in went the raisins, coconut and walnuts…….
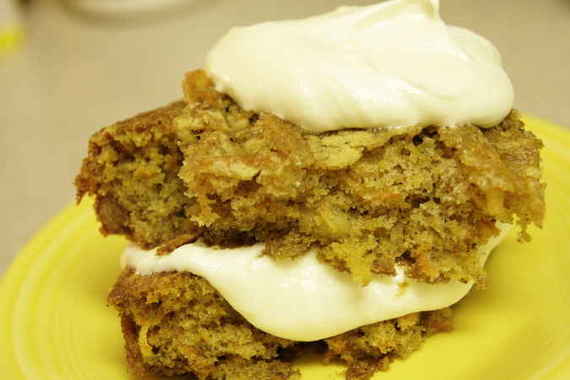
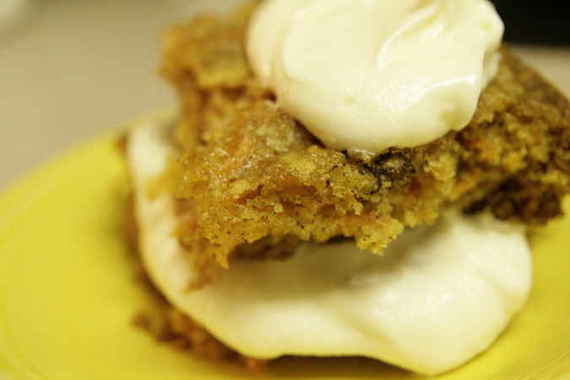
This cake was super easy to make. Throw the ingredients in a bowl, spread it in pans, and you’re done! And can we talk about that cream cheese frosting? – YUM. I think I ate half of it before the cakes were even finished baking!
My house smelled heavenly as the cakes baked away in the oven. After taking them out and letting them cool, it was time to put the cake together! This is where the “oops” comes into play….
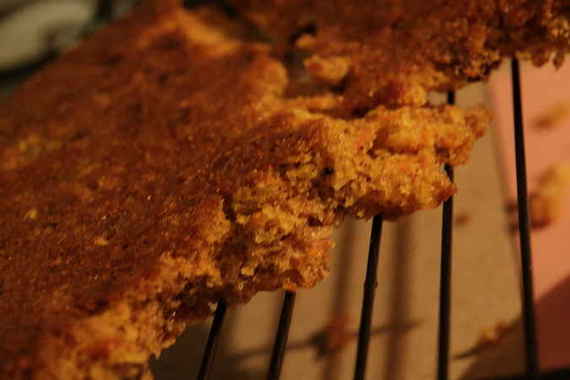
The little buggers STUCK! As I inverted the pans onto the plate, something felt wrong. Sure enough, there, on the plate, was half of my cake….the rest was still stuck in the pan. “No big deal”, I figured….I’d just discard that unfortunate layer and just use the other two. Um…..yeah….another “oops”. Long story short, all the cakes stuck….I ended up with a huge mess, and large “chunks” of carrot cake to work with. So, instead of getting mad and throwing it all away, I decided to still take pictures of it. And hey, even if it didn’t look good, we could still have a taste, right? Joel and I each had a large “chunk” of cake slathered with cream cheese frosting (by far, the best part), and I have to say, this cake was pretty yummy, despite my issues with raisins, coconut and nuts.
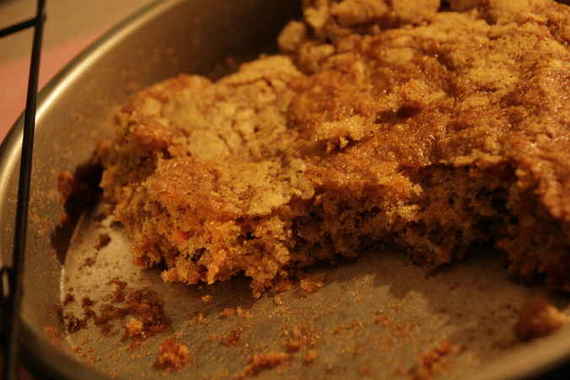
So, here they are…my wonderful pictures of carrot cake “chunks”. Please don’t disown me, TWD members….have pity on a humble “oops”-prone baker.
Bill’s Big Carrot Cake
Baking: From My Home to Yours by Dorie Greenspan
Ingredients:
For the cake:
2 cups all purpose flour
2 teaspoons baking powder
2 teaspoons baking soda
2 teaspoons ground cinnamon
¾ teaspoon salt
3 cups grated carrots (about 9 carrots, you can grate them in food processor fitted w/ a shredding a blade or use a box grater)
1 cup coarsely chopped walnuts or pecans
1 cup shredded coconut (sweetened or unsweetened)
½ cup moist, plump raisins (dark or golden) or dried cranberries
2 cups sugar
1 cup canola oil
4 large eggs
For the frosting:
8 ounces cream cheese, room temperature
1 stick ( 8 tablespoons) unsalted butter, at room temperature
1 pound or 3 and ¾ cups confectioners’ sugar, sifted
1 tablespoon fresh lemon juice or ½ teaspoon pure lemon extract
½ cup shredded coconut (optional)
Finely chopped toasted nuts and/or toasted shredded coconut (optional)
Getting ready:
Position the racks to divide the oven into thirds and preheat the oven to 325 degrees Fahrenheit. Butter three 9-x-2-inch round cake pans, flour the insides, and tap out the excess. Put the two pans on one baking sheet and one on another.
To make the cake:
Whisk the flour, baking powder, baking soda, cinnamon and salt. In another bowl, stir together the carrots, chopped nuts, coconut, and raisins.
Working with a stand mixer, preferably fitted with a paddle attachment, or with a hand mixer in a large bowl, beat the sugar and oil together on a medium speed until smooth. Add the eggs one by one and continue to beat until the batter is even smoother. Reduce the speed to low and add the flour mixture, mixing only until the dry ingredients disappear. Gently mix the chunky ingredients. Divide the batter among the baking pans.
Bake for 40-50 minutes, rotating the pans from top to bottom and front to back at the midway point, until a thin knife inserted into the centers comes out clean. The cakes will have just started to come away from the sides of the pans. Transfer the cakes to cooling racks and cool for about 5 minutes, then run a knife around the sides of the cakes and unmold them. Invert and cool to room temperature right side up.
To make the frosting:
Working with a stand mixer, preferably fitted with a paddle attachment or with a hand mixer in a large bowl, beat the cream cheese and butter together until smooth and creamy. Gradually add the sugar and continue to beat until the frosting is velvety smooth. Beat in the lemon juice or extract.
If you’d like coconut in the filling, scoop about half of the frosting and stir the coconut into this position.
To assemble the cake:
Put one layer top side up on a cardboard cake round or a cake plate protected by strips of wax or parchment paper. If you added the coconut to the frosting, use half of the coconut frosting to generously cover the first layer (or generously cover with plain frosting). Use an offset spatula or a spoon to smooth the frosting all the way to the edges of the layer. Top with the second layer, this time placing the cake stop side down, and frost with the remainder of the coconut frosting or plain frosting. Top with the last layer, right side up, and frost the top- and the sides- of the cake. Finish the top with swirls of frosting. If you want to top the cake with toasted nuts or coconut, sprinkle them on now while the frosting is soft.
Refrigerate the cake for 30 minutes, just to set the frosting before serving.
Serving:
This cake can be served as soon as the frosting is set. It can also wait, at room temperature and covered with a cake keeper overnight. The cake is best served in thick slices at room temperature and while it’s good plain, it’s even better with vanilla ice cream or some lemon curd.
The other night, hubby and I happened to be browsing through the kitchen gadget section at Bed, Bath, and Beyond (kitchen gadgets are a small obsession of mine, I admit…). I’d had my eye on a fancy microplane, but for some reason kept putting it back on the shelf saying to myself, “you don’t need that; just keep using the cheap, flimsy grater you have at home.” But something kept drawing me back to the microplane. Maybe it was its long, sleek shape; or perhaps the easy grip handle; or possibly the tiny little holes that grate so finely so that you don’t get large bits of lemon peel in your mouth, ala Amy’s old cheap grater. Whatever it was, I decided I owed it to myself to spend a mere thirteen dollars on this delightful gadget. Needless to say, I tested it out as soon as I got it home.
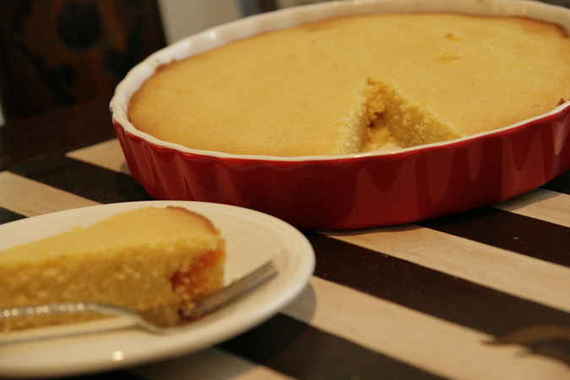
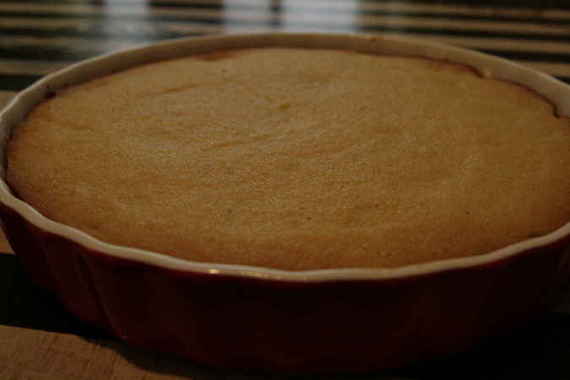
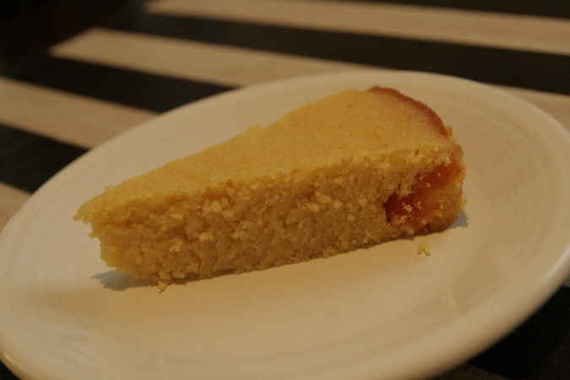
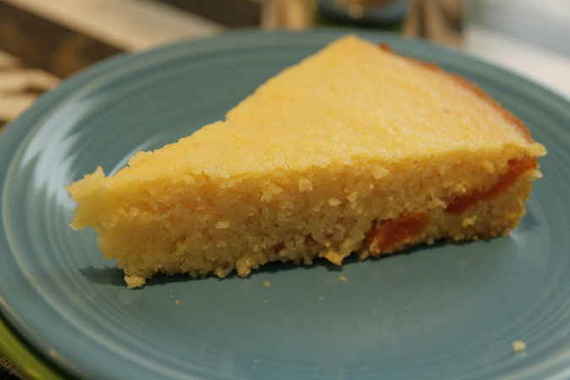
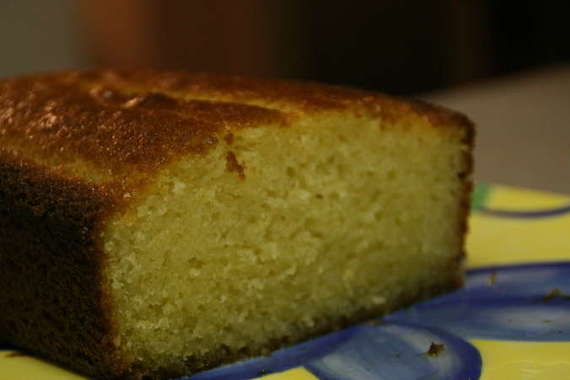
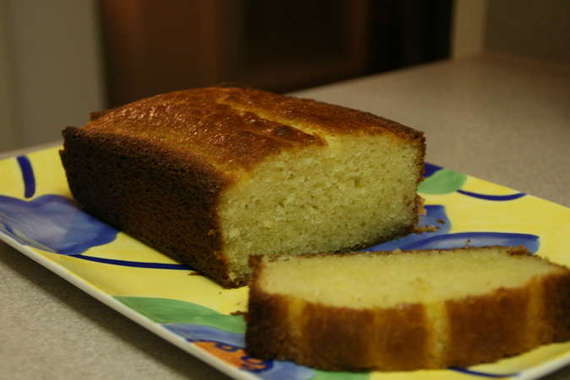
It wasn’t long after I got my magical microplane that Joelen of Joelen’s Culinary Adventures announced the “Tasty Tools Challenge Blogging Event”; and the tool of choice was the microplane!! Woo hoo! As a new blogger (and a fairly new cook), I couldn’t wait to jump in and be a part of this challenge. I was a little overzealous and made two dishes – Lemon Cake and Fruit Salad with Blood Orange syrup. However, I’m only posting the Lemon Cake because the fruit salad pictures turned out horrible (and let’s face it, who wants to read about a recipe with no picture?!).
This lemon cake is to die for! I made it the first time for my in-laws and it was a huge hit. It was so good, I told my mother all about it and she requested I serve it for her birthday dinner! Its pretty much made its way around to most of my family and everyone goes nuts for it. The tart, lemony glaze soaks into the warm cake, making it spongy with a burst of sweet lemon flavor. Its a fantastic way to end a meal, but its also great with your morning coffee…..or for a midday snack…tee hee. Anyway, I thoroughly enjoyed using my brand new microplane for this challenge (it really makes zesting SO much easier!) and I look forward to the next Tasty Tools Challenge! Hope you enjoy the lemon cake!
Lemon Cake
-adapted from Barefoot Contessa at Home
*The original recipe calls for yogurt, but I opted for Mascarpone cheese to add a little richness.
1 1/2 cups all-purpose flour
2 teaspoons baking powder
1/2 teaspoon salt
1 cup (8 oz container) Mascarpone cheese at room temperature
1cup sugar
3 extra-large eggs
2 teaspoons grated lemon zest (2 lemons)
1/2 teaspoon pure vanilla extract
1/2 cup vegetable oil
For the glaze:
1/2 to 1 cup confectioners’ sugar
2 tablespoons freshly squeezed lemon juice
Preheat the oven to 350 degrees F. Grease an 8 1/2 by 4 1/4 by 2 1/2-inch loaf pan.
Sift together the flour, baking powder, and salt into 1 bowl. In another bowl, mix together the mascarpone cheese and sugar with a hand mixer; then add the eggs, lemon zest, and vanilla. Slowly whisk the dry ingredients into the wet ingredients. With a rubber spatula, fold the vegetable oil into the batter, making sure it’s all incorporated. Pour the batter into the prepared pan and bake for about 45- 50 minutes, or until a cake tester placed in the center of the loaf comes out clean.
For the glaze, combine the confectioners’ sugar and lemon juice and pour over the cake while still warm.


