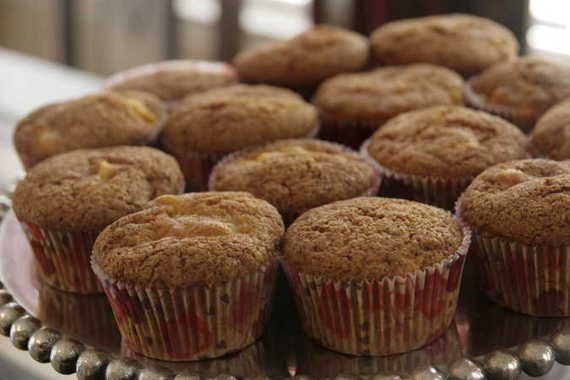
Yes, I know my use of an exclamation mark in the title is probably a little over-the-top for muffins, but it seems like lately, I’m in a constant state of excitement, so I figure I get a free pass. Why am I so extra perky, you might ask? Well, for a couple of reasons – #1.) As I type this, there are two men installing a beautiful set of French doors in my dining room where there used to be a big, ugly, non-functioning behemoth of a sliding door before. That excites me. Big time. And #2.) it has finally stopped raining long enough for me to arrange my patio furniture and get the pool swim-ready. I now have a beautiful, tropical (ish) backyard getaway, perfect for al fresco dining with my hubby, followed by a long, leisurely dip in the pool – summer is here!! And finally, #3.) This week is the last week I have to teach voice lessons – after Thursday, I’m done, baby! Woo hoo!! So, now it’s probably a little easier for you to understand my over-excitedness for all things lately – including mango muffins.
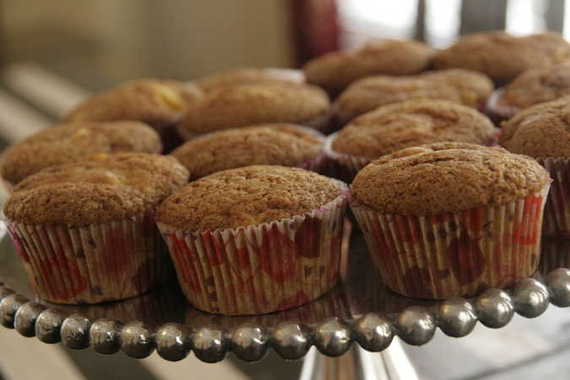
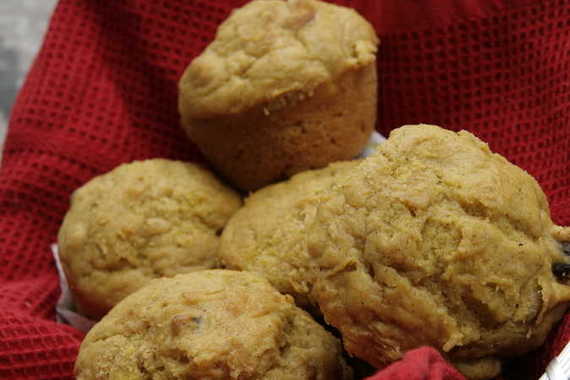
This week’s recipe is Fresh Mango Bread, chosen by Kelly of Baking With the Boys. This is the second time I’ve made Dorie’s mango bread, so I decided to make muffins this time around. Plus, muffins are easier to just grab and eat at a brunch (I served them at Mother’s Day Brunch). I was surprised at the amount of muffins I got out of one recipe – at least 20 – there may have been more, I can’t remember. Everybody really enjoyed these – in fact, everyone took a few home for later, which I always count as a compliment! Besides cutting the mangos being a giant pain in the butt, I always enjoy making this recipe because everyone seems to really enjoy it. A great summer recipe!
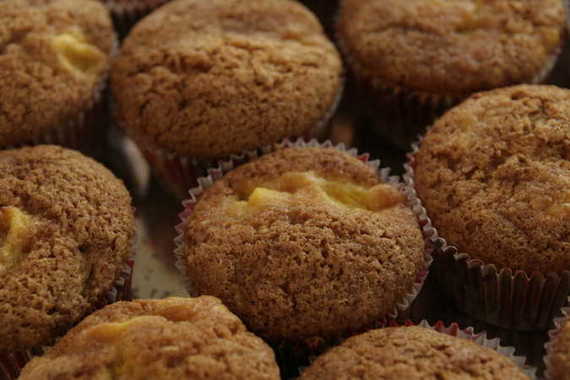
If you’d like the recipe for these little beauties, head on over to Kelly’s blog – she’ll post the recipe for you! Happy summer!
Some of you may remember my post “For Mommy” from last year – well, this is part 2. Mother’s Day brunch a year later. This year for Mother’s Day, I had the whole family over for brunch at my house. It was such a treat to have everyone over – I spent the whole day before baking all kinds of goodies and had my house fixed up just like I wanted it. This house is perfect for entertaining, and I do it as often as I can. There was tons of great food on the menu – my mother brought her breakfast casserole (eggs, sausage, croutons and lots of other good stuff), Nana brought a big fruit salad with a marshmallow cream/sour cream topping (we call it fruit gravy), my sister brought her Bruschetta cups (phyllo shells filled with tomato, basil, onion, mozzarella and mayo- really good!), and I fixed mango muffins, a lemon tart as part of my mom’s gift, mimosas, coffee, and from-scratch cinnamon rolls. Yes, that’s right- I, Amy-Scaredy-Pants, put on my Texas A&M apron, rolled up my sleeves and overcame my well-known fear of yeast. This is big, people.
(And sorry – the pictures are nothing short of disastrous. I forgot to take pictures until I realized too late that there was no natural light left….)
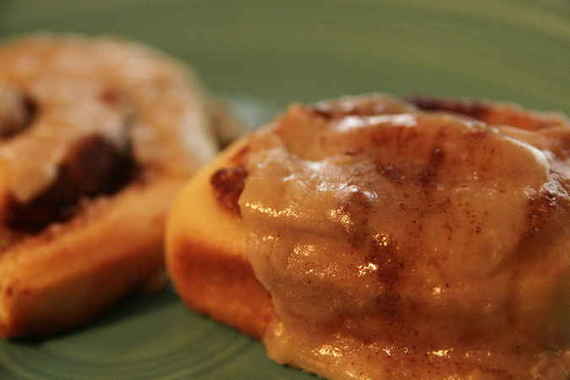
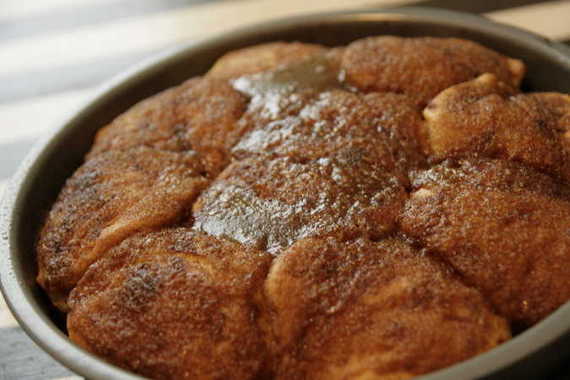
For too long now, the Pioneer Woman‘s Cinnamon Rolls have taunted me, made me drool all over myself, and made me ashamed that I was scared to attempt something so beautiful. I decided enough was enough – it was time to put my fears aside and attempt the unthinkable – yeast. What better dish to serve at brunch? Warm, gooey, chewy cinnamon rolls. I imagined my whole family taking a bite and instantly getting down on their knees, proclaiming me the greatest cook (greatest person, really) of all time. Joel would want to marry me all over again; my Daddy, brother-in-law and Grandaddy would declare I was the best wife a young man could ever hope for; and my mother, sister and Nana would all secretly wish they were as gifted as I in the arts of home-making. Yes, it could happen. It would happen. And all because of these cinnamon rolls.
Ok, so that stuff probably wouldn’t happen. But these were excellent cinnamon rolls. And honestly, they weren’t hard at all. I just followed the directions as closely as possible, and poof – yummy cinnamon rolls! The icing is really what makes these so darned tasty. That was by far my favorite part. I will most definitely be making these again…and again….and again. So thank you, Pioneer Woman, for helping me overcome my fear of yeast. Who knows what else I’ll try now? Do I dare attempt Brioche again?……………….um, maybe next year.
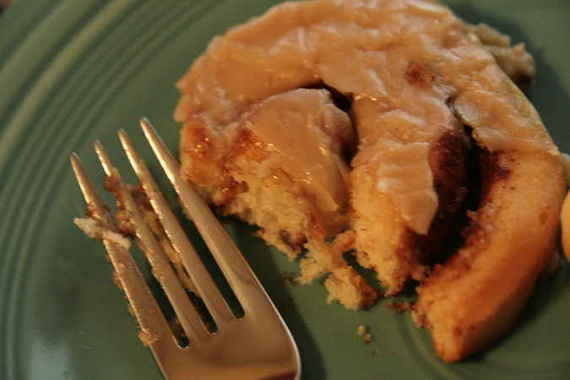
(Sorry for the blurry picture)
The Pioneer Woman’s Cinnamon Rolls
-I used half of this recipe and got about 4 pans of rolls
For the Dough:
4 cups whole milk
1 cup vegetable oil
1 cup sugar
2 packets active dry yeast
8 cups all-purpose flour
1 cup flour
1 teaspoon baking powder
1 teaspoon baking soda
1 tablespoon salt
1 1/2-2 cups melted butter
1 cup sugar
generous sprinkling cinnamon
For the Icing:
7 tablespoons melted butter
2 lbs powdered sugar
2 teaspoons maple flavoring
1/2 cup milk
1/4 cup melted butter
1/4 cup brewed coffee
1/8 teaspoon salt
Mix milk, vegetable oil, and sugar in a pan (large soup-pot type). “Scald” the mixture (heat until just before the boiling point.) Turn off heat and leave to cool 45 minutes to 1 hour.
When the mixture is lukewarm to warm, but NOT hot, sprinkle in yeast. Let this sit for a minute so the yeast gets all warm and moist and happy. Then add 8 cups of all-purpose flour. Stir mixture together. Cover and let sit for at least an hour.
Now add 1 more cup of flour, baking powder, baking soda, and salt. Stir mixture together. At this point, you could cover the dough and put it in the fridge until you need it—overnight or even a day or two, if necessary. Just keep your eye on it and if it starts to splurge out of the pan, just punch it down. Or, of course, you can just go ahead and make the rolls.
Sprinkle surface generously with flour. Take half the dough and form a rough rectangle. Then roll the dough thin, maintaining a general rectangular shape. Rectangle should increase in both width and length as you roll it out.
Now drizzle melted butter over the dough. Don’t be shy; lay it on thick, baby. Sprinkle sugar over the butter, followed by a generous sprinkling of cinnamon.
Starting at the opposite end, begin rolling the dough in a neat line toward you. Keep the roll relatively tight as you go. Some of the butter/sugar/cinnamon mixture may ooze out toward the end, but that’s no big deal. Next, pinch the seam to the roll to seal it.
Spread 1 tablespoon of melted butter in seven round, foil cake or pie pans. Then begin cutting rolls approximately 3/4 to 1 inch thick and laying them in the buttered pans. Repeat this process with the other half of the dough. This recipe makes approximately seven pans of rolls (56 rolls)
Let the rolls sit for 20 to 30 minutes to rise, then bake at 400 degrees until light golden brown, about 15 to 18 minutes.
While the rolls are in the oven, make the deliciously sinful maple frosting. To a mixing bowl, add powdered sugar, maple flavoring, 1/2 cup milk, 1/4 cup melted butter, brewed coffee, and salt. Stir until mixture is thick but pourable. Taste and adjust as needed.
Generously drizzle frosting over warm rolls after you pull them out of the oven. And take a walk on the wild side. Don’t be afraid to drown them puppies. Be sure to get frosting around the perimeter of the pan, too, so the icing will coat the outside of the rolls.
Make these for your mom sometime, trust me, she’ll thank you!
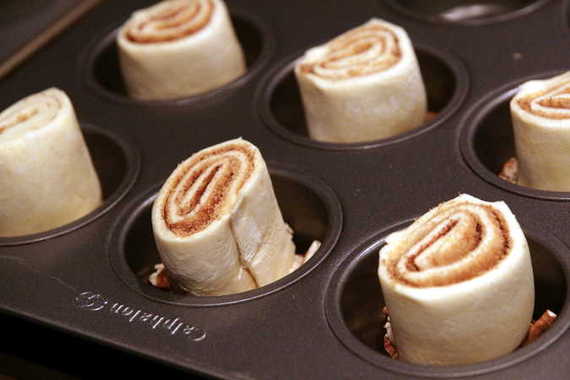
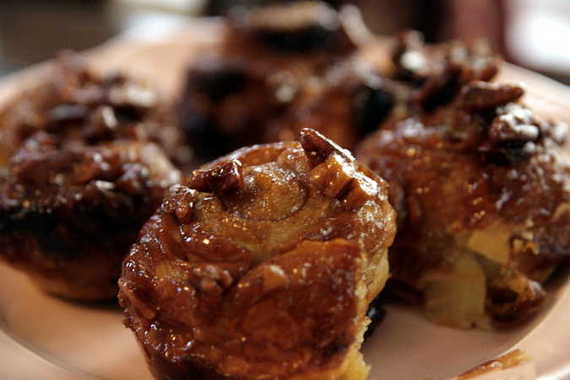
When Jessica was staying with us for the weekend, I wanted to have something really good for breakfast. So, naturally, the first person I turned to was Ina Garten. I love this woman. Especially her new cookbook – Back to Basics. She has a great recipe in her new book for Easy Sticky Buns that uses frozen puff pastry – perfect!
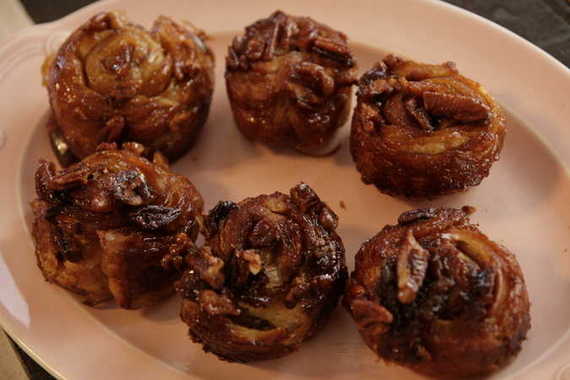
These were so good and SO easy – they came together in about 40 minutes total! That way I didn’t have to get up at the crack of dawn….eeeeexcellent.
Easy Sticky Buns
-Barefoot Contessa – Back to Basics
12 tablespoons (1 1/2 sticks) unsalted butter, at room temperature
1/3 cup light brown sugar, lightly packed
1/2 cup pecans, chopped in very large pieces
1 package (17.3-ounces/ 2-sheets) frozen puff pastry, defrosted
For the filling:
2 tablespoons unsalted butter, melted and cooled
2/3 cup light brown sugar, lightly packed
3 teaspoons ground cinnamon
1 cup raisins (I left them out – yucky!)
Preheat the oven to 400 degrees F. Place a 12-cup standard muffin tin on a sheet pan lined with parchment paper.
In the bowl of an electric mixer fitted with the paddle attachment, combine the 12 tablespoons butter and 1/3 cup brown sugar. Place 1 rounded tablespoon of the mixture in each of the 12 muffin cups. Distribute the pecans evenly among the 12 muffin cups on top of the butter and sugar mixture.
Lightly flour a wooden board or stone surface. Unfold 1 sheet of puff pastry with the folds going left to right. Brush the whole sheet with the melted butter. Leaving a 1-inch border on the puff pastry, sprinkle each sheet with 1/3 cup of the brown sugar, 1 1/2 teaspoons of the cinnamon, and 1/2 cup of the raisins. Starting with the end nearest you, roll the pastry up snugly like a jelly roll around the filling, finishing the roll with the seam side down. Trim the ends of the roll about 1/2-inch and discard. Slice the roll in 6 equal pieces, each about 1 1/2 inches wide. Place each piece, spiral side up, in 6 of the muffin cups. Repeat with the second sheet of puff pastry to make 12 sticky buns.
Bake for 30 minutes, until the sticky buns are golden to dark brown on top and firm to the touch. Be careful – they’re hot! Allow to cool for 5 minutes only, invert the buns onto the parchment paper (ease the filling and pecans out onto the buns with a spoon) and cool completely.
Give these a try this weekend…say, Valentine’s morning, maybe? A little breakfast in bed, perhaps? Hmmm?? 🙂 Enjoy!
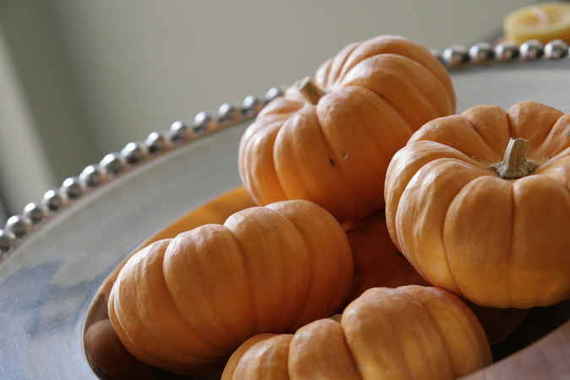
Before I go into my TWD post, as originally planned, I thought I’d take a minute or so to get everybody in the proper “pumpkin-y” mood. I love pumpkin – every year around the middle of September, I start drooling over all the pumpkin recipes I’ve yet to make – there’s a lot of them out there, but hey, all I got is time, people! 🙂 In fact, I’ve got my eye on a sinfully delicious looking pumpkin cheesecake recipe that’s just calling my name. Sure, there is lots of new, uncharted territory when it comes to pumpkin recipes; but what about the old stand-by ones? The ones you can’t help but make every single year as soon as there’s the slightest hint of a nip in the air? (except not really in Texas…..there isn’t an actual “nip” in the air until about Thanksgiving, and you’re lucky if you even get one then!) The ones like the pumpkin muffins my mom would make for me in the Fall when I would come home from college for the weekend. Ahhh, pumpkin muffins – one of my great loves. Moist, fluffy, full of spice,packed with pumpkin and dripping with melty butter….does it get any better? I think not! Which is why I was so very excited when Kelly of Sounding My Barbaric Gulp (interesting blog name, no?) chose Pumpkin Muffins for this week’s TWD recipe. God love her!
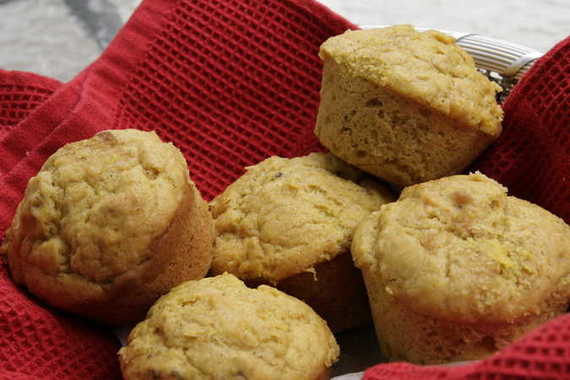
Usually when I make pumpkin muffins, I like to use either my mother’s recipe or one from allrecipes.com (Downeast Maine Pumpkin Bread), but I was more than happy to give Dorie’s recipe a shot – I mean, let’s face it, everything I have ever tried of hers’ has been a complete success (unless I did something to screw it up). And really, her recipe was almost exactly the same as my mother’s…cinnamon, nutmeg, pumpkin puree, sugar…all the usual ingredients. The only big difference is that she adds walnuts (which I love) and raisins (which I do not love and gladly omitted) to the batter and tops them with sunflower seeds (which I didn’t have so I left out). So, by the time I finished omitting most of Dorie’s different-from-everybody-else’s ingredients, these were almost identical to the one’s I love so much. Perfect!
Now, its just not Fall until you’ve made pumpkin muffins, so if you haven’t and you’d like the recipe, just head on over to Kelly’s blog and then make these as soon as possible! Otherwise you’re only cheating yourself out of the complete “Fall Experience”.
We’re still in the never-ending process of moving into our house and getting everything unpacked, decorated, etc, so I don’t have a whole lot of time to blog, but here’s a little mini-post, just to keep things moving around here!
A few weeks ago I was making breakfast for dinner (one of my favorites!) and wanted something sweet (other than pancakes or waffles) thrown in there with the bacon, eggs, etc. but it needed to be super quick! Luckily I remembered one of my sister’s quick and easy recipes – a coffee cake made out of refrigerated biscuits that bakes in no time! Perfect!
Sweetly Simple Coffee Cake
2 10-oz tubes refrigerated biscuits
1/4 c margarine, melted
1/3 c brown sugar, packed
1 1/2 tsp cinnamon
1/4 c chopped nuts
Arrange biscuits very close together in a 9″ round cake pan. Mix together margarine, brown sugar, cinnamon, and nuts; spread over biscuits. Bake at 350 degrees for 20 minutes.
This is perfect for mornings when you’re trying to hurry and get something on the table for breakfast, or if you want a quick and easy substitute for the usual pancakes and waffles! Yum yum!

Oh my gosh, I was so excited when I peeked in over at the TWD blog and saw that this week’s recipe was going to be Apple Cheddar Scones…I have seriously been dying to try these ever since I first got my copy of Baking From My Home to Yours! So, a big, fat THANK YOU to Karina of The Floured Apron for picking these yummy little scones!
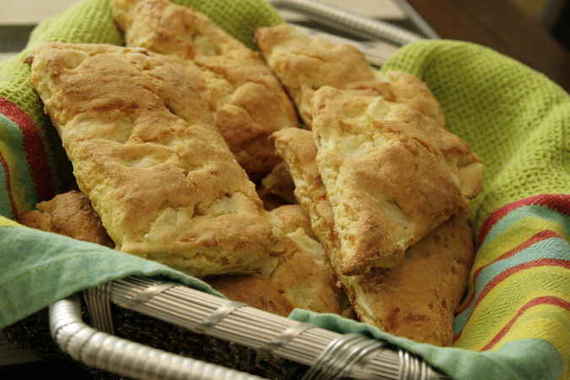
Actually, I’ve never made scones before so I was curious about how easy/hard these might be to make, but surprisingly, they were totally easy! They didn’t take long at all. Most of the TWD bakers mentioned how sticky the dough was….definitely true! Pretty sticky stuff, but I rolled it out with plenty of flour and it was easily workable.
The recipe calls for dried apples, but my crummy Tom Thumb (yes I’m naming names!) doesn’t carry them, so I decided to take my chances and try fresh apples. I was a little worried they might give off too much liquid and make the scones soggy, but they came out perfectly! I think the little chunks of fresh baked apple in scones added great flavor and texture!
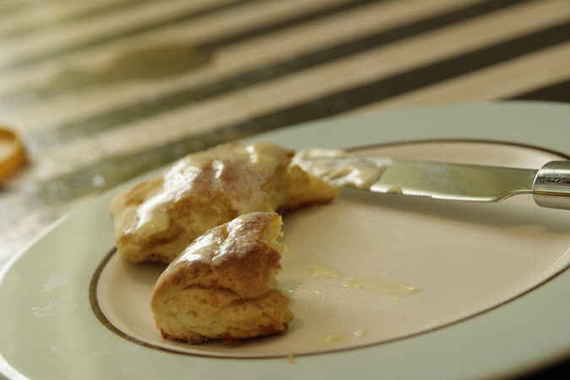
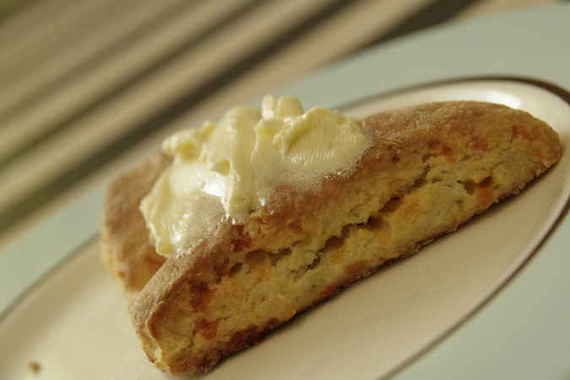
These were pretty darn tasty served warm with lots of honey butter – I’m really looking forward to having them for breakfast tomorrow with my coffee or a hot cup of tea!
I’m also really looking forward to next week’s recipe – Double Crust Blueberry Pie chosen by Amy of South In Your Mouth. Check back, cause it’s gonna be GOOD!

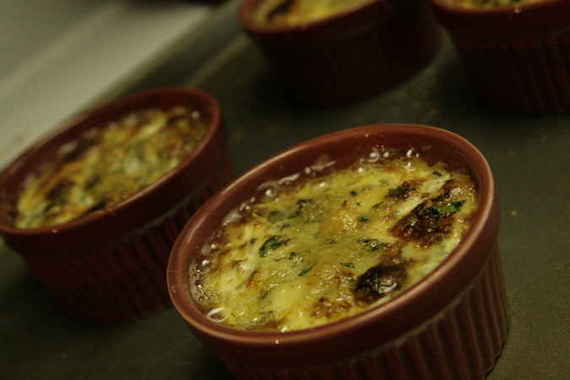
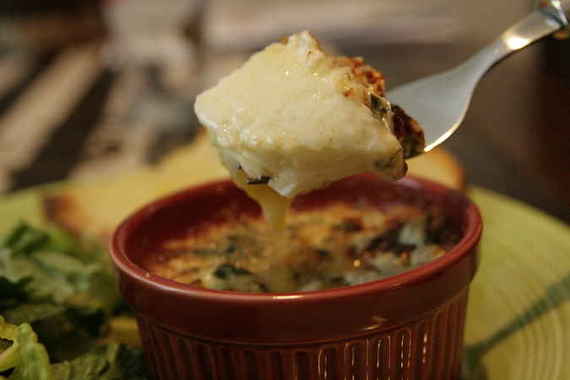
I’m happy to announce I’ve joined a new blogging group! Fellow food blogger and absolute genius, Tara started a group last week dedicated to cooking Ina Garten’s (aka: the Barefoot Contessa) recipes twice a month. She decided to call this wonderful group “Barefoot Bloggers” – genius! Being a HUGE fan of Ina, I of course, signed up without hesitation when I heard about this group! The recipe this time around was herb baked eggs – super yummy! We had these for dinner tonight and they were delicious! Joel even loved them and he’s not the biggest fan of eggs for dinner!
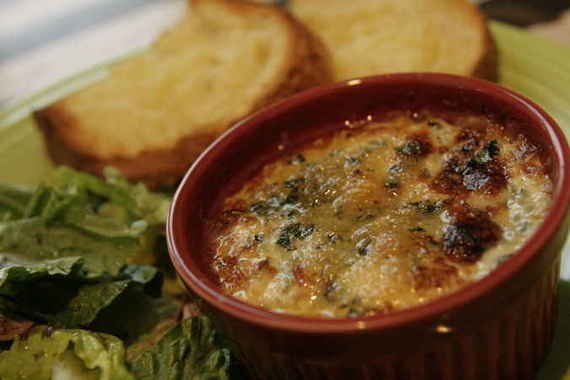
These cook very quickly and have a lovely, crunchy crust on top. I didn’t have a gratin dish, so I used four individual ramekins, which worked out perfectly! These went perfectly with a salad and toasted crusty sourdough bread.
Herb Baked Eggs
1/4 teaspoon minced fresh garlic
1/4 teaspoon minced fresh thyme leaves
1/4 teaspoon minced fresh rosemary leaves
1 tablespoon minced fresh parsley
1 tablespoon freshly grated Parmesan
6 extra-large eggs
2 tablespoons heavy cream
1 tablespoon unsalted butter
Kosher salt and freshly ground black pepper
Toasted French bread or brioche, for serving
Preheat the broiler for 5 minutes and place the oven rack 6 inches below the heat.
Combine the garlic, thyme, rosemary, parsley, and Parmesan and set aside. Carefully crack 3 eggs into each of 2 small bowls or teacups (you won’t be baking them in these) without breaking the yolks. (It’s very important to have all the eggs ready to go before you start cooking.)
Place 2 individual gratin dishes on a baking sheet. Place 1 tablespoon of cream and 1/2 tablespoon of butter in each dish and place under the broiler for about 3 minutes, until hot and bubbly. Quickly, but carefully, pour 3 eggs into each gratin dish and sprinkle evenly with the herb mixture, then sprinkle liberally with salt and pepper. Place back under the broiler for 5 to 6 minutes, until the whites of the eggs are almost cooked. (Rotate the baking sheet once if they aren’t cooking evenly.) The eggs will continue to cook after you take them out of the oven. Allow to set for 60 seconds and serve hot with toasted bread.
Mother’s Day was kind of unfortunate this year. My mom was having my sister and her family and my grandparents stay for the weekend, and I offered to have a Mother’s Day brunch on Sunday morning for everybody (9 people total). I was so excited to have everyone over – neither my grandparents or my sister had ever had a meal at my apartment. Joel and I worked so hard to get everything ready the night before so that all I would have to do Sunday morning was pop the casseroles in the oven. Everything was perfect. And then, as luck would have it, I ended up being sick all through the night. I was still feeling horrible Sunday morning, so my mom told me to go back to bed and she and my grandparents would just come back the next morning. So, it sort of worked out anyway – although my sister and her husband weren’t able to be there, nor my dad, which sucked. However, we still had a really good time, and hopefully they enjoyed the food.
My menu consisted of:
Fresh Mango Bread
Pioneer Woman’s Breakfast Potatoes
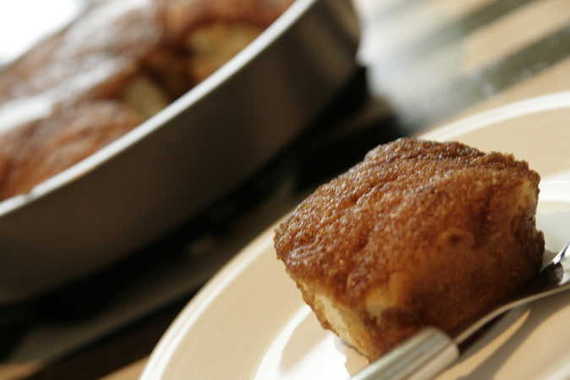
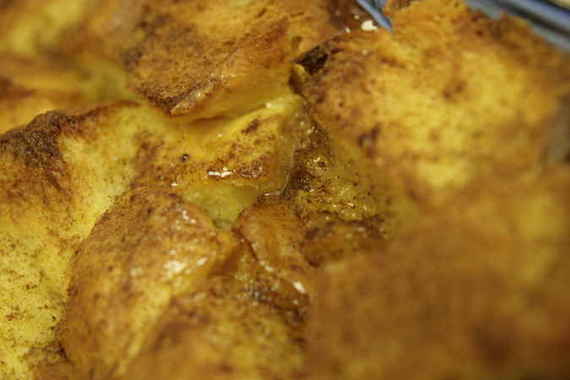
Baked Caramel French Toast
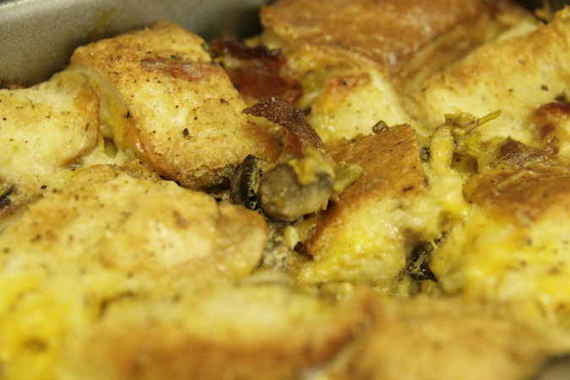
Bacon, Egg and Cheese Strata
Peach Bellinis
I had made the french toast before at Christmas and it was delicious – once again, it didn’t disappoint. Please, please, PLEASE excuse my appalling pictures- it was early Monday morning and I was expecting guests in any second, and I was still a little under the weather. I probably shouldn’t even post these pictures, but I wanted you to have some sort of idea of what the dishes look like (even if they do resemble something you might feed to your dog).
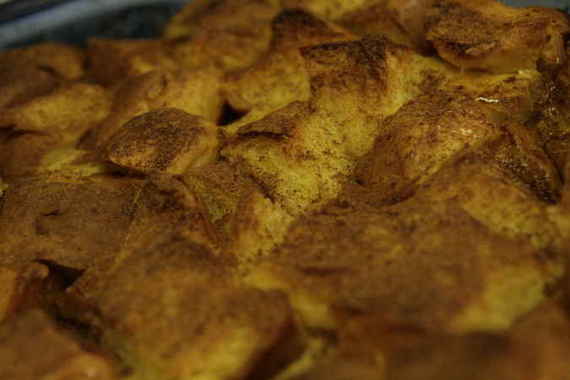
(That’s the baked french toast, in case you can’t tell…..I barely can)
Baked Caramel French Toast
– from The Magic of Christmas Gooseberry Patch Cookbook
1/2 Cup butter
1 Cup brown sugar, packed
2 Tablespoons light corn syrup
1 loaf french bread,cubed (I used Challah)
6 eggs
1 1/2 Cups milk
2 teaspoons vanilla extract
cinnamon to taste
Blend together butter, brown sugar and corn syrup in a medium saucepan over medium heat. Bring to a boil, then remove from heat. Pour into ungreased 9×13 baking dish. Place bread cubes in baking dish over sauce. Whisk together eggs, milk and vanilla until well blended; pour over bread and sprinkle with cinnamon. Let sit in the refrigerator for at least an hour (my plan was to let this sit overnight, but since we ended up having guests the next day, it sat for 2 nights and was still perfect! I just splashed a little half and half over it before i baked it). Bake at 300 degrees for one hour.
This egg strata was amazing – I can’t wait to make this again. Even with the bread, it was still light and fluffy and full of flavor! Once again, I present you with an unbelievably horrible picture. Please don’t base your opinion of this dish on my picture – it tastes SO much better than it looks!! Give it a try!!

Bacon, Egg and Cheese Strata
from allrecipes.com
12 thick slices white bread, cut into 1 inch cubes (I used almost a whole loaf of french bread)
1/4 cup crumbled cooked bacon (I used half a pound)
2 cups shredded Cheddar cheese
1 1/2 cups chopped fresh mushrooms
12 eggs
2 1/2 cups half-and-half
1 teaspoon Dijon mustard (I also used a little dry mustard)
(I also added a small can of diced green chiles and a little garlic powder)
Toss cubed bread with bacon, cheese, and mushrooms, and pour into a 9×13 inch baking dish. Whisk together eggs, half-and-half, and mustard (this is where I added the green chiles) until smooth, then pour evenly over cubed bread. Cover dish with plastic wrap, and refrigerate overnight.
Preheat oven to 350 degrees.
Remove plastic wrap from the baking dish, and bake strata in preheated oven until the top is golden brown, and the eggs are set, about 1 hour. Let stand for 10 minutes before serving.