
Well, today is the first day of November, and I’m super excited! November holds lots of happy, joyous occasions for me – I start listening to Christmas music about two weeks in, Thanksgiving, of course, the 5:00 AM Black Friday shopping, and the most joyous of all – our Christmas tree goes up! Wheeeeee!!! The day we put our tree up is by far, the happiest day of the year for me – I absolutely love it! But I need to brace myself…that’s not for another 26 days.
Since today is the first day of a very happy month, I thought I’d post a very yummy, Fall-y cake to start it off right. A delicious Pumpkin and Maple Gingerbread Bundt. I saw this on a blog called Tongue-n-Cheeky and couldn’t wait to try it! I think the flavors of pumpkin, gingerbread, cinnamon and maple go beautifully together; they certainly made a delicious cake. Very simple, not too sweet, and full of flavor – a perfect Fall cake!

I’m going to post the recipe exactly how she posts it on Tongue-n-Cheeky, since it’s a very simple layout and easy to follow.
Pumpkin and Maple Gingerbread Bundt
-Tongue-n-Cheeky
In One Bowl, Mix:___________________In Another Bowl, Mix:
3 eggs 3 eggs
1 c. canned pumpkin 1 1/2 c. brown sugar
1 c. sugar 1/4 c. molasses
1/2 c. oil 1/2 c. oil
1 T. cinnamon 1 T. ginger
1/2 tsp. baking powder 1/2 tsp. baking powder
1/2 c. milk 1/2 c. milk
2 c. flour 1 3/4 c. flour
1/2 tsp. salt 1/2 tsp. salt
1 tsp. vanilla 1 tsp. maple extract
Preheat oven to 350 degrees. Beat all ingredients together. Pour each batter in rotating layers into a well greased & floured bundt pan. Run a knife through the layers to marble the batters together. Bake bundt for 52-55 minutes or until top of cake springs back when touched.

Happy November, everybody!

Ok, ok, I know it has nothing to do with food…but I just thought I’d let Izzy show off her Halloween PJ’s! We really get in the Halloween spirit around here, so I thought I’d go ahead and start spreading Halloween warm fuzzies! 😉 Get ready for some fun Halloween-y treats coming soon!!
Silly title, I know – but chances are, most of you can probably relate to the relationship I have with canned pumpkin. When it’s the end of summer and still sweltering hot outside, I find myself walking down the ‘Baking/Spices’ aisle of the grocery store, just to get a glimpse of the empty spot on the shelf where the Libby’s canned pumpkin would normally be. Just to check and see if they have any yet…we all know it’s not really the calendar that tells us when Fall gets here – it’s the good people of Libby’s who decide when Fall begins. The day I see the cans of pumpkin puree on the shelves of the grocery store is the first day of Fall, as far as I’m concerned. And recently I discovered just how precious my canned pumpkin is to me…as you all know, it’s been near impossible to find it lately. None of my stores had any. What a tragedy. Autumn with no canned pumpkin??! I think not! However, just recently, the pumpkin-shortage nightmare was ended and Libby’s was on the shelves once again. Needless to say, I grabbed as many cans as I could carry! For a week or so now, I’ve been thinking of ways to use my beloved canned pumpkin…pancakes? Cookies? Bread? Possibly, but not just yet. Pumpkin blondies? Yes, please! Blondies filled with pumpkin, spices and full of white chocolate chips…perfect! (*For those of you who aren’t familiar with blondies – they’re just like brownies, but minus the chocolate)

If you’ve got a can or two just sitting around in the back of your pantry, crack one open and re-discover the goodness and joy to be found in baking with canned pumpkin!
Pumpkin Blondies
–Annie’s Eats
2 cups all-purpose flour
1 tbsp. pumpkin pie spice (I doubled this)
1 tsp. baking soda
¾ tsp. salt
16 tbsp. unsalted butter, at room temperature
1¼ cups granulated sugar (or brown sugar)
1 large egg
2 tsp. vanilla extract
1 cup pumpkin puree
1 cup white chocolate chips
½ cup chopped, toasted nuts (optional)
Preheat the oven to 350° F. Line a 9×13-inch baking dish with foil. In a medium bowl, combine the flour, pumpkin pie spice, baking soda and salt. Stir together and set aside.
In the bowl of an electric mixer fitted with the paddle attachment, beat together the butter and sugar on medium-high speed until light and fluffy, about 2 minutes. Beat in the egg and vanilla until well combined. Mix in the pumpkin puree. With the mixer on low speed add the dry ingredients and mix just until incorporated. Fold in the white chocolate chips (and nuts, if using) with a rubber spatula.
Spread the batter evenly into the prepared pan. Bake until the edges begin to pull away from the sides of the pan and a toothpick inserted in the center comes out with just a few crumbs, about 35-40 minutes. Transfer the pan to a wire rack and let cool completely before cutting.
To serve, lift the cake from the pan using the foil and transfer to a cutting board. Peel off foil and using a sharp knife, cut into 24 squares.

When I was little, I used to loooove a certain brand of store-bought cookies; they had all kinds of yummy flavors, but my favorite was their molasses cookies. I loved them because they were really chewy and sugary (chewy cookies were a big deal!). Nowadays, I like them for a few other reasons as well – I love the spices and the rich flavor the molasses adds. I haven’t had those cookies in a few years, and actually hadn’t really thought about them in a long time, until I found a great sounding recipe for ginger molasses cookies a few days ago. I stumbled on a fellow musician’s food blog- Gimme Some Oven (how cute is that?!) and found these cookies and knew I had to make them – after a few days of really chilly, crisp Fall weather, these spicy cookies sounded like perfection.

My cookies actually came out looking and tasting almost exactly like the ones I used to love so much as a kid – I was really pleased with how they turned out. Perfectly chewy and soft, with lots of warm spices. These were great and hubby and I have really enjoyed gobbling them up!
Chewy Ginger Molasses Cookies
-Gimme Some Oven
1 1/2 cups butter, softened
2 cups sugar
1/2 cup molasses
2 eggs
4 cups all-purpose flour
4 tsp. soda
2 tsp. cinnamon
1 tsp. cloves
1 tsp. ginger
1 tsp. salt
Preheat oven to 375 degrees.
In a medium bowl, whisk together flour, soda, cinnamon, cloves, ginger and salt. Set aside.
With an electric mixer, beat together butter and sugar until combined. Add in the eggs and molasses, and beat until combined. Then slowly add in the dry ingredient mixture until combined.
Roll the dough into small balls (about 1″ in diameter). Fill a small bowl with sugar, and roll each ball in the sugar until it is completely coated. Place on cookie sheet, and bake for about 8-10 minutes. Once they are done, remove from the oven and let cool for a minute or two. Then transfer to wire racks to cool completely.

I have a tendency to jump the gun sometimes…my husband would tell you I start listening to Christmas music entirely too early (which I think is debatable), I always buy Spring flowers and potted plants when it’s still too chilly out, and I start cooking/baking with pumpkin, apples and butternut squash when it’s still 90 degrees. It’s just that I get excited about seasons! It happens every year (especially when Fall comes around!) and this year is no exception.

I’ve had this recipe saved for about a year now. I copied it out of my mother’s Southern Living magazine last Fall and somehow just now got around to making it. Chicken and Corn Pie with Cornbread Topping…mmm, now doesn’t that sound yummy?? And it was, too – really yummy, actually! But after making it, I realized (ok, ok, so I pretty much knew all along…) that it really is a dish that is better served when it’s chilly or cold outside – however, I just couldn’t wait that long! I’m ready for Fall now! The filling is more like a thick stew (which I love!) and the cornbread topping is really cheesy and yummy- and the great thing is, it’s really versatile- you could put in ground beef, or another kind of vegetable…lots of possibilities! I think this would be a perfect dish for watching a football game when it’s nice and chilly outside! In fact, I’ll probably serve this again when the hubby and I are at home watching the Fightin’ Texas Aggies one saturday!

Chicken and Corn Pie with Cornbread Topping
-Southern Living Magazine, October 2008
1 (10-oz.) can enchilada sauce
1 (10-oz.) can Rotel Tomatoes
2 cups frozen whole kernel corn
1 teaspoon chili powder
3 cups chopped cooked chicken (2- 12.5-oz. cans chicken, drained, may be substituted)
1 (6-oz.) package Mexican-style cornbread mix
2/3 cup milk
1 large egg
2 tablespoons vegetable oil
1 cup (4 oz.) shredded Mexican four-cheese blend, divided
Preheat oven to 375°. Stir together enchilada sauce and next 3 ingredients in a 3 1/2-qt. saucepan over medium heat until combined; cook, stirring occasionally, 10 minutes. Stir in chicken.
Whisk together cornbread mix, next 3 ingredients, and 3/4 cup cheese in a small bowl just until blended.
Pour chicken mixture into a lightly greased 11×7 inch baking dish. Spoon cornbread mixture over hot chicken mixture. Sprinkle evenly with remaining 1/4 cup cheese.
Bake at 375° for 30 minutes or until golden and bubbly. Serve with sour cream and jalapeno peppers if desired.
Tuesdays with Dorie Holiday “Twofer” Pie: a blend of pumpkin and pecan
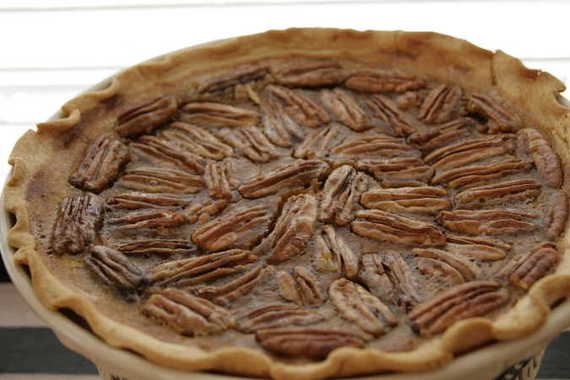
Happy Thanksgiving, ya’ll! (I know – you’re probably wondering why I’m blogging on Thanksgiving evening instead of enjoying family time….well, I figured blogging about pie might be a little more fun than watching A&M get slaughtered by Texas….hubby isn’t happy.) This week’s TWD recipe was chosen by Vibi of La Casserole Carree. As I said before, it’s a Holiday “Twofer” pie – a layer of pumpkin pie and a layer of pecan. Extremely tasty. The dark rum added a whole lot of flavor.
Holiday Twofer Pie
-Dorie Greenspan
1 9-inch unbaked pie crust
For the Pumpkin Filling:
1 cup canned unsweetened pumpkin puree
2⁄3 cup heavy cream
1⁄2 cup (packed) light brown sugar
1 large egg
1 large egg yolk
2 tsp. dark rum
1⁄2 tsp. pure vanilla extract
1⁄2 tsp. ground cinnamon
1⁄4 tsp. ground ginger
1⁄4 tsp. salt
For the Pecan Filling:
1⁄2 cup light or dark corn syrup
1⁄4 cup packed light brown sugar
2 tbsp. unsalted butter, melted
1 egg
1 egg yolk
1⁄2 tsp. pure vanilla extract
1⁄4 tsp. ground cinnamon
1⁄8 tsp. salt
1 1⁄2 cups (about 7 oz.) pecan halves or pieces
For the pumpkin filling: Pulse all ingredients together in a food processor. Leave filling in bowl.
For the pecan filling: In a bowl, whisk together all ingredients except pecans until smooth.
Preheat oven to 450°. Roll dough out to a 12″ circle on a floured counter, turning dough over frequently; keep counter floured. Slide dough into the fridge for about 20 minutes to rest and firm up. Fit dough into a buttered 9″ pie plate; cut excess dough to a 1⁄4″–1⁄2″ overhang. Fold dough under itself, so that it hangs over the edge just a tad, and flute or pinch the crust to make a decorative edge.
To assemble: Give the pumpkin filling one last quick pulse, then remove bowl, rap it on counter to debubble batter, and pour filling into crust. Top pumpkin filling evenly with pecans, then pour over pecan filling. Poke down any pecans that float to the top and aren’t covered with filling. Bake pie for 10 minutes. Reduce oven temperature to 300° and bake for another 35–40 minutes, or until it is evenly puffed and a slender knife inserted into the center comes out clean. Transfer pie to a cooling rack and let it stand until it is just warm or until it reaches room temperature.
Here are just a few more Thanksgiving pictures! Enjoy!

Hubby, brother-in-law, nephew and Daddy playing football across the street.

My Thanksgiving Table
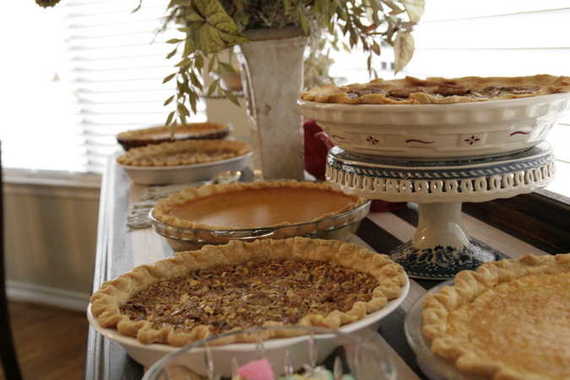
Pies galore! Pumpkin, pecan, buttermilk, and of course, my TWD pie.

Nephew having his pie on the floor! Silly boy!
It was a great day! Hope everyone else had a wonderful Thanksgiving! On to the Christmas decorating!!
Thanksgiving is upon us – one of my absolute favorite holidays. To me, Thanksgiving means having all of my family together, eating the best food we’ll eat all year long (I have to admit, the canned gelatinous cranberry sauce goo is my favorite part! And hubby’s too, incidentally – we so belong together!), and most importantly, the start of the Christmas holidays! The day after Thanksgiving is when we pull out the Christmas tree, ornaments, lights and our favorite holiday music and decorate our little hearts out! My favorite day of the year….seriously.
BUT – Thanksgiving isn’t just about food and family – it’s about giving thanks. The more I live, the more I learn just how much I have to be thankful for in my life. Especially this year. Allow me to take a moment to get real personal and share some of the things I am most thankful for (If you don’t want to take the time to read about my thankfulness, that’s cool- just scroll down and at least check out my bread!):
I’m thankful for my hubby. All the time. Even when we fight, because that means we’re a part of something worth fighting for. This past year has been the hardest of our married life, but we worked together and came through our troubles even stronger and more “together” than we started out.
A loving family – both my own and my husband’s. Especially my mommy. 🙂
My new house – it’s everything I ever dreamed of and I love being in it.
I’m thankful for Baba.
I’m thankful that I’ve already made my greenbean casserole – one less thing I have to do tomorrow.
The ability to sing. I would be one boring, plain-vanilla girl if I didn’t have my voice.
I’m thankful for my kitchen – it’s my favorite room in the house! I’ve made some wonderful meals and goodies in that kitchen!!
My blonde hair….seriously. I know it sounds silly, but this is my Thanksgiving list!
My friend Jessica – it’s nice to have a close friend again.
I’m thankful for my parents’ new house and all that goes along with it (no more Josephine – woo hoo!!!)
Of course there are tons of things I’m leaving out (our troops, the food on our table, our safety and health, etc) but there’s simply too many to list today, so I decided to keep it brief!
One last thing I’m thankful for is my cranberry orange bread….it’s delicious, it’s good with coffee….it’s good bread (even if the pictures aren’t!)!
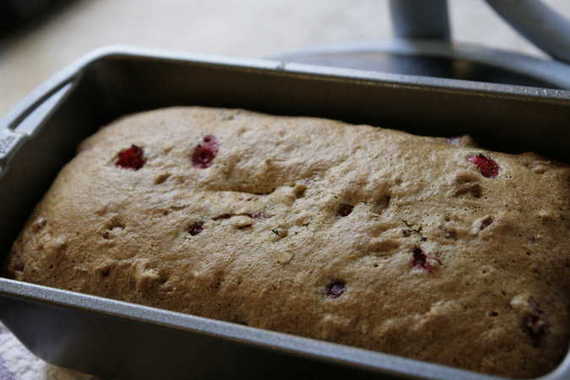
I first made this bread last year at Thanksgiving and it was a great success – not too sweet, nicely tart, and really tasty, so I decided to make it again – this time for hubby’s parents who came up to help us with some fix-it projects this week (thank ya’ll again!!).
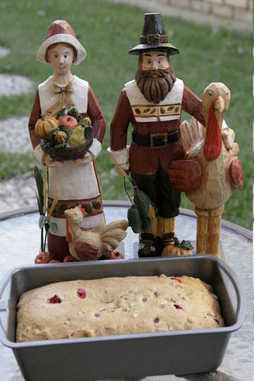
(and since it’s the Thanksgiving season, I thought I’d let the pilgrim people in on the bread action!)
Cranberry Orange Bread
-Allrecipes.com
2 cups all-purpose flour
1 cup sugar
1 1/2 teaspoons baking powder
1 teaspoon baking soda
1/2 teaspoon salt
1 egg
1/2 cup orange juice
Grated peel of 1 orange
2 tablespoons melted butter or margarine
2 tablespoons hot water
1 cup fresh or frozen cranberries
1 cup coarsely chopped walnuts (I used pecans)
In a large mixing bowl, combine dry ingredients. In another bowl, beat egg. Add orange juice, peel, butter and hot water. Add to flour mixture, stirring just until moistened. Gently fold in cranberries and walnuts. Spoon into greased 9-in. x 5-in. x 3-in. loaf pan. Bake at 325 degrees for 60 minutes or until toothpick inserted near the center comes out clean. Cool for 10 minutes before removing to a wire rack.
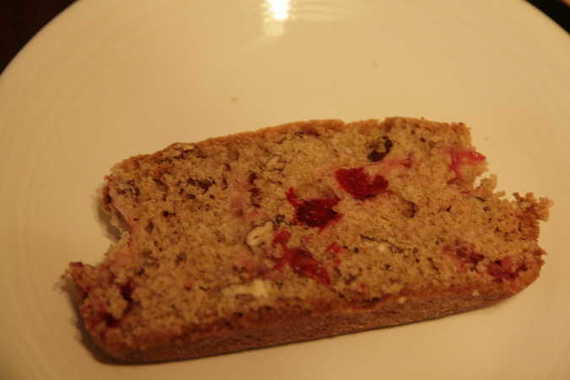
(Please, please, please forgive the horrible picture…..I was in a hurry and it was already dark!) 🙂
HAPPY THANKSGIVING, YA’LL!!!
This is going to be a fun post, I can tell…….
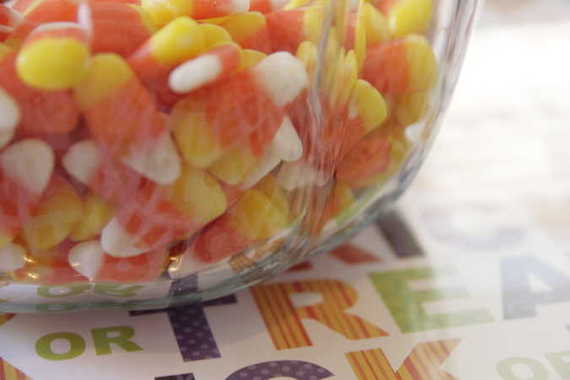
YIPPEE!! Its the week of Halloween!!! I love this holiday, people! Not just me, though – my family too. My mom, my sister and I always decorate our houses with cute Halloween decor – not creepy stuff, though – I don’t dig on having fake spider webs and black lights on my front porch. Cute stuff, like pumpkins, candy corn and cute, friendly little ghosts! Although I will admit that I have an embarassingly large collection of The Nightmare Before Christmas stuff on display every year (its my second favorite movie ever!), which is about as morbid as I get on Halloween (however, I guess the fact that I leave it all out on display until Christmas adds to the morbid factor a bit).

Sorry, just couldn’t resist!!
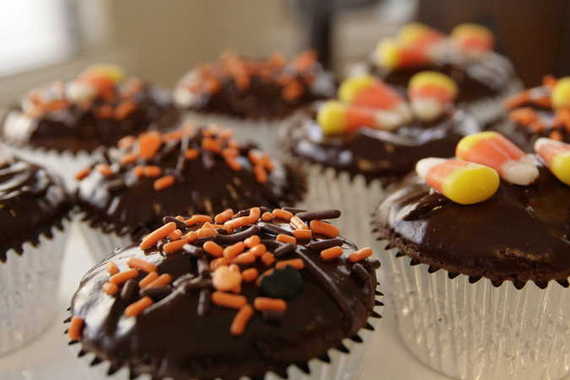
Anyway, back to my post….every year we all get together and watch fun stuff like It’s the Great Pumpkin, Charlie Brown!, Hocus Pocus (boy, do I love Bette Midler!) and the Disney version of Ichabod Crane (you know, the cute animated version with Bing Crosby narrating? Golly I love that movie!) So obviously, Halloween is big in my family. Which is why I was SO excited when Clara of I Heart Food 4 Thought chose Chocolate-Chocolate Cupcakes for this week’s TWD recipe with the idea in mind that we could decorate them for Halloween!! How fun!! How clever you are, Clara!
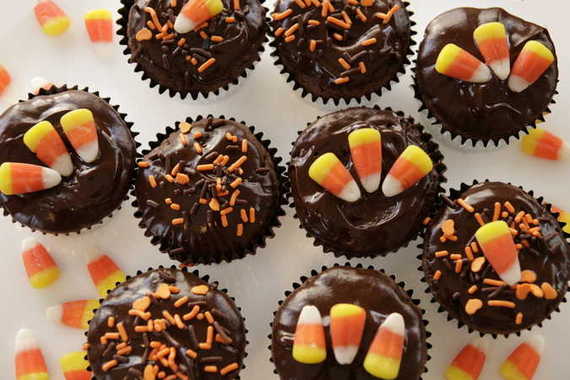
Now, you’d think that a cupcake wouldn’t take much trouble…wouldn’t cause any confusion….no worries, right? W-R-O-N-G. We’ve had all kinds of nerdy food discussions all week about these cupcakes! Just look! Apparently these cupcakes came out rather dry for many of the bakers, and dry cupcakes just won’t do. So, the TWD geniuses started thinking of ways to make them more moist – sour cream, pudding, oil instead of butter, applesauce, less flour, etc – really good stuff! So I took their ideas and ran with it; I’ll give you the low-down:
- Instead of using a softened stick of butter, I used half butter (melted) and half oil
- Instead of 1/2 cup buttermilk, I used 1/2 cup low-fat sour cream
- I used half brown sugar, half white sugar instead of all white
- I used semi-sweet chocolate instead of bittersweet (for the cake and the glaze)
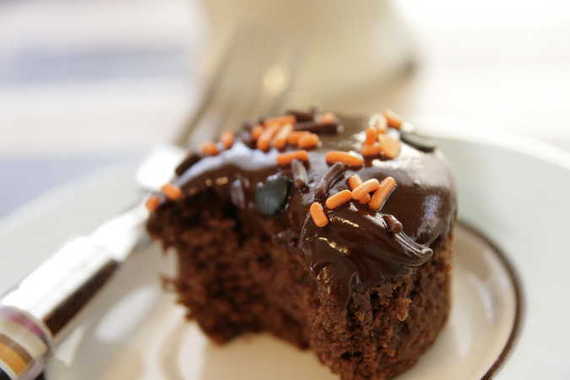
And there you have it. Its not much of a change but I’ll tell you, these were THE MOST AWESOME CUPCAKES I’VE EVER TASTED. Oh my heavens, that chocolate glaze….to die for!!! These were seriously amazing. Seriously. And oh-my-goodness, did I have a good time decorating them all Halloweeny-like!
I was planning on sending these to work with hubby tomorrow, but after tasting, I think these babies will stay right here with mama! Oh yeah!
You know, honestly, I’d love to know what these cupcakes taste like when using the recipe as written. I’m sure they’re still fabulous – but I just couldn’t risk a dry cupcake…nope, sorry.

Isn’t that little plate cute?! I got that at Hobby Lobby and I’m oh-so-proud of it!!
Ok, I suggest rushing over to Clara’s blog and getting the recipe for these babies…..they’re good. What a great party treat!
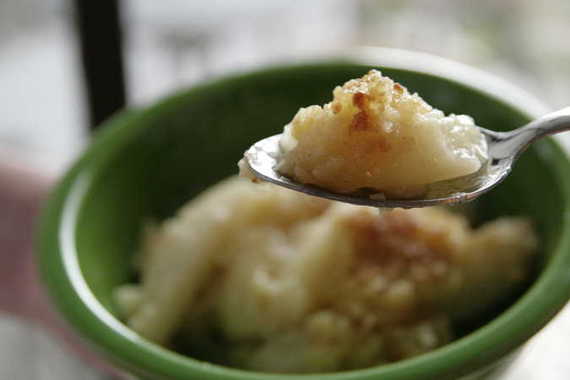
(Hehe – if you look really close, you can see my reflection in the spoon!)
There comes a time (not very often, mind you) when you want something more than chocolate chip cookies or brownies for dessert. Now, I LOVE a good chocolate chip cookie fresh out of the oven…there’s nothing like it! But on a cool Fall night, there’s nothing better than a bowl of warm apple crisp – soft, cinnamony apples covered with a crispy, yet slightly chewy, buttery topping, dripping with a scoop of melty vanilla ice cream. Ohhhhhh baby…..now THAT’S a dessert!! And the fact that it takes practically no time to prep, which means you don’t have to wait long to shove your pie hole full of a big ‘ol bite, doesn’t hurt its case, either! Its one of those quick fix desserts that I find myself making every single Fall. The same recipe. Everytime. Why change a good thing, you know?
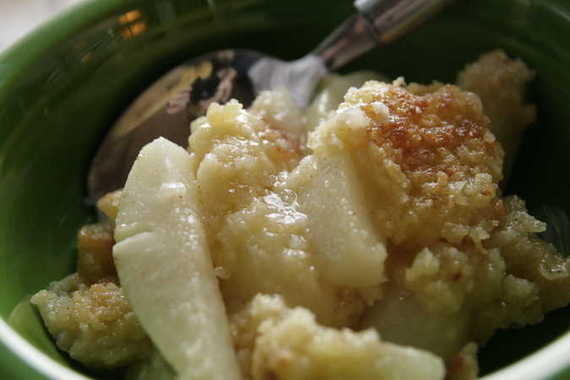
BUT – I didn’t come here to talk about apple crisp….I’d rather talk about pear crisp. (“Oooh, pear crisp?” you’re thinking….yeah, pear crisp – and its fantastic!) Yesterday I was at the grocery store picking up stuff for dinner (beef tips over rice – post coming soon!) and as I walked through the produce section, I was hit in the face with the overwhelming smell of fresh, juicy pears. “Hmmmm, pears would be great in place of apples in my apple crisp recipe!” , I thought! So I decided to give it a try and boy was I glad I did! This was delicious! Last night was a really chilly night, and hubby and I cuddled up on the couch with a big bowl of warm pear crisp and had ourselves a fantastic night! I highly recommend this recipe – its just delicious!
Pear Crisp
-original apple crisp recipe from my mom
1 Cup AP flour
1 Cup sugar
pinch salt
1 stick butter or margarine, melted (I found that about 6 tablespoons does the trick – a whole stick is a little too much, in my opinion)
1 egg, beaten
cinnamon to taste
3 -4 pears, peeled, cored and sliced into wedges
juice of half a lemon
Preheat oven to 350 degrees and grease a square baking dish. In a bowl, whisk together flour, sugar, and salt, then add the beaten egg and stir until you have pea-sized pieces of dough. Place sliced pears in the baking dish and squeeze lemon juice over them; sprinkle desired amount of cinnamon over pears. Sprinkle crumb topping over pears and pour the melted butter evenly over the topping. Cover and bake for about 20 minutes, then remove foil and bake for another 20 – 25 minutes or until golden brown and bubbly. Serve with a big ‘ol scoop of ice cream!
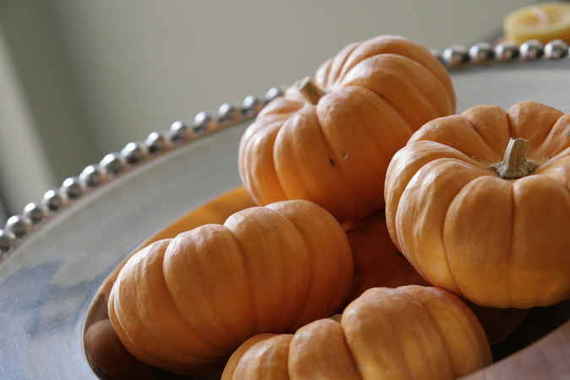
Before I go into my TWD post, as originally planned, I thought I’d take a minute or so to get everybody in the proper “pumpkin-y” mood. I love pumpkin – every year around the middle of September, I start drooling over all the pumpkin recipes I’ve yet to make – there’s a lot of them out there, but hey, all I got is time, people! 🙂 In fact, I’ve got my eye on a sinfully delicious looking pumpkin cheesecake recipe that’s just calling my name. Sure, there is lots of new, uncharted territory when it comes to pumpkin recipes; but what about the old stand-by ones? The ones you can’t help but make every single year as soon as there’s the slightest hint of a nip in the air? (except not really in Texas…..there isn’t an actual “nip” in the air until about Thanksgiving, and you’re lucky if you even get one then!) The ones like the pumpkin muffins my mom would make for me in the Fall when I would come home from college for the weekend. Ahhh, pumpkin muffins – one of my great loves. Moist, fluffy, full of spice,packed with pumpkin and dripping with melty butter….does it get any better? I think not! Which is why I was so very excited when Kelly of Sounding My Barbaric Gulp (interesting blog name, no?) chose Pumpkin Muffins for this week’s TWD recipe. God love her!
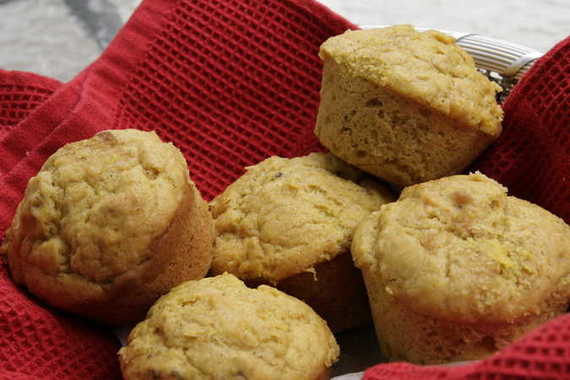
Usually when I make pumpkin muffins, I like to use either my mother’s recipe or one from allrecipes.com (Downeast Maine Pumpkin Bread), but I was more than happy to give Dorie’s recipe a shot – I mean, let’s face it, everything I have ever tried of hers’ has been a complete success (unless I did something to screw it up). And really, her recipe was almost exactly the same as my mother’s…cinnamon, nutmeg, pumpkin puree, sugar…all the usual ingredients. The only big difference is that she adds walnuts (which I love) and raisins (which I do not love and gladly omitted) to the batter and tops them with sunflower seeds (which I didn’t have so I left out). So, by the time I finished omitting most of Dorie’s different-from-everybody-else’s ingredients, these were almost identical to the one’s I love so much. Perfect!
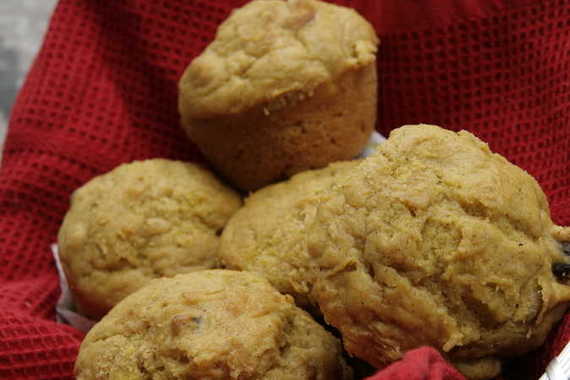
Now, its just not Fall until you’ve made pumpkin muffins, so if you haven’t and you’d like the recipe, just head on over to Kelly’s blog and then make these as soon as possible! Otherwise you’re only cheating yourself out of the complete “Fall Experience”.


