Well, here in Texas, all anyone can talk about is the “Great Arctic Blast of 2010” (ok, so they’re not exactly calling it that…yet) – you’d think a deadly blizzard was on its way or something. A little cold breezes coming our way and we all panic. Yesterday at the store, people were buying up groceries like the apocalypse was coming. We Southerners really tend to overreact when a little bad weather hits, but hey, it usually gets me off work, so I’m not complaining. The point is, no one wants leave their house when the weather is freezing cold and icy like this – so what do you do when dinnertime rolls around and you haven’t got a plan? Raid your pantry and fridge and throw something together! By all means, don’t get out in the “deadly” weather – grab some pasta, canned mushrooms, make a little sauce and go from there. That’s what I did with this pasta, and I have to say, this was some darn tasty pasta!

I didn’t measure anything; I just threw stuff in, so bear with me – I haven’t really got a recipe to go by here. Here’s what I did:
I started with these ingredients: one chicken breast, frozen peas, small can of mushrooms, canned chicken broth, spaghetti, heavy cream and parsley.
I started by sauteing my chicken breast in some olive oil, then chopping it into small pieces and setting it aside. In the same pan, I melted some butter (probably 2 or 3 tablespoons), then added a little flour to make a roux. I slowly whisked in a can of chicken broth, then a splash of heavy cream; then seasoned with salt and pepper and added the mushrooms and frozen peas. I cooked my pasta, then tossed everything together (the chicken, pasta and sauce) and topped with some parsley. Voila! Delicious pasta in less than 15 minutes! Simple as that!
If you’ve got the pantry staples on hand (pasta, canned goods, etc), it’s so simple to just throw something together when you don’t want to go to the store (or if the weather is “deadly”). Who knows, you may just invent a new family favorite – I know I did!
I know -I’ve been a terrible TWD member lately. I haven’t participated in weeks…bad, I know. And I’ve missed it a lot, too – it seems like every week, something got in the way of me baking that week’s recipe. My students’ All-State Choir auditions have been going on for the past few weeks and that’s been distracting, not to mention my hubby starting a new job…not that I’m complaining or making excuses, even – I just felt I should at least let you know where I’ve been as far as TWD goes. But now I’m back, and that’s all that matters! And what a recipe to welcome me back on the wagon! Dorie’s Sweet Potato Biscuits…mmm, MMM!!

These were DE-licious. They start out the way all normal biscuits start out; but then you add in mashed sweet potatoes (canned, even!) and a pinch of nutmeg and cinnamon and you’ve got a slightly sweet, spicy, flaky biscuit that will knock your socks off! I made a little maple compound butter (just a fancy way of saying “butter with stuff mixed in” – saying it that way makes me feel important…) to spread on these bad boys and WOW – we seriously gobbled them all up. They couldn’t have turned out better, in my opinion. A lot of other TWD bakers said they were having issues with the biscuits baking up totally flat like cookies – I guess the biscuit gods were smiling down on me because mine seemed to rise perfectly. Thanks to Erin of Prudence Pennywise (seriously love her blog!) for choosing these wonderful biscuits! Go now and check out her blog – you’ll absolutely love her! Get the recipe for these babies while you’re there – make ’em for Saturday breakfast this weekend!

A few months before our wedding (golly, that was over three years ago!!) my sister gave me a very special cookbook. She worked really hard collecting her favorite recipes, gathering pictures and getting everything organized and put together in a cute little book. I happened to think this was the coolest present ever since I had no idea how to cook, really- and had hardly any recipes of my own. But thanks to my big sister, I now had a nifty book full of tried-and-true recipes that were simple and no-fail. To this day, out of all the volumes of cookbooks I own (and trust me, there are quite a few!), I still turn to my homemade collection of Lindsay’s recipes whenever I need a good, comforting meal. Some of my favorites include Fiesta Soup, Chicken Parmesan and the recipe I’m posting today – Cheesy Chicken Chowder.

This one can’t be beat- it’s as simple as can be, yet totally delicious. Perfect for these cold evenings we’ve been having lately (love it!), and it makes enough for you to get at least two meals out of it. I love the chunks of potatoes and chicken, with the richness and creaminess that feels like it should be way more fattening than it really is (the most fattening part is the cheese melted in it)! This is one of those soups that always gets made every year as soon as the weather gets cooler – it’s comforting, filling and down-right delicious!

Cheesy Chicken Chowder
4 cups chicken broth
1 1/2 cups diced potatoes
1 cup diced celery
1 cup diced carrots
1/2 cup diced onions
1/4 cup butter
1/3 cup all-purpose flour
3 cups milk
1 tbsp soy sauce
1 teaspoon black pepper
8 oz Velveeta cheese, cubed (1 loaf)
2 cups chopped cooked chicken
Combine the broth and the vegetables in a large sauce pan. Cover and cook over medium heat for 15 minutes or until the vegetables are tender.
Melt the butter in a Dutch oven over low heat. Add the flour, whisking until smooth. Cook for 1 minute, stirring constantly. Gradually stir in the milk and cook over medium heat, stirring constantly, until thickened and bubbly. Gradually stir in the vegetable mixture, soy sauce, cheese and chicken. Cook until the cheese melts and the soup is thoroughly heated.

Ok, I know I’ve been sort of MIA lately…it’s been a busy couple of weeks (translation: I started teaching voice lessons last week and have 12 freshman girls…it’s not the easiest thing in the world trying to get someone to open their mouth wider when they obviously think you’re the biggest loser that ever walked the earth…). But anyway, here I am, back to normal (hopefully) and blogging on a regular basis again! Let me just take a couple of seconds to tell you about this bread…it’s seriously good. I was browsing allrecipes.com for zucchini bread and just wasn’t feeling all that impressed with the recipes. They all sounded pretty boring to me. So I finally just closed my eyes and picked one (sort of) and ended up with this recipe. I’m SO very glad I did, because this turned out to be really, really good!

The inside of the bread was soft and incredibly moist, with just a hint of spice (I don’t like an overpowering amount, so this was just right!), and the top of the loaf had sort of a crust on it that was crumbly and delicious – the top crust was by far my favorite part! I can tell you with complete honesty that I will most definitely be making this recipe over and over again! It’s just perfect for Fall….or for those of us who just have to pretend it’s Fall since it’s still a blazing 95 degrees outside…ugh.

Zucchini Bread
-allrecipes.com
3 cups all-purpose flour
1 teaspoon salt
1 teaspoon baking soda
1 teaspoon baking powder
3 teaspoons ground cinnamon
3 eggs
1 cup vegetable oil
2 1/4 cups white sugar
3 teaspoons vanilla extract
2 cups grated zucchini
1 cup chopped walnuts
Grease and flour two 8 x 4 inch pans. Preheat oven to 325 degrees F.
Sift flour, salt, baking powder, soda, and cinnamon together in a bowl.
Beat eggs, oil, vanilla, and sugar together in a large bowl. Add sifted ingredients to the creamed mixture, and beat well. Stir in zucchini and nuts until well combined. Pour batter into prepared pans. (I sprinkled a little brown sugar over the top before baking and it helped to create the nice crust!)
Bake for 40 to 60 minutes, or until tester inserted in the center comes out clean. Cool in pan on rack for 20 minutes. Remove bread from pan, and completely cool.
**Note: This recipe makes two loaves – I cut it in half and came out with one perfectly sized loaf.

In the town where hubby and I grew up, there is a small little restaurant called The Purple Turnip that serves really good “chick food”. If you were to go for lunch on a weekday, you’d see 90% women – teachers, old ladies, business women and “ladies-who-lunch”…of course there will be the occasional male, but chances are he was dragged there by his wife. Their biggest seller? Quiche. It’s SO good. It’s different every day. Sometimes it has broccoli, sometimes spinach, sometimes asparagus…but it’s always totally delicious. Naturally, everytime we’re visting home, I always want to go to Purple Turnip. Quiche, followed by out-of-this-world tiramisu. Perfect.

Recently, I had a major hankering for quiche, and since an hour’s drive to Purple Turnip wasn’t in our near future, I decided to just make my own awesome quiche. And boy was it good! I was really pleased with the way it turned out – light and fluffy and filled with tons of asparagus, mushrooms and bacon…YUM! I will most definitely be making this one again!
Quiche with Asparagus, Mushrooms and Bacon
1 9-inch pie crust
7 large eggs
3/4 cup half and half
1 bunch asparagus, trimmed and chopped
1 small can sliced mushrooms, drained (you can use fresh, I just happened to have canned on hand)
4-6 slices bacon, cooked and diced
1/2 cup shredded cheddar cheese
1 teaspoon salt
1/2 teaspoon pepper
Preheat oven to 400 degrees. Press pie crust into a pie plate and set aside. In a large bowl, whisk together the eggs, half and half and salt and pepper. Add the chopped asparagus, mushrooms, bacon and cheddar cheese and stir to combine. Pour into pie plate and bake for 50-60 minutes, or until quiche is set (the center might still be slightly jiggly- that’s ok). If it starts browning too soon, cover it with a foil tent. Let sit for 10 minutes before serving.
*I like my asparagus slightly crisp, so I don’t cook it before putting it in the quiche; but if you like it really tender, you can blanch it in some boiling water for about 5 minutes before adding it to the egg mixture.

I have a tendency to jump the gun sometimes…my husband would tell you I start listening to Christmas music entirely too early (which I think is debatable), I always buy Spring flowers and potted plants when it’s still too chilly out, and I start cooking/baking with pumpkin, apples and butternut squash when it’s still 90 degrees. It’s just that I get excited about seasons! It happens every year (especially when Fall comes around!) and this year is no exception.

I’ve had this recipe saved for about a year now. I copied it out of my mother’s Southern Living magazine last Fall and somehow just now got around to making it. Chicken and Corn Pie with Cornbread Topping…mmm, now doesn’t that sound yummy?? And it was, too – really yummy, actually! But after making it, I realized (ok, ok, so I pretty much knew all along…) that it really is a dish that is better served when it’s chilly or cold outside – however, I just couldn’t wait that long! I’m ready for Fall now! The filling is more like a thick stew (which I love!) and the cornbread topping is really cheesy and yummy- and the great thing is, it’s really versatile- you could put in ground beef, or another kind of vegetable…lots of possibilities! I think this would be a perfect dish for watching a football game when it’s nice and chilly outside! In fact, I’ll probably serve this again when the hubby and I are at home watching the Fightin’ Texas Aggies one saturday!

Chicken and Corn Pie with Cornbread Topping
-Southern Living Magazine, October 2008
1 (10-oz.) can enchilada sauce
1 (10-oz.) can Rotel Tomatoes
2 cups frozen whole kernel corn
1 teaspoon chili powder
3 cups chopped cooked chicken (2- 12.5-oz. cans chicken, drained, may be substituted)
1 (6-oz.) package Mexican-style cornbread mix
2/3 cup milk
1 large egg
2 tablespoons vegetable oil
1 cup (4 oz.) shredded Mexican four-cheese blend, divided
Preheat oven to 375°. Stir together enchilada sauce and next 3 ingredients in a 3 1/2-qt. saucepan over medium heat until combined; cook, stirring occasionally, 10 minutes. Stir in chicken.
Whisk together cornbread mix, next 3 ingredients, and 3/4 cup cheese in a small bowl just until blended.
Pour chicken mixture into a lightly greased 11×7 inch baking dish. Spoon cornbread mixture over hot chicken mixture. Sprinkle evenly with remaining 1/4 cup cheese.
Bake at 375° for 30 minutes or until golden and bubbly. Serve with sour cream and jalapeno peppers if desired.

Mmmm, look at this moist, chocolatey cake; so full of deep chocolate flavor, covered with sticky dark chocolate ganache….and filled with….zucchini…?!?! Yep, you read correctly – zucchini. I know it sounds disgusting, but you’ve all had or heard of zucchini bread, right? Well, there’s really not much of a difference – using it in a sweet, spiced quick bread or baking it into a chocolate cake – it’s all the same! And believe me when I tell you you can’t even tell the zucchini’s in there; no, seriously! I first saw this on The Repressed Pastry Chef and it looked so good I had to get the recipe. And then I saw it again…and again…food bloggers all over the place have been making this cake lately! I figured I needed to make it ASAP and see what all the fuss was about. I’m so glad I did, too! This was an amazing cake – the most moist (moistest??) chocolate cake I think I’ve ever had…and like I said before, there isn’t even the slightest hint of anything out of the ordinary. I know what you’re thinking – if you can’t even tell it’s there, why put it in?? Am I right?? 😉 I wondered the same thing, but Em over at The Repressed Pastry Chef told me that it adds a ton of moisture – boy was she right! And the great thing is, you don’t use all that much butter – the zucchini makes it plenty moist. You might still be thinking “eww..”, but you’re just going to have to trust me when I say that this cake is absolutely and completely delicious.

Chocolate Zucchini Cake
-The Repressed Pastry Chef
For the Cake
1/2 cup (1 stick) butter
1/2 cup vegetable oil
1 3/4 cups granulated sugar
1 teaspoon vanilla
1 teaspoon baking soda
1/2 teaspoon baking powder
1/2 teaspoon salt
2 large eggs
1/2 cup sour cream or yogurt
2 1/2 cups All-Purpose Flour
3/4 cup Dutch-process cocoa
2 teaspoons espresso powder, optional but tasty
2 cups shredded zucchini (about one 10″ zucchini, about 12 ounces)
1/2 cup chocolate chips
For the Icing
3/4 cup heavy cream
9 ounces chocolate chips
Preheat the oven to 325°F. Lightly coat a 9″ x 13″ pan with baking spray.
In a large mixing bowl, cream together the butter, oil, sugar, vanilla, baking soda, baking powder, and salt. Beat in the eggs.
Stir in the sour cream or yogurt alternately with the flour. Then add the cocoa and espresso powder, mixing until smooth. Finally, fold in the zucchini and 1/2 cup chocolate chips.
Spoon the batter into the prepared pan. Bake the cake for 35 – 40 minutes or until a cake tester inserted in the center comes out clean. Remove the cake from the oven and cool on a rack.
To prepare the frosting, heat the heavy cream in a saucepan over medium heat until simmering. Remove from heat and pour over the chocolate chips. Wait 3-5 minutes then stir to combine. It will thicken as it cools… when warm (but not hot) pour over cake and smooth with offset spatula. Allow frosting to set for about 30 minutes before serving… or not 😉
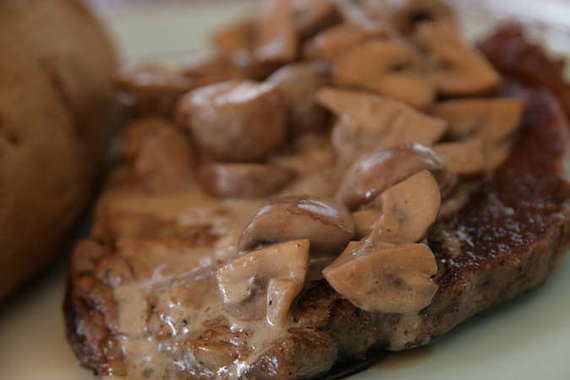
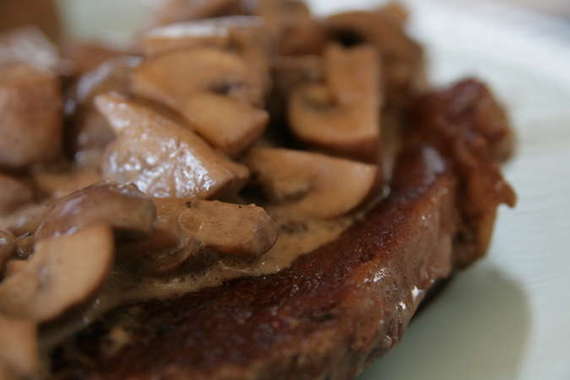
These are the steaks I mentioned a couple of days ago (one blog post below) that I made for my hubby last week. I have to say, I was a wee bit (ok more than a wee bit) proud of myself for finally (and successfully!) cooking steaks! I know – what kind of cook doesn’t know how to make a good steak, right? For some reason I had always thought steaks would be too finicky for me to handle – I just knew I’d overcook them or set my kitchen on fire or something else awful. BUT – these were surprisingly super duper easy! Once again, Ina Garten comes to my rescue and makes things that once looked challenging totally approachable for me. Love her! Her recipe is for Filet Minon, but I had some great looking Ribeyes that I wanted to use instead – they worked just fine!
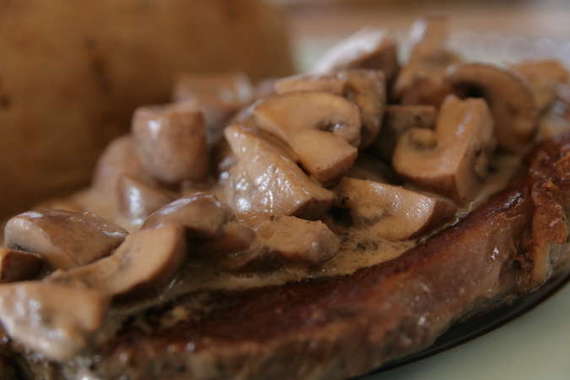
I decided to top the steaks with a mushroom cream sauce – I love mushrooms on my steak, so I thought this sauce would be really good on top – sure enough, it was deeeeelicious! Hubby absolutely loved the whole meal and I was quite surprised at how delicious it turned out (especially since it was so easy!!). Toot, toot tooooot! (That’s me tooting my own horn, if you can’t tell…).
Steakhouse Steaks
-Barefoot Contessa
2 (10-ounce) filet mignon (or in my case, Ribeye steaks)
2 tablespoons vegetable oil
1 tablespoon salt
1 tablespoon coarsely cracked black peppercorns
2 tablespoons unsalted butter, at room temperature, optional
Preheat the oven to 400 degrees F.
Heat a large, well-seasoned cast iron skillet over high heat until very hot, 5 to 7 minutes.
Brush the steaks with the vegetable oil on each side and season with salt and pepper.
When the skillet is ready, add the steaks and sear them evenly on both sides for about 1 1/2 minutes per side.
Top each steak with a tablespoon of butter, if using, and place the skillet in the oven. Cook the steaks until they reach 120 degrees F for rare or 125 degrees F for medium-rare on an instant-read thermometer. (To test the steaks, insert the thermometer sideways to be sure you’re actually testing the middle of the steak.)
Remove the steaks to a serving platter, cover tightly with aluminum foil and allow to rest at room temperature for 10 minutes. Top with mushroom cream sauce (recipe below) and serve. Enjoy!
Mushroom Cream sauce
-Adapted from Barefoot Contessa
2 pounds baby Portobello mushrooms
1/2 cup good olive oil
1 shallot, chopped
4 tablespoons (1/2 stick) unsalted butter
2 teaspoons kosher salt
1/2 teaspoon freshly ground black pepper
1 tablespoon Worcestershire sauce
1/2 cup heavy cream (you could also use half and half)
1 tablespoon dry red wine
Brush the caps of each mushroom with a clean sponge. Remove and discard the stems. Slice the small mushrooms thickly and cut the large ones in a large dice.
Heat the olive oil in a large Dutch oven or saucepan. Add the shallots and cook over low heat for 5 minutes, or until the shallots are translucent. Add the butter, mushrooms, salt, and pepper and cook over medium heat for 8 minutes, until they are tender and begin to release their juices, stirring often. Stir in the Worcestershire sauce, red wine and cream and cook for 2 more minutes. Serve warm over steaks.
This turned out to be one of the best meals I’ve made in a long time – hubby kept going on and on about how good it all tasted. I always feel so good when I put a good dinner on the table for my hard-working hubby – especially when he really loves it! I know this recipe will be in my recipe box from now on…it’s definitely a keeper!
OH! – and, be on the lookout….something new and exciting is in the works here at Sing For Your Supper!! I can’t wait!……………
Poor hubby has had a hard week. So last night I wanted to make him a nice, relaxing, delicious dinner that would hopefully let him forget his troubles for a while. That’s just what I did; pan-seared Ribeye steaks with a mushroom cream sauce, baked potatoes, gelato (all coming soon!) and this salad – it was a wonderful meal and a wonderful evening!
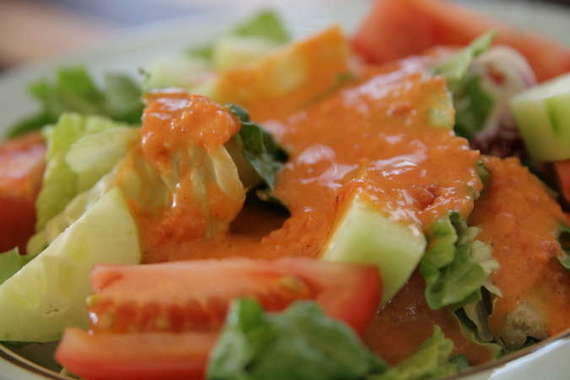
There is an Italian restaurant we like to go to that has the best house salad dressing; they make it with fresh tomatoes and it’s totally delicious. I’ve been meaning to try and recreate it at home so we can enjoy it anytime. So of course when I saw this recipe on Kayotic Kitchen, I knew I had to try it. While this recipe was great – it wasn’t quite like the restaurant style we love so much- pretty close, though. However, it’s good to have this recipe on hand – it’s delicious!!
Fresh Tomato Salad Dressing
-Kayotic Kitchen
3 Roma tomatoes
1 garlic clove
2 tbsp red wine vinegar
4 tbsp oil
pepper
salt
I put all ingredients in a blender and pureed it until smooth. Taste for seasoning and refrigerate until needed.

This was a great salad – it was a nice change of pace from regular ranch dressing and we both loved it! I think hubby enjoyed his meal tremendously…I know I did!
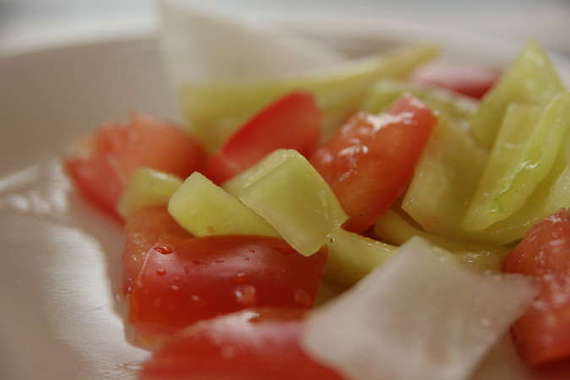
No, I’m not speaking some strange, made-up language…Bum Goolie is a type of food! It’s light, it’s tart, it’s refreshing…it’s totally delicious! But what is it, you’re probably wondering…
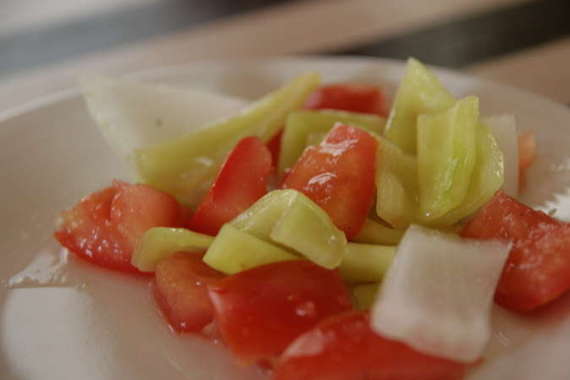
I guess you could say it’s a type of salad. It’s been in my family for years ever since my Aunt Bunny gave my Nana the recipe. We have no idea what the heck “bum goolie” means, but hey, it tastes good and that’s all that matters. It’s sort of a salad of pickled tomatoes, banana peppers and onions – that’s the best way I can describe it. It’s absolutely delicious in the summer when tomatoes and banana peppers are in season and the weather is hot- it’s very refreshing. I love to stock up on tomatoes and peppers at the Farmer’s Market and make a big batch – it goes great with pretty much every meal.
Here’s how I make it:
Bum Goolie
6-8 long, fresh banana peppers, seeded and chopped into bite-size chunks
3-4 tomatoes, seeded, cut into chunks
1/2 a yellow onion, cut into chunks
1/2 – 3/4 cup white vinegar (depending on how tart you like it – add as much or as little as you like. I like mine pretty tart, so I’d probably use a little more than this)
1/2 water
1 teaspoon sugar (or more if you like it a little sweeter)
salt and pepper to taste
Mix all ingredients in a large bowl (it will be very liquidy – you’ll need a slotted spoon when you go to serve it); cover and refrigerate for at least 2-3 hours. Overnight is best.
I know it looks and sounds weird, but trust me, it’s delicious. I just love it in the hot summertime! Enjoy!


