First off, I want to thank you all for the birthday wishes! I feel like my readers and my food blogging buddies are my real life friends- it means so much to be able to share my special day with all of you! I had a fantastic birthday; my sweet hubby treated me like a queen and I loved every minute of it (you gotta take advantage of it whenever it comes around, girls!)! And the piece of chocolate cake that was as big as my head (seriously!) that I had at dinner was the cherry on top of a great day!
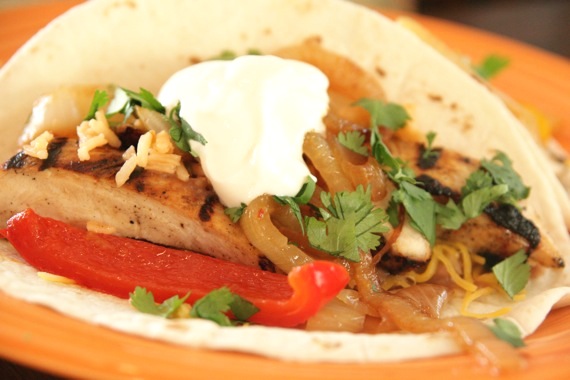
Now on to the good stuff- fajitas! Sometimes I feel like the only Tex-Mex I ever fix anymore is fajitas; but we just love them so much it’s hard to stray away from them! Normally when I make fajitas, I use steak and cook them in a large skillet with beer, salsa and a few other “secret” ingredients- they’re pretty hard to beat, if I do say so myself! However, when we go out to our favorite Mexican restaurant, Joe T. Garcia’s, I always, without fail, order their chicken fajitas. They’re slightly sweet, spicy and amazingly tender and juicy. So when I saw this recipe for grilled chicken fajitas that called for brown sugar, I knew I had to try them! The finished product was excellent and we really enjoyed them- they weren’t quite as good as Joe T’s, but hey, no one could EVER live up to Joe T’s standards! I suggest you give these chicken fajitas a try next time you’ve got a hankering for good Tex-Mex; you won’t be disappointed!
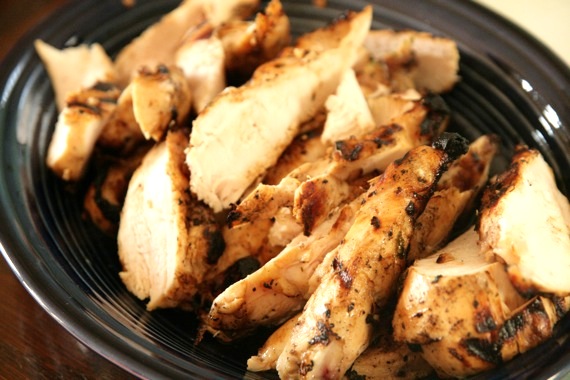
Grilled Chicken Fajitas
–The Way the Cookie Crumbles, originally from Cooks Illustrated
1/3 cup juice from 2 to 3 limes
6 tablespoons vegetable oil
3 medium garlic cloves, minced
1 tablespoon Worcestershire sauce
1 1/2 teaspoons brown sugar
1 jalapeno, seeds and ribs removed, minced
1 1/2 tablespoons minced fresh cilantro leaves
table salt and ground black pepper
3 boneless, skinless chicken breasts (about 1 1/2 pounds) pounded to 1/2-inch thickness
1 large red onion, peeled and cut into 1/2-inch-thick rounds (do not separate rings)
1 large red bell pepper, quartered, stemmed, and seeded
1 large yellow bell pepper, quartered, stemmed, and seeded
8-12 (6-inch) flour tortillas
In a medium bowl, whisk together the lime juice, 4 tablespoons oil, garlic, Worcestershire, brown sugar, jalapeno, cilantro, 1 teaspoon salt, and 3/4 teaspoon pepper. Reserve 1/4 cup marinade in a small bowl; set aside. Add another teaspoon salt to the remaining marinade. Place the chicken in the marinade; cover with plastic wrap and refrigerate 15-30 minutes. Brush both sides of the onion rounds and the peppers with the remaining 2 tablespoons oil and season with salt and pepper.
Remove the chicken from the marinade and place it smooth side down on the grill over medium-high heat; discard the remaining marinade. Place the onion rounds and peppers (skin side down) on the cooler side of the grill. Cook the chicken until it’s well browned, 4 to 5 minutes; using tongs, flip the chicken and continue grilling until it’s no longer pink when cut into with a paring knife or an instant-read thermometer inserted into the thickest part registers about 160 degrees, 4 to 5 minutes longer.
Separate the onions into rings and place them in a medium bowl; slice the bell peppers lengthwise into 1/4-inch strips and place them in the bowl with the onions. Add 2 tablespoons reserved unused marinade to the vegetables and toss well to combine. Slice the chicken into 1/4-inch strips and toss with the remaining 2 tablespoons reserved marinade in another bowl; arrange the chicken and vegetables on a large platter and serve with warm tortillas. Serve with rice, refried beans, sour cream, grated cheese, salsa and additional cilantro if desired.
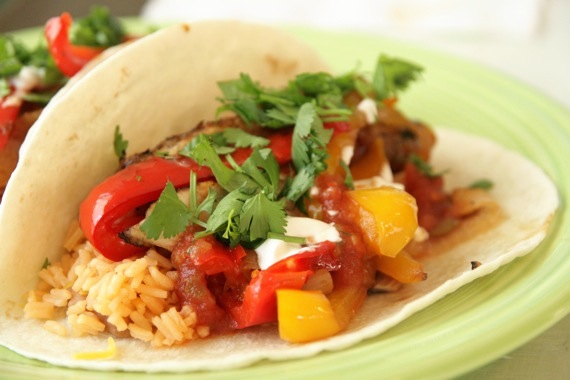
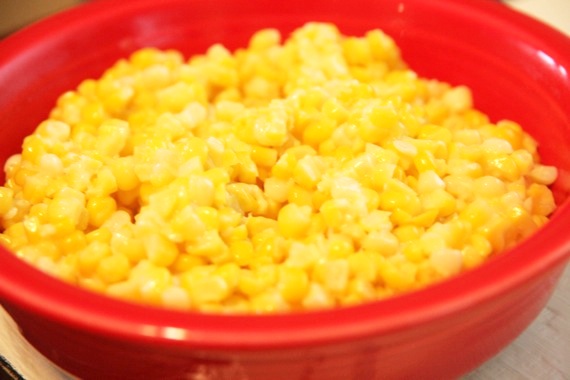
I love fresh corn. It’s one of my very favorite vegetables- so sweet, crunchy and fresh tasting. Yum. My favorite way to eat it is grilled- my hubby does a mean grilled corn on the cob! But I think this is my second favorite way to serve it- creamed. Now I know what you’re thinking, and no, this is nothing like those cans of mysterious, mushy, runny creamed corn. This is how my Great-Grandaddy, Pop, used to make it and it’s so simple and fast- and completely and utterly delicious. The only thing is, you simply must use fresh corn. Canned or frozen is absolutely NOT the same. Got it? Ok, here we go:
Classic Creamed Corn
5-6 ears of fresh corn, shucked (make sure to remove all the silk too)
2 tablespoons butter
salt to taste
splash heavy cream
In a medium skillet (cast iron is best, but not necessary), melt the butter over medium heat.
In the meantime, in a large bowl, slice the corn kernels off of each cob, then with the back (dull side) of your knife, apply pressure and scrape off all the juices from the cob- this is where all the good flavor comes from!
Add the corn and juices to the hot skillet and cook for 5-10 minutes, stirring occasionally, until the corn is beginning to soften just a bit. Don’t cook it too long- you want it to have a nice crunch to it. Add the salt and heavy cream. Serve immediately. Enjoy!
**This post is going to be pretty short and sweet- I have an opera rehearsal soon and this ridiculously hard music isn’t going to memorize itself!!
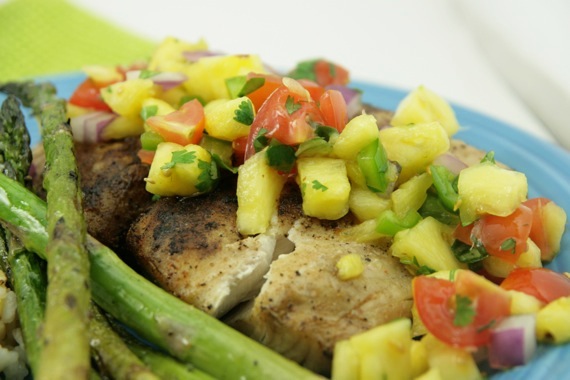
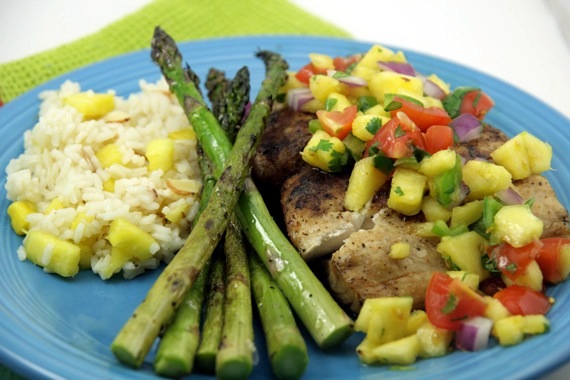
The other night I decided to be brave and figure out how to cut a fresh pineapple. Can you believe that I had never sliced a pineapple?? They’re just so darn intimidating- all those spikes and scary looking leaf things… But, honestly it’s not hard at all! I couldn’t believe just how simple it was! So with my new-found pineapple cutting skills, I decided to make a fresh pineapple salsa to go on top of grilled fish. YUUUUMMM! So hubby grilled up some Mahi-Mahi and asparagus and I made some pineapple-almond rice and it turned out to be a pretty great meal! However, I love fresh pineapple so much, I ended up eating so much of it that my poor tongue went raw and swelled up! Eeek! So be careful not to eat too much of the stuff…no matter how delicious it is! You don’t want to sthtart thalking like thith. Not fun. Or attractive. Just ask my husband. 😉
Fresh Pineapple Salsa
1 cup fresh pineapple, cut into small chunks
1/2 cup cherry tomatoes, cut into small chunks (measure after chopping)
1/4 cup chopped red onion
1 small jalapeno pepper, seeded and diced
handful chopped fresh cilantro
juice of 2 limes
1/2 teaspoon salt
Mix all ingredients in a bowl, taste for seasoning and chill for at least 1 hour. Serve over grilled fish, pork chops or chicken. Serves 2.
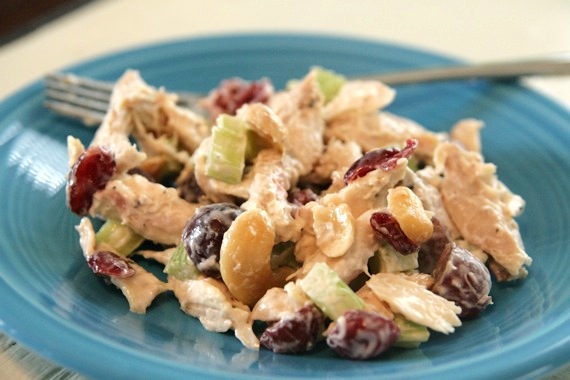
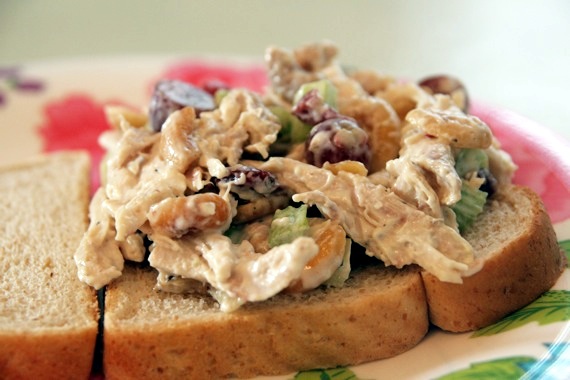
You may not know this but chicken salad is one of my favorite things to eat. I love it! But surprisingly, I’ve only posted one recipe for it on my blog and it wasn’t even my own personal recipe. Well it’s been long enough!
There are SO many different ways of making a good chicken salad – my mom sometimes puts pineapple and almonds in hers and my grandmother puts a little whipped cream in hers. They’re all different and they’re all so good. Mine is a bit different from theirs, but not too much. I love it because it’s really crunchy, sweet and salty at the same time. Mmmm, just talking about it makes me hungry for more….. This is a perfect meal- it’s light, refreshing and keeps really well in the fridge for lunch the next day. You really need to try this one; I promise you’ll love it as much as we do!
My Chicken Salad
1 small rotisserie chicken, deboned and shredded
2 celery stalks, chopped
handful red grapes, sliced in half (we like lots)
1/2 cup lightly salted cashews
1/3 cup dried cranberries
1/4-1/3 cup mayonnaise (start with 1/4 cup and see if you need more)
1/2 teaspoon sugar
1 teaspoon salt
1/2 teaspoon freshly ground pepper
pinch cayenne pepper
Mix all ingredients in a medium bowl and taste for seasoning; chill until ready to serve.
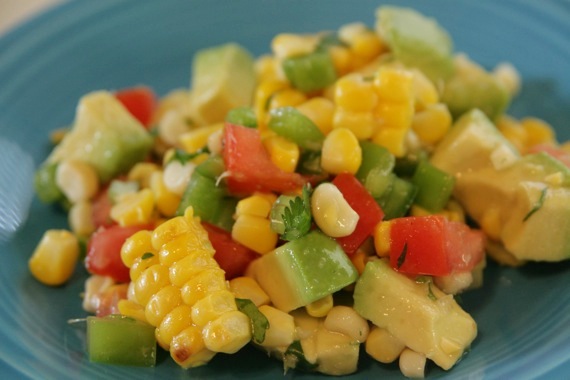
Ok, I am officially FIRED UP about Summer!! Every year I get so depressed that the Christmas/Winter season will be over and Spring/Summer is on its way…but not this year! This year I was ready to kick winter to the curb and move on to sunny weather, warm breezes and spending as much time as possible outdoors. But, as luck would have it…it rained. Non-stop. For weeks. I feel like it’s been raining all. stinking. year. Just when we would get a taste of beautiful Spring weather – BAM! More rain for the next 4 or 5 days. But, this weekend, luckily, the rain subsided and we were blessed with a wonderfully sunny, warm, beautiful weekend. JOY! And to celebrate that, hubby and I decided to grill. I marinated (then hubby grilled) some chicken breasts in my beloved Lime Ponzu (and lemme tell ya- this stuff is an awesome marinade!!! Next up is grilled Lime Ponzu shrimp!), whipped up some spiced sweet potato bites with curry, chili powder and paprika (coming soon!) and topped it off with this grilled corn salad (aka, heaven in a bowl- you MUST try this!!). And WOW- what a great meal! We sat outside by the pool and enjoyed every second of our meal- especially the corn salad! And now, I’m SO ready for summer so we can do this every night!! Come on, summertime!!
Grilled Corn Salad
-adapted from For the Love of Cooking
4 ears of fresh corn, grilled, (I took off 1 layer of the shucks, then hubby grilled them over medium heat for 20-30 minutes, turning occasionally)
2 roma tomatoes, diced
half a green bell pepper, diced
1 small jalapeno, diced
1 avocado, diced
handful cilantro, chopped
juice of 2 limes
1 tablespoon vegetable oil
2 teaspoons honey
salt and pepper to taste
To make the dressing: Put honey and lime juice in a small bowl and slowly whisk in the vegetable oil. Add salt and pepper.
To assemble the salad: Cut the corn off of the husks and place in a large bowl with tomatoes, bell pepper, jalapeno, avocado and cilantro. Toss with dressing. Check for seasoning. Chill until ready to serve. Serves 4.
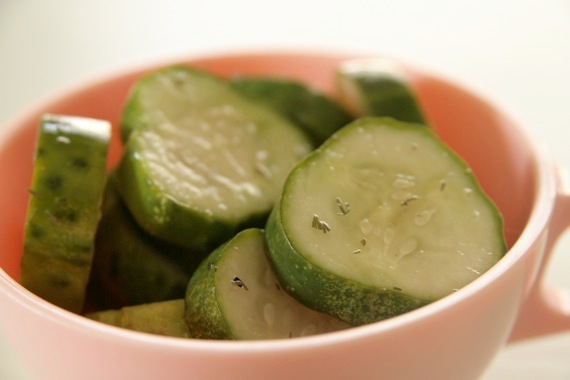
I love all things tangy, briny, or “vinegary”. My favorite flavor of potato chip is hands down, Salt and Vinegar (YUM!). So of course, I love to make my own “pickles”- however, these probably can’t really be considered real pickles. They’re more like quick pickles. Let’s call them “Quickles”. Hehehe…quickles….. Anyway, anytime I go to the Dallas Farmer’s Market, I always linger over the short little pickle-sized cucumbers and think, “I could SO make my own pickles”. But I never do and still never have, really. Someday, though, I promise, I’m going to dive head-first into this whole pickling thing- pickles, beets, okra, you name it! Until then, these “quickles” will have to do.
Basically, I slice cucumbers (any size will do, but these little ones work perfectly!), throw them in with some vinegar, water, salt, sugar, pepper and dill; let them sit in the fridge for awhile and voila! Quickles! You can add in anything you want, really- garlic, cayenne pepper…the possibilities are endless! I like mine extra “puckery” so I use plenty of vinegar, but you can use less if you like a more mild pickle. These measurements are just approximations, as I just throw everything in without measuring, so think of them more as “guidelines”.
Quick and Easy “Pickles” (or Quickles!)
10-12 small pickle-sized cucumbers, cut into thick slices
1/2 – 3/4 cup red wine vinegar
1/2 cup water
2 teaspoons dill (fresh or dried)
1 – 2 teaspoons salt (depending on how salty you like them)
1/2 teaspoon sugar
1 teaspoon black pepper
Mix all ingredients in a large bowl. Check for seasoning. Make sure all the cucumbers are covered by the liquid. Cover and refrigerate for at least 3 hours. Serve cold.
*I should mention that these small cucumbers are delicious by themselves with just a little salt and pepper – a great side dish!
And now onto more important matters- the winner of the Bob’s Red Mill Whole Grain Cookbook! And the winner is…………

Congrats, Jen! And thank you to everyone for your sweet comments! I’m so lucky to have such wonderful readers!!!
*On a separate note: if any of you are having issues with my blog not loading…please be patient- hubby is working on it. Once again, (it seems like this stuff never ends!) thanks to Go Daddy.com, we’re having server issues. Sometimes it kinda sucks hosting your own site……
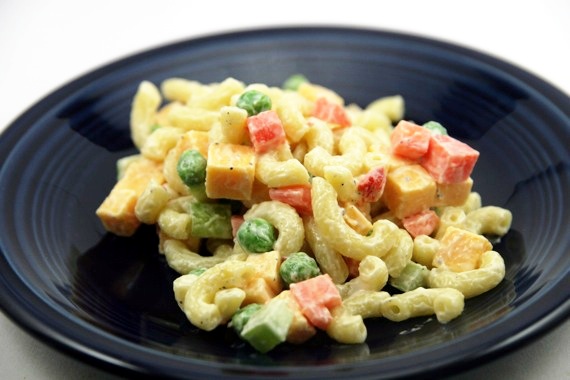
I realize I’ve sort of been MIA lately, but I have a good excuse – my sweet hubby took off Thursday and Friday to be with me and relax a bit (and wasn’t his timing impeccable? We’ve had nothing but NCAA tournament on for 4 days straight!). We’ve had such a wonderful 4 days together – we cooked together, played games (I’ve almost gotten to the point where I can beat him at Mario Cart…almost), took nice, long walks with Izzy, and he even helped me paint our dining room table! There’s nothing I enjoy more than spending time with my husband (especially when life is SO happy and care-free)! I just hate that he’s back at work now, and unfortunately, my Spring Break is over as well- it’s back to work tomorrow for me too. 🙁
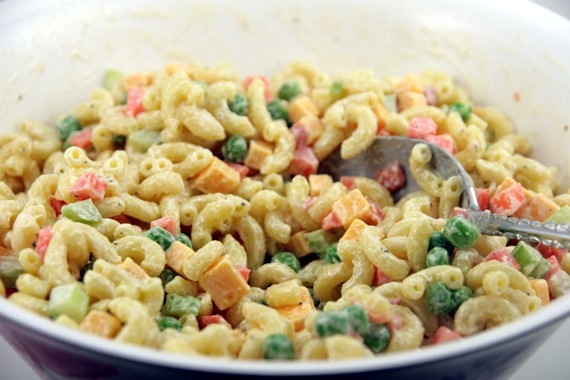
While we were enjoying our free time, we decided it would be nice to grill hamburgers and hot dogs; and one of my favorite things to serve with grilled burgers is macaroni salad. Mmmm! Macaroni salad is just one of those foods that puts me in a good mood. It’s crunchy, creamy, slightly tangy…I just love it! I just sort of “threw” this one together and it was actually one of the best tasting macaroni salads I’ve had! Our favorite part is definitely the little cubes of cheese – we loooove cheese! These measurements are just approximations, so be sure to taste as you go along and add additional seasoning or ingredients as needed to suit your tastes.
Creamy Macaroni Salad
1/2 pound macaroni, cooked, drained and completely cooled.
3 small carrots, diced
1 celery stalk, diced
1-2 Tablespoons jarred pimento
1/2 cup frozen sweet peas, thawed
1/2 cup cheddar cheese, cut into small cubes (we like more cheese, so I ended up using closer to 3/4 cup)
salt and pepper to taste (we like lots of black pepper)
1/2 cup mayonnaise
1/2 teaspoon dijon mustard
1/2 cup Creamy Italian salad dressing
Mix all ingredients in a large bowl. Taste for seasoning. Chill for at least 1 hour before serving.
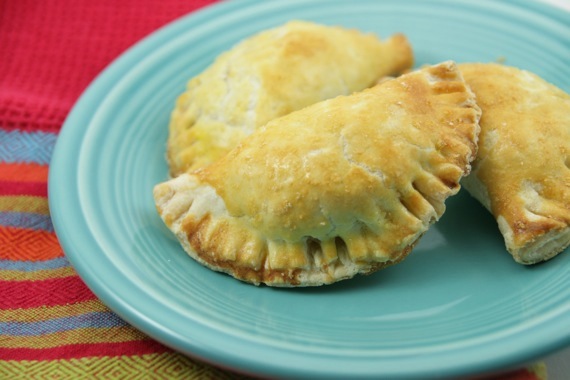
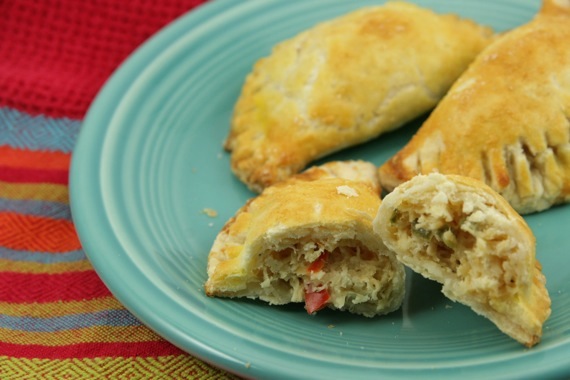
I know, I know – more Mexican food. But hey, we can’t get enough of the stuff, ok? Back when we had my family over for the Super Bowl, my Nana brought these chicken empanadas and MAN, where they good! Not too spicy, full of flavor, and the best part – they’re baked instead of fried so you can feel better about eating a lot! 😉 Luckily, I had made some homemade guacamole – they were perfect together! We all loved these- they got gobbled up pretty fast! Luckily, I managed to save a couple for my lunch the next day, and the good news is, these re-heat perfectly. I’ll definitely be making these again! SO glad Nana decided to bring these over! Give ’em a try – they’ll be perfect for your next “Mexican Feast”!
Chicken Empanadas
-Paula Deen
3 cups chopped, cooked chicken
1 (8-ounce) package shredded Colby and Monterey Jack cheese blend
4 ounces cream cheese, softened
1/4 cup chopped red bell pepper
1 jalapeno, seeded and chopped
1 tablespoon ground cumin
1 1/2 teaspoons salt
1/2 teaspoon pepper
1 (15-ounce) package refrigerated pie crusts
Water
Preheat oven to 400 degrees.
Lightly grease a baking sheet. In a large bowl, combine the chicken and next 7 ingredients. Unroll 1 piecrust onto a lightly floured surface. Roll into a 15-inch circle. Cut out rounds, using a 3-inch cookie cutter. Re-roll dough as needed. Repeat procedure with remaining piecrusts, making 12 to 15 circles total. Arrange 1 round on a clean, flat surface. Lightly brush the edges of crust with water. Place 1 heaping teaspoon of chicken mixture in the center of the round. Fold the dough over the filling, pressing the edges with a fork to seal. Repeat with the remaining rounds and chicken mixture. (Up to this point, the recipe can be made ahead and frozen for up to 1 month). Arrange empanadas on the prepared baking sheet. Bake for 15 minutes.
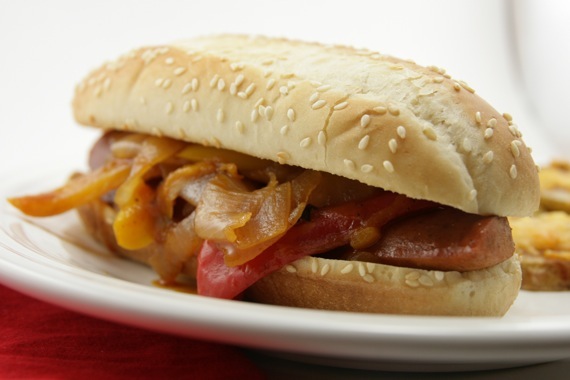
Sausage, pepper and onion sandwiches are something I’d never eaten before. Mainly because I grew up hating peppers and onions, and only recently overcame my hatred. These sandwiches just seem like something that wouldn’t be very tasty, yet everytime I see someone make them on TV or see someone blog them, they look SO good. I decided to put my fears aside and give these sandwiches a try once and for all. And boy, am I glad I did – they were great!! The peppers and onions are really sweet and soft, and the smokey, spicy sausage really balances it all out perfectly. And they’re cooked with beer, which my hubby really likes! These would be great for a whole number of occasions: weekend, tailgating, Olympic-watching, backyard barbeque….or even just a plain ‘ol weeknight!
Sausage, Pepper and Onion Sandwiches
-adapted from the Neelys
1 tablespoons olive oil
1 pound smoked sausage, sliced into quarters then lengthwise (I used turkey sausage)
1 red bell pepper, sliced
1 yellow bell pepper, sliced
2 medium yellow onions, sliced
1 garlic clove, chopped
1 teaspoon black pepper
2 tablespoons tomato paste
1 cup beer
1 tablespoon barbeque sauce
4 fresh hoagie rolls
Preheat the oven to 350 degrees.
Heat the olive oil in a large cast iron skillet or Dutch oven over medium heat. Add the sausages and brown on all sides, about 7 to 8 minutes. Remove from skillet and reserve.
Add onions and peppers to the skillet and saute until tender and golden brown, about 6 minutes. Add the garlic and saute until fragrant. Stir in the tomato paste, beer, and barbeque sauce. Cook for a few minutes, then add the sausages back to the pan. Reduce the heat and simmer until the sauce is nice and thick, about 10 minutes.
Slice the bread open, put on sheet tray, and toast in the oven while the sausage is simmering. Remove the bread from the oven and fill with the sausages and peppers.
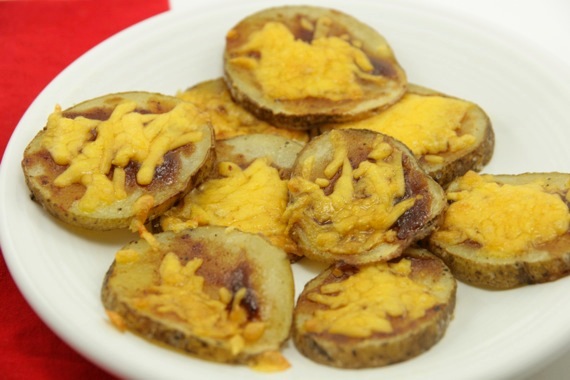
Pretty much everyone in my family or close circle of friends is well aware of my undying love for A-1 Sauce. I could eat it on just about anything…seriously. Growing up, anytime my dad would grill steaks, I would literally pour almost half a bottle of it all over my plate (including my baked potato) – over the years he learned not to be offended at me drowning his steaks in A-1; it’s not personal – it’s just what I do. 🙂 To this day, my favorite thing to eat A-1 on is my baked potato – I don’t eat one without it. Which is how I arrived at these. I was making sausage, pepper and onion sandwiches (coming soon) and wanted to make my yummy Southwestern Potatoes for a side dish, only I discovered I had no barbeque sauce. I noticed a bottle of A-1 in the fridge and thought about how much I love A-1 on my baked potatoes…so why not try it on these? Bullseye! These were SO good (even though, judging by the picture, they don’t look so appetizing…). We both gobbled these up in no time; and I can definitely say, I’ll be making these again soon.
A-1 Potatoes
2 unpeeled large potatoes, scrubbed
3 tablespoons olive oil
1/2 teaspoon salt
1/2 teaspoon black pepper
1/4 cup A-1 Sauce
1 cup shredded cheddar cheese
1/2 sour cream, optional (for dipping)
Line a large baking sheet with foil and preheat oven to 450 degrees.
Cut potatoes into 1/4 inch slices. Toss the potatoes, olive oil, salt and pepper in a big ziploc bag to coat the potatoes. Arrange potatoes in a single layer on the baking sheets. Bake until lightly browned, about 15-20 minutes. Brush with A-1 Sauce, then top with the shredded cheese. Bake until the cheese melts, about 3-5 minutes. Top with sour cream, if desired.
*You want to go easy on the salt, since the A-1 already has so much salt in it.


