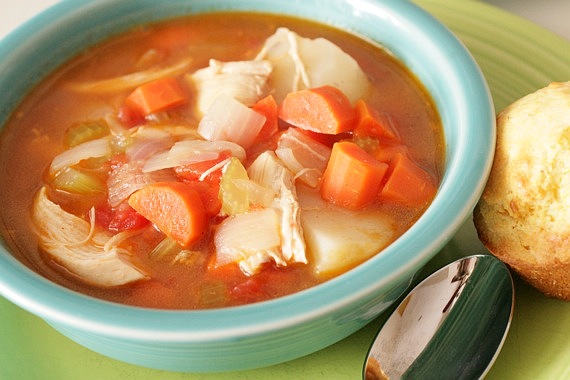
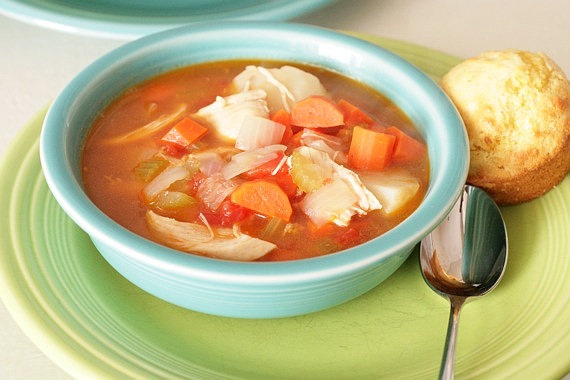
Um, it’s been cold. Really bad, snowy, icy, power outages, school-closed-for-4-days COLD. But I probably don’t have to tell you that. Most likely, it’s been the same story where you are too (unless you live in California or someplace delightful and sunny, in which case…I hate you.). In fact, as I’m sitting here typing this, cars are slipping and sliding down my icy street. Weather like that can only mean one thing- warm, hearty chicken stew. It’s the easiest stew in the world to make and it requires very few ingredients. This is how my mom always made it and I just love it. In fact, not too long ago I was visiting my parents and my mom served me this stew for lunch- big chunks of potatoes, carrots and tender juicy chicken all simply seasoned with salt and pepper. This is the best kind of cold weather food! All you need is some good crusty bread or cornbread muffins to go with it and you’ve got a hearty, delicious meal!
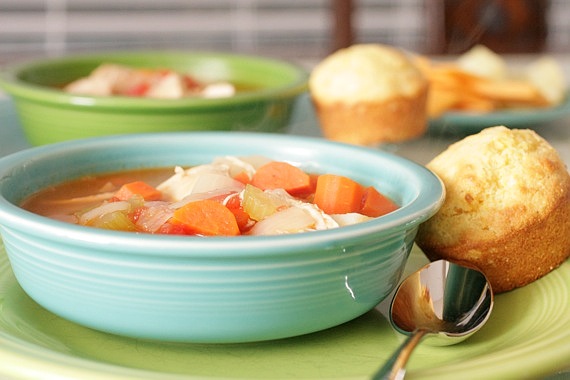
My Mom’s Chicken Stew
3 bone-in chicken breasts
5 carrots, peeled and chopped
5 or 6 small potatoes (or 2 or 3 medium sized), cut into chunks
1 medium onion, chopped
2 celery stalks, chopped
1 14-ounce can diced tomatoes
salt and pepper
Place the chicken in a large pot and fill with enough water to cover. Boil the chicken for 1 1/2 – 2 hours, or until very tender.
Remove chicken from pot (save the broth- you’ll use that later!) and let cool. Remove the skin and bones and shred chicken (I like it in pretty large chunks).
Put the pot with the chicken broth back on medium heat and add in the chopped onion, carrot, celery, tomatoes and salt and pepper (depending on how thin you like your stew you can add a little water if needed). Cook for 15-20 minutes, until the vegetables are just about tender. Add in the potatoes and chicken and cook for another 15-20 minutes, until the potatoes are soft. Check for seasoning. Serve hot with crusty bread or cornbread muffins. Enjoy!
Serves 4-6 (also makes great leftovers!)
Recipe source: Sing For Your Supper’s mom 🙂

I’m one of those people that loves breakfast-for-dinner. For me, it’s like a special treat getting eggs or pancakes or biscuits and gravy at dinner. I used to love it when my mom would make breakfast for dinner – she’d fix a huge cast iron skillet full of scrambled eggs, a big plate of biscuits, sausage gravy, jelly and coffee. My dad is the pancake maker- as long as I can remember, he’s always been the one in charge of pancakes, which we’d also have for dinner a lot. YUM! I seriously LOVE breakfast-for-dinner! What a concept! So, naturally, I like to make it myself as often as possible. The other night, neither of us could decide what we wanted for dinner, so I rummaged around in the fridge and came up with this knock-out recipe. It’s one of those lovely “throw it all in” recipes that I just adore so much. You can put in whatever you like! Onions, potatoes, mushrooms, tomatoes…the possibilities for dish like this are endless! A perfect breakfast or breakfast-for-dinner meal!

Breakfast Tostadas
4 flour tortillas
1 tablespoon butter
6 eggs
1/4 pound bacon, cooked and crumbled into pieces
1/2 red bell pepper, chopped
4-5 slices jarred jalapenos, chopped
1/2 cup shredded cheddar cheese
salsa, for serving
salt and pepper, to taste
Preheat oven to 400 degrees. Place tortillas on a baking sheet in a single layer and bake for 5-7 minutes, until slightly crisp. Set aside.
In a large skillet, melt the butter over medium heat. Place the eggs in a large bowl and whisk until homogeneous. Stir in the cooked bacon, peppers and salt and pepper. Pour into hot skillet and stir continuously until eggs are completely cooked and scrambled (about 5 minutes).
Lay two tortillas on each plate. Top with the scrambled egg mixture, shredded cheese and salsa. Serves 2.
Recipe source: Sing For Your Supper original

Well, Christmas is over (sad…) and I hope that everyone enjoyed a safe, happy and joyous time with friends and family. We certainly did! It would have been just about perfect except I caught a terrible 24 hour stomach bug that’s been going around and it really put a damper on our Christmas Day- no worries though, we still had a wonderful, joyous holiday! My sweet, thoughtful husband put 4 kinds of aged cheese in my stocking this year, along with a BIG bottle of Mexican vanilla! He also got me a new set of pots and pans- bye-bye 4 year old, scratched up non-stick pans! Woo!

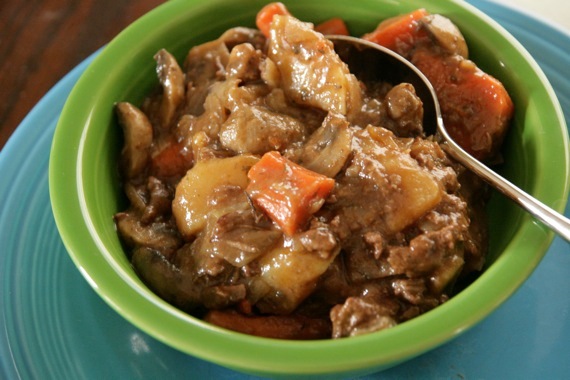
But now, it’s back to blogging and I’m so excited to share this stew with you! The weather is cold and rainy here (and blizzard-y pretty much everywhere else in the US!), so we need a good, hearty stew that will help to melt away the cold! This one is absolutely delicious- I saw it on Jamie’s blog, My Baking Addiction and was intrigued by the use of A-1 sauce, so I immediately made it. Normally when I make stew I like lots of liquid, so I guess technically what I’ve always made is ‘soup’. After trying this one, I’m not sure I’ll ever go back! It really exceeded my expectations and I can’t wait to make it again.
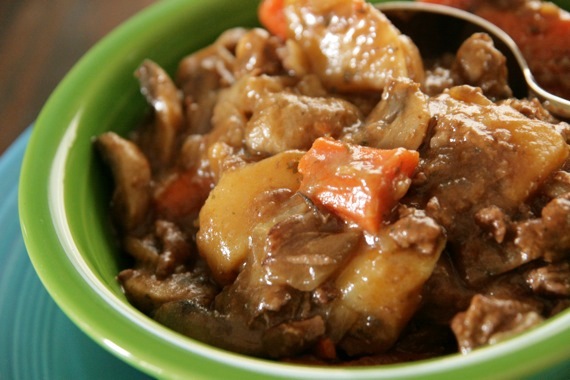
Thick and Hearty Beef Stew
-adapted from My Baking Addiction
1/4 cup flour
2 pounds beef stew meat, cubed
2 tablespoons olive oil
1/2 cup red wine
4 cups beef broth (I like to use reduced sodium)
1 teaspoon dried parsley
salt and pepper to taste
3 large potatoes, peeled and cut into large chunks
4 or 5 large carrots, peeled and cut into chunks
9 or 10 cremini mushrooms, cut into quarters
1 large onion, roughly chopped
1/2 tablespoon Worcestershire sauce
1 1/2 tablespoons ketchup
1 tablespoon A-1 steak sauce
Toss the beef and flour in a bowl until the beef is coated. Heat the olive oil in a large dutch oven over medium heat; add the beef and cook until nicely browned. Set aside.
Deglaze pot with red wine, scraping up the brown bits from the bottom of the pot. Pour in the beef broth and add in the beef, parsley, salt and pepper. Bring to a boil, then reduce heat to low, cover and simmer 1 hour.
Stir in potatoes, carrots, mushrooms, onion, Worcestershire, ketchup and A-1. Cover and simmer 1 hour more.
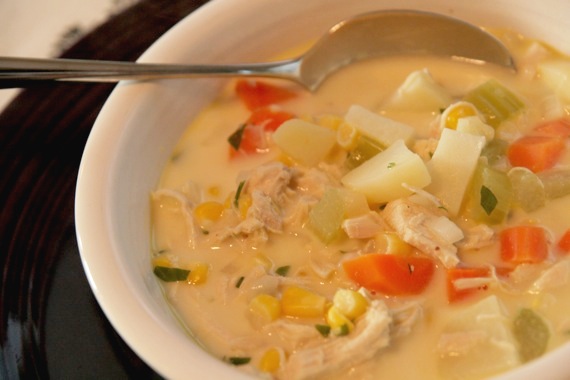
The weather has been cold and wet the past few days which only means one thing in our house- soup. After forgetting my umbrella yesterday and thus getting soaked on the way to the car, I came home and immediately set out to make a big pot of soup. Nothing makes me feel cozier or more comfortable. Ahhhh. This is just a plain ‘ol, good-for-the-soul chicken soup…with a splash of cream to give it a little richness. Nothing fancy or difficult- just warm and full of comfort. Perfect for cold rainy days! And it tastes even better if you snuggle up to your hubby on the couch while you eat! Now THAT makes for good soup! 🙂
Creamy Chicken and Vegetable Soup
2 chicken breasts, cooked and shredded
4-6 medium-sized carrots, chopped
1 onion, chopped
1 clove garlic, chopped
2 celery stalks, chopped
2 medium-sized potatoes, cut into cubes
1 cup frozen or canned corn
6 cups chicken broth
salt and pepper to taste
1 bay leaf
1/2 cup heavy cream or half and half
handful chopped parsley
**Feel free to add in any other vegetables you like- frozen peas, green beans, zucchini…whatever!
Place carrots, celery, onion, garlic, chicken broth, bay leaf, salt and pepper in a large stockpot over medium heat. Bring to a boil and cook for 15-20 minutes, until the vegetables are tender. Stir in the chicken, potatoes and corn. Simmer for another 20-30 minutes. Check for seasoning then add in the heavy cream and chopped parsley.
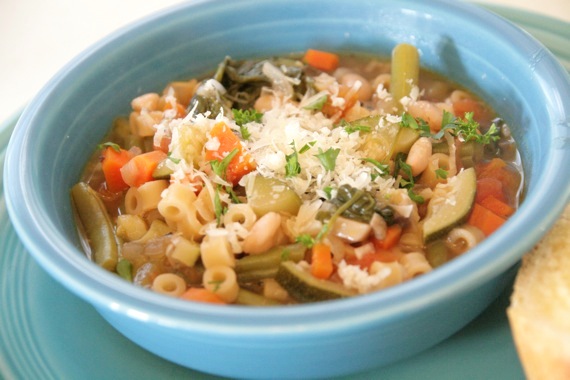
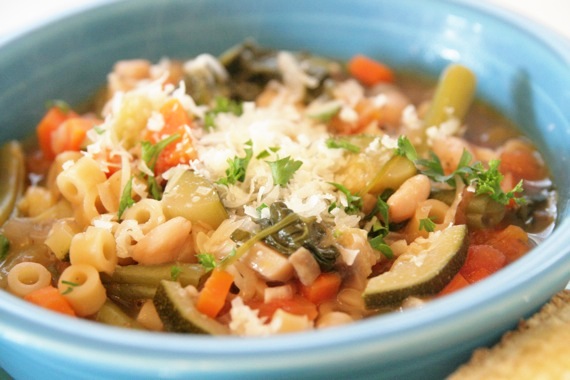
It’s that odd time of year again. The period where it’s definitely NOT cool, fall weather yet, but I’m sick to death of summer and want warm, comforting meals. I’m tired of ice cream and popsicles and watermelons. I want fall food. I want sweet potatoes and pumpkins and SOUP! Well, today, I gave myself the best of both worlds! I managed to satisfy my craving for cool weather food, while still taking advantage of summer vegetables. I decided to make a hearty, delicious minestrone using veggies that are still in season. A great success! I went to Sprouts and loaded up on fresh summer vegetables- fresh green beans, tomatoes, zucchini, spinach- tons of goodies! This was a really delicious pot of soup! Plus there’s plenty for our dinner tomorrow night too (I go back to start teaching the kiddos tomorrow, so coming home to a ready-made meal will be quite nice!). Give this one a try- it’s definitely satisfying and comforting, yet really fresh and bright!
Minestrone with Summer Vegetables
2 tablespoons olive oil
1 medium onion, chopped
2 cloves garlic, minced
*4 roma tomatoes, peeled, seeded and chopped (alternatively, you can use one 14-oz. can)
3 carrots, chopped
2 cups fresh green beans, trimmed (snap off the ends, then snap in half)
2 medium zucchini, chopped
1 cup mushrooms, chopped
1 bunch fresh spinach, thoroughly washed and roughly chopped
1 can Cannellini beans, drained
1/4 cup parsley, chopped
1 cup ditalini pasta (any small pasta is fine)
1/4 cup dry red wine (you can leave this out if you want)
3 cups chicken broth
1 cup water
1 tablespoon salt
2 teaspoons pepper
1 bay leaf
Heat the olive oil in a large stock pot over medium heat. Add in the onion and cook for 3-4 minutes. Add in the garlic and cook for one minute more. Add in the tomatoes, carrots, green beans, zucchini, mushrooms, chicken broth, water, wine, salt and pepper, and bay leaf. Bring to a boil, then reduce heat. Cook for 10 minutes. Stir in the spinach, cannelloni beans and pasta. Cook for 15-20 minutes, stirring occasionally, then check for seasoning. Add more salt and pepper if needed. Stir in the parsley at the last minute. Remove the bay leaf. Serve.
Top with fresh grated parmesan cheese, a drizzle of olive oil and parsley. Enjoy!
*To peel the tomatoes, cut a small ‘x’ in the bottom and place in a pot of boiling water for about 1 minute. Remove from water and immediately place in a bowl of ice water to stop the cooking. The peels should come right off.
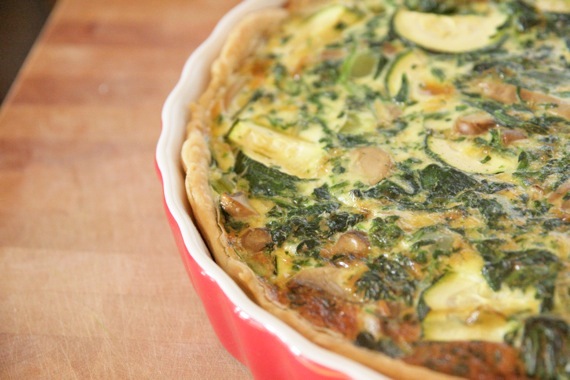
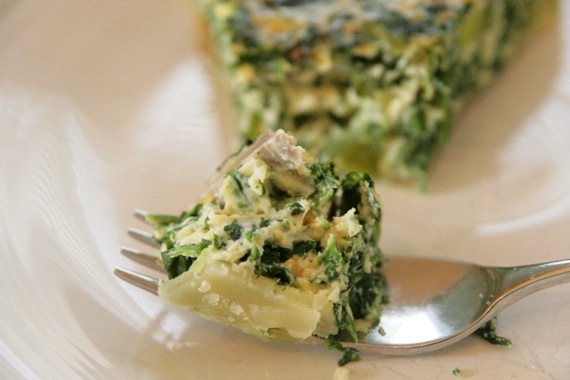
Speaking of quick, easy meals you can throw together on a moment’s notice… Quiche is always a perfect solution for a busy weeknight. Not only that, but it’s down-right delicious and satisfying! I think the thing I love most about quiche is its versatility- you can throw in almost any kinds of vegetables, cheeses or seasonings you want! I mean, anything you’ve got in your pantry, freezer or crisper drawer can be baked into a quiche- amazing!
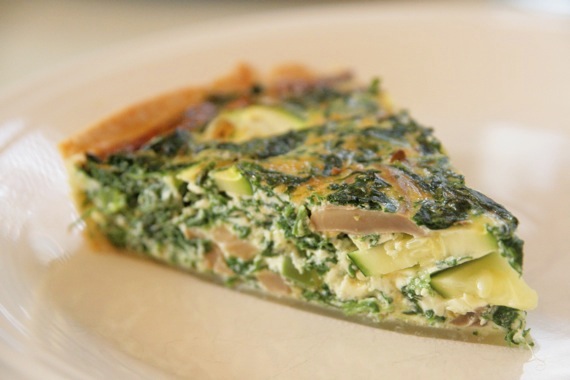
Here’s some good news: I’m getting a new car!! WOAH! That IS good news, eh? 😉 So that means, instead of meal planning and focusing on what kinds of things I should cook for dinner each night, I’m thinking about what color I’d like my new SUV to be, what kinds of music should I listen to while I’m cruising around town, and most importantly, what kind of outfits go best with my new car. Yeah, that’s right. I went “new car clothes shopping” yesterday. If I’m going to have a spanking fresh, new car, I’m going to need a couple of new outfits…DUH. 😉 So, obviously, that didn’t leave a lot of time for meal planning. That’s why this quiche is perfect- I had no idea what I was going to make for dinner, and somehow, at the last minute, I ended up with a beautiful meal! TA-DAH!! And so far, I think this is my favorite combination of vegetables in a quiche- they all went really well together and we ate like pigs, it was so good! Give it a try!
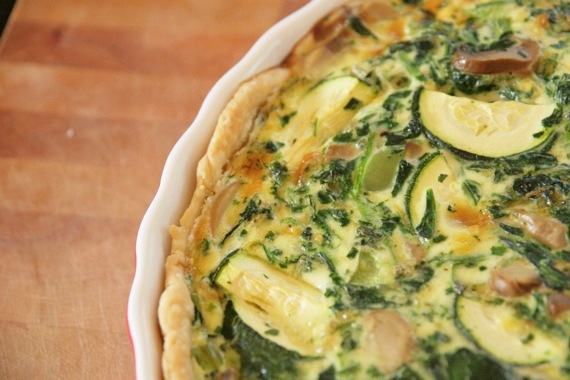
Spinach, Zucchini and Mushroom Quiche
1 9-inch pie crust, unbaked (store-bought works just fine here!)
7 large eggs
3/4 cup half and half
1/2 cup cheddar cheese
1 medium zucchini, cut in half and sliced into pieces
1 small green pepper, chopped
1 small box frozen spinach, thawed and drained of all water
1 small can mushrooms (fresh would be even better)
2 teaspoons salt
1 teaspoon pepper
1/2 teaspoon white pepper
Preheat the oven to 375 degrees. Press the pie crust into a quiche pan or a pie plate. In a large bowl, beat the eggs with the half and half; stir in the salt, black pepper, white pepper and cheese. Add in the vegetables and stir to combine. Pour into the prepared pie crust and bake for 35-55 minutes, or until the top is golden brown and a knife inserted comes out clean (*My oven cooks a little faster, so it only took 35 minutes, but it could take longer in different ovens. Just keep an eye on it after about 30 minutes). It shouldn’t be too jiggly when you pull it out. Let sit for 5 minutes before cutting.
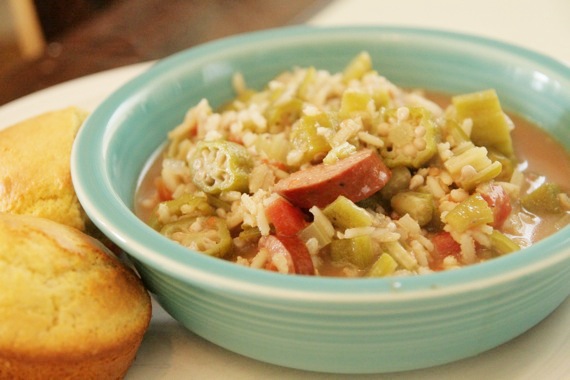
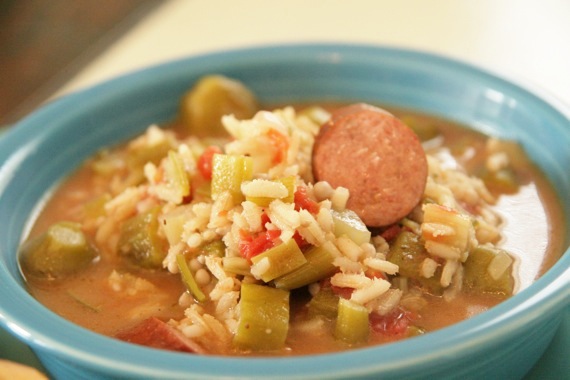
I tend to forget about Cajun food. It’s pretty simple and straight-forward and always totally delicious, yet for some reason, I never think about making it. However, every time I do, I always think to myself, “I really should make this more often!”. Just one of those things, I guess. But not anymore! I promise, dear Cajun food, that I won’t neglect you anymore!
Now, I know I already have a recipe for okra gumbo posted, but this one is a teensy bit more involved and more complex than the other. Plus, it’s pretty much an entirely different recipe, and I thought you should have both! This isn’t a real, honest-to-goodness ‘Nawlins style gumbo that starts with a roux. Honestly, I’m not a big fan of that “deep” (*cough* burnt) flavor it gives, so I started mine with some good ‘ol bacon grease (to all my gumbo aficionados out there, please don’t hate me). I sort of just threw some things together and ended up with one fantastic tasting gumbo! The great news is, this made a giant pot, so we had enough for 2 meals!
Sausage and Okra Gumbo
3 or 4 strips bacon
1 small onion, chopped
1 bell pepper, chopped
3 stalks celery, chopped
1 15-oz. can chopped tomatoes
1 bag frozen okra (I don’t actually know the size- it’s probably around 4-6 cups), thawed
1 package fully cooked turkey sausage (14 oz.), cut into 1-inch pieces
1 cup rice
2 bay leaves
1 1/2 teaspoons Old Bay seasoning
1 teaspoon Tony Chachere’s seasoning
4 cups chicken broth
salt and pepper to taste (you won’t need much salt at all since Tony C. has salt in it)
Cook rice according to instructions on packaging. In a large dutch oven or stock pot, heat the bacon over medium heat and render fat. Remove the bacon and set aside. Add onion, pepper and celery and cook for 7-10 minutes, or until onions are slightly translucent. Add tomatoes (with their juice), okra, seasonings and chicken broth. Add the bacon back to the pot. Bring to a boil and reduce heat to low. Add sausage and rice. Cook for 10-15 more minutes (if it gets too thick for your liking, feel free to add a little more chicken broth or even a little water). Remove the bacon and bay leaves and serve.
*The okra can be a little “slimy” sometimes; adding a splash of white vinegar at the end helps to cut through the sliminess, and you’ll never know it’s there.
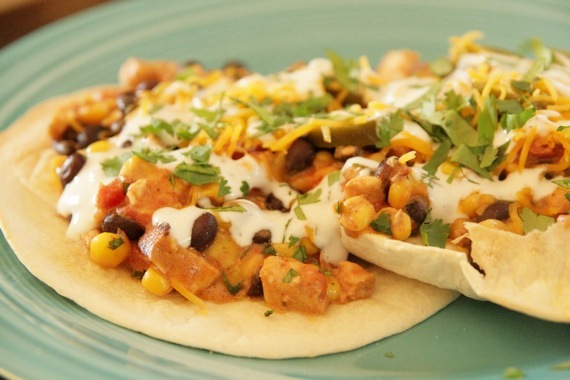
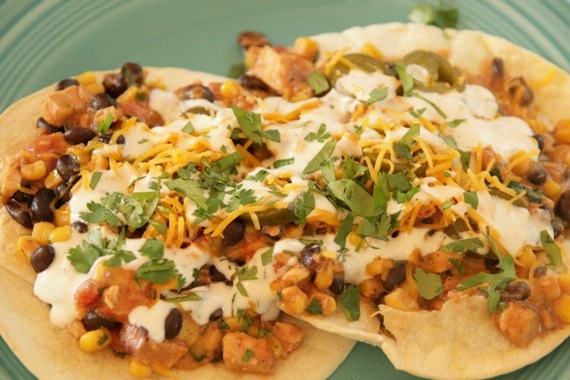
I always, always, always have cans of black beans, diced tomatoes and Mexi-corn in my pantry (Mexi-corn is just canned corn with chopped red and green peppers). They can transform pretty much anything into a spicy, fun, Tex-Mexy meal- which we just love. The other night I had some leftover grilled chicken breasts that were really tasty and I wanted to use them up. This dish was born. It started out just a way for me to use up leftovers and pantry staples, but ended up being one heck of a delicious meal- we couldn’t get enough of it! In fact, I can’t wait to make it again- it was SO easy and really, really delicious. The Ranch dressing really give it a fantastic flavor! If you find yourself in need of a recipe to use up leftover chicken, steak, ground beef, or whatever you have- this is for you! Give it a try!
Southwestern Skillet
2 fully cooked chicken breasts, diced into small pieces
1 can black beans
1 can Mex-corn (regular corn would work just fine too)
1 can petite diced tomatoes
1/2 red onion, diced
handful chopped cilantro (reserve some for the top)
1 packet taco seasoning (I didn’t use the entire packet, but if you feel like you want more spice, add the whole thing)
1/2 cup sour cream
1/2 shredded cheddar cheese (reserve some for the top)
2 large or 4 small tortillas
Ranch dressing
jarred pickled jalapenos
*Feel free to add in any additional vegetables you have on hand- bell peppers would work great, or even zucchini or potatoes.
Preheat the oven to 400 degrees. In a large skillet over medium heat, cook the diced onion until translucent; add the chicken, beans, corn, tomatoes, cilantro, taco seasoning, sour cream and cheese. Stir to combine. Cook for 4-5 minutes, until the cheese melts.
Spray the tortillas with cooking spray and place on a baking sheet; bake for 5 minutes or until golden brown and slightly crisp.
Top the tortillas with the skillet mixture then drizzle with ranch dressing. Top with jalapenos, cilantro and cheese. Serves 2-3. Enjoy! We sure did!
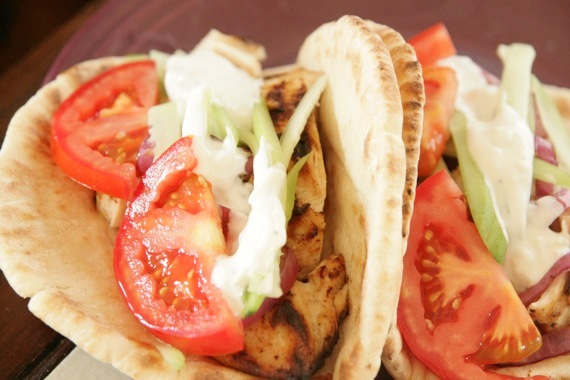
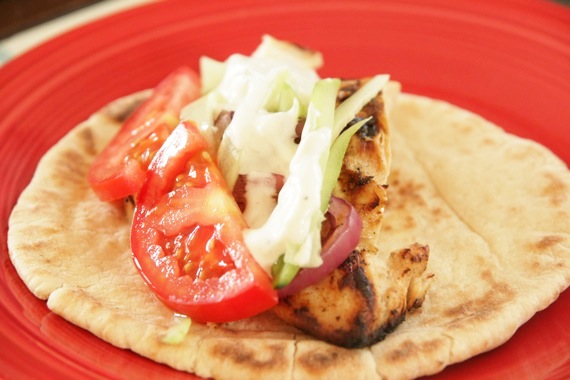
Those of you who have followed me for awhile know how much I looooove Greek food. Anything even remotely “Greek-tasting” is a winner in my book! Especially Gyros (pronounced “yee-rohz”). Oh man, oh man…I could go on and on about Gyros. The first one I ever tasted (ever heard of, actually) was in Vienna. Street vendors were selling them everywhere and that giant, rotating slab of meat looked pretty good to me, so I tried it. The meat was juicy, spicy and ohmigosh-so flavorful, and it was topped with a cool, cucumbery yogurt sauce, called Tzatziki; all served up in a warm, soft pita bread with tomatoes, onions and cucumbers. Heaven in hand-held form. I was absolutely smitten from there on. Since then, I’ll eat a Gyro every chance I get! And now, luckily, I can make them at home anytime I like! I just happen to see this recipe over at Made By Mel, who saw it on Elly Says Opa! (the queen of Greek food!) and turned around and made it that night! Like I said earlier, typically, Gyros are made with lamb or beef or both, but this recipe calls for chicken, which makes it so quick and easy!
The Tzatziki is especially delicious- almost like a garlic-y (much, much lighter) Ranch dressing. If you have any left over, it makes a great dip for veggies or a nice sauce for grilled chicken or steak. It’s so versatile!
Chicken Gyros
-seen on Made by Mel, originally from Elly Says Opa!
2 Cloves Garlic, smashed
Juice of 1 Lemon
2 teaspoons Red Wine Vinegar
2 tablespoons Extra Virgin Olive Oil
2 heaping tablespoons Plain or Greek Yogurt
1 tablespoon Dried Oregano
1 pound boneless, skinless chicken breasts
Salt and Pepper
Tzatziki (see below)
sliced tomatoes
sliced red onions
Pita Bread
Whisk together the garlic, lemon juice, vinegar, oil, yogurt, and oregano in a bowl. Add the chicken and rub the marinade in. Cover and refrigerate for at least an hour.
Preheat the grill to medium heat (or broiler, or pan on the stove). Sprinkle the chicken with salt and pepper on both sides, and then grill until cooked through, about 5 minutes per side, depending what size/type chicken you are using. Allow the chicken to rest for a few minutes before slicing into strips.
Meanwhile, heat your pitas in a fry pan, in the toaster or spray with a bit of oil and place right on a gas burner. Top the pita with the chicken, tzatziki, tomatoes and onions. *I grilled my onions since I don’t really like them raw- it added a great layer of flavor! (I also added some thinly sliced cucumbers)
Tzatziki
16 oz. of plain or Greek yogurt (preferably not fat free)
1/2 hothouse cucumber or 1 regular cucumber, peeled and seeded
2-3 cloves garlic, minced
1/2-1 teaspoon white wine vinegar
salt and pepper
squeeze of fresh lemon juice
drizzle of extra virgin olive oil
Strain yogurt using a cheesecloth over a bowl for several hours or overnight to get out as much moisture as possible. (Since I was using Greek yogurt which was already quite thick, I skipped this step and it came out the perfect consistency)
Shred the cucumbers and then wrap in a towel and squeeze to remove as much moisture as possible. Don’t skip this step!
Mix together the strained yogurt, shredded cucumbers, garlic, vinegar and lemon juice. Add salt and pepper to taste. It’s best to refrigerate for 30 minutes or more before serving, so flavors can meld.
Drizzle a little olive oil over the top.
In the Summertime, you grill. Period. If you don’t know how to grill, you better learn, because as far as I’m concerned, it’s not Summer without grillin’. Of course, that’s just my own personal opinion; I have lots of them. Probably way too many. Just ask my hubby. Or my mom. Or my second grade teacher.
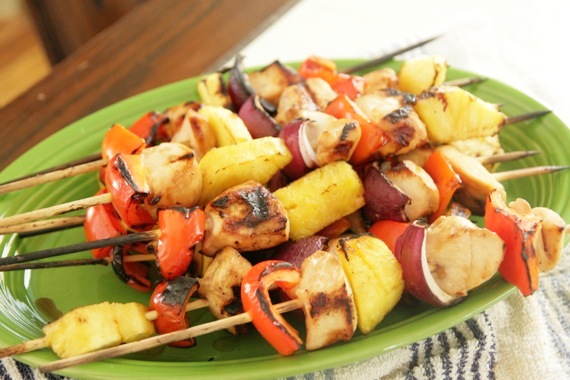
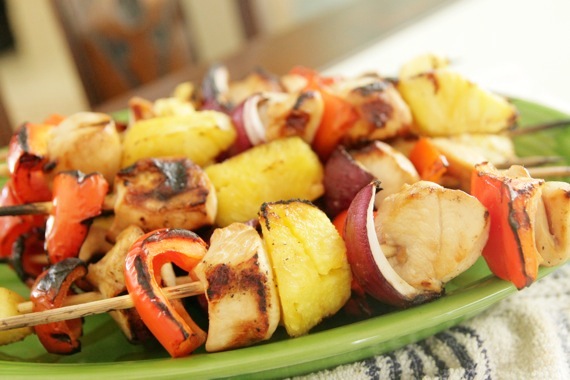
Honestly, one of my favorite grilled things to eat is chicken breast marinated in my favorite marinade, Lime Ponzu. It’s so amazingly simple, and the chicken turns out so sweet and juicy. We were having company recently and I thought the Ponzu marinated chicken would be great to serve along with my grilled corn salad and pineapple rice. Then I took it a step further and thought, “why not do a Ponzu shish-kabob with red peppers, red onions and pineapple?” Perfect! So that’s what we did and boy am I glad! Those kabobs were amazing! The chicken was perfectly tender and juicy, and the peppers, onions and fresh pineapple paired so well with the Ponzu- almost kind of a “Hawaiian” flavor. Totally delicious! We’ve made them twice since then! If you’re looking for a great grilling meal- look no further, because these are as easy as they come, yet really, really flavorful and delicious!
Easy Grilled Chicken Shish-Kabobs
4 boneless, skinless chicken breasts, cut into 1 1/2-inch cubes
1/2-3/4 cup Lime Ponzu (You can find this in the Asian section of the grocery store, next to the soy sauce)
3 red peppers, cut into 1 1/2-inch pieces
1 large red onion, cut into 1 1/2-inch pieces
1 fresh pineapple, cut into 1 1/2-inch chunks
freshly ground black pepper to taste
skewers (wooden or metal- if you use wooden, make sure to soak them in water for at least 30 minutes before grilling so they won’t catch on fire)
Place the cut up chicken in a large ziploc bag with the marinade. (*Save 2 or 3 tablespoons of the Ponzu for later use.) Refrigerate for at least 1-2 hours.
Take out the chicken and dispose of the marinade. To assemble the kabobs, place the red pepper first, then the chicken, then the pineapple, then the onion, then repeat with the same order. Try to fit two of everything on each skewer. You’ll end up with around 12-14 skewers.
Grill the kabobs over medium-high heat for about 8-11 minutes, turning 3 or 4 times, until the chicken is cooked through. Occasionally brush with the reserved marinade and season with the pepper. Remove from heat. Serve with rice and a cold salad and enjoy! Serves 4-6.


