
My sister and I like to exchange new recipes we try. In fact, over the years, I’ve gotten tons of good, simple, delicious recipes from her. This one is definitely a winner! She was telling me about it and when she got to the part about the banana peppers I have to admit I was a little thrown off. Banana peppers are…sorta sour. How on earth would that taste good with sausage and potatoes? But I trust my sister’s judgement, so I did it.
What a surprise! This was a GREAT meal- it took no time to throw together and there was SO much flavor! And only one pan to clean- bonus! If you make this, don’t skip the banana peppers; they add so much great flavor!
Roasted Sausage, Potatoes, Onions and Peppers
1 pound cooked sausage, such as Eckridge or Hillshire Farms (I use Turkey), cut into 1/2-inch rounds
2 bell peppers, roughly chopped
4 medium-sized red potatoes, chopped
1 onion, chopped
1 jar banana peppers, drained (you can use the spicy kind if you like heat, but I used the mild)
olive oil
salt and pepper
Preheat the oven to 400 degrees. Toss the chopped bell pepper, potatoes, and onion with olive oil and season with salt and pepper. Spread the vegetables and sausage on a large baking sheet in an even layer and top with the banana peppers. Roast in the preheated oven for 35 minutes, or until the potatoes and sausage are crisp and browned. Serves 4-6.
Recipe source: I’m not sure on the original source of this one, but I searched and found one here
My all-time favorite, easy go-to side dish is roasted vegetables. Roasting just brings out all kinds of delicious flavor, and it’s just SO EASY! Toss your favorite veggie with some olive oil, salt, and pepper and pop in the oven. Done. My favorite vegetable to roast has got to be broccoli– something magical happens to broccoli when its roasted. Magical, I tell you.
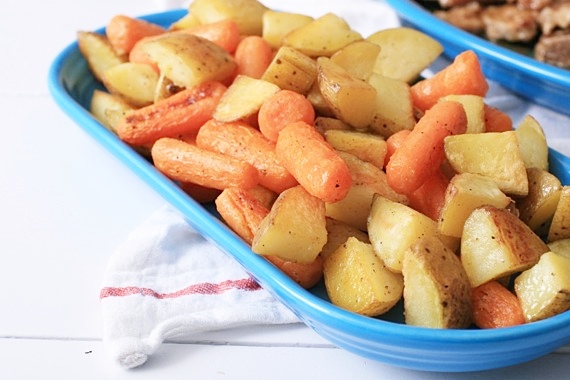
However, when it comes to firmer vegetables like carrots and potatoes, I have a method for roasting that comes out perfect every single time. All it takes is one extra step- no biggie. Just boil them for about 5 minutes first, THEN pop them in the oven. It makes the vegetables almost creamy on the inside, with a nice brown crust on the outside. So perfect. I do it this way every time I roast potatoes or carrots, and every time Joel and I are like, “MAN. These potatoes (or carrots) are SO good!” Every time.
Perfect Roasted Vegetables
5-6 medium sized yukon gold potatoes, scrubbed and cut into chunks
1 small bag baby carrots (or 5-6 large carrots, peeled and cut into chunks)
olive oil
salt and pepper
Preheat oven to 400 degrees. Put the potatoes and carrots in a large pot and cover with water. Bring to a boil and cook for about 5-7 minutes, until they’re just beginning to soften. You don’t want to be able to poke a fork all the way through them; the centers should still be hard.
Drain and toss with olive oil (about 2 or 3 tablespoons). Spread on a baking sheet in an even layer and sprinkle with salt and pepper. Roast for 15-20 minutes, until fork tender and a nice crust has formed. Serves 4 as a side dish.
You could also use this method for rutabagas/turnips, butternut squash, sweet potatoes, and any other really firm vegetable.
Recipe source: Sing For Your Supper original
Let’s say hypothetically, you’ve had a day from you-know-where; maybe hypothetically, your sweet, precious little angel had somehow transformed into a squealing, screaming, whining, hitting little devil. [hypothetically] Perhaps the little tike dropped her toy espresso maker on your foot at just the right angle, so as to make each step you take after that excruciatingly painful. And then, perhaps, upon trying to give her a hug, the little sweetheart tried to slap your face away and ended up cutting your gums with her adorable little fingernail. HYPOTHETICALLY. 12 screaming tantrums, 4 thrown sippy cups, and 1 disappointingly short nap later, it’s dinner time. Joy. And since your precious cherub is teething, getting her to eat anything is darn near impossible. And don’t forget the fact that you let her eat Chick-fil-a nuggets for lunch, so whatever you cook needs to be healthy. Go ahead, supermom. Get in that kitchen and make some magic! And don’t forget to whistle a happy tune while you do it! 😉
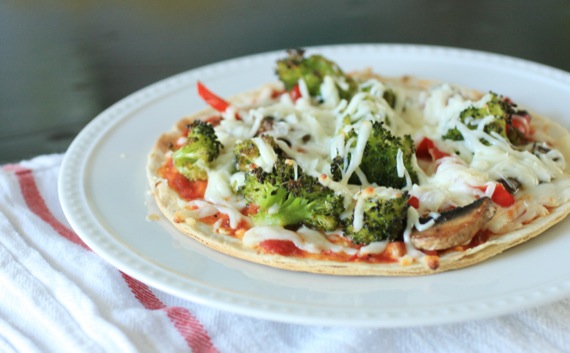
Luckily, I have recipes like this one on standby. Quick, easy, and good for you. My 3 requirements. And when I’ve had the (ahem, hypothetical) day from you-know-where (by the way, my freaking foot is still throbbing…), I can pull this dinner off in less than 30 minutes. Remember that awesome roasted broccoli I just shared with you? Well guess what- it’s GREAT on pizza! And Cassidy loves it! Mommy: 1; Rotten day: 0!
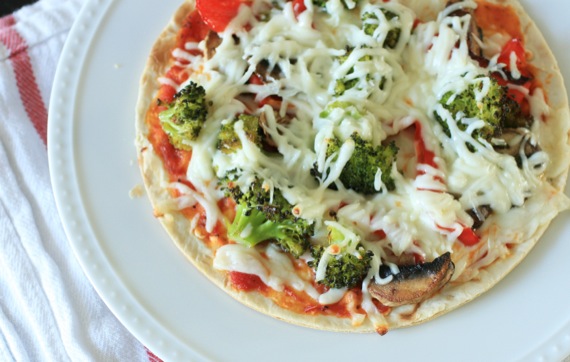
Roasted Veggie Pizza
4 personal-sized thin pizza crusts (I use store-bought, but feel free to make your own)
1 head broccoli, cut into bite-sized pieces
1 red bell pepper, sliced thinly
1 heaping cup button mushrooms, sliced
salt and pepper
olive oil
pizza sauce
mozzarella cheese
Preheat oven to 400 degrees and line a baking sheet with foil. Toss the broccoli, red pepper, and mushrooms in a little olive oil and spread in a single layer on the baking sheet. Sprinkle with salt and pepper and roast for about 20 minutes, until vegetables are soft.
Make your pizzas: spread each pizza crust with a thin layer of pizza sauce. Top with roasted veggies, then cheese. Bake in the preheated oven (still at 400) for about 8 minutes, until crust is crisp and cheese is melted. Serve immediately.
Recipe source: Sing For Your Supper original
Moms: do you have trouble getting your little ones to eat their veggies? Well don’t give up! Green vegetables like peas, spinach, green beans, broccoli, kale, etc are so, so good for our growing kiddos! I understand the struggle – up until I started cooking it like this, I could never get Cassidy to eat her broccoli. She loves peas and green beans, but it seemed like no matter what I did, she wouldn’t touch broccoli. Probably because it tastes like flavorless mush by the time I finish steaming it. But broccoli fixed this way? She can’t get enough and I’m thrilled!
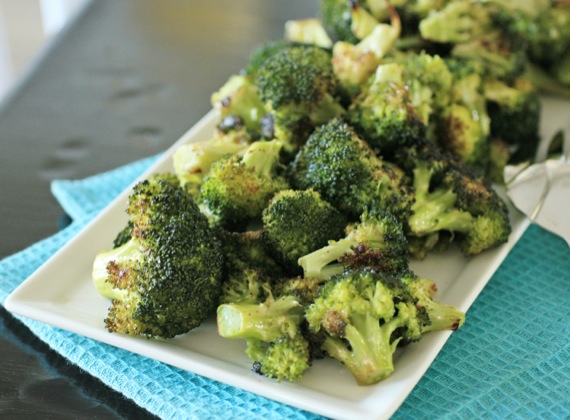
It’s SO simple- toss your broccoli florets with a little olive oil, salt, and pepper and roast it at 400 for about 15-20 minutes. That’s it and it’s WONDERFUL! The broccoli gets nice and soft, but it’s still bursting with flavor. I’m a huge fan of roasting any vegetables since it brings out the flavor so beautifully, and I have to say, I think roasted broccoli is my new favorite.
…just make sure you burn a candle or open a window since we all know how stinky it is to cook broccoli. A small price to pay for a delicious, healthy side dish, right? 😉
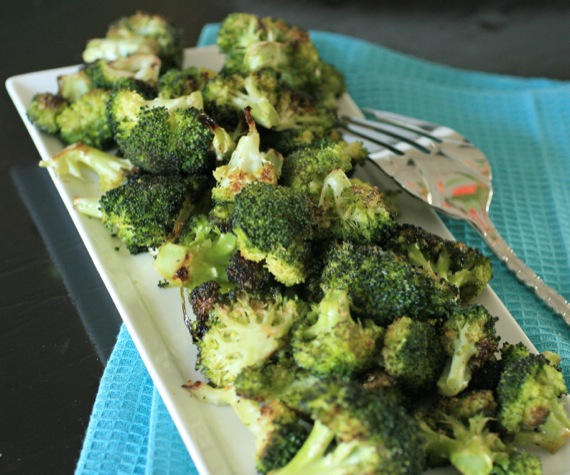
Roasted Broccoli
1 head fresh broccoli, cut up into bite-size pieces
olive oil
salt
pepper
Preheat oven to 400 degrees. Toss the broccoli with the olive oil, then spread onto a baking sheet lined with foil (this makes cleanup a snap!) and sprinkle with salt and pepper. Roast for about 15-20 minutes, turning the broccoli over halfway through cooking. Edges should be slightly dark and broccoli will be tender when done. Serves 2-3 as a side dish.
Recipe source: Sing For Your Supper original, although, this is not a new concept 😉
Are you scared of greens? Does kale or spinach send you running in the opposite direction? Well, fear, be gone, because I have news for you- there’s nothing easier or tastier if you know how to prepare them! I know a plate of soggy kale might seem unappealing to those of you who aren’t big into greens, but I promise it’s just the opposite! Joel and I both love kale (even Cassidy loves it!); in fact, it’s just about our favorite green. I keep a giant bag of frozen, chopped kale in the freezer and put it in soups, casseroles, smoothies, and much more. But my favorite way to prepare it is simply sauteed. It’s amazing how much flavor is packed in these amazingly healthy greens.
A church friend and neighbor of ours is going through some health issues and he and his wife have decided to completely change their lifestyle. They’re exercising and eating healthy- no processed or refined foods. I recently talked with them about their new diets and found out they’re trying to eat as many healthy vegetables as possible. So of course, I asked them if they’d tried kale yet. Since they hadn’t, and seemed a little hesitant, I decided to post this recipe for them. Getting healthy is serious business and I want to help them find some recipes that are super good for you, yet delicious as well.
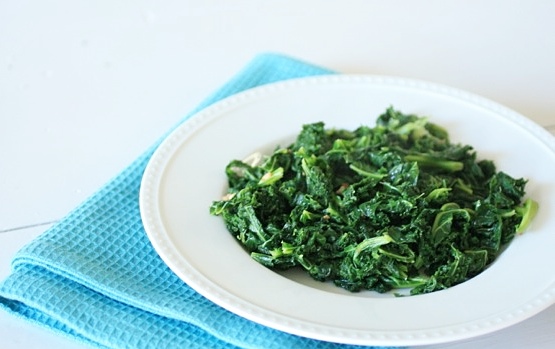
The kale is blanched, then simply sauteed with a little pancetta (which could absolutely be left out), garlic, and a little red pepper for some heat. Ready in 7 or 8 minutes, full of flavor, and packed with nutrition! Say yes to kale!
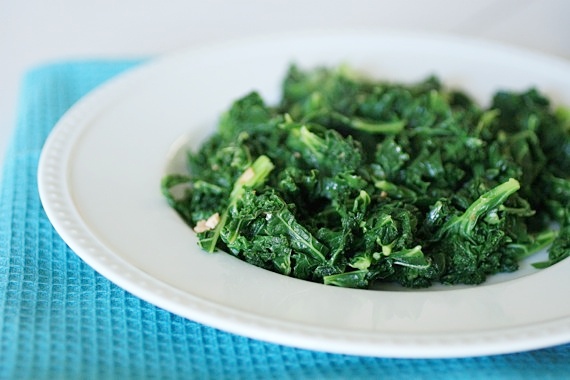
Sauteed Kale
1 pound fresh kale, washed, ribs removed, and roughly chopped
1 tablespoon diced pancetta
1 tablespoon olive oil
1 clove garlic, chopped
salt and pepper
pinch red pepper
Bring a large pot of water to a boil. Drop the kale in and cook for about 3 or 4 minutes, until it starts to wilt. Meanwhile, cook the pancetta in a skillet over medium heat for about 3 or 4 minutes. Add the olive oil. Add the garlic to the pan and cook for a minute or so.
Using a large slotted spoon, remove the kale from the boiling water and place directly in the skillet with the pancetta and garlic. Sautee for 3 or 4 minutes, stirring constantly. Season with salt, pepper, and red pepper. Serves 4 as a side dish.
Recipe source: Sing For Your Supper original
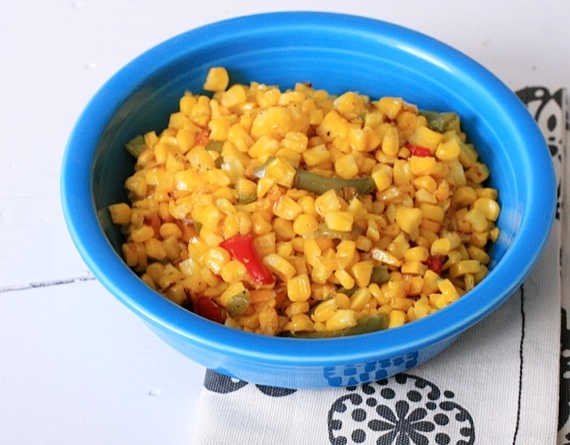
I don’t know about you guys, but one of my favorite things about summer is the fresh corn on the cob. Our grocery store will usually have them for around 5 for a dollar, so I stock up! We grill them, roast them, make salads, casseroles and all kinds of awesome dishes. But right now, fresh corn on the cob isn’t in season, so I’m stuck with frozen. Luckily, I found this tip about how to make oven roasted corn using frozen kernels. I was so intrigued I just had to try it.
I’m not going to say it’s as sweet and awesome as fresh-off-the-cob, but hey, in a bind, it works great! I added in some red and green peppers and my family gobbled it up!
[Short Cut] Oven Roasted Corn
1 bag frozen corn kernels
olive oil
salt and pepper
Preheat the oven to 400 degrees. Toss the frozen corn with olive oil, salt, and pepper and spread on a baking sheet in an even layer. Roast for about 10 minutes until corn begins to blister slightly. Serve immediately.
Recipe source: adapted from Bev Cooks

Making baby food at home is a practice very near and dear to my heart, so when I asked you all if it was something you cared about, then received such an enthusiastic response…I couldn’t WAIT to share with you! So, just for you mommies out there, I’ve put together a detailed post with everything you need to know about making healthy, safe, and delicious baby food at home for your sweet little ones!

Now, there are lots of myths out there about making your own baby food at home; so let’s just get past those right now:
Myth #1: making homemade baby food is hard. This couldn’t be more wrong. Not only is homemade baby food incredibly easy (I’ll show you how); it’s fun! I actually really enjoy making baby food at home. During all the stress of our move, I switched to store-bought for a little while and wasn’t too fond of the experience. Now that I’m back to homemade, things are much better and we’re all happier! You don’t need fancy recipes- just steam it, puree it, and store it. That’s it.
Myth #2: you need fancy, expensive equipment to make baby food at home. WRONG. I’m sure those little gadgets that are specially designed for the sole purpose of making baby food are great (too bad they cost a fortune…), but let me tell you now- save your money! All you need to make baby food at home is a vegetable steamer basket, a food processor (or blender), and a few ice cube trays for freezing (I have a couple of silicon heart-shaped ice cube trays that I like to use from time to time). The one special piece of equipment I did go out and buy was this baby food storage kit. I like it because it’s really easy, dishwasher safe, and each cup is the perfect portion size for Cassidy.
Myth #3: making homemade baby food is more expensive. Tooooootally not true! I buy mostly frozen vegetables, which are never more than around a dollar a bag, and I can usually get around 6 or 7 servings out of each bag. I can get over 8 2-ounce jars out of one sweet potato! With store-bought, depending on what kind you buy, you may spend anywhere from .75 – $1.75 a serving. Yikes!

Now, I’m not here to preach at you. If you prefer store-bought, hey, that’s fantastic. There is absolutely nothing wrong with store-bought baby food! I just happen to a.) enjoy making it, b.) appreciate knowing exactly what I’m feeding my daughter, and c.) like saving my pennies. So, without further ado, here are my best tips and methods:

Why I love store-bought frozen fruits and vegetables: I prefer frozen because not only are they pre-washed, chopped, and ready to go, they’re picked and frozen at the peak of their ripeness, which means they retain pretty much all of their vitamins and minerals. Plus, you can always get certain out-of-season vegetables year round!
Fresh is always a great option, but since I hate peeling, seeding, and chopping certain vegetables, I prefer to buy frozen. You can always buy fresh, then freeze for later use. I like to stock up on fresh fruits and vegetables at Costco, then bring them home to prep and freeze for later use. Call me crazy, but I actually kind of enjoy prepping for baby food making. Oh, and here’s a little tip: if you’re going to freeze bananas for later use, peel them, toss them with a little lemon juice, then place in an airtight ziploc baggie; that way they won’t get slimy and brown. Works every time!

Ok, now that we’ve got a few of the logistics out of the way, let’s make baby food!
Begin by preparing your fruits or vegetables. If you’re using frozen, just throw ’em in the steamer basket; since they come pre-washed and chopped, you’re good to go. Fresh may require peeling/seeding. If you’re using fruits, no cooking is necessary (except for apples and pears- I like to soften those up a bit first).

Steam your vegetables on medium-high heat. Depending on the vegetable, I steam mine for around 10-15 minutes, just until they’re good and soft. Harder veggies like sweet potatoes, rutabagas, and butternut squash may take up to 30 minutes. Once they’re fork tender, carefully (it’s hot!) put them in the food processor or blender (or if you’re really old school, a food mill) and pulse until smooth. Keep the steaming liquid close by in case your puree is too thick. I like to pulse the snot out of mine to make extra sure there are no lumps.
No seasoning is needed- most fruits and vegetables taste great on their own. However, I do like to add a pinch of cinnamon to my sweet potatoes for a little extra something. 😉

Once you’ve reached your desired consistency, set it aside to cool down a bit. Then carefully spoon the baby food into clean ice cube trays (perfectly portioned at 1 ounce each!) or freezer safe baby food containers. If you’re using ice cube trays, cover tightly with plastic wrap before freezing. And that’s it! When you’re ready to serve, pop it in the microwave for about 30 seconds to 1 minute and that’s it! Baby food!

The flavors I’ve made so far are: peas, green beans, summer squash, blueberry/banana, prunes*, sweet potato with cinnamon, pears, strawberry/banana, avocado, and broccoli. (NOTE: Cassidy’s doctor told me not to make carrots or spinach at home, due to possible high levels of nitrates [which I found out only after I had made an entire batch…]. Baby food companies screen all their baby foods for nitrates before selling them, so it’s a safer bet to just buy your carrot and spinach baby food. Safety first! Just FYI.) All super easy, all heartily approved by miss Cassidy herself (as pictured below)!

*If you’re going to make prunes (hey, some babies need a little extra fiber, if you know what I’m sayin’…), you’ll need to steep them in boiling water for 5-10 minutes before pureeing, just to plump them up a bit. Same with dried cranberries or raisins.
So, there you have it! Easy, right? I hope this has all been helpful to some of you, and please don’t hesitate to email me with any questions! I love to hear from you! Now get out there and make some baby food at home! 🙂

This picture doesn’t really do this chicken pot pie justice, but I was losing daylight fast and had to snap a quick picture before the whole thing disappeared! We LOVE chicken pot pie. It’s one of those great comfort foods that seem to make a hard day just melt away. I love the creamy white sauce with the juicy chicken and tender vegetables- an absolute winner! I’ve been making this exact recipe for 5 years now and it never, ever disappoints. I normally use store-bought pie crusts because it saves time, but you could absolutely make your own and be totally authentic. 🙂
So, the next time you’re tempted to throw one of those frozen numbers in the microwave- consider making yourself a gorgeous homemade chicken pot pie instead. You’ll be SO glad you did!
Chicken Pot Pie
2 large bone-in, skin-on chicken breasts
1 cup sliced carrots
1 cup frozen green peas
1/2 cup frozen green beans
2 medium Yukon Gold potatoes, cut into chunks
1/3 cup butter
1/3 cup chopped onion
1/3 cup all-purpose flour
1/2 teaspoon salt
1/4 teaspoon black pepper
1 3/4 cups chicken broth
2/3 cup milk
2 (9 inch) unbaked pie crusts
Preheat oven to 400 degrees. In a medium pot, cover chicken with water and boil for 30-45 minutes, until tender. Remove bones and skin and shred chicken with two forks and set aside. In a saucepan, combine chicken, carrots, peas, green beans and potatoes. Add water to cover and boil for 15 minutes. Remove from heat, drain and add to shredded chicken.
In a saucepan over medium heat, cook onions in butter until soft and translucent. Stir in flour, salt and pepper. SLOWLY whisk in chicken broth and milk. Simmer over medium-low heat until thick. Remove from heat and set aside.
Press bottom crust into a pie dish and place the chicken mixture in the crust (depending on how deep your pie dish is, you may have a little extra filling- just be sure not to overfill). Pour white sauce over. Cover with top crust, seal edges, and cut away excess dough. Make several small slits in the top to allow steam to escape.
Bake in the preheated oven for 30 to 35 minutes, or until pastry is golden brown and filling is bubbly. Cool for 10 minutes before serving.
Recipe source: adapted from allrecipes.com

I’ve been trying to broaden my horizons a bit in the kitchen lately. Ever since I made that delicious fish curry, I’ve wanted to delve deeper into curries and other ethnic flavors. That’s when my opera friend Meredith told me about one of her simple weeknight recipes she makes often that uses Thai red curry paste. I was totally intrigued, not only by the simplicity of the dish, but by how totally yummy it sounded. I’ve been waiting weeks for a free night to make this! Not only was it easy (and QUICK! It took less than 10 minutes!), it rocked!!! If you’ve never cooked with Thai red curry paste (or made your own), you’re missing out! If you’re looking for something different and simple for your weeknight dinner rotation, try this! You’ll love it!
Easy Weeknight Thai Stir Fry
1 package frozen stir fry vegetables (I used one with broccoli, cauliflower, carrots, snow peas, water chestnuts and red peppers but you can use anything you want. Fresh veggies would be ideal, obviously, but when you’re short on time, this is too easy!)
1 package vermicelli or rice noodles (rice also works great)
1-2 tablespoons Thai red curry paste (depending on how hot you like it)
3/4 cup coconut milk
1/4 cup water
Cook the noodles according to the package. In a large skillet over medium-high heat, cook the frozen vegetables in a little olive oil until thawed and hot. Whisk together the curry paste, coconut milk and water and pour over the vegetables. Add the cooked noodles and toss to coat.
Serves 2-4.
Recipe source: my friend Meredith


I can’t tell you how nice it is to be able to cook and bake with lemon again…I love this time of year! I got the inspiration for this dish from a recipe I saw on another blog- ok, tell me this isn’t the cutest name ever- Feed Me, Seymour. Get it?? Like, from Little Shop of Horrors?? I LOVE that musical, so naturally I was drawn to Kim’s blog from the start. I loved Kim’s idea of serving small pieces of chicken over asparagus and immediately set out to recreate it for dinner that night. This was an absolutely scrumptious dish! Joel and I loved it and cleaned our plates! I really hope you’ll try this- it’s so quick and easy (literally, if you’ve got 30 minutes, you’ve got lemon chicken and asparagus for dinner!) and really, really delicious.
Lemon Chicken and Asparagus
1 tablespoon olive oil, plus more for the asparagus
2 boneless, skinless chicken breasts, cut into 1-inch pieces
1 yellow bell pepper, chopped or cut into thin strips
1 cup chicken broth
1 tablespoon flour
salt and pepper
juice of one large lemon
1 bunch fresh asparagus
Preheat the oven to 350 degrees and line a baking sheet with foil. Lay the asparagus in a single layer on the baking sheet and drizzle with olive oil. Season with salt and pepper and bake for about 6-8 minutes, until just barely tender. Set aside.
Meanwhile, heat the 1 tablespoon olive oil in a large skillet over medium-high heat. Add the chicken pieces and cook, turning the pieces so they cook evenly, for about 5 minutes. Add in the peppers. Cook for an additional 5 minutes then using a slotted spoon, transfer the chicken and peppers to a plate and set aside.
Reduce heat to medium-low and whisk the flour into the drippings left in the skillet. Slowly whisk in the chicken broth. Add salt, pepper and lemon juice. Whisk constantly until the sauce starts to thicken slightly. Add the chicken and peppers back in and cook for 5-7 minutes.
Spoon the chicken, peppers and sauce over the asparagus and serve. Serves 2.
Recipe source: Sing For Your Supper original, inspired by Feed Me, Seymour


