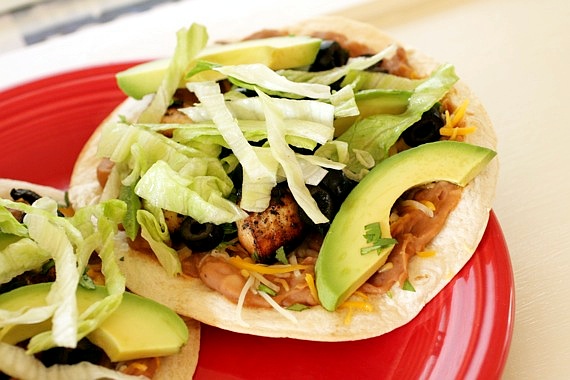
Hello friends! Guess what- I’m finally in my 2nd trimester and starting to feel a little better! I’m at 15 weeks now and the baby’s the size of a large navel orange- which means I’m starting to look….um, “plump”. Personally, I don’t really think I look pregnant- just fat. Oh well! 🙂
I made these tostadas for dinner awhile back and they tasted so good! And they’re insanely simple to make (plus, Joel grilled the chicken for me, which made it even easier)! They’re so versatile- you can use any meat you like and any toppings. A vegetarian version would be great too!
Easy Chicken Tostadas
2 boneless, skinless chicken breasts, cut into 1 inch chunks
1 can refried beans
sliced black olives
shredded cheddar cheese
shredded lettuce
salsa
1 large avocado, sliced
4 flour tortillas
For the marinade:
juice of 3 large limes
2 tablespoons vegetable oil
1 heaping teaspoon brown sugar
handful cilantro, chopped
1/2 green bell pepper, roughly chopped
1/2 onion, roughly chopped
2 cloves garlic, roughly chopped
Preheat the oven to 350 degrees.
Place the chicken and marinade in a large ziploc bag and refrigerate for at least 1 hour. Remove the chicken from the bag and discard the marinade. Grill chicken pieces over medium-high heat for about 6-8 minutes, turning occasionally, until fully cooked.
Heat the refried beans in a small pan over medium heat until hot (I like to stir in a little liquid smoke and a splash of jarred jalapeno juice to jazz it up).
Spray the tortillas with a little cooking spray and place on a baking sheet; bake for about 5 minutes, until crisp. Spread each tortilla with a thin layer of beans then top with the cheese, black olives, salsa, chicken, lettuce and avocado. Serves 2.
Recipe source: Sing For Your Supper original
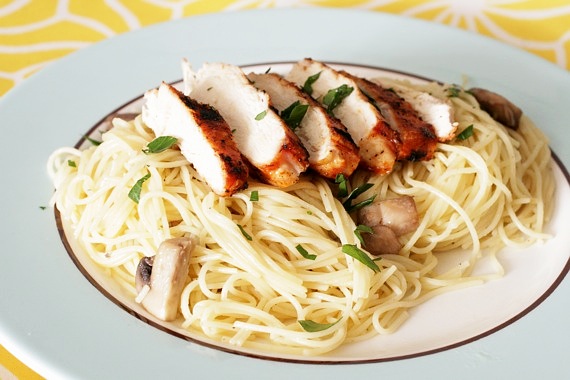
This is the time of year I crave simple, light, quick dishes that aren’t overly heavy and take hardly any time to prepare. Hence, my love for this dish. I had an abundance of fresh mushrooms and a couple of leftover grilled chicken breasts the other night, so I threw together my favorite pasta. Nothing fancy, just angel hair tossed with a little butter and olive oil and topped with grilled chicken and sauteed mushrooms. Ahhhh. I could seriously eat this every night. I know it sounds almost too simple, but it hits the spot every time! The next time you’ve had a busy, long day and need a quick, satisfying dinner- try this!
Pasta with Mushrooms and Grilled Chicken
1/2 pound angel hair pasta
2 boneless chicken breasts
7-8 baby portabella mushrooms, sliced (as much as you like, really)
olive oil
butter
salt and pepper
fresh parsley, chopped (optional)
Cook the pasta according to the package instructions and drain. Season chicken with olive oil, salt and pepper and grill on medium-high heat for about 6 minutes on each side until cooked through. Slice the chicken into thin slices.
In a skillet, heat 1 tablespoon butter and 1 tablespoon olive oil over medium heat and saute the sliced mushrooms for about 5 minutes, until soft. Season with salt and pepper.
Toss the pasta with a few tablespoons of olive oil and butter (again, as much as you like- you don’t want to drown it in oil, just enough to give it some flavor), salt and pepper.
Divide the pasta between two plates and top with the mushrooms and chicken. Sprinkle with parsley. Serves 2.
Recipe source: Sing For Your Supper original (however, I’m sure I’m not the first person to think up pasta topped with chicken 😉 )
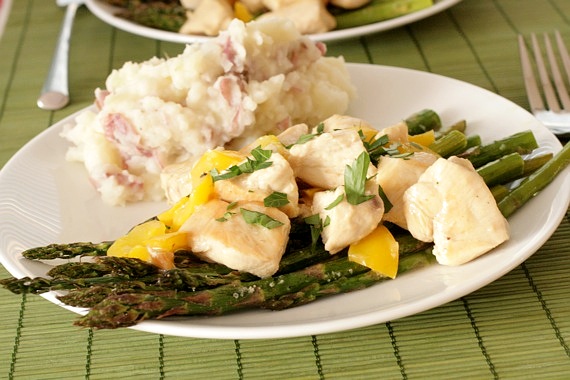
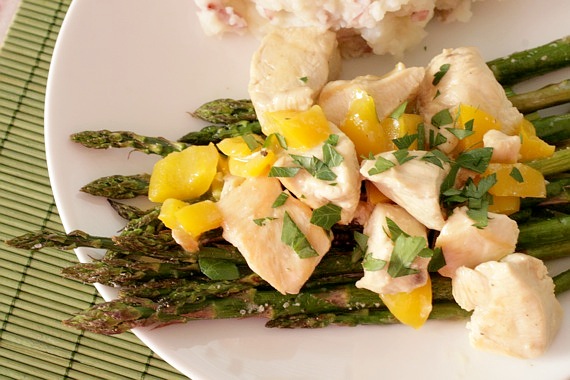
I can’t tell you how nice it is to be able to cook and bake with lemon again…I love this time of year! I got the inspiration for this dish from a recipe I saw on another blog- ok, tell me this isn’t the cutest name ever- Feed Me, Seymour. Get it?? Like, from Little Shop of Horrors?? I LOVE that musical, so naturally I was drawn to Kim’s blog from the start. I loved Kim’s idea of serving small pieces of chicken over asparagus and immediately set out to recreate it for dinner that night. This was an absolutely scrumptious dish! Joel and I loved it and cleaned our plates! I really hope you’ll try this- it’s so quick and easy (literally, if you’ve got 30 minutes, you’ve got lemon chicken and asparagus for dinner!) and really, really delicious.
Lemon Chicken and Asparagus
1 tablespoon olive oil, plus more for the asparagus
2 boneless, skinless chicken breasts, cut into 1-inch pieces
1 yellow bell pepper, chopped or cut into thin strips
1 cup chicken broth
1 tablespoon flour
salt and pepper
juice of one large lemon
1 bunch fresh asparagus
Preheat the oven to 350 degrees and line a baking sheet with foil. Lay the asparagus in a single layer on the baking sheet and drizzle with olive oil. Season with salt and pepper and bake for about 6-8 minutes, until just barely tender. Set aside.
Meanwhile, heat the 1 tablespoon olive oil in a large skillet over medium-high heat. Add the chicken pieces and cook, turning the pieces so they cook evenly, for about 5 minutes. Add in the peppers. Cook for an additional 5 minutes then using a slotted spoon, transfer the chicken and peppers to a plate and set aside.
Reduce heat to medium-low and whisk the flour into the drippings left in the skillet. Slowly whisk in the chicken broth. Add salt, pepper and lemon juice. Whisk constantly until the sauce starts to thicken slightly. Add the chicken and peppers back in and cook for 5-7 minutes.
Spoon the chicken, peppers and sauce over the asparagus and serve. Serves 2.
Recipe source: Sing For Your Supper original, inspired by Feed Me, Seymour
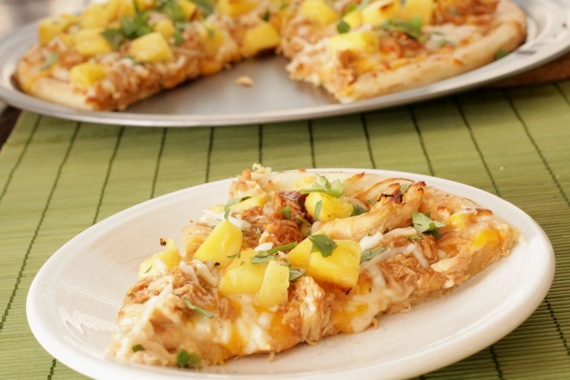
Thursday night at our house is usually “pizza night”. We didn’t really plan it out that way, it just sort of happened over time. By the time Thursday rolls around, I’ll have cooked dinner every night that week and we’re ready for something convenient, plus, we happen to live within a stones throw of the best pizza in the area. So, somehow, Thursday night eventually turned into “pizza night”. But just because it happens to be “pizza night”, doesn’t mean it has to be take out pizza. We love making pizza at home- our favorite variety is black olives, mushrooms, green olives and fresh tomatoes, but last week we wanted something different. I had some leftover grilled pineapple from the night before and thought the classic ham/pineapple combination might be good, but honestly, I’m a little tired of that one. Then I remembered I had two small chicken breasts thawed in the fridge, so I decided on BBQ chicken pizza with pineapple and cilantro! YES!
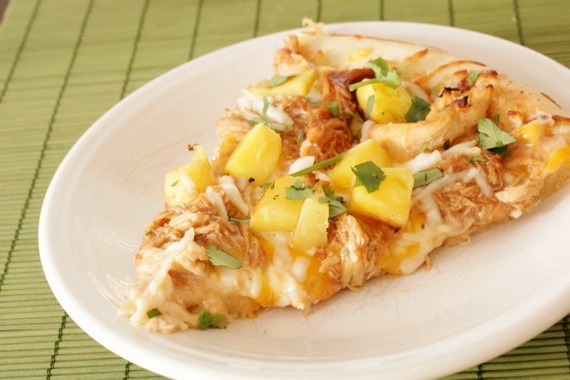
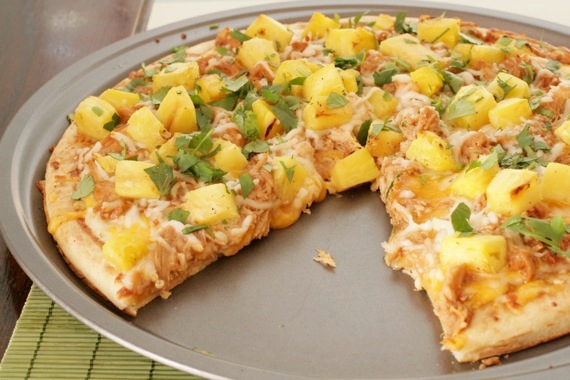
I cooked my chicken in the crockpot, then shredded it and tossed it with BBQ sauce, brushed the pizza crust with a very thin layer of BBQ sauce and ranch dressing, topped it with cheddar and mozzarella cheese, the BBQ chicken and the pineapple, then after baking, gave it a hearty sprinkling of cilantro. OMG-HOLY-YUM!!! We gobbled this up as if we hadn’t eaten in days! An instant favorite! You MUST try this pizza!
BBQ Chicken and Grilled Pineapple Pizza
1 large, thin pizza crust (I used Boboli brand)
1 cup grated mozzarella cheese
1/2 cup grated cheddar cheese
2 chicken breasts, fully cooked and shredded
1/2 cup BBQ sauce, plus more for brushing on the crust
1/4 cup ranch salad dressing (*I make my own with a ranch seasoning packet, mayo and buttermilk)
fresh pineapple, cut into 1-inch pieces (however much you like- we like lots!)
fresh cilantro, chopped, about 1/3 cup
Preheat the oven to 375 degrees. Toss the cooked, shredded chicken breasts with the BBQ sauce. Set aside.
Brush the pizza crust with a thin layer of BBQ sauce (if you’re using homemade pizza dough or the roll-out kind in the can, you’ll need to pre-bake it for 10 minutes or so, just to crisp it up a little bit. My crust was pre-baked already, so I skipped this step), then spread on the ranch dressing. Top with the cheddar cheese and mozzarella cheese, then the chicken and pineapple. Bake for about 15 minutes, until all the cheese is melted and the crust is golden brown. Top with the chopped cilantro. Makes 1 pizza.
Recipe source: Sing For Your Supper original
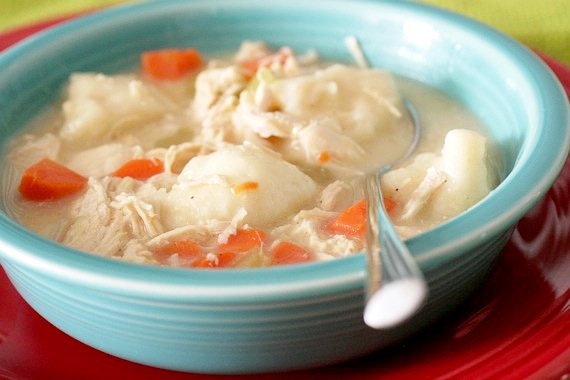
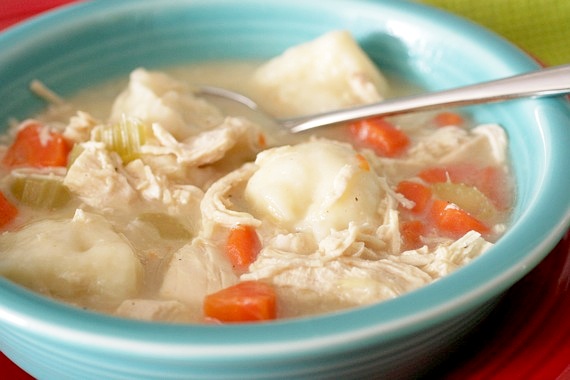
You’ve seen these chicken and dumplings here before. In fact, according to my StatPress, it’s one of the most searched for items on my blog. Funny, isn’t it? I guess people really appreciate recipes with good shortcuts! I have to be honest- this really is a truly delicious, easy, family-pleasing recipe; but it’s been buried in my archives for almost 2 years now (with some really, really bad pictures). I think it needs a little freshening up, don’t you? So here it is, the same great recipe, re-shot and re-submitted for your approval!
“Cheater” Chicken and Dumplings
1/4 cup olive oil
4 boneless, skinless chicken breasts
1 medium onion, diced
2 cups diced carrots
1 cup diced celery
1 cup dry white wine
1/2 tablespoon salt (plus more to taste)
1/2 tablespoon fresh ground pepper (plus more to taste)
6 cups chicken stock
5 frozen biscuits (such as Pillsbury Grands Frozen Biscuits), thawed enough to cut into pieces
Pat the chicken dry and season with salt and pepper. Heat half of the olive oil (1/8 cup) in a large pot or Dutch oven over medium-high heat. Sear the chicken, turning the pieces so that all sides are slightly brown, about 3 to 4 minutes for each side. Remove the chicken pieces and place on a paper towel-lined plate. Add the remaining 1/8 cup of olive oil to the pot, along with the onions. Saute the onions until they’re soft, about 6 minutes. Add the carrots, celery, and white wine. Scrape up any brown bits from the bottom of the pot. Saute, stirring frequently, for another 6 minutes. Add the chicken back to the pot. Cover the meat and vegetables with chicken stock. Bring to a boil. Reduce heat to medium-low and simmer, partially covered, for 90 minutes. (This step is especially flexible. If your liquid is reducing too much, you may need to add more chicken stock. If the dish is too liquidy, turn up the heat and to reduce the stock more. The idea is to end up with a consistency of a very thick stew.) If the broth is not as thick as you would like, remove one cup of the broth into a measuring cup and whisk in 1 tablespoon of corn starch. Return the broth to the pot and stir. Remove chicken pieces with tongs and allow them to cool. Shred into small pieces. Return to the pot. Cut the frozen biscuits into thirds. Drop the pieces onto the top of the chicken and vegetable mixture. Cover and cook on medium-low heat for 8-10 minutes, until the dumplings are cooked through. Serve immediately.
**Alternatively, you can cook your chicken in a crockpot, shred it, then add it in with the vegetable/wine/broth mixture. If you do this, you won’t need to simmer everything for 90 minutes- 20 or 30 would be plenty- just long enough to cook the vegetables until soft. This is what I’ve always done and it comes out perfect everytime!
Recipe source: adapted from The Bitten Word
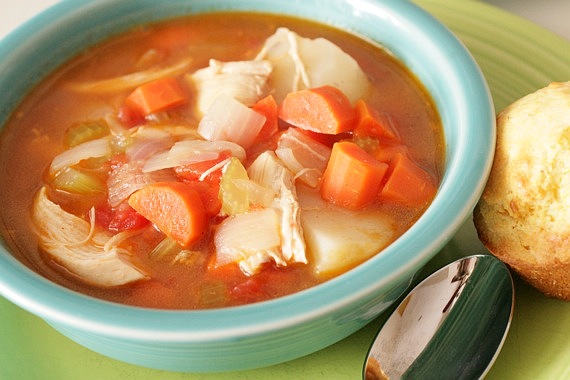
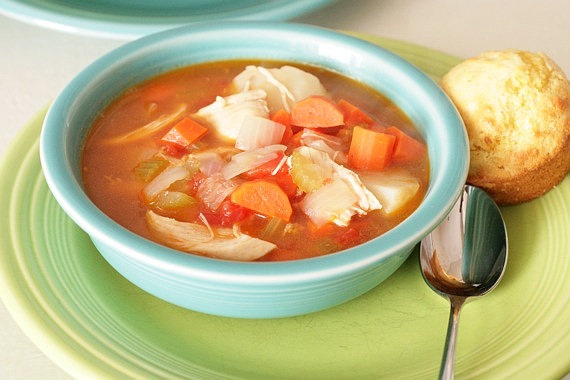
Um, it’s been cold. Really bad, snowy, icy, power outages, school-closed-for-4-days COLD. But I probably don’t have to tell you that. Most likely, it’s been the same story where you are too (unless you live in California or someplace delightful and sunny, in which case…I hate you.). In fact, as I’m sitting here typing this, cars are slipping and sliding down my icy street. Weather like that can only mean one thing- warm, hearty chicken stew. It’s the easiest stew in the world to make and it requires very few ingredients. This is how my mom always made it and I just love it. In fact, not too long ago I was visiting my parents and my mom served me this stew for lunch- big chunks of potatoes, carrots and tender juicy chicken all simply seasoned with salt and pepper. This is the best kind of cold weather food! All you need is some good crusty bread or cornbread muffins to go with it and you’ve got a hearty, delicious meal!
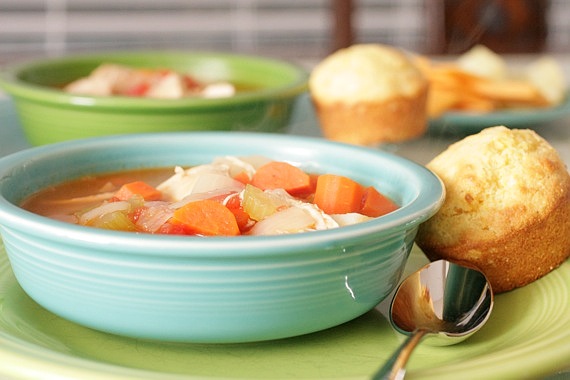
My Mom’s Chicken Stew
3 bone-in chicken breasts
5 carrots, peeled and chopped
5 or 6 small potatoes (or 2 or 3 medium sized), cut into chunks
1 medium onion, chopped
2 celery stalks, chopped
1 14-ounce can diced tomatoes
salt and pepper
Place the chicken in a large pot and fill with enough water to cover. Boil the chicken for 1 1/2 – 2 hours, or until very tender.
Remove chicken from pot (save the broth- you’ll use that later!) and let cool. Remove the skin and bones and shred chicken (I like it in pretty large chunks).
Put the pot with the chicken broth back on medium heat and add in the chopped onion, carrot, celery, tomatoes and salt and pepper (depending on how thin you like your stew you can add a little water if needed). Cook for 15-20 minutes, until the vegetables are just about tender. Add in the potatoes and chicken and cook for another 15-20 minutes, until the potatoes are soft. Check for seasoning. Serve hot with crusty bread or cornbread muffins. Enjoy!
Serves 4-6 (also makes great leftovers!)
Recipe source: Sing For Your Supper’s mom 🙂
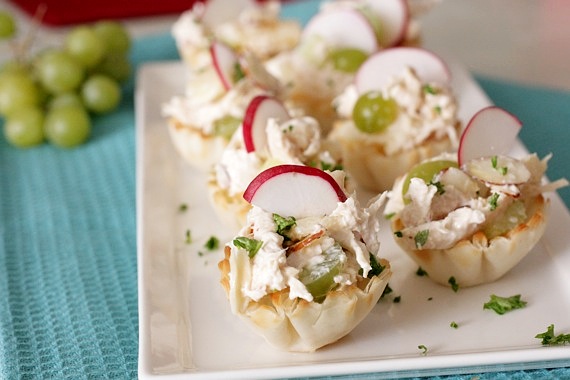
When you think of baby showers or wedding showers, tell me, what’s the first food you think of? For me, it’s chicken salad, no doubt. I don’t know what it is about chicken salad, but it seems to be the honorary queen mother of shower food. Which is just fine by me, I adore chicken salad. Especially chicken salad with grapes and crunchy almonds….mmm. So naturally, when I was invited to take part in a little virtual baby shower for our fellow food blogging friend Annie, chicken salad was the very first thing to pop into my head! And to make it more accessible and “mingle-friendly”, I decided chicken salad bites would be perfect.
Annie will be having a sweet baby girl (little Caroline; What a sweet name!) in just a short while, and to show our support, a bunch of us bloggers are throwing her a virtual shower- how cool is that (and stay tuned, because I’m hosting a little shindig of my own in a few weeks!)?! My good friend Courtney, of Cook Like A Champion is our gracious shower hostess- she and Annie will have the entire round-up posted on their blogs, so be sure to head over for some beautiful dishes by a group of very talented bloggers!
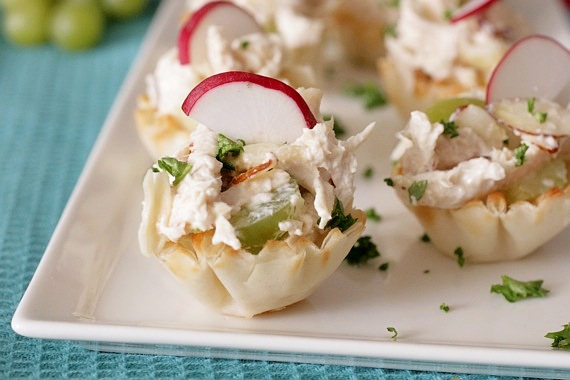
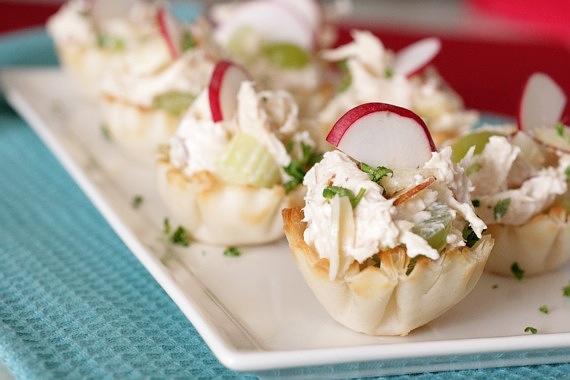
Now, onto these chicken salad bites! I love a good crunch in my chicken salad, so this is full of crunchy sliced almonds and celery. There’s also green grapes and pineapple, and let me tell you, the pineapple really adds a delicious sweetness and flavor that compliments the chicken perfectly! The sauce is made up of non-fat yogurt and mayonnaise, so it’s a little lower in fat than most chicken salads. The salad sits in crisp little phyllo cups, which gives great texture and makes them easy to eat. Simply stated: this is really an easy, delicious dish to put together and it’s just perfect for parties (or showers!). 🙂 Don’t forget to head over to Courtney and Annie’s blogs to see everyone else’s beautiful dishes! Happy baby shower, Annie! Congratulations to you and your sweet little family!
Chicken Salad Bites
30 baked phyllo cups (you can find these in the freezer section of the grocery store- they usually come in packs of 15)
3 bone-in, skin-on chicken breasts
2 stalks celery, chopped
1 small can pineapple chunks (crushed would be fine as well)
handful green grapes, sliced into halves
1/2 cup sliced almonds
1/4 cup mayonnaise
1/2 cup plain, non-fat yogurt
1 squirt lemon juice
salt and pepper, to taste
parsley and thinly sliced radishes, for garnish, if desired
Place the chicken breasts in a large pot and fill with enough water to cover the tops. Boil on medium heat for approximately 1 1/2- 2 hours, until chicken is very tender. Remove the chicken and let cool.
Once the chicken is cool, remove the meat from the skin and bones and shred into small pieces. Place in a large bowl. Add in celery, pineapple, grapes and almonds.
In a small bowl, make the sauce. Stir together the mayonnaise, yogurt and lemon juice. Season with salt and pepper. Pour over the chicken mixture and stir until combined. Taste for seasoning.
If serving immediately, place a small amount of chicken salad in each phyllo cup. Garnish with chopped fresh parsley and thinly sliced radishes (optional).
If you’re making the salad ahead of time, keep it refrigerated until ready to serve. Don’t assemble the bites until right before serving, as the cups will get soggy.
Makes 30 cups.
Recipe source: Sing For Your Supper
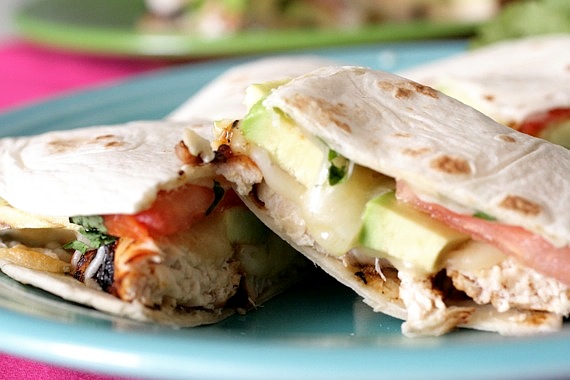
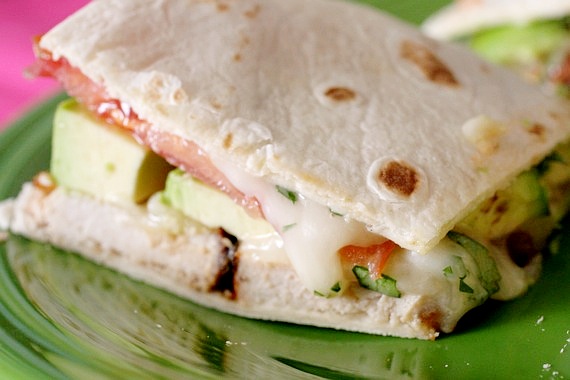
I really love quesadillas. They’re so versatile- you can just throw in whatever you have on hand for a delicious meal! Have leftover grilled chicken? Throw it in! That’s the beauty of quesadillas; they transform ordinary leftovers into a whole new meal! However, the ingredients I used for these quesadillas were definitely not leftovers- I specifically bought them with this recipe in mind because I just couldn’t wait to try them! It wasn’t very cold outside, so I had Joel grill up some chicken breasts lightly brushed with barbecue sauce, then I sliced them thinly and paired them with sliced tomatoes, avocados, Monterrey Jack cheese and a little cilantro- WOW, what a quick, delicious meal! These were so good, I made them again the following night! I served them with some oven baked sweet potato fries and it was the perfect meal. One I’ll be making on a regular basis.
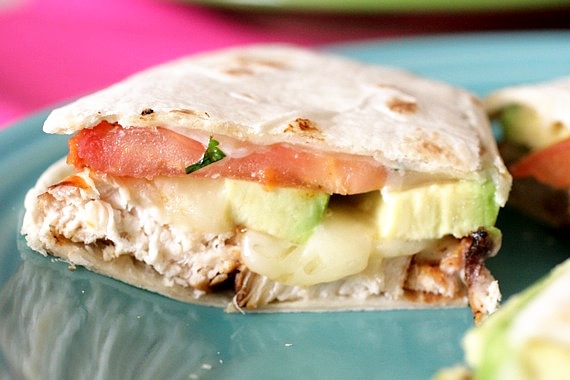
Chicken, Avocado and Tomato Quesadillas
-my own recipe
4 flour tortillas
2 boneless, skinless chicken breasts
barbecue sauce, for brushing
salt and pepper
1 avocado, thinly sliced
1 tomato, thinly sliced
1/2-3/4 cup Monterrey Jack cheese (depending on how cheesy you like them)
1/4 cup fresh cilantro, chopped
Season chicken breasts with salt and pepper, then brush with barbecue sauce and grill over medium-high heat, until fully cooked (approximately 6 minutes on each side). Remove from grill and let rest for 5 minutes. Slice into thin strips.
Preheat oven to 375 degrees.
Place two of the tortillas on a baking sheet and top each with half of the cheese. Top with the chicken, then sliced avocado and tomato. Sprinkle the remainder of the cheese and the cilantro. Place the other two tortillas on top. Brush the outer edges with a little water to keep them from turning up during baking (you can even do this with your finger).
Bake for approximately 6-8 minutes, until cheese is fully melted. Cut into quarters and serve.
Serves 2.
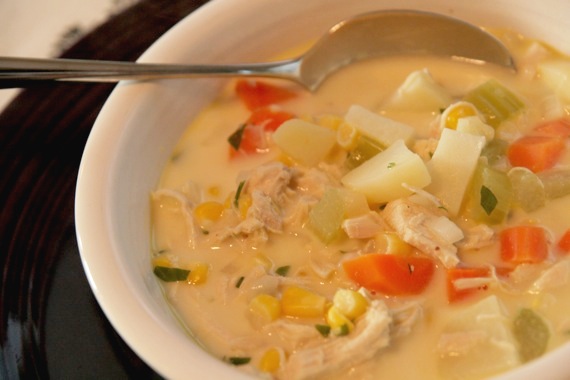
The weather has been cold and wet the past few days which only means one thing in our house- soup. After forgetting my umbrella yesterday and thus getting soaked on the way to the car, I came home and immediately set out to make a big pot of soup. Nothing makes me feel cozier or more comfortable. Ahhhh. This is just a plain ‘ol, good-for-the-soul chicken soup…with a splash of cream to give it a little richness. Nothing fancy or difficult- just warm and full of comfort. Perfect for cold rainy days! And it tastes even better if you snuggle up to your hubby on the couch while you eat! Now THAT makes for good soup! 🙂
Creamy Chicken and Vegetable Soup
2 chicken breasts, cooked and shredded
4-6 medium-sized carrots, chopped
1 onion, chopped
1 clove garlic, chopped
2 celery stalks, chopped
2 medium-sized potatoes, cut into cubes
1 cup frozen or canned corn
6 cups chicken broth
salt and pepper to taste
1 bay leaf
1/2 cup heavy cream or half and half
handful chopped parsley
**Feel free to add in any other vegetables you like- frozen peas, green beans, zucchini…whatever!
Place carrots, celery, onion, garlic, chicken broth, bay leaf, salt and pepper in a large stockpot over medium heat. Bring to a boil and cook for 15-20 minutes, until the vegetables are tender. Stir in the chicken, potatoes and corn. Simmer for another 20-30 minutes. Check for seasoning then add in the heavy cream and chopped parsley.
Here I am again (and honestly, I just can’t believe it!), thanking you all for your continued support through Project Food Blog. I’m just blown away by your unfailing sweet, generous comments, encouragement and your votes. You are all truly wonderful readers…I am SO lucky to have you!! THANK YOU!!!
Ok, so here’s the challenge for Round 4: Sure, you can take a pretty picture. But your task here is to go above and beyond and use photography to create a step-by-step, instructional photo tutorial. It could be anything from how to bone a chicken to how to make your favorite recipe, but your photos need to guide the reader through the steps.
Honestly, at first, I thought this challenge would be a cinch. “Eh, what’s a few extra pictures?” However, it didn’t take long (about 12 seconds) for me to discover one very simple factor: step-by-step photos are HARD. For an A.D.D girl, something as simple as taking a few extra photos of the cooking process can be DAUNTING. I found myself running all over the kitchen, dining room and living room trying to get lists together, compiling my ingredients, writing down every single step of each recipe and trying to get my camera settings figured out (it takes awhile to do step-by-step photos, and your lighting is changing constantly- if you don’t change your camera settings accordingly, your pictures will absolutely start to suck). So needless to say, this has been the hardest challenge for me BY FAR. But, I barreled through and got it done- and came out with two totally awesome and delicious recipes to share with you! Yay me!!
For this challenge, I decided to do the kind of food that makes me happy (and my hubby!)- nachos. It was a very BIG game day in Texas today- the Aggies were playing a big game (who am I kidding, every game is a big game at our house!), then the Rangers with a playoff game after that. Needless to say, we needed game day food and we needed it bad. Just one kind of nacho wouldn’t be enough. I decided on two different kinds: Tequila Lime Chicken Nachos and Bananas Foster Nachos (yes, bananas foster- and let me just say….I’ve come up with a doozy.) So let’s open with recipe #1! This is how my family makes nachos- just layer on your favorite flavors. It’s great with seasoned ground beef, shredded chicken, or even meatless! I decided shredded chicken with a little tequila and lime juice would be perfect (and it was!)! Let’s get started!
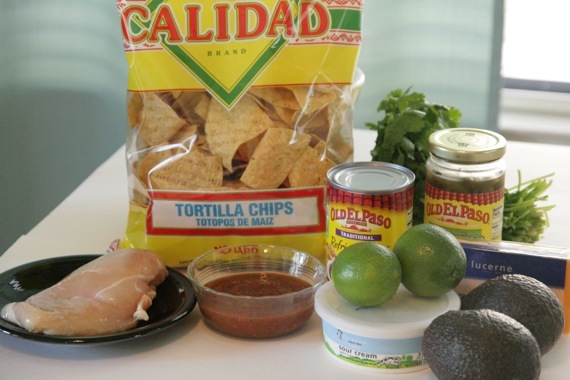
You’ll need: 1 chicken breast, tortilla chips, a can of refried beans, shredded cheddar cheese, cilantro, jalapeno peppers, limes, sour cream, guacamole and salsa, salt and pepper and tequila (not pictured…oops).
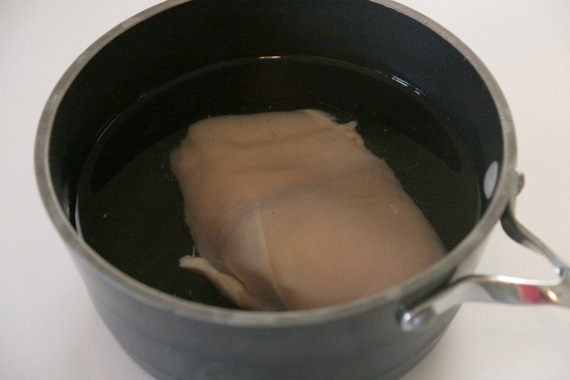
Put the chicken in a small pot, cover with water and bring to a boil. Cook for about 10-15 minutes, until the chicken is cooked through.
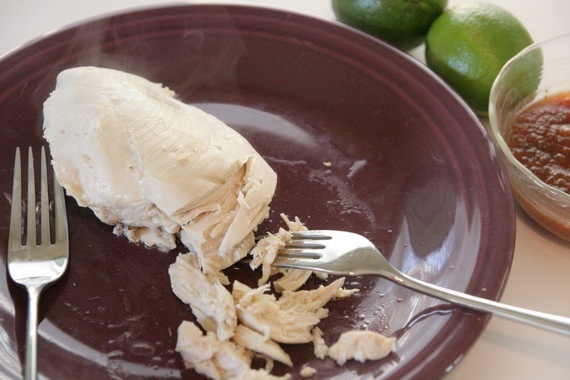
Remove from water and shred with two forks. Toss with 1 tablespoon tequila, the juice of one lime and salt and pepper to taste. Set aside.
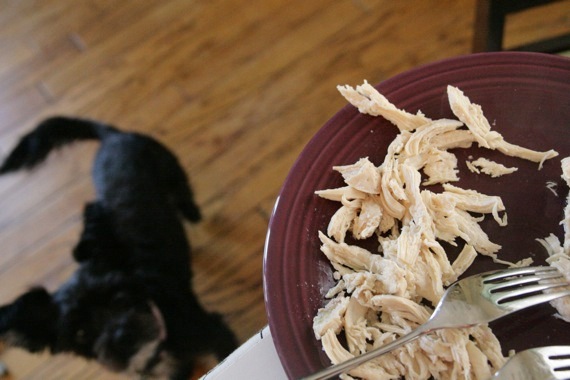
But before you season your chicken, be sure to give your sweet doggy a little tidbit. 😉
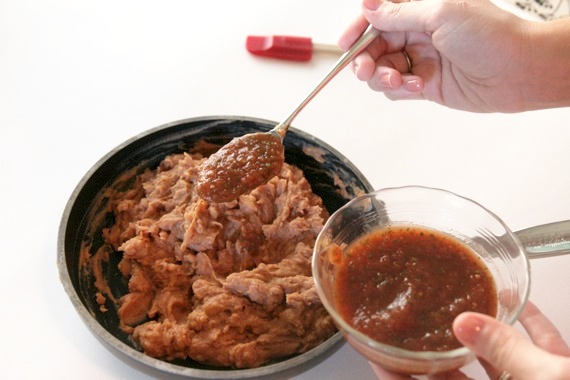
Put your refried beans in a small skillet, stir in 1 (rounded) teaspoon of salsa and a splash of the juice from your jarred jalapenos (trust me, it’s good! Plus, it helps thin it out a little bit so it’s easier to spread). Cook the beans over medium-low heat, until heated through. Set aside.
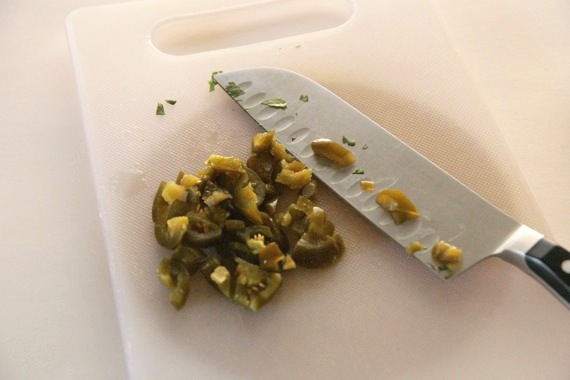
Chop 8-10 slices of the jalapenos.
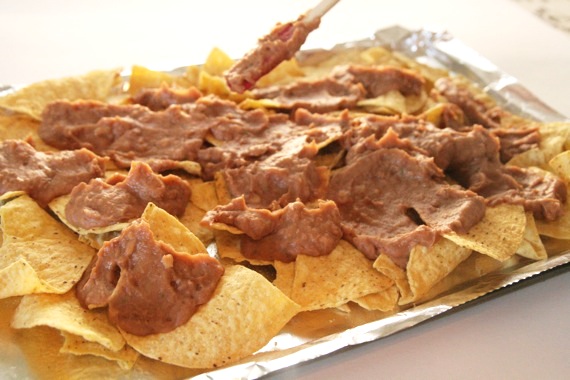
Spread out some tortilla chips on a baking sheet lined with foil and top with the beans. Just spoon some on, then gently spread it out with a small spatula.
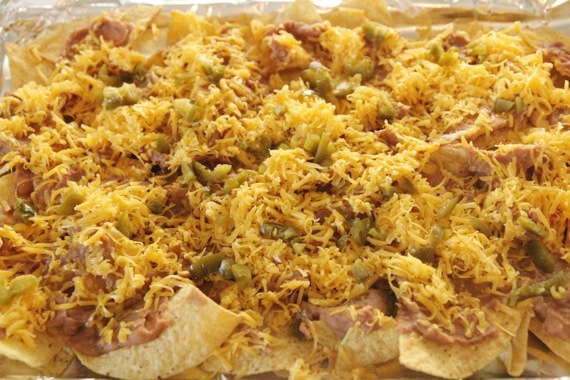
Top with the shredded cheese and the chopped jalapenos.
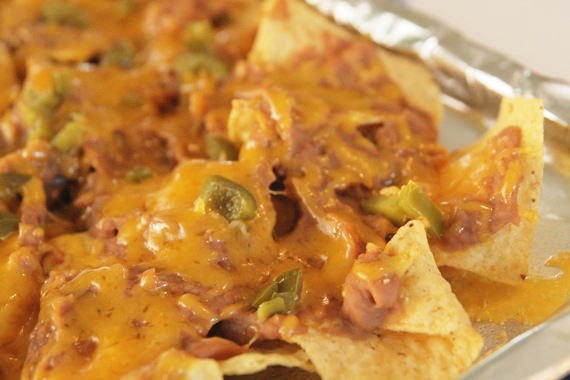
Bake it in a preheated 350 degree oven for about 5 minutes, until it looks all gooey and delicious, like this.
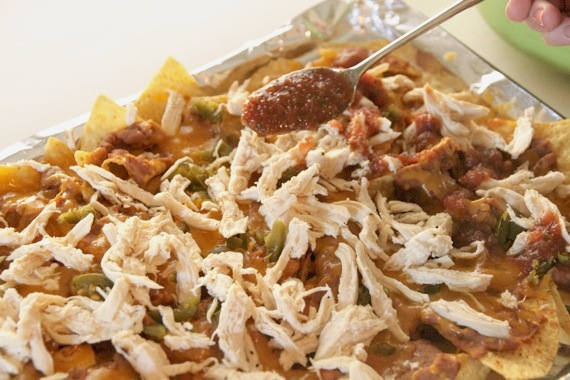
Top with the chicken then spoon on some of your salsa.
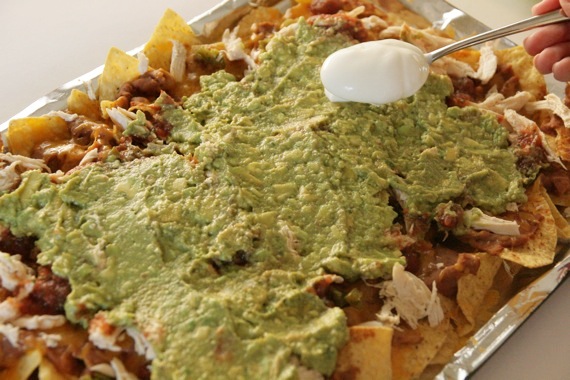
Spread the guacamole over the top, then dollop with sour cream.
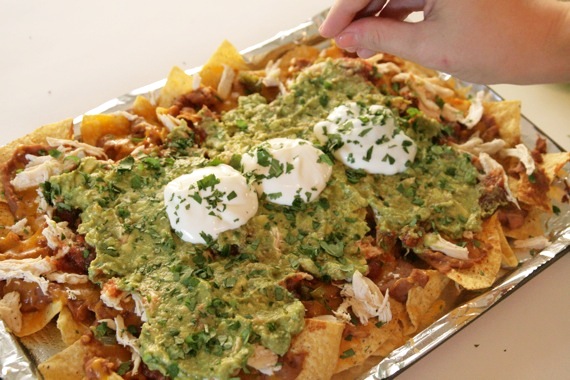
Sprinkle with the chopped cilantro.
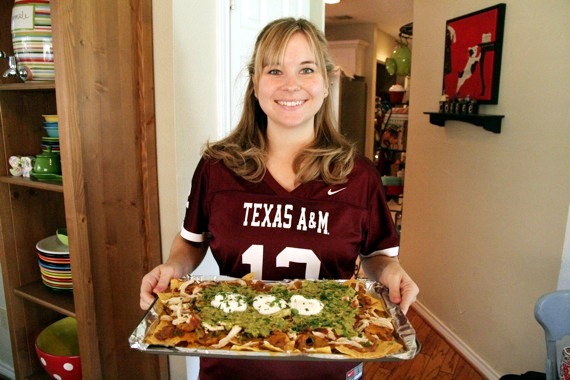
And….ENJOY!!
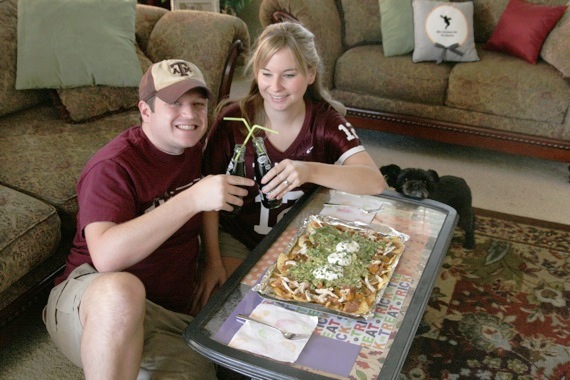
Game Day nachos are best enjoyed with cold Dublin Dr. Pepper…Mexican Coke would be excellent as well. 😉
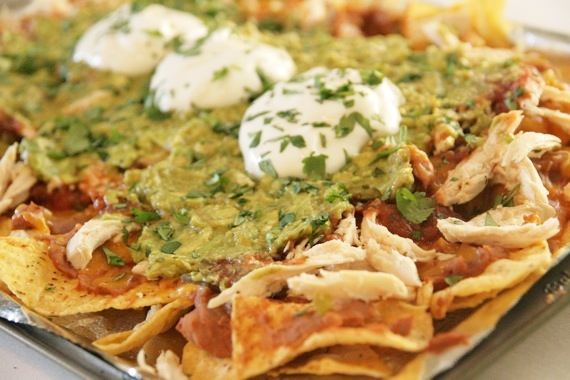
These nachos are seriously GOOD (and they serve a whole boat-load of people!). They’re packed with so many different layers of flavor- the chicken is so moist and the hint of tequila really adds a lot! This is seriously, the perfect game day food! But those aren’t the star of today’s meal….these Bananas Foster Nachos are BY FAR, some of the BEST dessert food I have ever had. Seriously. An explosion of awesome in your mouth. So rich…so gooey…so amazing! I can’t wait to show them to you! Here we go- hold onto your hats…this is gonna be good.
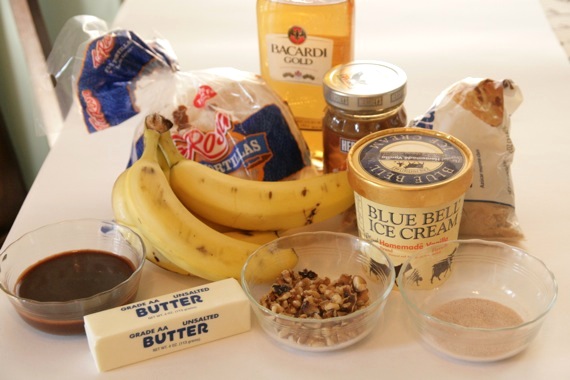
You’ll need: flour tortillas, rum, caramel sauce (by all means, make homemade if you want to- I chose not to today), brown sugar, bananas, vanilla ice cream, chopped toasted walnuts, cinnamon/sugar, butter and hot fudge (I use this recipe).
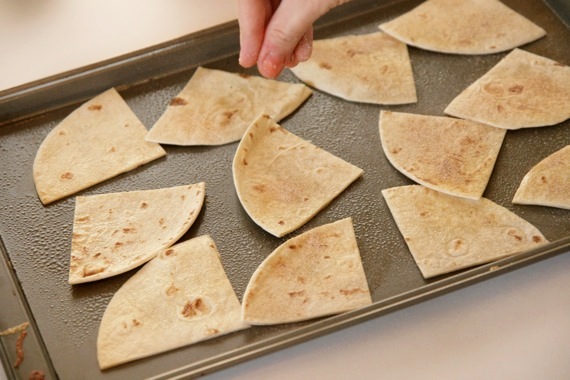
Start by cutting 3 tortillas into quarters. Arrange on a greased baking sheet and spray with butter spray. Sprinkle with cinnamon/sugar. Bake in a 350 degree oven for about 10-12 minutes, until crisp. Set aside.
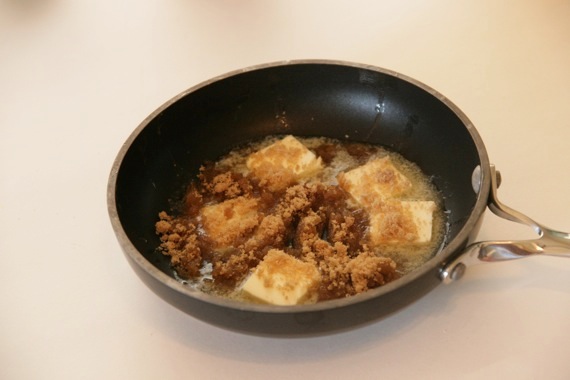
In a small saucepan, melt half a stick (4 tablespoons) butter, 2 tablespoons brown sugar and 1 teaspoon cinnamon.
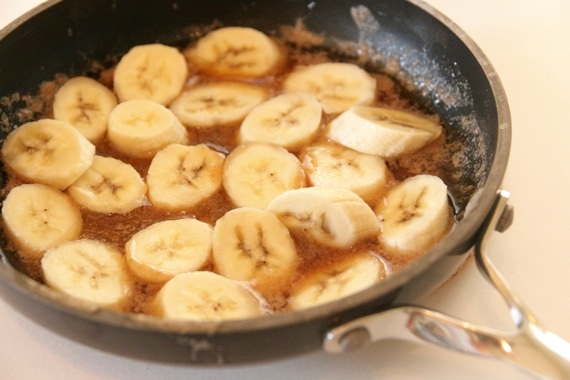
Place three sliced bananas in the pan, gently stir, then add in 2 teaspoons rum. Cook over medium-high heat for about 3 minutes. You still want the bananas to have some texture, so be sure not to overcook them.
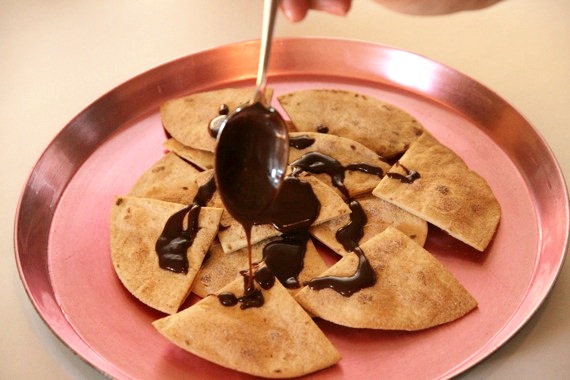
Arrange the tortilla wedges on a platter and drizzle with hot fudge (not too much- this dish can get RICH quick!).
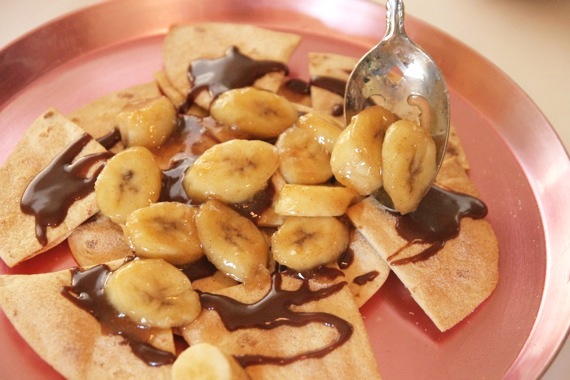
Top with the bananas. Wow. This is looking good already!
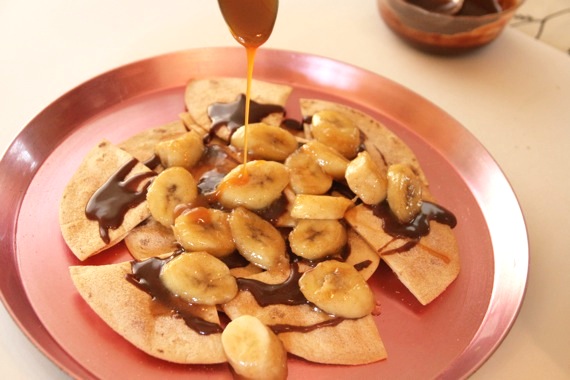
Drizzle with the caramel sauce. Try not to lick the spoon.
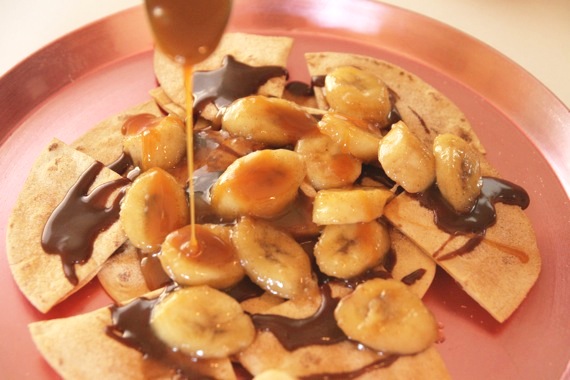
Seriously. Don’t lick that spoon.
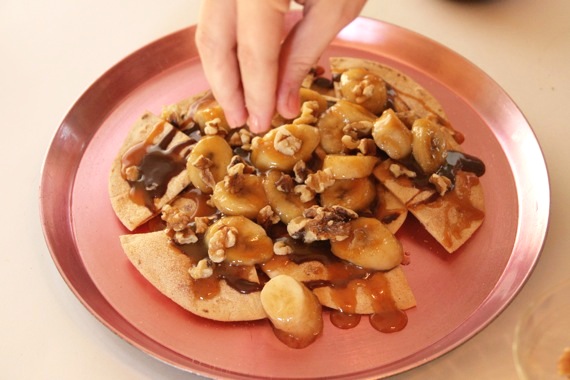
Sprinkle with the toasted walnuts.
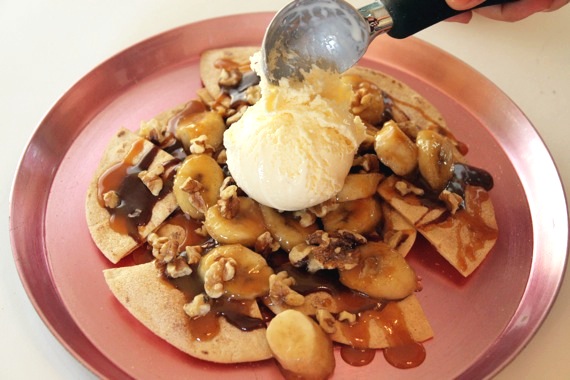
And finally, top with a couple of hearty scoops of vanilla ice cream. Holy cow.
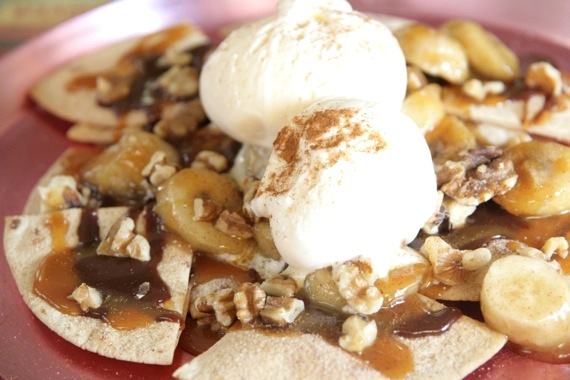
Go ahead and sprinkle with a teensy tiny bit of cinnamon.
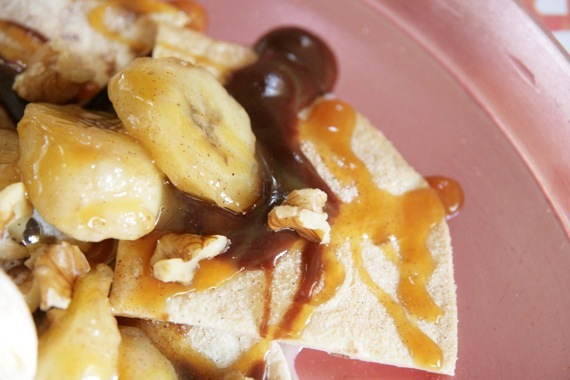
OMIGOSH, OMIGOSH, OMIGOSH….

Take a bite…and find yourself on a short trip to “Delicious-Gooey-Yum-Yum-Land”. A truly magical place….

Oh yeah…he’s there too…welcome, honey. Welcome.
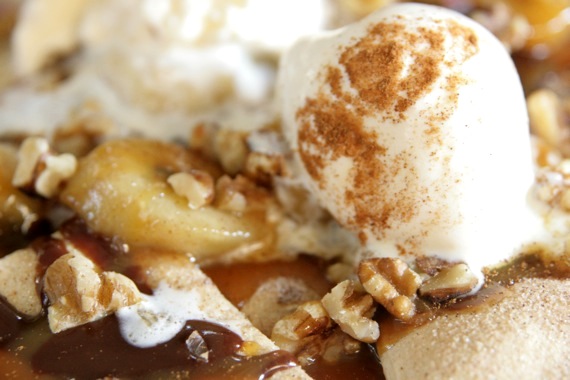
You’re welcome.


