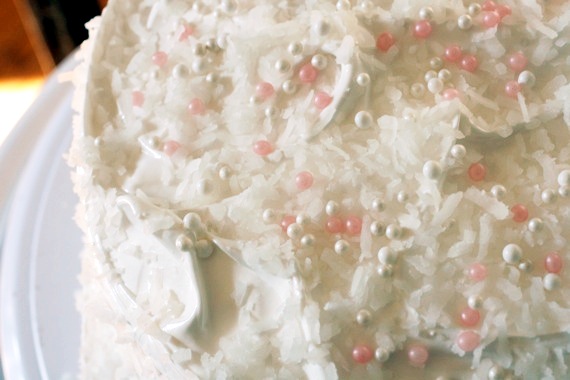
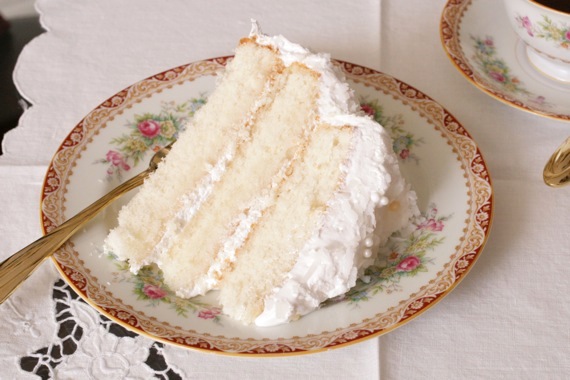
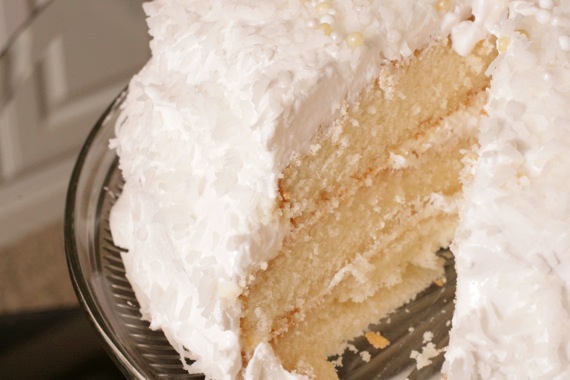
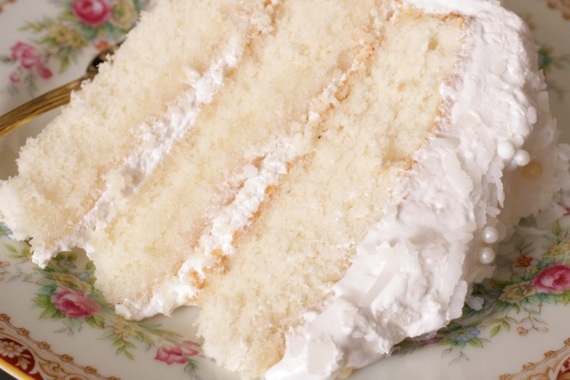
This is a very special, nostalgic cake for my family. It was my great-grandmother, Baba’s favorite go-to cake recipe. The Lady Baltimore Cake. It’s dainty, delicate, feminine and beautiful to look at. It starts with a light, tender white cake, filled with a delicate orange marmalade filling, spread with a fluffy marshmallowy frosting and sprinkled all over with sweetened coconut. Baba made this cake for special occasions, birthdays, holidays, etc. My mother’s birthdays were made so special because Baba would always make her this cake. And finally, after years of being too scared to try it for myself, I made it for my mother’s birthday last week. I love making something that Baba used to make- it’s almost as if it transports me through time and I’m standing next to her in her kitchen, baking alongside her.
Food is so powerful. One taste can bring back old friends, memories, and family. Glancing at an old, hand-written recipe can bring back smells and emotions and feelings from your childhood. Eating at your mom’s table, no matter your age, can make you feel safe and happy. Sharing a dessert with your husband can make you feel so loved and secure. And baking a cake from a book that your great-grandmother once used links you to something you can’t quite explain. I was so happy to make this cake for my mother, because for one short moment, we both got to be with Baba again. This is a very special cake. One I hope to be making for years and years to come.
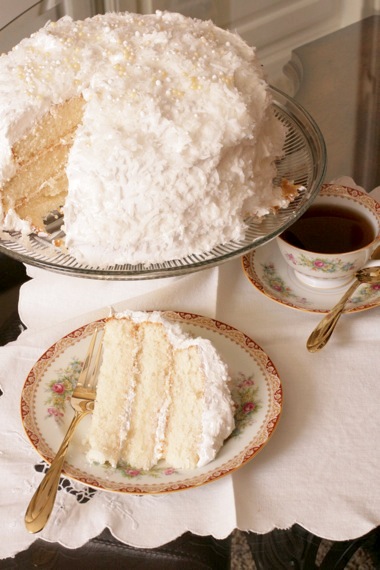
(That’s Baba’s china my mom let me use in the pictures- we thought it only fitting! Isn’t it gorgeous?)
The cake portion of this recipe is very similar to Dorie Greenspan’s Perfect Party Cake (my favorite white cake recipe), which is why it’s so light and fluffy. However, I noticed something odd while reading over the frosting portion of the recipe; no butter. NO butter?! What?! But I trudged on, thinking to myself, “Baba used this recipe a ton, so it must be right!” Upon actually making it, I realized it’s basically a marshmallow frosting. YUM! The frosting takes a little extra time and effort but in the end, it’s worth every second. I couldn’t get Joel to stop eating it! If you ever need an impressive cake for a special occasion, try the Lady Baltimore Cake- it’s different from your run-of-the-mill white cakes and really looks beautiful on a cake stand. It would really be perfect for showers, actually.
Lady Baltimore Cake
3/4 cup butter, at room temperature
2 cups sugar
grated zest of one lemon
3 cups cake flour
3 teaspoons baking powder
1/2 teaspoon salt
1/2 cup milk
1/2 cup water
1 1/2 teaspoons vanilla
6 egg whites
Preheat oven to 350 degrees and line 3 9-inch cake pans with parchment paper and grease generously.
Cream butter, sugar and lemon zest together until light and fluffy, about 2 minutes. Sift flour, baking powder and salt together and set aside.
Combine milk, water and vanilla. Add small amounts of flour mixture to creamed butter mixture, alternately with milk mixture, beating until smooth after each addition.
Beat egg whites until stiff and gently fold into batter. Pour into prepared pans and bake for 20-25 minutes, or until a toothpick inserted into the center comes out clean. The cakes shouldn’t get very brown on top. Allow to cool for 10 minutes in the pans, then transfer cakes to wire wracks to cool completely.
For the Orange Marmalade Filling:
3/4 (18-ounce) jar orange marmalade
1 tablespoon fresh orange juice
1 tablespoon fresh lemon juice
1 teaspoon Grand Marnier (or any orange liqueur), optional
Heat the marmalade, orange juice and lemon juice in a small saucepan over medium heat just before it reaches boiling point. Remove from heat and stir in the Grand Marnier. Strain out the peels and allow to cool to room temperature.
For the Frosting:
3 cups sugar
1 cup water
1/4 teaspoon cream of tartar
3 egg whites
1 teaspoon vanilla
sweetened, flaked coconut, for garnish
Using a mixer, beat egg whites until stiff.
Boil sugar, water and cream of tartar in a small saucepan over medium-high heat until it reaches 238 degrees on a candy thermometer, or until a small amount of syrup will form a soft ball when dropped into very cold water (this is what’s known as “soft ball stage”).
With the mixer running, slowly pour the hot syrup over the egg whites and continue to beat until the mixture is of spreading consistency (this could take up to 10 minutes; don’t be alarmed if your mixture is runny, just keep beating and eventually it will thicken up.). Add vanilla.
To Assemble:
Spread half of the orange marmalade filling in the center of the bottom cake layer, leaving an inch border around the outside (when you add the frosting, the marmalade will spread). Gently spread some of the frosting over the marmalade and place second cake layer on top. Repeat with the other half of the marmalade filling and more frosting, then place the third cake layer on top. Frost the whole cake with the frosting (be generous, the recipe makes a TON of frosting!) and sprinkle generously with coconut. Refrigerate until 30 minutes to one hour before serving.
Recipe source: adapted from Baba’s favorite, The American Woman’s Cookbook
I hope this cake made your birthday extra-special, mommy! I love you!
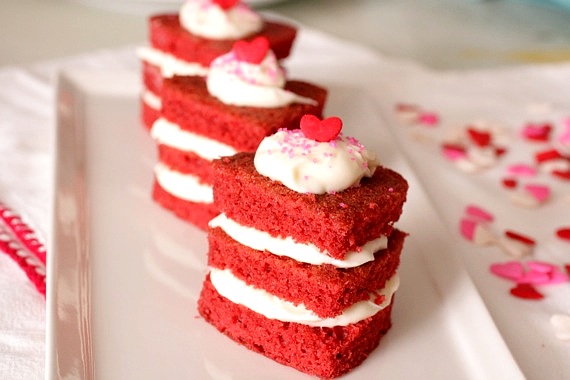
I’m actually not the world’s biggest fan of red velvet cake. Never have really seen the big deal. However, lately I’ve been craving it like crazy! I guess because so may delicious looking red velvet recipes have been popping up all over the blogosphere lately. I guess February is definitely a red velvet kind of month. A year or so ago, I copied down my great-grandmother’s recipe for red velvet cake and have been wanting to try it ever since. I figured now would be as good a time as any, then my friend Kelsey recommended I try her recipe- in fact, her exact words were, “try my recipe- I dare you not to love it.” Well, how can I resist THAT?! And luckily, upon comparing the two recipes, I found that Kelsey’s is almost identical to my great-grandmother’s, with only a couple of very minor differences. Excellent!
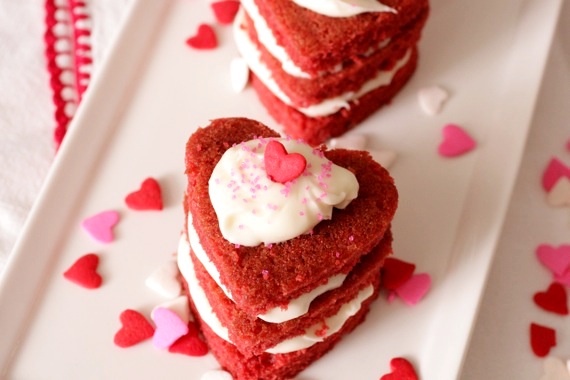
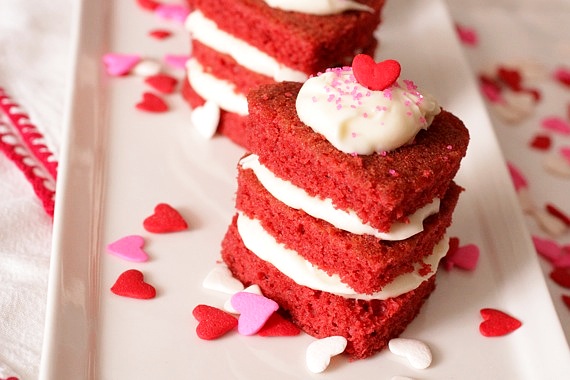
I didn’t want to make a traditional cake (which is very unlike me, but I just decided to ride the wave…), and ended up baking the cake in a jelly roll pan. After baking and cooling I found myself looking at it thinking, “well….what the heck do I do now?!” I knew I wanted to somehow do something heart-shaped, for a Valentine’s theme, but beyond that I was lacking inspiration. Lucky for me, my friend Leah suggested Napoleons. Perfect Leah, thanks! Napoleons (or Mille-feuille) are traditionally made with puff pastry and pastry creme, but I thought in honor of Valentine’s Day a cute little red velvet cake Napoleon would be oh-so-fun! The red velvet cake turned out so delicious- especially with the tangy cream cheese frosting! These little guys were so much fun to make and so easy! A perfect little sweet treat for your sweetheart this Valentine’s Day!
Red Velvet Cake Napoleons
For the cake:
2 1/2 cups cake flour
1 1/2 cups sugar
1 teaspoon baking soda
1 tablespoon cocoa powder
1 teaspoon salt
2 eggs
1 1/2 cups vegetable oil
1 cup buttermilk
2 tablespoons (1 oz.) red food coloring
1 teaspoon vanilla extract
1 teaspoon white distilled vinegar
For the frosting:
12 ounces cream cheese, softened
8 ounces butter (2 sticks), softened
1 1/2 teaspoons vanilla extract
3 cups confectioners’ sugar
squirt of fresh lemon juice
For the cake:
Preheat oven to 350 degrees. Grease and line a jelly roll pan with parchment paper.
Sift together flour, sugar, baking soda, cocoa, and salt into a medium bowl.
Beat eggs, oil, buttermilk, food coloring, vanilla, and vinegar in a large bowl with an electric mixer until well combined. Add dry ingredients and beat until smooth, about 2 minutes.
Pour batter into the prepared pan and bake for 30-35 minutes, or until a toothpick inserted into the middle comes out clean. Let cool completely.
When the cake is cooled, flip it onto a large surface and peel the parchment paper off. Using a heart-shaped cookie cutter, cut out hearts and set aside. Using a serrated knife, slice each heart in half. Set aside while you make the frosting.
For the frosting:
Beat cream cheese, butter, vanilla and lemon juice together in a large bowl with an electric mixer until combined. Add sugar and beat until frosting is light and fluffy, 3-5 minutes (you’ll end up with some left over).
To assemble:
Place a small amount of frosting on one of the hearts, place another heart on top, pressing down slightly, then more frosting; finally place one last heart on top and a dollop of frosting (that’s 3 hearts total). Top with sprinkles, if desired. Repeat with the remaining hearts. I ended up with 14 Napoleons.
Recipe source: cake and frosting seen on Apple A Day, originally from Saveur.com
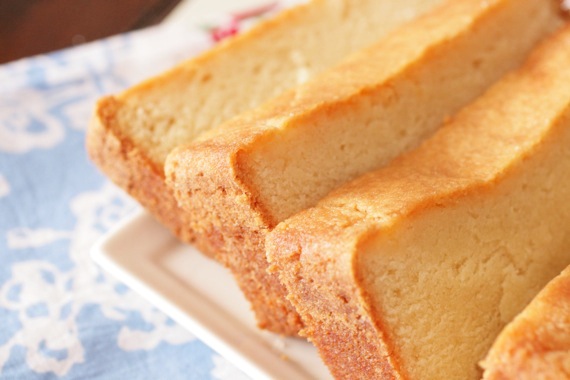
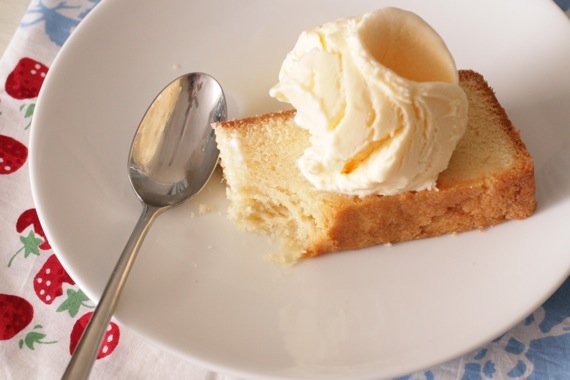
What do you do when you’re snowed in with only 1 stick of butter? Why, make half a pound cake, of course! You can bet that this cake is pretty special to me, seeing as I had one opportunity to bake (while snowed in), with ONE stick of butter to my name. I could have chosen anything. Any recipe. But I chose this one. THIS pound cake. Brings a tear to the eye, doesn’t it? No? ……..ok.
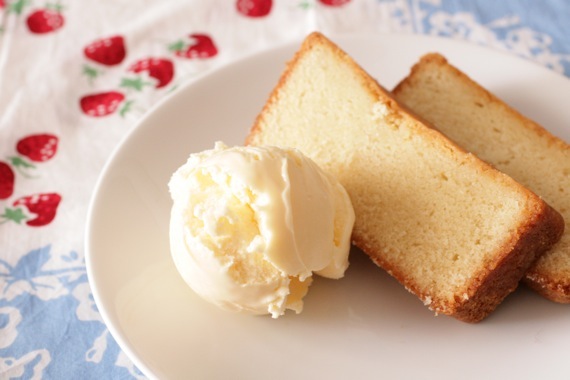
A long time ago, Joel’s mother bought me a Williams-Sonoma cake mix for peach pound cake. It was magical. Moist and buttery and brushed with peach schnapps while still warm. I’ve never forgotten that cake. And recently, while snowed in with one stick of butter (stop me if you’ve heard this story before…) I decided to recreate it. I chose Paula Deen’s recipe for pound cake, as it is my favorite. I baked in some peach schnapps with the batter as well as brushed the whole outside of the cake while still warm. It was close; perhaps not quite as good as I remember the Williams-Sonoma mix being, but DARN good, just the same. And even better with a scoop of vanilla ice cream! A snow day baking success! That last stick of butter really did itself proud….
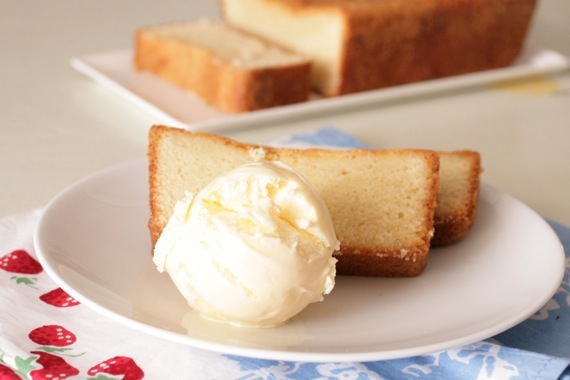
(And yes, I took lots of pictures. That’s what you do when you’re snowed in….apparently.)
Peachy Pound Cake
1 stick butter
1/4 cup vegetable shortening
1 1/2 cups sugar
2 eggs
1 1/2 cups all-purpose flour, plus more for pan
1/2 teaspoon salt
1/4 teaspoon baking powder
1/2 cup milk
1 teaspoon vanilla extract
1/3 cup, plus 1 tablespoon peach schnapps
Preheat oven to 350 degrees.
With a mixer, cream butter and shortening together. Add sugar, a little at a time. Add eggs, 1 at a time, beating after each addition. Stir dry ingredients together in a bowl and add to mixer alternately with milk, starting with the flour and ending with the flour. Mix in vanilla and the 1 tablespoon peach schnapps. Pour into a greased and floured 9×5 loaf pan and bake for 60-70 minutes, until a toothpick inserted in the center of the cake comes out clean. Let cool in the pan for about 10 minutes.
While the cake is still warm, remove from pan and brush the top and sides with the remaining peach schnapps. Let cool completely before serving.
Serves 6-8
Recipe source: adapted from Paula Deen
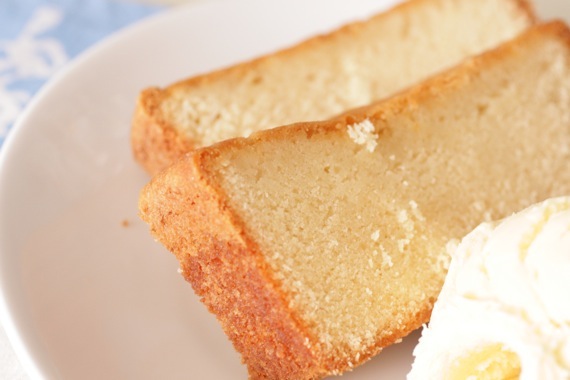
**If you’d rather not use alcohol, this quick and easy peach simple syrup would be a great alternative!
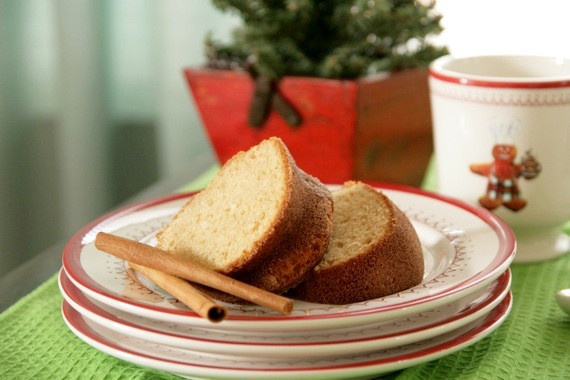
If you love cinnamon, be sure to bookmark this recipe because it’s just bursting with it! This cake is one of my very favorite things around Christmas (and winter)- my mom used to make it every single Christmas and the whole family loved it. Now my sister and I both make it for our own families every Christmas. It’s wonderful for parties if you don’t want to take the same old cookies or candy, but still want something quick and easy (and of course impressive).
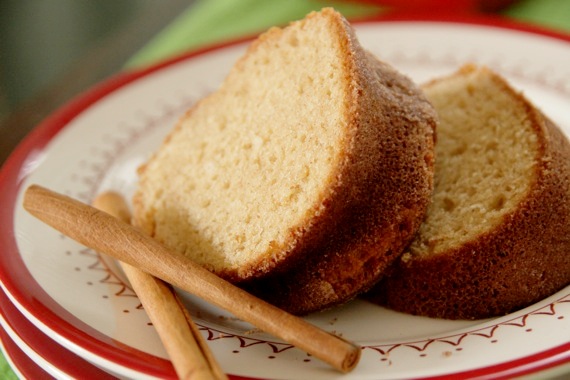
This cake is incredibly moist and just FULL of warm cinnamon flavor; a real treat during the holidays! Perfect after a delicious meal with a cup of hot coffee. If you’re looking for that perfect Christmas morning breakfast treat, this would be delicious! And it keeps beautifully, so feel free to make it a day or two before! This cake is Christmas to me and I just love it. In fact, I’ve posted it before, but it was a looong time ago and the pictures were just awful. I decided to feature it again, so that it might get the attention it deserves! Thanks Mommy, for a delicious recipe! 🙂
Cinnamon Pound Cake
-my mom’s recipe (I’m not sure where she got it from originally)
4 tablespoons sugar
2 tablespoons cinnamon
1 yellow butter cake mix (don’t use white cake mix – it has to be butter)
1 package instant vanilla pudding
1/2 cup canola oil
1 8-ounce container sour cream
4 eggs
Preheat oven to 350 degrees and grease a bundt pan.
Mix the sugar and cinnamon together in a small bowl and sprinkle half of the mixture in the greased bundt pan – shake it all around to coat the entire pan. Mix cake mix with pudding, oil, sour cream, eggs and other half of cinnamon/sugar mixture. Pour into pan and bake for 45 – 50 minutes until springy. Cool for 20 minutes before taking out of pan.
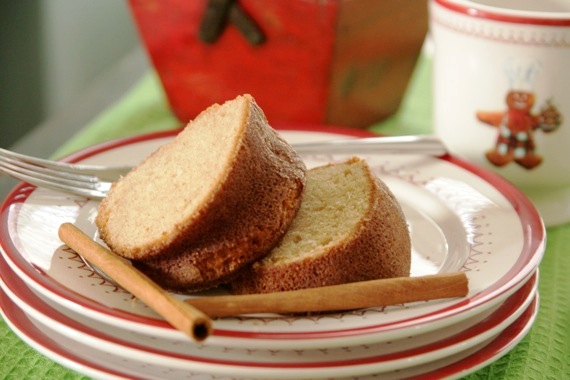
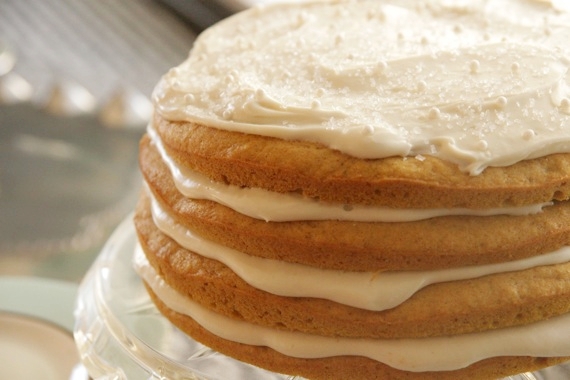
Ahh, Vermont Spice Cake…how I love thee! This cake is so reminiscent of Autumn to me- one bite and I get all warm and cozy and immediately, it feels like Fall. I’ve had this recipe forever (well, since getting married) and I remember making it the first month of my marriage- it was pretty much the first ‘real’ dessert I baked for Joel. I was so proud of myself. I had never made a cream cheese frosting from scratch before, and I was hooked right away! There’s just something about the combination of pumpkin, warm Fall spices and thick, maple cream cheese frosting that just sings to me. I absolutely love this dessert. Very simple and quick to make, and always a winner with guests (or husbands!).
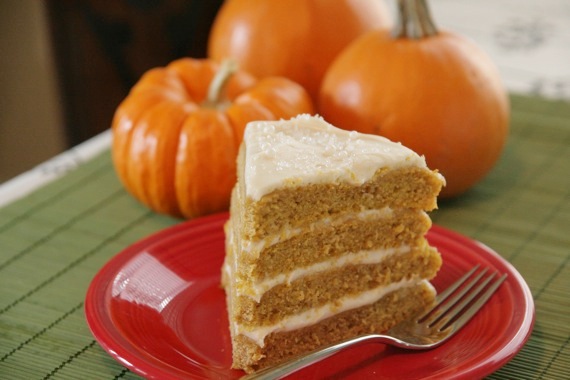
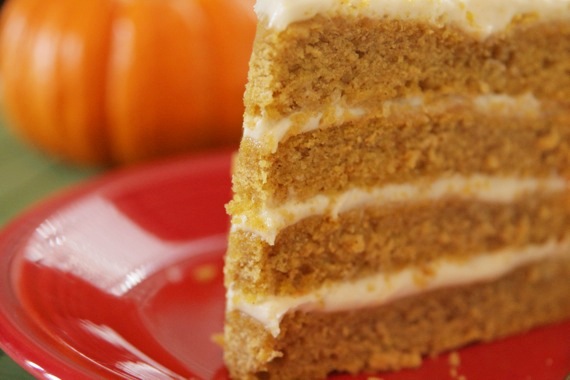
This was the cake I served at my dinner party a couple of weeks ago and it was the absolute perfect end to our meal. We each enjoyed a (big) slice with a cup of cinnamon-orange coffee. It was a huge success- not too sweet, the perfect amount of spice, and a touch of luxuriousness from the cream cheese frosting. The ultimate Autumn dessert!
Vermont Spice Cake with Maple Cream Cheese Frosting
-from my Nestle Classic Recipes cookbook
For the Cake:
3 cups all-purpose flour
3 1/2 teaspoons baking powder
2 teaspoons pumpkin pie spice (I used a mixture of 1 1/2 tsp. cinnamon, 1 tsp. cloves and 3/4 tsp. nutmeg)
1 teaspoon baking soda
1/2 teaspoon salt
1 1/2 cups sugar
3/4 cup (1 1/2 sticks) butter, softened
3 large eggs
1 1/2 cup canned pumpkin
1/2 cup evaporated milk
1/4 cup water
1 1/2 teaspoons vanilla extract
Preheat oven to 325 degrees. Grease 2 9-inch round cake pans. Combine flour, baking powder, spices, baking soda and salt in a small bowl. Beat sugar and butter in a large mixer bowl fitted with a paddle attachment until creamy. Add eggs one at a time; beat for 2 minutes. Beat in pumpkin, evaporated milk, water and vanilla extract. Gradually add the flour mixture. Spread evenly into prepared cake pans. Bake for 35-40 minutes until a toothpick inserted comes out clean. Cool in the pans on wire racks for 15 minutes; remove to wire racks to cool completely.
For the Maple Cream Cheese Frosting:
11 ounces cream cheese, softened
1/3 cup butter, softened
3 1/2 cups powdered sugar
2-3 teaspoons maple extract
squeeze of lemon juice
Beat cream cheese and butter until smooth. Gradually add in the powdered sugar and beat until fluffy. Add in the maple extract and lemon juice. Mix well. Refrigerate until needed.
To assemble:
Cut each layer in half horizontally with a long, serrated knife. Frost between layers and on top of cake, leaving sides unfrosted. Garnish as desired.
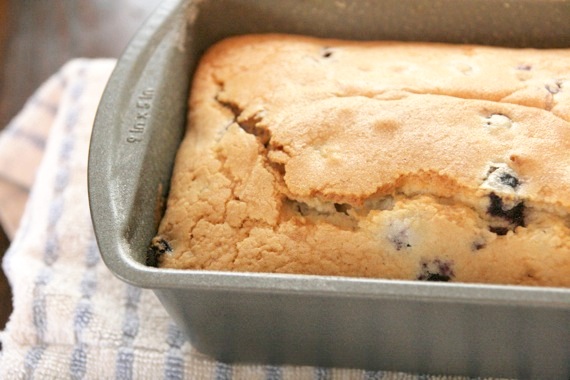
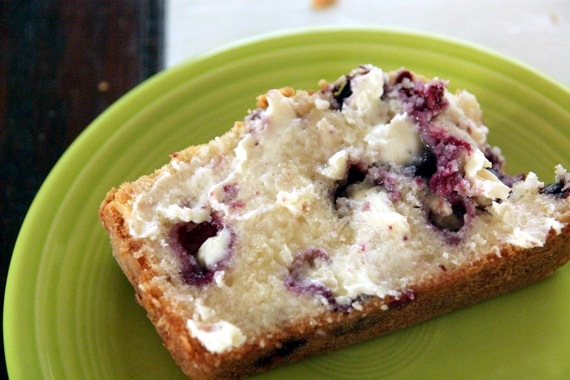
Anybody who knows me, reads my blog, or has been in a room with me for at least 3 seconds knows that I crave chocolaty, rich, over-sweet desserts (well, that and the fact that I’m a little weird and kind of “all over the place”, but that’s neither here nor there); but lately, I’ve had a taste for something different. I’ve never been a huge fan of those desserts that are only a little sweet (i.e. pound cake), but yesterday, the craving hit and I decided it was imperative that I bake a pound cake. For some reason I was craving that slightly sweet, dense, buttery taste that comes only from a pound cake. And, as luck would have it, I remembered some gorgeous blueberries I had bought and frozen earlier in the summer. Perfect. I chose Paula Deen’s recipe for her mama’s pound cake (if P.D.’s mom made it, it’s probably really good). I was more than pleasantly surprised. I had a piece warm out of the oven with a little (ok, a lot) of butter smeared on it….heavens to Betsy! My craving was satisfied. This was one fantastic pound cake! The blueberries don’t add a lot of extra sweetness- just a fresh, subtle blueberry flavor that goes perfectly with the buttery, tender cake. I’m in love, I tell you!
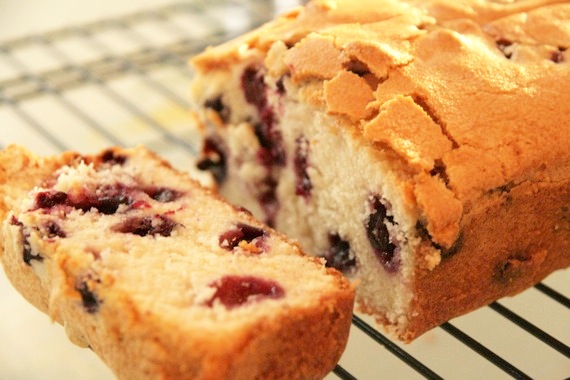
Blueberry Pound Cake
-adapted from Paula Deen
1 stick butter, plus more for pan
1/4 cup vegetable shortening
1 1/2 cups sugar
3 eggs
1 1/2 cups all-purpose flour, plus more for pan
1/2 teaspoon salt
1/4 teaspoon baking powder
1/2 cup milk
1 teaspoon vanilla extract
1 heaping cup fresh blueberries (If you’re using frozen, don’t thaw beforehand)
Preheat oven to 350 degrees.
With a mixer, cream butter and shortening together. Add sugar, a little at a time. Add eggs, 1 at a time, beating after each addition. Stir dry ingredients together in a bowl and add to mixer alternately with milk, starting with the flour and ending with the flour. Mix in vanilla. Gently fold in the blueberries. Pour into a greased and floured 9×5 loaf pan and bake for 60-70 minutes, until a toothpick inserted in the center of the cake comes out clean.
*Toss the blueberries with a little flour before stirring them into the batter- this keeps them from sinking to the bottom during baking.
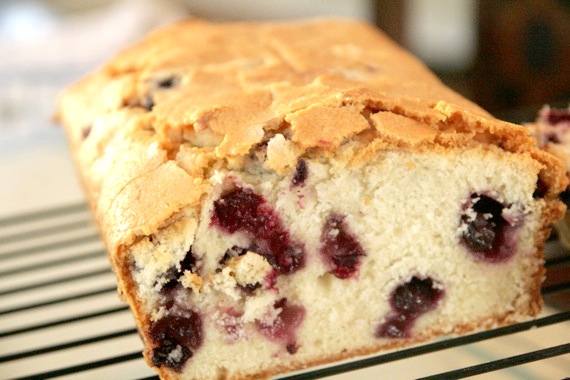
I don’t know if you can tell from the picture (that was my hope), but this cake is incredibly moist and has a beautiful, tender crumb! SO good!
Sorry; once again, it’s been awhile since my last post. This time I was sick for a few days and on top of that, I pretty much just flat ran out of recipes to post. I haven’t cooked anything worth blogging in a few days; but all that’s about to change – with this cake!
I’ve had a hankering to bake a cake lately. Something big and tall and covered with tons of colorful frosting. But it just seems wrong to bake a giant cake for just the two of us- it would most likely be wasted. We really try not to eat too much sweets…………………….
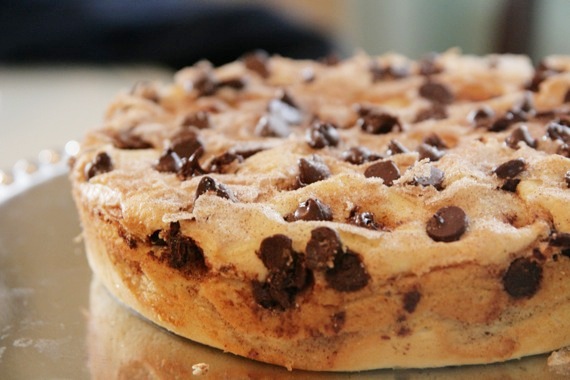
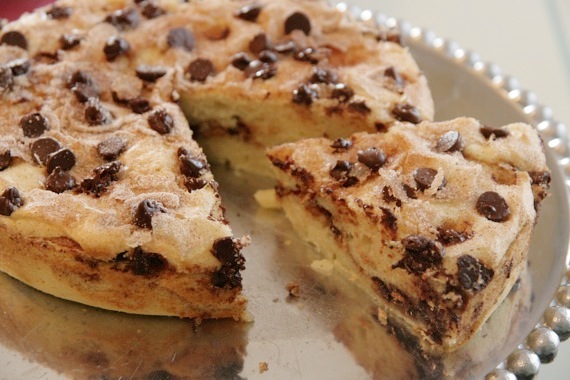
…ok, that’s a lie. What would most likely happen is I would end up sitting on the kitchen floor at midnight shoveling handfuls of cake into my mouth like some kind of crazy primate. That’s why I won’t be making a big giant cake for just the two of us. But I’m not about to suppress my inner baking needs. So I got in the kitchen, cranked up my Dolly Parton Bluegrass and baked up a cake. A much smaller, simpler cake. Perfect for a weekend breakfast or an afternoon snack. Smitten Kitchen’s Cinnamon Chocolate Chip Sour Cream Cake. This took no time to throw together and only 40 minutes to bake. It’s surprisingly dense and slightly spongy, but really tasty. I love the combination of cinnamon and chocolate.
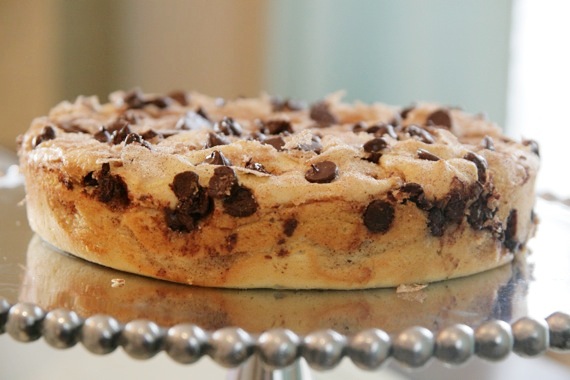
I was really glad I baked this yesterday – it’s nice to be able to bake a cake when you don’t have anything to celebrate, or need a dessert for an occasion. Just a simple, sweet little cake for the two of us to enjoy. Those are the best kind of desserts.
Cinnamon Chocolate Chip Sour Cream Cake
-Smitten Kitchen
1 stick unsalted butter at room temperature
1 1/2 cups sugar
3 eggs, separated
1 1/2 teaspoons vanilla extract
16 ounces sour cream
3 cups all-purpose flour
1 teaspoon baking powder
1 1/2 teaspoons baking soda
12 ounces chocolate chips
1/2 cup sugar
1 teaspoon cinnamon
Preheat oven to 350°F.
In a large bowl, cream butter and 1 1/2 cups sugar, then mix in the egg yolks and vanilla. Sift flour, baking soda and baking powder together into a separate bowl. Alternately add sour cream and then dry ingredients into butter mixture. Beat eggs whites until stiff, then fold into batter. Mix last 1/2 cup sugar and cinnamon together in a separate, small dish.
In a greased 9″x13″ pan, pour in half of the cake batter. Sprinkle the top with half of the cinnamon-sugar mixture and half of the chocolate chips. Pour remaining batter on top, sprinkling the top with the remaining cinnamon-sugar and chocolate chips. Bake for 40 to 50 minutes, or until a tester comes out clean.
*I halved the recipe and got a nice 9-inch cake; perfect for 2-4.
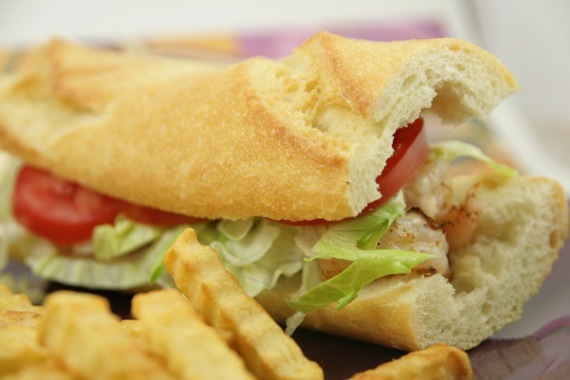
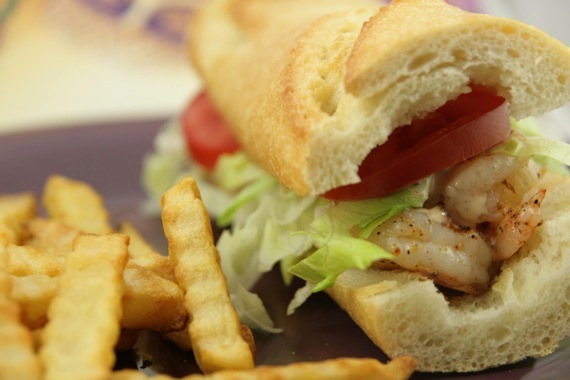
This weekend, in honor of Mardi Gras in New Orleans (laissez les bon temps rouler!), I decided to make a whole Mardi Gras-themed meal to celebrate. We both loooove Cajun food and love the city of New Orleans, so we really enjoyed the whole ordeal! I started off with grilled shrimp Po’ Boys with a spicy remoulade and ended the meal with…wait for it……..a King Cake! Yep, that’s right, I made a King Cake, but more on that later! I found the recipe for the Po’ Boys on Closet Cooking, who found it on Ezra Pound Cake. Now, normally, you’d see a Po’ Boy sandwich with some form of fried seafood, but this recipe looked so good with the grilled shrimp that I had to give it a try. Plus, I’m not big on frying. I can’t tell you how simple and fast this whole process was – it takes mere minutes to grill your shrimp and the remoulade comes together equally as fast. Although I would (naturally) prefer mine with fried oysters, these were SO good – we literally devoured them in no time! Give these a try….you absolutely won’t be sorry!
Grilled Shrimp Po’ Boys
Makes 2
1 pound shrimp, shelled and deviened (I only used a 1/2 pound and it was perfect)
1 tablespoon oil
1 tablespoon creole seasoning (see below)
1 baguette
1 cup lettuce, shredded
2 large tomatoes, sliced
1/4 cup remoulade sauce (see below)
Toss the shrimp in the oil and creole seasoning to coat.
Grill the shrimp until cooked, about 2-3 minutes per side.
Assemble sandwich.
Remoulade Sauce
makes 1/2 cup
1/4 cup mayonnaise
1 tablespoon creole mustard
1 tablespoon ketchup
1 teaspoon horseradish
1 small clove garlic
1 tablespoon lemon juice
1 teaspoon capers
1 green onion, chopped
1/4 teaspoon cayenne pepper
1/4 teaspoon paprika
hot sauce to taste
Blend everything in a food processor until smooth.
Creole Spice Blend (I actually didn’t use this- I just used my Tony Chachere’s Cajun Spice)
makes 4 tablespoons
2 1/2 teaspoons paprika
2 teaspoons salt
2 teaspoons garlic powder
1 teaspoon onion powder
1 teaspoon black pepper
1 teaspoon cayenne pepper
1 teaspoon dried leaf oregano
1 teaspoon dried leaf thyme
And now…on to the King Cake!! Ok, for those of you who don’t know what a King Cake is, HERE is a little history. As far as the actual taste – the dough is almost identical to cinnamon roll dough – very light and chewy (yum). There is a layer of cinnamon and brown sugar in the center and it’s topped with a lemony glaze and colored sugars. Perfect for breakfast, really. The dough contains yeast, therefore it’s a total pain in the butt to make, especially for someone who has chronic problems with yeast. You let it rise, then punch it down…then let it sit for 2 hours, then punch it down…then roll out the dough and braid it…then let it rise again….*sigh*. Anyway, it’s completely delicious and worth every bit of the trouble. I mean, just look at it…
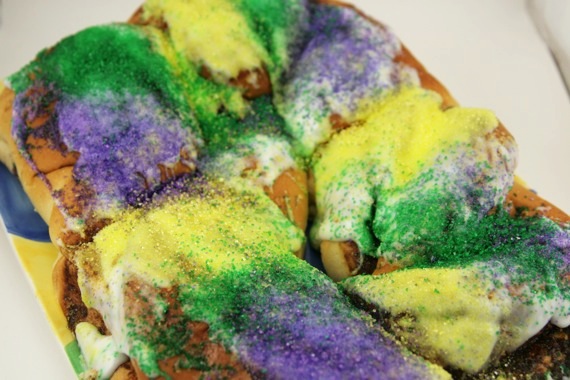
Yum. Isn’t that beautiful?? Only thing is….that isn’t mine. This….
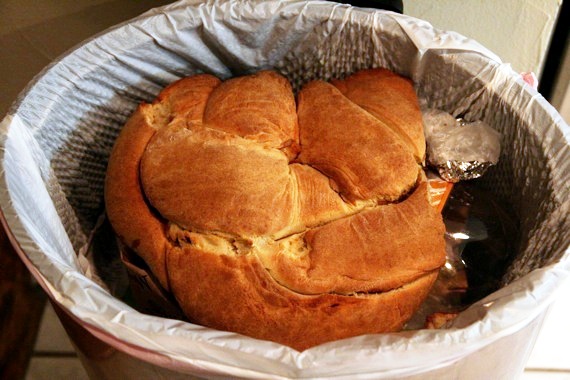
….is mine. Yes, it’s in the trash. Yes, it’s completely disgusting-looking. Yes, it was a total and complete DIS-AS-TER. Welcome to my world. A world in which baked goods with yeast just don’t stand a chance. My kitchen is where yeasted treats go to die.
Now, I realize I could’ve just shown you the picture above (the beautiful, pristine store-bought version) and taken 100% of the credit – Lord knows I worked hard enough! – BUT, that’s what having this food blog is all about. My adventures and misadventures. Therefore, I choose to be honest and tell you that although I worked my rear end off on this stupid dough, and followed the instructions to a TEE, it just didn’t turn out (the dough didn’t rise. At all. It came out tasting like a really dense, hard biscuit). That happens. Especially to me. Of course I’ll keep trying, and eventually I’m sure I’ll make a darn beautiful King Cake…just not for a while. For now, that beautiful store-bought version is still in my kitchen, and it’ll do just fine for the time being. *sigh*……… Here is the recipe, for those of you who don’t have my problem.
Lemon-Glazed King Cake
seen on Peanut Butter and Julie
Makes 1 cake
For the dough
1/2 cup whole milk
2 1/4 teaspoons active dry yeast
1/3 cup plus 1 teaspoon sugar
3 1/2 cups flour
6 ounces butter, softened
4 large eggs
Zest from one orange
1/2 teaspoon ground cinnamon
1/2 teaspoon ground cardamom
1/2 teaspoon salt
For the filling
3 tablespoons butter, melted
1/3 cup light brown sugar
1 tablespoon ground cinnamon
1 whole almond or large dried bean
For the glaze
2 large egg whites
1 pound confectioner’s sugar
2 tablespoons light corn syrup
1/4 teaspoon pure vanilla extract
2 tablespoons fresh lemon juice
Green, yellow/gold, and purple decorative sugars
Prepare the dough: In a small saucepan, heat the milk to about 110F degrees. Pour the milk into a small bowl and sprinkle the yeast over the surface. Add 1 teaspoon of the sugar and stir to combine. Set the mixture aside until the yeast is foamy, 10 minutes.
In the bowl of an electric mixer fitted with the paddle attachment, cream the butter and the remaining sugar until light and fluffy, 2-3 minutes. Add the yeast mixture and mix for 1 minute. Add an egg and mix thoroughly; follow with a third of the flour. Repeat with the remaining eggs and flour. Add the orange zest, cinnamon, cardamom, and salt, and continue to mix on low speed for 7-8 minutes, until the dough is smooth, shiny, and elastic, and it starts to pull away from the sides of the bowl. If the dough is too soft, add up to 1/2 cup of flour.
Scrape the dough from the bowl and lightly knead to form into a ball. Butter or oil the inside of a medium size bowl and transfer the dough to the bowl, turning to coat with the butter. Cover with plastic wrap and set in a warm spot to rise for 1 hour, or until doubled in bulk.
When the dough has risen, turn it out of the bowl, punch it down, and knead it lightly to form a ball. Put the dough back in the bowl, cover, and refrigerate for 2 hours.
Form the cake: Flour a clean work surface. Roll the dough into a 10 by 20-inch rectangle, keeping the thickness consistent throughout. Cut the dough lengthwise into 3 strips. Paint each strip of the dough with the melted butter, leaving a 1/2-inch border clean along the length of each strip. Reserve any leftover butter. Sprinkle the strips with the brown sugar and cinnamon.
Line a large baking sheet with parchment paper. Fold each strip over lengthwise toward the clean edges to enclose the cinnamon sugar, and pinch the seam to seal the dough closed. Snugly braid the three pieces together. Transfer the braid to the baking sheet and form the braid into a wreath, pressing the ends together. Cover the wreath with a clean towel and set aside to rise for 40 minutes. Preheat the oven to 350F degrees.
Brush the cake with the reserved melted butter and bake for 18 minutes, until golden brown. Cover the cake loosely with foil and continue to bake for 20-25 minutes more, until baked through. Keep the cake on the baking sheet and allow to cool completely. After the cake has cooled, carefully tuck the almond into the underside of the cake.
Prepare the glaze: Place the egg whites and the confectioner’s sugar in the bowl of an electric mixer fitted with the paddle attachment. Mix on low speed until combined. Add the corn syrup, vanilla, and lemon juice, and continue to mix until smooth, adding more lemon juice if necessary to achieve your desired glaze consistency.
Drizzle the glaze over the cake, spreading with an offset spatula to coat. Cover with alternating colored sugars, and allow to set before serving.
Don’t be afraid to try this recipe after what happened to me. Really. I’m sure it will turn out just fine for you. Whatever you’re celebrating this week, be it Mardi Gras, the Olympics, or whatever – enjoy it! 🙂
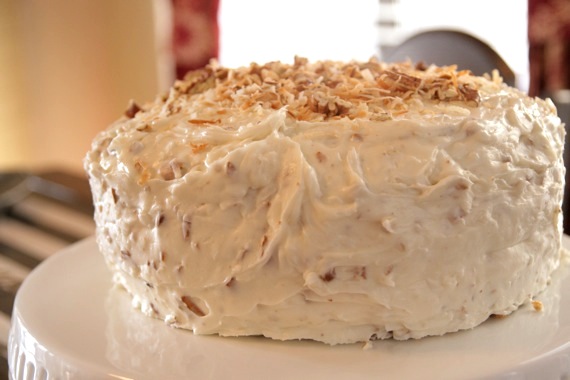
Do you ever have one of those nights? The kind where absolutely nothing goes right, to the point of just having to laugh it off, lest you get really, really upset? Seems like we have those kind of nights a lot. The kind of nights where an entire tray of boiling hot soup and a HUGE glass of tea is dumped into my lap; my husband choking on the not-so-delicious, romantic Valentine’s Day meal I made for him, thus ruining everybody’s evening (and appetite!); or most recently (like, last night) our dog, Izzy eating the remainder of my beloved Girl Scout Caramel Delite cookies while we were out. My cookies! My precious, delicious only-come-once-a-year Girl Scout cookies!! She’s snickering at me right now from across the room…. *Sigh*
Anyway…that really has nothing whatsoever to do with Italian Cream Cake, but it feels better venting a little bit. Right, so, on with the post…
Months and months ago, my dad made a cake request for his birthday, which is 3 days after Christmas. Italian Cream Cake. That’s one of his favorites, so for the past few months I’ve been searching for the perfect recipe. Finally, I decided on one – Billie’s Italian Cream Cake, found on The Pioneer Woman. The instructions were really easy to follow and the end result was nothing short of amazing. Everyone agreed that it was the best Italian Cream Cake they’d ever tasted – success! The only change I made was adding a little lemon juice to the cream cheese frosting to bring out the tangy-ness in the cream cheese; à la Ms. Dorie Greenspan. I think we’d all agree that the frosting, by far, was the best part.
Billie’s Italian Cream Cake
-found on The Pioneer Woman
For the Cake:
1 stick Butter, at room temperature
1 cup Vegetable Oil
1 cup Sugar
5 whole Eggs (separated)
3 teaspoons Vanilla
1 cup Sweetened Coconut
2 cups All-purpose Flour
1 teaspoon Baking Soda
1 teaspoon Baking Powder
1 cup Buttermilk
For the Frosting:
2 packages (8 Oz) Cream Cheese, at room temperature
1 stick Butter, at room temperature
2 teaspoons Vanilla
1 package 2 Lb Powdered Sugar
1 cup Chopped Walnuts (I used pecans)
1 cup Sweetened, Flaked Coconut
1 squeeze fresh lemon juice (optional, but highly recommended!)
Preheat oven to 350 degrees. Grease and flour three 9-inch round cake pans.
Beat egg whites until stiff. Set aside.
For the Cake:
In a large bowl, cream together butter, oil, and sugar until light and fluffy. Mix in the egg yolks, vanilla, and coconut.
In a separate bowl, mix flour, baking soda, and baking powder.
Alternate adding buttermilk and dry ingredients to wet ingredients. Mix until just combined, then fold in egg whites.
Pour evenly into the three prepared pans, then sprinkle the top of each pan with 1 (at least) tablespoon sugar.
Bake in preheated oven for 20 to 25 minutes, or until toothpick comes out clean. Remove from oven and allow to cool for 15 minutes, then turn the cakes out onto cooling racks and allow to cool completely.
For the Frosting:
In a medium bowl, combine cream cheese, butter, vanilla, and powdered sugar. Beat until light and fluffy. Stir in chopped nuts and coconut. (Here is where you would add the lemon juice, if using). Spread between layers and serve.
Note: cream cheese frosting will soften at room temperature, so refrigerate if you won’t use it right away.
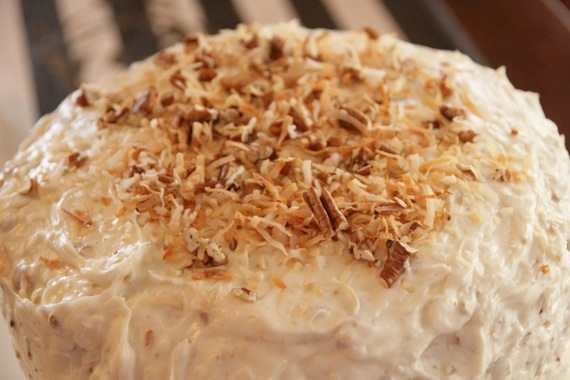
Sorry I don’t have any pictures of the inside of the cake – I took these before my parents came over; but trust me, it was beautiful! 🙂 I would highly recommend this cake to anybody; even those who think they don’t like coconut or nuts….I am one of those people, yet I gobbled up every bit of my (giant) slice! Make this cake! Make it TODAY!! I guarantee it’ll be gone before the weekend’s over!
Oh and by the way, Izzy is just fine after eating all those cookies – she was a little hyper last night, but she’s feeling just fine today!
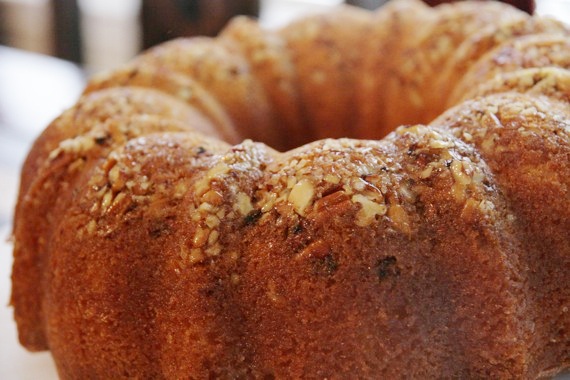
I hope everybody had a happy and safe New Year’s celebration – we certainly did! We aren’t exactly the kind of couple who like to go to the big, fancy New Year’s Eve parties (although, I’m sure they’re oh-so-fun!) – we’re the kind of couple who like to stay in, make dinner, watch the Twilight Zone marathon on the Sci-Fi channel (don’t make fun, it’s awesome and you know it! No one can resist watching William Shatner freak out about the scary-fuzzy-monster-monkey-man on the wing of the airplane!), pop open a bottle of champagne and bring the in new year with just the two of us. I can’t say in all honesty that I’m not completely relieved to have 2009 behind me, and hopefully (no, most definitely) 2010 will be much, much better; in fact, it’s already off to a great start. And I can’t think of a better way to bring my blog into 2010 than with this cake. Sure, from the picture above it may look like just an ordinary bundt cake…but trust me, it’s so much more. It’s called Yum-Yum Rum Cake, and it’s absolutely to die for. The recipe has been in our family for years – it came from a dear friend of my great grandmother’s and we all love it. It’s extremely simple – it uses a boxed cake mix and vanilla pudding, but it’s the topping that makes it special. It’s moist, slightly crunchy from the pecans on top and just dripping with sugary rum syrup (my heavens I’m practically drooling now!).
Yum Yum Rum Cake
1 box yellow cake mix
1/2 cup pecans, chopped
1 small package vanilla pudding mix
1/2 cup rum (not extract!)
1/2 cup vegetable oil
4 eggs
1/4 cup water
Preheat oven to 325 degrees. Grease bundt pan and sprinkle with pecans; set aside. Mix all ingredients except the eggs in a large bowl on medium speed; then add the eggs one at a time until incorporated. Pour batter into the bundt pan. Bake for one hour or until the cake is golden brown and a toothpick comes out clean.
Yum Yum Sauce:
1/4 cup rum (again, NOT extract!)
1 cup sugar
1 stick butter
1/4 cup water
In a small sauce pan, melt the butter and sugar over medium heat; add the water and stir until you have a smooth liquid. Remove from heat and add the rum. Spoon over cake while still hot in the pan.
*I like to take a toothpick and poke holes all over the top of the cake, that way the glaze soaks in better.
Invert the cake onto a serving platter, cover with plastic wrap and store at least 4 hours or overnight before serving.
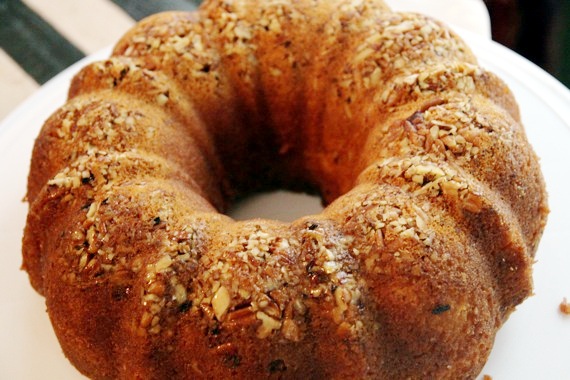
You’re absolutely going to love this cake. In fact, I’m sitting here craving a piece right now…I wonder if I could just have rum cake for dinner?…mmm…


