
YEEEESSSSSS. Blame it on the pregnancy cravings (give me all things Buffalo!), or the Super Bowl season, but I am PUMPED about Buffalo Chicken Dip, aka, Crack Dip. I only make it once a year for the Super Bowl, but I crave it year round. Don’t forget to make some for your Super Bowl bash! It’ll be the hit of the party!
Here’s a few more of my favorite football foods that would be equally as awesome for your party:
Baked Tex-Mex Pimento Cheese Dip
Cheesy Pepperoni Bread
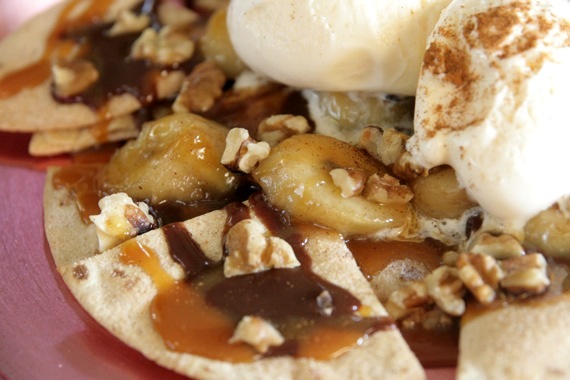
Bananas Foster Nachos. These are seriously AH-MA-ZING.
BBQ Bacon-Wrapped Jalapenos
Baked Chicken Empanadas
Chicken Enchilada Dip Roll-Ups
Happy Super Bowl party planning, everybody! May you enjoy your fatty dips, quesos, and deep-fried stuff as much as I will! 🙂

With Valentine’s Day fast-approaching, I thought it only fitting to post something festive and “Valentine-y”. Joel and I never make big plans for this holiday; instead, we stay in, cook steaks, sip wine (sadly, I’ll be skipping that part this year…), and enjoy some sort of delicious dessert like fudgy fondue or these moist red velvet cupcakes.

I only want red velvet once a year. It just seems weird to enjoy it any time but Valentine’s Day. So it had better be one fantastic recipe, otherwise, I’ve just let “red velvet season” slip through my fingers without fully enjoying it. This one doesn’t disappoint. The cake is super moist and rich and the cream cheese frosting is oh-so-smooth and slightly tangy. I just love a good red velvet cupcake.
Red Velvet Cupcakes with Cream Cheese Frosting
For the Cupcakes:
1/2 cup (one stick) butter
1/4 cup vegetable oil
1 1/2 cups sugar
2 eggs
1 teaspoon vanilla extract
1 oz. red food coloring (I prefer Wilton ‘no taste red’)
2 tablespoons cocoa powder
2 1/2 cups all-purpose flour
1 teaspoon salt
1 teaspoon baking soda
1 cup buttermilk
1 teaspoon vinegar
Preheat oven to 350 degrees and grease 3 9-inch cake pans or line cupcake pans with cupcake liners.
Cream the butter, oil, and sugar until light and fluffy; about a minute. Add eggs one at a time, beating after each. Add vanilla. Make a paste with the food coloring and cocoa powder and add it into the batter.
In a small bowl, combine the buttermilk and vinegar. In a separate bowl, mix flour, salt, and baking soda. Add the dry ingredients to the batter alternately with the buttermilk mixture, beating after each addition.
Spoon the batter evenly into each cupcake liner (about 3/4 of the way up) and bake for approximately 20 minutes. Depending on your oven, you may need more or less baking time, so keep an eye on them. Let cool completely.
For the Frosting:
2 packages (8 oz) cream cheese, at room temperature
1/2 cup (one stick) butter, at room temperature
1 package (2 lbs.) powdered sugar
2 teaspoons vanilla extract
1 teaspoon fresh lemon juice
Beat the cream cheese and butter at medium speed until fluffy. Reduce speed to low and slowly add the powdered sugar. Add the vanilla and lemon juice. Spread onto cooled cupcakes.
Makes approximately 24-30 cupcakes.
Recipe source: adapted from my great-grandmother’s recipe
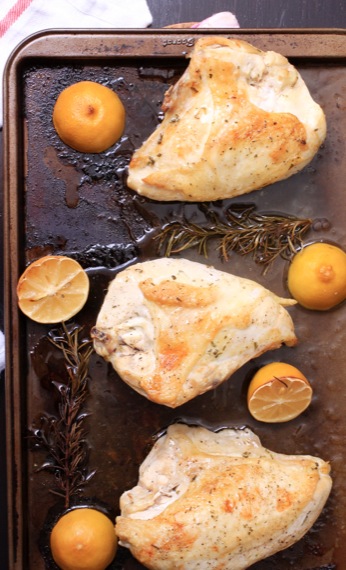
I looooove roast chicken. It’s one of my favorite things to make because a.) it’s super easy, b.) it makes the house smell amazing, and c.) it tastes awesome. I recently had some massive bone-in skin-on chicken breasts and decided to roast them just like I do a whole chicken. Except even easier. Just smear them with olive oil (or butter, if you prefer), sprinkle on a little salt, pepper, and chopped rosemary, squirt a couple of lemons on top and pop ’em in the oven. Could NOT be simpler!

Lemon Rosemary Roast Chicken Breasts
3 or 4 bone-in, skin-on chicken breasts, rinsed and patted dry
olive oil
salt
pepper
2 lemons, cut into halves
3 or 4 sprigs fresh rosemary (chop one sprig and leave the others whole)
Preheat the oven to 400 degrees. Place the chicken breasts on a baking sheet and rub generously with olive oil. Sprinkle with salt, pepper, and the chopped rosemary. Squirt the lemon halves over the chicken. Arrange the lemon halves and whole rosemary sprigs on the baking sheet around the chicken.
Bake for 30-40 minutes until skin is lightly browned and juices run clear. Serves 3-4.
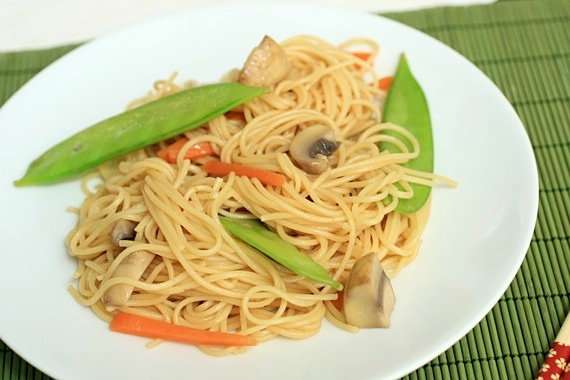
Quick and easy Asian Spaghetti made with angel hair pasta, crisp veggies, and a light sauce. The perfect side dish for any Asian-inspired meal!
Alright, folks. It’s a new year and I’m feeling good and ready to jump back in! Luckily, I’m no longer struggling with morning (aka: 24 hour) sickness and I’ve begun to regain a lot much of my energy that the first trimester robbed me of. I’m 16 weeks along, and we’ll find out in about 3 weeks if Cassidy will have a little sister or brother. We can’t wait! I’ve been getting back into the kitchen lots more and cooking healthy meals again (for awhile, Taco Bell was my only friend…). Now that I’m feeling better, I get to look forward to throwing Cassidy’s 2nd birthday party in a few weeks! She’ll be having a Curious George themed party and I’m soooo excited to put it all together!
I want to thank you all for being patient with me as I cope with the challenges of pregnancy and toddler-wrangling. I appreciate you all so much and can’t tell you what your readership means to me. So, before my hormones run wild and I start getting all teary-eyed (it happens a lot, really), I’ll go ahead and switch gears- let’s talk about food!
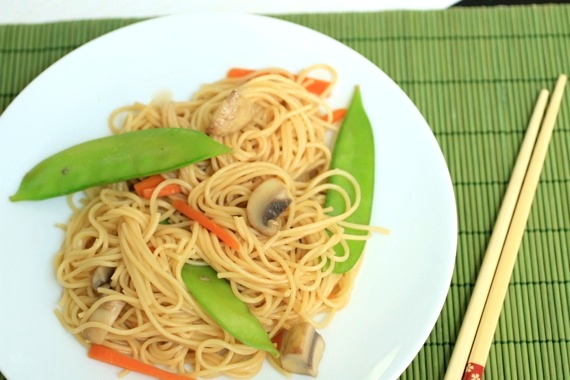
As I said before, I went through a phase where the only things I could stomach were junky, carb-y, really bad-for-you things. Don’t get me wrong, there is still a half-eaten chocolate cake and a package of Soft Batch cookies in my kitchen right now, but now that I’m feeling so good, I’m really focused on eating healthier foods, along with lots of fruits and vegetables. One of my favorite go-to meals is my Asian Glazed Salmon, and this Asian Spaghetti goes perfectly with it! Light, crisp, and full of flavor. I love the crunch of the snow peas and carrots, and the light soy sauce dressing is super quick and easy. Perfect for a healthy weeknight dinner!
Asian Spaghetti
8 ounces angel hair pasta
1 cup sliced fresh mushrooms
1 cup fresh snow peas
3/4 cup shredded carrots
4 green onions, chopped
2 tablespoons canola oil
1 garlic clove, minced
1/4 cup reduced-sodium soy sauce
1 teaspoon sugar
1/4 teaspoon cayenne pepper
2 tablespoons sesame seeds, toasted
Cook pasta according to package directions. Meanwhile, in a large skillet, saute the mushrooms, snow peas, carrots and onions in oil until crisp-tender, about 5 minutes. Add garlic; cook 1 minute longer.
In a small bowl, combine the soy sauce, sugar, and cayenne. Drain pasta. Add pasta and soy sauce mixture to skillet and toss to coat. Sprinkle with sesame seeds. Serves 4-6 as a side dish.
Recipe Source: Taste of Home

Hello there! I apologize (sort of…not really) for the super long hiatus I’ve been on! The months of November and December have been action-packed, to say the least. And it isn’t to say I haven’t wanted to post over the last few weeks, because believe me, I really, really have! But since I no longer have a reason to keep quiet….here goes! We are experiencing our own little Christmas miracle this year–
that’s right: Baby #2 is on the way!!! Cassidy is going to be a big sister and we are THRILLED. I’m 12 weeks along and due late June/early July. And of course, feeling rotten. 😉 Actually, the rotten part is (hopefully) almost done. I was pretty sick for awhile (i.e. the first 2 months) and had NO desire to eat food, think about food, or blog about food. It’s still not great, especially at night, but I really feel like I’m on the downhill slide.
We’ve talked to Cassidy about her new brother or sister, but I don’t think she quite getting it. We’ve got 6 months to get her used to the idea, though, and I’m sure she’ll start getting curious as soon as I start showing a lot more.
So now you know the reason for my disappearance. Thanks to those of you who missed me and sent me messages to check on me- that was greatly appreciated! After the holidays I hope to get back into blogging and back to a more normal version of myself (who knows, maybe I’ll even find the energy to change out of my pajama pants every now and then!). Until then, I want to wish you all a VERY merry Christmas and a happy New Year! Have a wonderful time with your friends and families and don’t forget the real reason we celebrate each year!
Who’s ready for Halloween??! Every single year, I’m always tempted to say Halloween is my favorite holiday, but Christmas always wins out. However, Halloween comes in at a VERY close 2nd! I absolutely love decorating the house (most importantly, dragging out all of my ‘Nightmare Before Christmas’ paraphernalia), but this year was even more fun than usual, because Cassidy helped me this time around. She had so much fun dragging pumpkins and other goodies out of the big boxes and saying, “cuuuuuute!” every time I’d hang something up. We had a blast together!
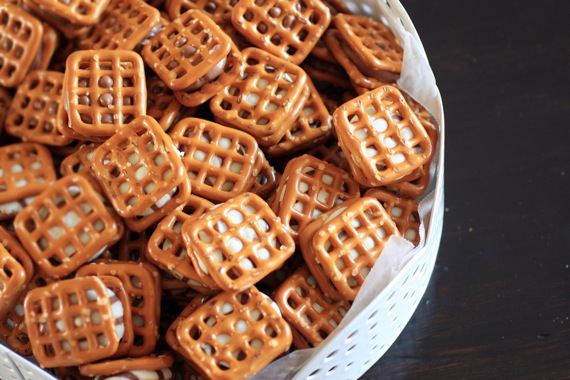
We’ve all had so much fun watching our favorite Halloween movies and eating snacks together- this seriously is just the greatest holiday. Speaking of snacks- here’s a super duper quick and easy one (and DARN addictive, I might add!). No party or gathering (or movie-watching night!) is complete without these little guys. All you need is pretzels and Hershey’s Hugs- that’s it! So little effort for so much yumminess! Plus, the kids could probably help with this one; I’m sure Cassidy will be a big help the next time I make these. 😉
Pretzel-Kiss Sandwiches
1 bag Pretzel snaps (such as Synder’s)
2 bags Hershey’s Hugs (I also used some of the caramel-filled Hershey’s Kisses and they worked great as well)
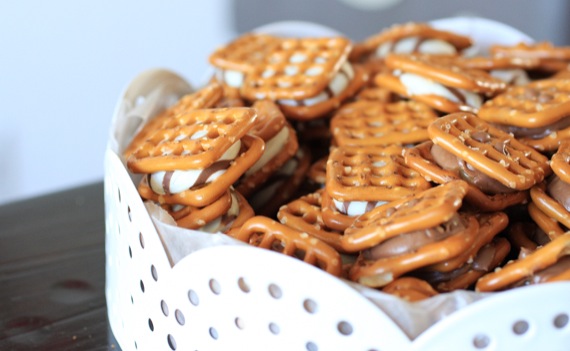
Preheat oven to 300 degrees and line a large baking sheet with wax paper. Lay the pretzels down in an even layer on the baking sheet and top each one with a hug. Put the baking sheet in the oven for 2 minutes, until the hugs get glossy-looking.
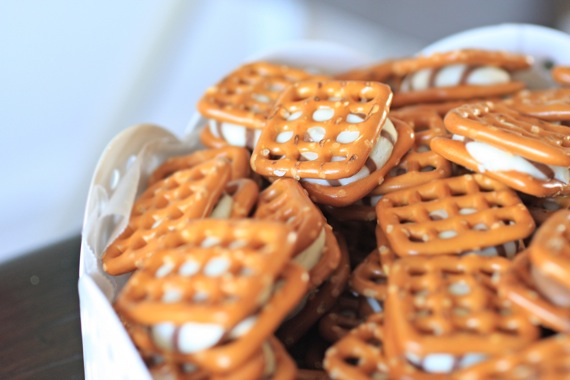
Remove from oven and let sit for 1 minute. Gently place another pretzel on top of each hug, making a sandwich. Don’t push down too hard, or the hug will ooze out everywhere. Leave at room temperature to cool completely and harden- about 30 minutes to an hour. You could also pop them in the fridge to speed up the hardening process. Place in a big bowl and enjoy!
Recipe source: Cookies and Cups
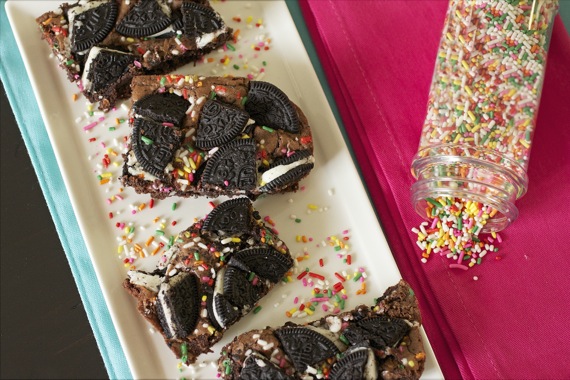
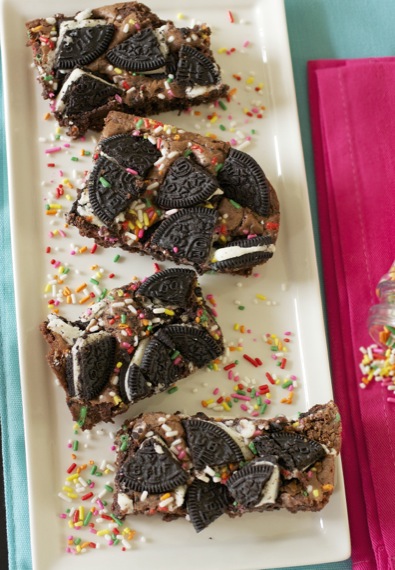
Get ready for a good time! These Oreo Funfetti Brownies are thick, fudgy, and bursting with crunchy Oreo goodness! Don’t forget the sprinkles…they’re the best part!
I love a good brownie. I’ll take them pretty much any way I can get them. Stuffed, topped, plain (maybe even a little undercooked and gooey…mmm)…just as long as there are no nuts involved, I’ll eat just about any brownie you put in front of me.
So clearly, I already had a bit of a brownie addiction. But take a fudgy, chewy brownie and top it with Oreo chunks and rainbow sprinkles?? I was doomed after one bite. To my shame, I ate waaaaaaay too many of these. An embarrassing amount. Like, multiple brownies in a DAY. Oh, Amy….
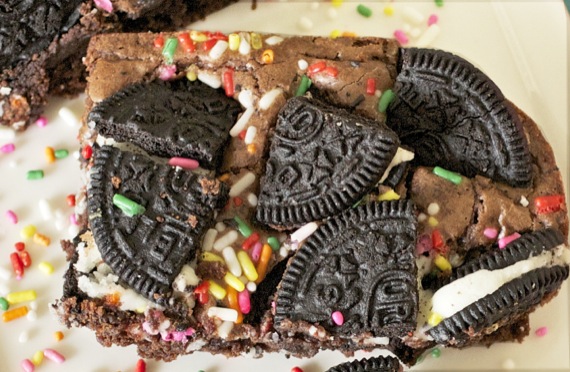
Do you see what I’m saying?? Just look at that! Oreos and brownies were MADE for each other!
Oreo Funfetti Brownies
1 cup (2 sticks) unsalted butter
2 1/4 cups sugar
4 large eggs
1 1/4 cups cocoa powder
1 teaspoon salt
1 teaspoon baking powder
1 teaspoon espresso powder, optional
1 tablespoon vanilla extract
1 1/2 cups All-Purpose flour
2 cups chocolate chips
8-10 Oreos (Double Stuf is where it’s at), chopped
rainbow sprinkles (about 1/4 cup)
Preheat the oven to 350 degrees and grease a 9″ x 13″ pan.
In a medium-sized microwave-safe bowl, or in a saucepan set over low heat, melt the butter, then add the sugar and stir to combine. Return the mixture to the heat (or microwave) briefly, just until it’s hot, but not bubbling; mixture will become shiny.**
Meanwhile, in a separate bowl, beat the 4 eggs with the cocoa, salt, baking powder, espresso powder, and vanilla until smooth. Add the hot butter/sugar mixture, stirring until combined.
Slowly add in the flour, again stirring until smooth. Spoon the batter into the prepared pan. Top with chopped Oreos and sprinkles. Bake for about 30 minutes, until a toothpick inserted into the center comes out clean. Let cool for about 10-15 minutes before cutting. Serves 12.
Recipe source: brownies adapted from King Arthur Flour; the Oreo Funfetti version was my own idea
**Heating this mixture a second time will dissolve more of the sugar, which will yield a shiny top crust on your brownies.
Feel free to just use a box brownie mix for these if you’re short on time!
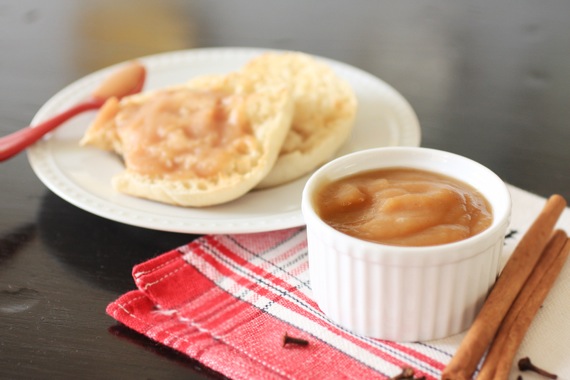
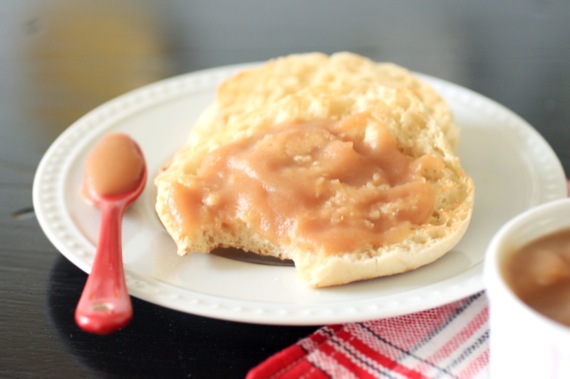
Try this easy stovetop version of rich, velvety, homemade apple butter as a spread for toast and muffins, or enjoy it all by itself!
October had just begun, there was a slight chill in the air, and I wanted apple butter. I headed to the grocery store to find my favorite jarred variety. Not only did they not have my preferred brand, but the one kind they did have was insanely expensive. I stood there in the jams and jellies aisle shaking my fist at the apple butter people (whoever they were) and then realized, “apples are on sale! I’ll just…..MAKE MY OWN!” [cue hallelujah chorus]
I really didn’t want to wait all day for the slow cooker versions (which is basically all I could find online), so I decided to try it on the stovetop and see what happened. Turns out, it works really well on the stovetop! And super tasty- I think the butter really gives it an extra richness that’s unbeatable!
Spreadable, velvety, rich apple butter…perfection on a piece of toast or even just by itself!
Stovetop Apple Butter
5 pounds apples, peeled, cored, and cut into chunks (I used Pink Lady, but Honeycrisp or Gala would work too)
2/3 cup brown sugar
squirt fresh lemon juice
1 1/2 teaspoons cinnamon
1/4 teaspoon ground cloves
pinch salt
1/2 stick butter (4 tablespoons)
1 teaspoon vanilla
Combine all ingredients except vanilla in a large pot and cook, covered, on low for 3 hours, stirring occasionally. Apples will be extremely soft. Stir in vanilla.
Using an immersion blender, puree the apples until completely smooth. You could also use a food processor, working in batches. I stopped the cooking process here because I was (very) satisfied with the taste and texture of the apple butter, but you could continue cooking it uncovered on low for another hour or so, if you desire a thicker, darker consistency. Let cool completely. Store in the refrigerator. Makes approximately enough for 3 pint-sized jars.
Recipe source: Sing For Your Supper original

We got a new playmate for Izzy! Meet ZuZu, the newest member of our family! 🙂 She’s about a year old and we *think* she’s part Chihuahua, part Maltese. Who knows, though.

(just look at that spotted little tummy!)
For quite awhile now, I’ve really been feeling like it was time to adopt another dog. Izzy is such a fun-loving, playful girl, so we didn’t feel it was quite right for her to be an only “dog-child”. As much as Cassidy loves pestering Izzy, we still thought she could benefit from a non-human friend. As sheer luck would have it, out of the blue, a friend of ours announced she had rescued a little dog from the side of the highway and was trying to find a good home for her. Honestly, ZuZu was nothing like what we thought we were looking for in a new dog, but once I met her, I was convinced she was the girl for us!
It all depended on how she interacted with Izzy and Cassidy (no pressure, Zu!). We brought her home and let the dogs run wild together in the yard. At first, Izzy wasn’t sure how to react to all of ZuZu’s energy, but she got the hang of it and eventually, they started playing really well together! Success!
We took ZuZu to the vet and got her all checked out, microchipped, vaccinated, and spayed, then promptly brought her home to STAY! Here it is a month later, and ZuZu and Izzy are best buds- they play SO well together (all the time!). She is so gentle and sweet with Cassidy and has our entire family wrapped around her little paw! We all love her so much already and Joel and I are SO happy we were lucky enough to adopt her! Welcome to the family, ZuZu!

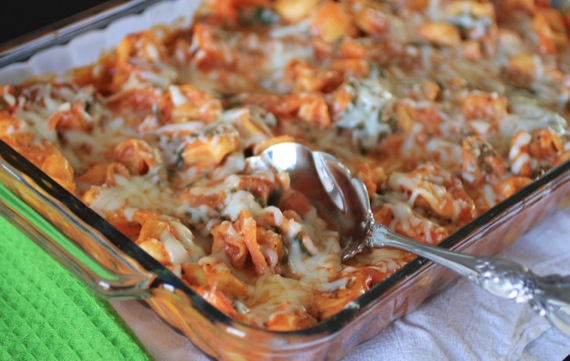
A quick and easy baked pasta dish with cheese tortellini, fresh spinach, and yellow peppers tossed in a creamy, tangy tomato sauce. Perfect for busy weeknights!
Cassidy is currently pushing through 4 teeth at once. Her incisors, to be exact. She usually teethes pretty hard (congestion, runny nose, rashes, fever, etc), but this time seems to be much worse. She hasn’t been acting like herself in days, not to mention, her little nose has been like a leaky faucet non-stop. Have you ever gotten ‘eskimo kisses’ from a toddler with a snotty nose? Not the most pleasant, but I’ll be darned if I deny my sweet baby girl her eskimo kisses!
Anyway, with Cassidy feeling under the weather, I haven’t had much time to cook. It’s times like these that I love baked pastas. I can pull out a bag of frozen tortellini and toss it with whatever I have in my fridge or pantry and dinner’s DONE! That leaves me plenty of extra time for cuddles! 🙂
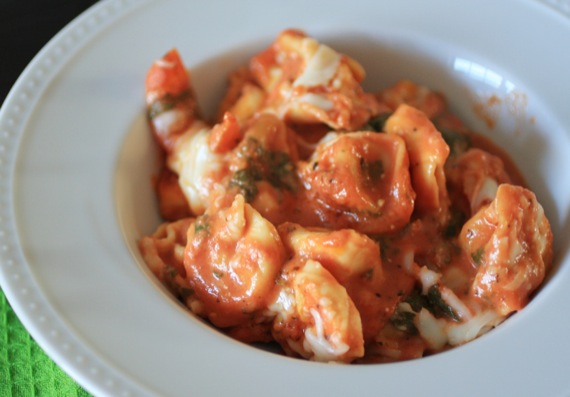
Tortellini Spinach Bake
1 lb. cheese tortellini
2 large handfuls fresh spinach leaves, washed
1 red or yellow bell pepper, thinly sliced
1 26-oz. jar marinara sauce
3 oz. cream cheese, softened
3/4 cup shredded mozzarella cheese
Preheat oven to 350 degrees. Spray a 9×13 inch pan with cooking spray. Bring a large pot of water to a boil and cook the tortellini for about 6 minutes (you don’t want to completely cook them). Meanwhile, in a large skillet, heat the marinara sauce, then stir in the bell peppers, spinach, and cream cheese.
Add the cooked tortellini and toss to coat. Spread the mixture in the prepared pan and top with the shredded mozzarella. Cover with foil and bake for about 20 minutes, until bubbly. Serves 6.
Recipe source: Sing For Your Supper original